5 Tips for Drilling Straight Holes with a Portable Drill

If you’ve ever tried to drill a hole with a portable drill, you know how frustrating it can be when your hole ends up crooked or off-center. However, with a few simple tips and techniques, you can easily improve your drilling accuracy and achieve clean and straight holes every time.
1. Use a Center Punch: Before drilling, it’s important to mark the exact spot where you want the hole to be. By using a center punch, you can create a small indentation in the surface, which will help guide the drill bit and prevent it from wandering off course.
2. Choose the Right Drill Bit: The type and size of the drill bit you use can greatly affect the accuracy of your holes. For drilling clean and straight holes, it’s recommended to use a twist bit that is specifically designed for the material you are drilling into. Additionally, make sure the drill bit is sharp and in good condition.
3. Maintain a Proper Grip: Holding the drill properly is crucial for drilling straight holes. Make sure to hold the drill with both hands, keeping the drill steady and aligned with the marked spot. Apply even pressure while drilling, and avoid pushing or forcing the drill into the material.
4. Use a Drill Guide: For more precise and consistent drilling, consider using a drill guide. A drill guide is a tool that attaches to your drill and helps guide the drill bit along a straight path. It can be particularly useful when drilling holes at specific angles or when working with tricky materials.

5. Take Your Time: Accuracy is all about patience and taking your time. Rushing through the drilling process can lead to mistakes and uneven holes. Take a moment to plan out your drilling path, go slow, and make steady movements. This will ensure that your drill bit stays on track and produces straight holes.
Remember, drilling straight holes with a portable drill is a skill that requires practice and attention to detail. By following these tips, you can greatly improve your drilling accuracy and achieve professional-looking results in your DIY projects.
Choose the Right Drill Bit
Choosing the right drill bit is essential when it comes to drilling straight holes with a portable drill. The drill bit you select should match the material you are drilling into, as well as the size of the hole you want to create. Here are a few tips to help you choose the right drill bit:
- Consider the Material: Different materials require different types of drill bits. For example, if you’re drilling into wood, a standard twist drill bit will work fine. But if you’re drilling into metal or masonry, you’ll need a specialized drill bit designed for that specific material. Make sure to check the packaging or labeling of the drill bits to ensure they are suitable for the material you are working with.
- Choose the Right Size: The size of the hole you want to create will determine the size of the drill bit you need. Drill bits are typically sized in fractions of an inch or in millimeters. If you’re not sure which size to choose, it’s always better to err on the side of a slightly smaller drill bit and widen the hole if necessary, rather than use a larger drill bit and risk creating a hole that is too big.
- Consider the Shank Type: The shank of the drill bit is the part that fits into the chuck of the drill. It’s important to choose a drill bit with a shank that matches the chuck of your portable drill. Most portable drills have a keyless chuck, which means they can accept drill bits with a straight shank or a hex shank. However, some older drills may have a keyed chuck that requires drill bits with a specific shank style.
- Look for High-Quality Bits: Investing in high-quality drill bits is essential for achieving straight and clean holes. Cheap drill bits may not be sharp enough or may not be made from durable materials, which can lead to inaccurate drilling and premature wear. Look for drill bits that are made from high-speed steel (HSS) or cobalt, as these materials are known for their durability and ability to maintain sharpness over time.
- Consider Specialty Bits: Depending on your specific drilling needs, you may require specialty drill bits. For example, if you’re drilling holes for dowels or screws, you may want to consider purchasing brad-point drill bits or countersink drill bits. These specialized bits are designed to create precise and clean holes for specific applications.
By choosing the right drill bit for your drilling project, you’ll greatly increase your chances of drilling straight, accurate holes with your portable drill.
Mark the Hole Location
Before you start drilling, it’s important to mark the hole location on the surface where you want to drill. This will ensure that your holes are correctly placed and aligned.

To mark the hole location, you can use a pencil or a marker. Take the measurement from your project plans or use a tape measure to determine the exact position of the hole. Use a straight edge or a level to draw a line or make a cross at the desired location.
If you’re drilling multiple holes, it’s a good idea to create a template or a jig to help you mark the hole locations accurately. This can be especially useful if you need to repeat the same hole pattern multiple times.
Make sure to double-check your measurements and markings before drilling. A simple mistake can result in misaligned holes, which can be difficult to correct later.
By taking the time to mark the hole location accurately, you’ll increase your chances of drilling straight and precise holes with your portable drill.
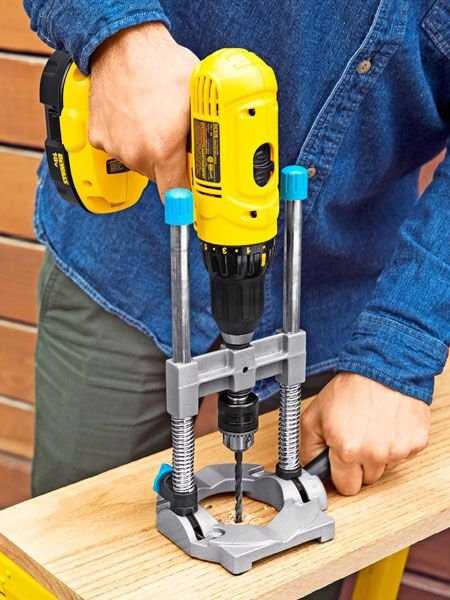
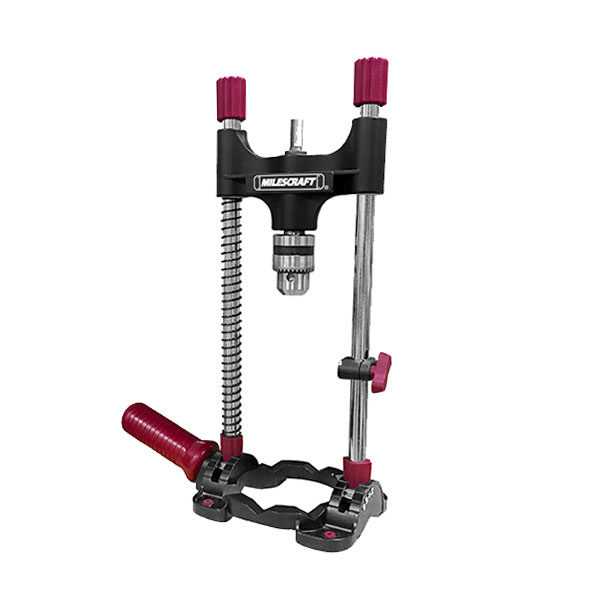
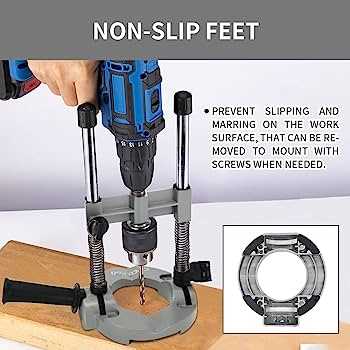
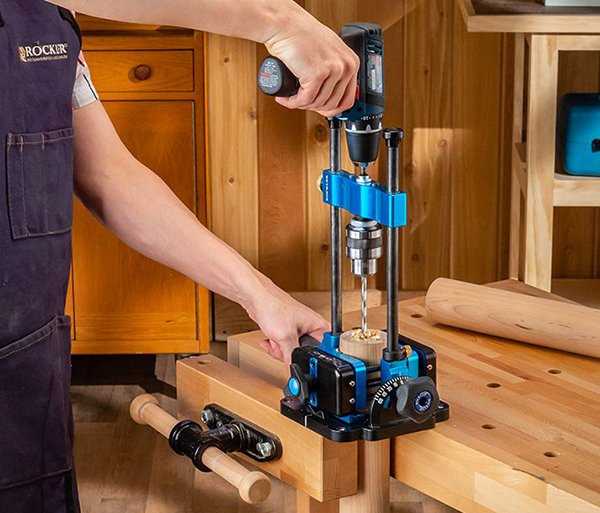
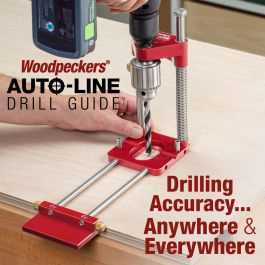
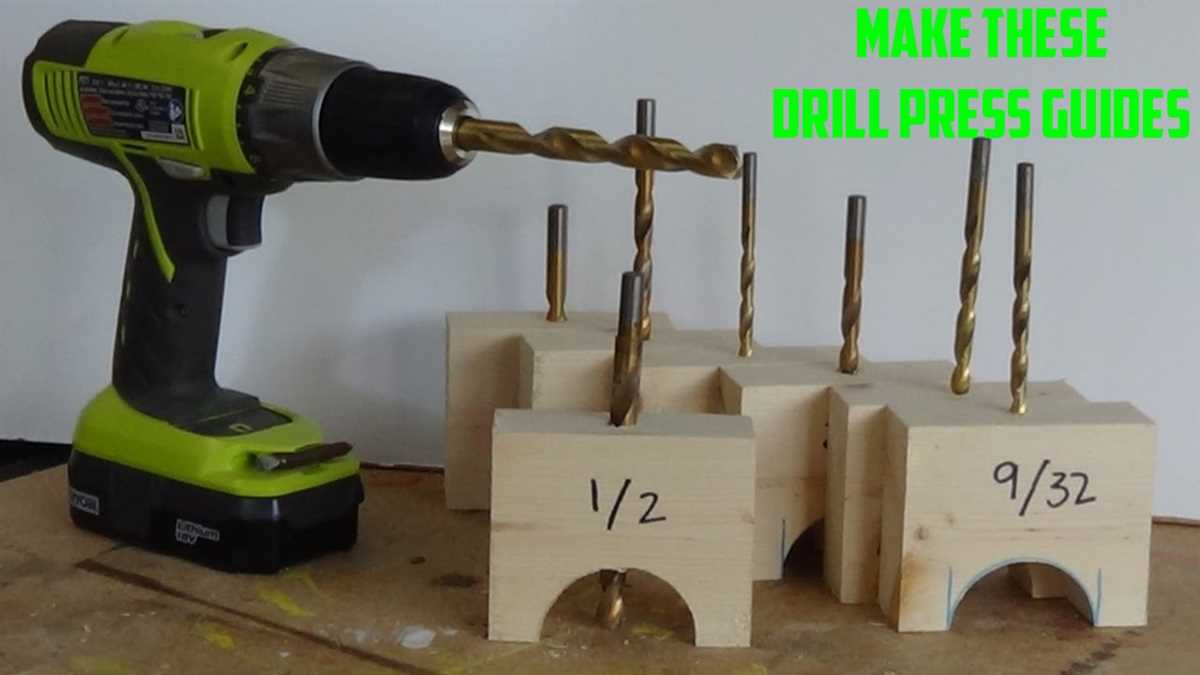
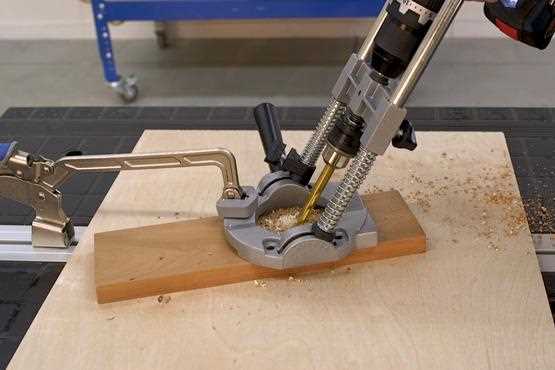
Use a Drill Guide
One of the most effective ways to ensure that you drill straight holes with a portable drill is to use a drill guide. A drill guide is a device that helps you maintain a consistent angle and direction while drilling.

Drill guides come in various designs, but most of them consist of a metal or plastic frame with holes that are designed to fit different drill bit sizes. The drill guide is clamped or secured in place and acts as a guide for the drill bit, keeping it straight and preventing it from deviating from the intended drilling angle.
Using a drill guide provides several benefits:
1. Increased Accuracy
A drill guide ensures that your holes are drilled at the exact angle and direction you desire, resulting in greater accuracy. This is especially important when working on projects that require precise measurements and alignments.
2. Consistency
With a drill guide, you can achieve consistent results throughout your project. Each hole will be drilled at the same angle and direction, ensuring that your work is even and professional-looking.

3. Reduced Risk of Mistakes
Using a drill guide minimizes the risk of drilling at the wrong angle or deviating from the intended path. This reduces the likelihood of making mistakes that can be time-consuming and costly to fix.
4. Versatility
Drill guides can be used with various drill bit sizes, allowing you to tackle different projects with ease. Whether you need to drill small pilot holes or larger holes, you can adjust the drill guide to accommodate different drill bits.
5. Easy to Use

A drill guide is relatively simple to use. Most models require you to secure it in place, adjust the desired drilling angle, and start drilling. Even beginners can quickly learn how to use a drill guide and achieve professional results.
In conclusion, using a drill guide is an effective way to drill straight holes with a portable drill. It provides increased accuracy, consistency, and reduces the risk of mistakes. With its versatility and ease of use, a drill guide is a valuable tool for any DIY enthusiast or professional contractor.
Maintain a Steady Hand
One of the key factors in drilling straight holes with a portable drill is to maintain a steady hand. Without a steady hand, it is challenging to control the drill and maintain the desired angle. Here are some tips to help you maintain a steady hand:
1. Position Yourself Properly
Stand in a comfortable and stable position, with your feet shoulder-width apart. This will provide you with a solid base of support and help you maintain balance while drilling.
2. Use Both Hands
Hold the drill firmly with both hands, using one hand on the handle and the other hand near the chuck. This grip will give you better control over the drill and reduce the chances of it veering off course.

3. Brace Against a Surface
If possible, brace yourself or the drill against a stable surface. This can be a wall, a workbench, or any other solid object that can act as a support. Bracing against a surface will provide additional stability and help you drill straighter holes.
4. Start Slowly
When starting to drill, begin at a slow speed and gradually increase it as you gain control and confidence. Starting slowly will give you better control over the drill and allow you to adjust your hand position if necessary.
5. Practice Proper Technique
Practice makes perfect, so take the time to learn and develop proper drilling techniques. This includes keeping your wrist straight, applying steady pressure, and maintaining a consistent drilling motion. With practice, you will become more comfortable and confident in your ability to drill straight holes.

By following these tips and maintaining a steady hand, you can improve your drilling accuracy and achieve straighter holes with a portable drill. Remember to always prioritize safety and use appropriate safety gear when operating power tools.
Control the Speed and Pressure
One of the most important factors in drilling straight holes with a portable drill is controlling the speed and pressure applied to the drill. Here are some tips on how to do it:
- Choose the right speed: Different materials require different drilling speeds. For example, wood typically requires a higher speed than metal. Consult the manufacturer’s guidelines or do some research to determine the appropriate speed for the material you are drilling.
- Start slow: When beginning a hole, it’s best to start with a slow speed to ensure precision. This will allow you to have better control of the drill and reduce the risk of the bit wandering off track.
- Increase speed gradually: Once the hole is started, you can gradually increase the speed. This will help to maintain control and prevent the drill from getting stuck or causing damage.
- Apply consistent pressure: Apply a steady and consistent pressure on the drill as you drill the hole. Avoid pushing too hard, as it can lead to misalignment or damage to the material. Let the drill do the work and guide it carefully.
- Use a drilling guide: If you need to drill multiple holes in a straight line or at a specific angle, consider using a drilling guide. This tool will help you maintain accuracy and reduce the chance of drilling off course.
By controlling the speed and pressure applied to the drill, you can greatly improve your ability to drill straight holes with a portable drill. Remember to always follow proper safety precautions and wear protective gear when operating power tools.
FAQ:
Why is it important to use a center punch when drilling straight holes?
Using a center punch helps to create a small indentation in the workpiece, which serves as a guide for the drill bit. This helps to keep the drill bit centered and prevents it from wandering off course, resulting in a straighter hole.
Can I use a portable drill to drill straight holes without a drill press or vise?
Yes, it is possible to drill straight holes with a portable drill without a drill press or vise. However, it might be more challenging to keep the drill bit aligned perpendicular to the workpiece. Using clamps or other methods to secure the workpiece can help to stabilize it and make it easier to drill straight holes.
What kind of pressure should I apply when drilling with a portable drill?
When drilling with a portable drill, it is important to apply consistent pressure. Too much pressure can cause the drill bit to wander off course, while too little pressure might result in slower and less effective drilling. Experiment with different levels of pressure to find the right balance for the material you are drilling.
How can I check if my hole is straight after drilling with a portable drill?
After drilling with a portable drill, you can use a level or straight edge to check if the hole is straight. Simply place the level or straight edge against the side of the hole and see if it aligns perfectly. If there is any deviation, it means the hole is not straight. In such cases, you may need to adjust your drilling technique or use other methods to achieve straighter holes.
Video:

Meet Harrison Clayton, a distinguished author and home remodeling enthusiast whose expertise in the realm of renovation is second to none. With a passion for transforming houses into inviting homes, Harrison's writing at https://thehuts-eastbourne.co.uk/ brings a breath of fresh inspiration to the world of home improvement. Whether you're looking to revamp a small corner of your abode or embark on a complete home transformation, Harrison's articles provide the essential expertise and creative flair to turn your visions into reality. So, dive into the captivating world of home remodeling with Harrison Clayton and unlock the full potential of your living space with every word he writes.


