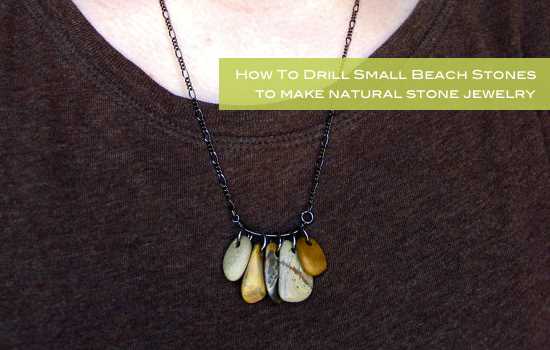
5 Tips for Drilling Holes in Rocks for Jewelry Making

Drilling holes in rocks for jewelry making can be a challenging task, but with the right techniques and tools, it can become much easier. Whether you are a beginner or an experienced jewelry maker, these tips will help you drill holes in rocks effectively and efficiently.
1. Choose the right drill bit: When it comes to drilling holes in rocks, using the right drill bit is crucial. Diamond drill bits are highly recommended for this task as they are designed to cut through hard materials like rocks. Make sure to choose a drill bit that is specifically meant for drilling stones and gems.
2. Use water as a lubricant: Drilling holes in rocks can generate a lot of heat, which can damage both the rock and the drill bit. To prevent this, it is important to use water as a lubricant while drilling. Simply place the rock in a container of water and keep the drill bit wet throughout the drilling process.
3. Start with a small pilot hole: Instead of trying to drill a large hole right from the start, it is recommended to begin with a small pilot hole. This will help guide the larger drill bit and prevent the rock from cracking or splitting. Once you have created the pilot hole, you can gradually enlarge it to the desired size.
4. Take breaks and be patient: Drilling holes in rocks can be a time-consuming task, especially if you are working with hard and dense rocks. It is important to take breaks and be patient throughout the process. Applying too much pressure or rushing the drilling can lead to mistakes or accidents.
5. Practice on easier rocks first: If you are new to drilling holes in rocks, it is recommended to practice on easier rocks first. Start with softer stones before moving on to harder and more valuable ones. This will help you gain confidence and improve your drilling skills before working with more delicate materials.
By following these tips, you can ensure that drilling holes in rocks for jewelry making becomes a smoother and more successful process. Remember to always prioritize safety and take your time to achieve the desired results.
Tip 1: Use the Right Tools
When it comes to drilling holes in rocks for jewelry making, having the right tools is essential. Using the wrong tools can lead to frustration, damaged stones, and wasted time and effort. Here are some essential tools for drilling holes in rocks:
- Drill Press: A drill press is a stationary tool that provides stability and precision while drilling. It allows you to control the speed and pressure, resulting in clean and accurate holes.
- Diamond Core Drill Bits: Diamond core drill bits are specially designed for drilling through hard materials like rocks. These bits have diamond-encrusted tips that can grind through the stone, creating a clean hole.
- Water Cooling System: Drilling through rocks can generate a lot of heat, which can damage the stone and the drill bit. Using a water cooling system, such as a drip feed or spray bottle, helps keep the temperature down and lubricates the cutting surface.
Using these tools will give you better control and precision, resulting in clean and professional-looking holes in your rocks for jewelry making.

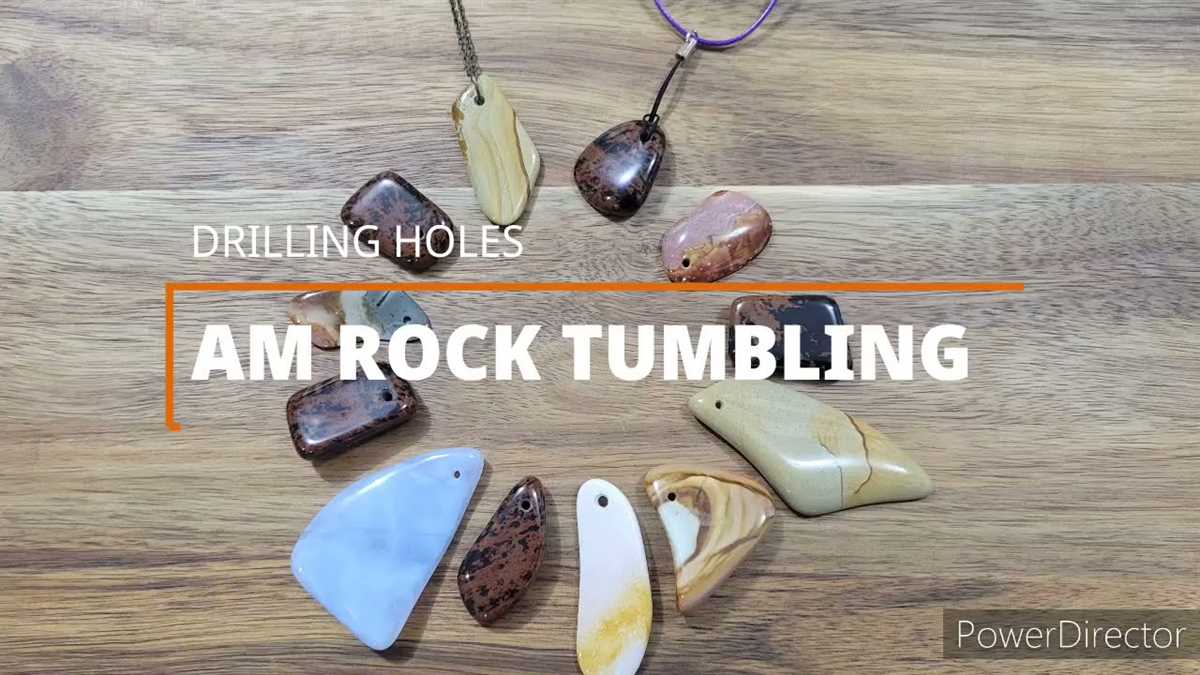
Tip 2: Choose the Right Rock
Choosing the right rock for drilling holes is essential to ensure success in your jewelry making project. Not all rocks are suitable for drilling, so it’s important to consider the following factors:
- Hardness: Rocks vary in hardness, and drilling through a hard rock can be challenging and time-consuming. It is recommended to choose a rock with a medium hardness for easier drilling.
- Uniformity: Look for rocks that have a uniform structure without large cracks or voids. Rocks with irregularities can be more prone to breaking or cracking during the drilling process.
- Size: Consider the size of the rock and the desired size of the hole. Larger rocks may require more powerful drilling equipment, while smaller rocks may be easier to handle.
- Type of rock: Different types of rocks have different properties and can present unique challenges when drilling. Some rocks, such as granite or quartz, can be harder and more difficult to drill, while softer rocks like limestone may be easier to work with.
- Texture: The texture of the rock can also affect the drilling process. Rocks with a grainy or sandy texture may require extra care to prevent the drill bit from getting stuck.
It’s important to experiment with different types of rocks to find the best ones for your specific drilling needs. Consider starting with rocks that are known to be easier to drill, and then gradually move on to more challenging materials as you gain experience and confidence in your drilling skills.
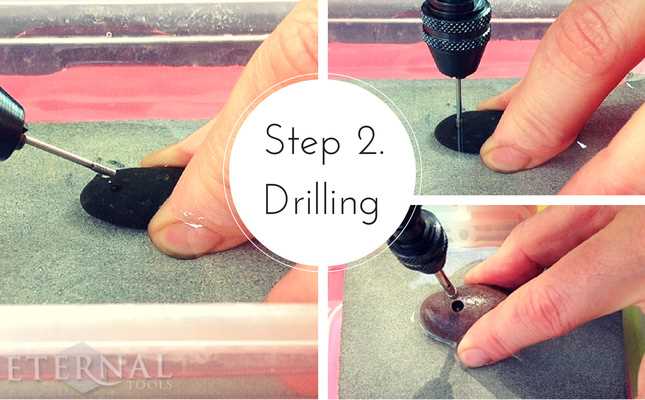
Tip 3: Mark the Spot
When drilling holes in rocks for jewelry making, it is important to mark the spot where you want to drill. This will help ensure that your hole is placed exactly where you want it and prevent any mistakes or errors.

To mark the spot, you can use a variety of methods depending on the type of rock you are working with. One common method is to use a permanent marker or a pen to draw a small dot or cross on the surface of the rock. This will serve as a guide for your drill bit.
Another method is to use a center punch or a nail to create a small indentation at the desired drilling location. This will give your drill bit a starting point and help prevent it from slipping or wandering off course.
If you are working with a particularly hard or smooth rock, you may need to use a diamond-tipped engraving tool or a carbide tip marker to create a more visible and durable mark.
Whichever method you choose, make sure to mark the spot accurately and clearly, as this will greatly improve the precision and quality of your drilling.
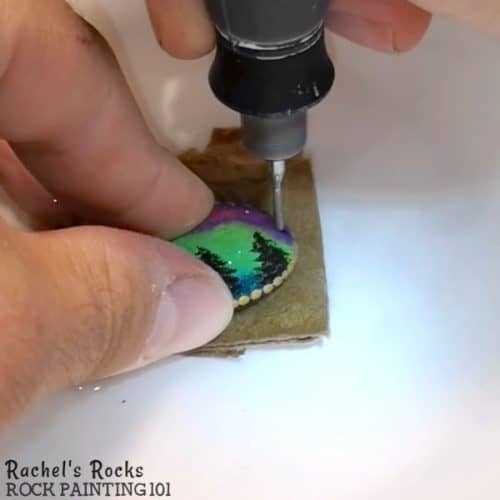
Tip 4: Start Slowly

When drilling holes in rocks for jewelry making, it’s important to start slowly. Rushing the process can lead to damage to the rock or the drill bit, and can cause the hole to be uneven or off-center.
Here are some tips for starting slowly:
- Use a low speed: Set your drill to a low speed setting to start with. This will help you have better control over the drilling process and prevent any sudden movements that can result in a ruined piece of jewelry.
- Apply gentle pressure: When starting to drill, apply gentle pressure to the rock. This will help you gauge how easily the rock can be drilled, and prevent any unexpected breaks or cracks.
- Use a smaller drill bit: Starting with a smaller drill bit can help you get a feel for the rock’s hardness and how easily it can be drilled. Once you have established a comfortable drilling speed and pressure, you can switch to a larger drill bit if needed.
By starting slowly, you can ensure that you have better control over the drilling process and achieve more accurate and precise holes in your rocks for jewelry making.
Tip 5: Use Water for Lubrication
When drilling holes in rocks for jewelry making, it is important to use water as a lubricant. Water not only helps to keep the drill bit cool, but it also helps to prevent the bit from getting clogged with debris.

To use water for lubrication, follow these steps:
- Fill a small bowl or container with water.
- Place the rock you want to drill in the water, ensuring that it is fully submerged.
- Hold the rock securely with one hand, making sure to keep your fingers away from the drilling area.
- With your other hand, slowly insert the drill bit into the rock, applying gentle pressure.
- As you drill, periodically lift the bit out of the water to allow the water to flow over the bit and into the hole.
- Continue drilling, periodically adding more water if necessary, until you have drilled the desired hole.
Using water as a lubricant not only makes the drilling process smoother and easier, but it also helps to prolong the life of your drill bits. It is important to note that when using water for lubrication, you should always use a drill with a water-resistant casing and be cautious of electrical hazards.
FAQ:
What tools do I need to drill holes in rocks for jewelry making?
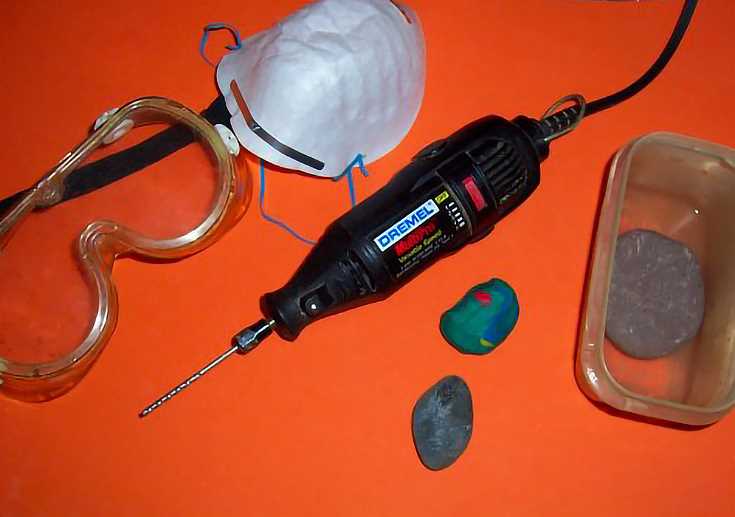
To drill holes in rocks for jewelry making, you will need a few essential tools. These include a rotary tool with a diamond-tipped drill bit, a vice or grip to secure the rock in place, protective goggles, and a water container to keep the drill bit cool.
Can I drill holes in any type of rock?
While it is possible to drill holes in most types of rocks, some rocks may be harder than others and require more time and effort. Softer rocks like sandstone and limestone are easier to drill through, while harder rocks like quartz and granite may take more time and patience.
How do I prevent the rock from cracking while drilling?
To prevent the rock from cracking while drilling, it is important to keep the drill bit cool by using water as a lubricant. Dip the drill bit in water frequently while drilling, and ensure that the rock is also wet. This will help to dissipate heat and reduce the chances of the rock cracking.

What should I do if the drill bit gets stuck in the rock?
If the drill bit gets stuck in the rock, do not force it or try to pull it out forcefully. This can cause damage to the drill bit and the rock. Instead, try reversing the drill in the opposite direction to release the bit. If this doesn’t work, gently tap the bit with a hammer to loosen it, or use a lubricant such as WD-40 to help release it.
Are there any safety precautions I should take while drilling holes in rocks?
Yes, there are a few safety precautions to keep in mind while drilling holes in rocks. Always wear protective goggles to protect your eyes from any flying debris. It is also a good idea to work in a well-ventilated area or wear a respirator to avoid inhaling any dust. Remember to take breaks and rest your hands to prevent strain or injury.
Video:


Meet Harrison Clayton, a distinguished author and home remodeling enthusiast whose expertise in the realm of renovation is second to none. With a passion for transforming houses into inviting homes, Harrison's writing at https://thehuts-eastbourne.co.uk/ brings a breath of fresh inspiration to the world of home improvement. Whether you're looking to revamp a small corner of your abode or embark on a complete home transformation, Harrison's articles provide the essential expertise and creative flair to turn your visions into reality. So, dive into the captivating world of home remodeling with Harrison Clayton and unlock the full potential of your living space with every word he writes.


