5 Creative Ways to Make a Hole in Metal without a Drill

Drilling a hole in metal can be a daunting task, especially if you don’t have access to a drill. But fear not, there are actually several creative ways to make a hole in metal without a drill. Whether you’re a DIY enthusiast or just need to make a quick repair, these methods will come in handy.
The first method involves using a hammer and a nail. Simply place the nail on the metal surface where you want to make the hole, and gently tap it with the hammer until it pierces through the metal. This method requires patience and precision, as you don’t want to damage the surrounding area.
Another method that works well for thinner metals is using a punch and a hammer. Start by marking the spot where you want to make the hole, then place the punch on the marked spot and gently tap it with the hammer. The punch should create a small indentation in the metal. Continue tapping until the hole is the desired size.
If you have access to a blowtorch, you can also use it to make a hole in metal. This method works best for thicker metals and requires caution. Heat up the metal in the area where you want to make the hole, then use a sharp object like a nail or an awl to puncture through the heated area. Be sure to wear protective gloves and goggles when using this method.
An unconventional way to make a hole in metal is by using a soldering iron. This method works well for softer metals like aluminum. Simply heat up the tip of the soldering iron and apply it to the metal surface. The heat will melt through the metal, creating a hole. Be careful not to touch the hot tip of the soldering iron to avoid burns.

Finally, if you have a rotary tool with a cutting disc attachment, you can use it to make a hole in metal. Start by marking the spot where you want to make the hole, then slowly guide the cutting disc along the marked line. This method requires a steady hand and caution, as the cutting disc can be quite sharp.
These creative methods will help you make a hole in metal without a drill. Remember to take proper safety precautions and work slowly and carefully to achieve the desired results.
Why you may need to make a hole in metal without a drill
There are several reasons why you may need to make a hole in metal without a drill. Here are a few common situations where this might be necessary:
- Lack of access to a drill: Sometimes, you may not have access to a drill, either because you don’t own one or because you are in a location where it is not practical or possible to use a drill.
- Noisy or disruptive environment: Drilling can be a noisy and disruptive process, especially if you are working in a place where quiet is required or where the noise of a drill could be bothersome to others. In such cases, finding an alternative method to make a hole in metal without a drill can be useful.
- Special circumstances: There may be situations where using a drill is not feasible due to special circumstances, such as working with delicate or fragile materials that may get damaged by drilling, or working in a confined space where using a drill is difficult or dangerous.
- Creative solutions: Sometimes, using alternative methods to make a hole in metal without a drill can be a creative solution to a problem. These methods often require thinking outside the box and can result in unique and interesting outcomes.
Whatever the reason, knowing different techniques to make a hole in metal without a drill can be a valuable skill to have. It allows you to be more versatile and flexible in your approach to metalworking projects.
Alternative methods for creating holes in metal
1. Punching
Punching is a method commonly used in industrial applications to create holes in metal. It involves using a punch and die set to exert high pressure on the metal, which causes the material to deform and create a hole. This method is effective for creating clean, precise holes and can be used on various thicknesses of metal.

2. Plasma cutting
Plasma cutting is a method that uses a high-velocity jet of ionized gas to cut through metal. It can also be used to create holes in metal by focusing the plasma stream in a smaller area. Plasma cutting is commonly used for cutting and drilling in industrial settings and can be an effective alternative to drilling for creating holes in metal.
3. Laser cutting
Laser cutting is a precise and efficient method of cutting and drilling holes in metal. It uses a high-powered laser beam to heat and vaporize the material, creating a hole. Laser cutting is commonly used in industrial applications where precision is required, and it can be a good alternative for creating holes in metal without using a drill.
4. Water jet cutting
Water jet cutting is another method that can be used to create holes in metal. It uses a high-pressure jet of water mixed with abrasive material to cut through the metal. The water jet can be focused to create a hole of the desired size and shape. Water jet cutting is a versatile method that can be used on various types and thicknesses of metal.
5. Rotary broaching
Rotary broaching is a method that involves using a specially-shaped cutting tool called a broach to create holes in metal. The broach is mounted on a rotating spindle and is pressed into the metal, which cuts out the hole. Rotary broaching is commonly used for creating small holes with non-standard shapes or sizes and can be a good alternative to drilling in certain applications.
| Method | Precision | Application | Cost |
|---|---|---|---|
| Punching | High | Industrial | Low |
| Plasma cutting | Medium | Industrial | Medium |
| Laser cutting | High | Industrial | High |
| Water jet cutting | High | Industrial | High |
| Rotary broaching | Medium | Specialized | Medium |

Method 1: Punching holes with a nail and hammer
Punching holes in metal without a drill can be easily accomplished with a common household tool: a nail and a hammer. This method is best suited for thin metal sheets or softer metals, such as aluminum or brass.
Materials:
- Thin metal sheet or softer metal
- Nail
- Hammer
- Protective gloves and goggles
Steps:
- Put on protective gloves and goggles to ensure safety.
- Place the metal sheet on a sturdy surface, such as a workbench or table, with a piece of scrap wood underneath to prevent damage to the surface.
- Mark the desired location of the hole on the metal sheet using a pencil or marker.
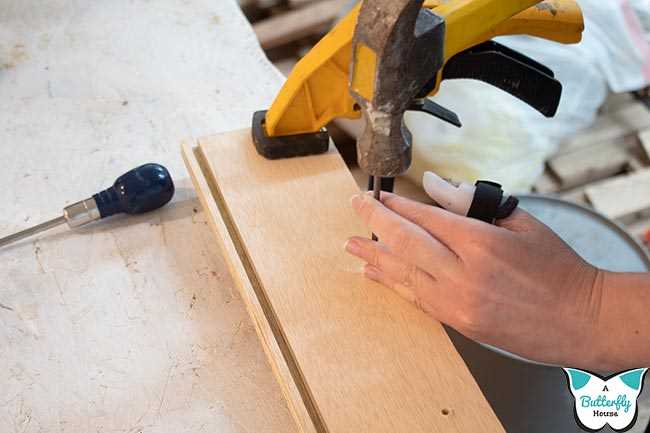
- Hold the nail perpendicular to the marked spot on the metal sheet.
- Position the point of the nail directly over the marked spot.
- Strike the nail using the hammer, applying consistent pressure and aiming for the center of the marked spot.
- Continue striking the nail with the hammer until it punctures through the metal sheet.
- Once the nail has gone through the metal, remove it from the hole and smooth out any rough edges if needed.
Note: This method may require more force for harder metals, and it is recommended to start with a smaller nail and gradually increase the size if necessary. Also, ensure that you are working in a well-ventilated area and take breaks if needed to avoid strain or fatigue.
Step-by-step guide to punching holes in metal
1. Gather the necessary tools and materials
Before you start punching holes in metal, make sure you have all the necessary tools and materials. You will need:
- Metal punch: Choose a punch that is appropriate for the thickness and type of metal you are working with.
- Hammer: Select a hammer that is suitable for striking the metal punch. A ball peen hammer or a mallet can be good options.
- Protective gear: Wear safety glasses and gloves to protect yourself from metal shards.
- Marker: Use a marker to mark the location of the hole on the metal.
- Workbench or sturdy surface: Find a stable surface to place the metal on while punching the holes.
2. Mark the location of the hole
Use a marker to clearly mark the location of the hole on the metal. Double-check your measurements and ensure the mark is in the correct position.

3. Secure the metal
Place the metal on a workbench or a sturdy surface. Make sure it is firmly secured so that it doesn’t move or slip while you are punching the hole.
4. Position the metal punch
Position the metal punch on the marked location. Make sure it is centered and aligned with the desired hole.
5. Strike the metal punch
Hold the punch firmly in place with one hand and strike the top of the punch with the hammer using controlled, even force. Start with light taps and gradually increase the force until the punch starts to penetrate the metal.
6. Increase the hole size (optional)
If you need a larger hole, you can use a step drill bit or a hole saw to enlarge the punched hole. Follow the manufacturer’s instructions for using these tools.
7. Remove the metal punch
Once the hole is punched, release the pressure on the punch and remove it from the metal. Check the quality of the hole and make any necessary adjustments.

8. Clean up
Remove any metal shavings or debris from the work area. Use a brush or vacuum cleaner to ensure the area is clean and safe.
9. Finishing touches
If desired, you can use a deburring tool or a file to smooth the edges of the hole and remove any sharp burrs.
Remember to always follow proper safety precautions when working with metal, such as wearing protective gear and taking breaks if needed. Happy hole punching!
Method 2: Using a screw and pliers to create holes
If you don’t have access to a drill, you can still create holes in metal by using a screw and a pair of pliers. This method requires a bit more strength and effort, but it can be effective in a pinch.
Here’s how you can use a screw and pliers to create holes in metal:

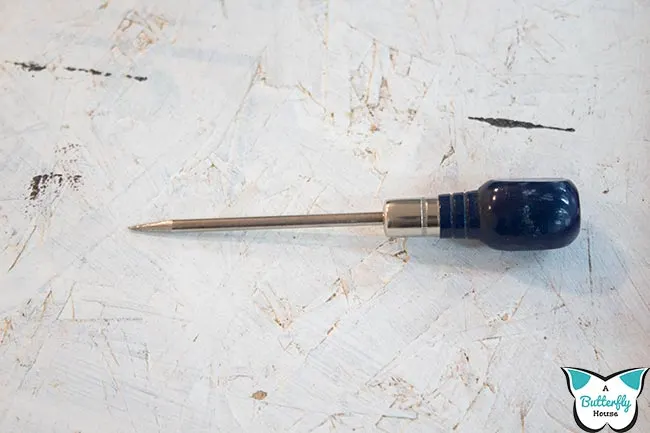
- Choose the right screw: Select a screw with a sharp point that is slightly smaller in diameter than the desired hole size. It’s important to choose a screw with a pointed tip to penetrate the metal.
- Mark the spot: Use a marker or a punch to mark the exact spot where you want the hole to be created. This will help guide the screw into the metal.
- Start screwing: Place the screw on the marked spot and use a pair of pliers to grip the screw tightly. Apply pressure and begin turning the screw clockwise with the pliers. This will start creating a hole in the metal.
- Continue screwing: Keep applying pressure and continue turning the screw until it fully penetrates the metal. This will take some time and effort, so be patient and take breaks if needed.
- Remove the screw: Once the screw has fully penetrated the metal, use the pliers to unscrew it counter-clockwise and remove it from the newly created hole.
- Smooth the edges: After removing the screw, you may notice that the hole has rough or jagged edges. Use a file or sandpaper to smooth out the edges and create a clean hole.
Note that this method may not be suitable for creating large or precise holes, as it relies on manual force and may result in less accurate results. It’s also important to exercise caution and use protective gear, such as gloves and safety glasses, as metal shavings and fragments can be sharp and hazardous.
Overall, using a screw and pliers can be a viable alternative to drilling holes in metal, especially in situations where a drill is not available. However, it’s important to keep in mind the limitations of this method and to prioritize safety during the process.
Step-by-step guide to creating holes with a screw and pliers
If you don’t have access to a drill, you can still create holes in metal using a few simple tools. One of the most effective methods is using a screw and a pair of pliers. Follow these steps to create a hole in metal without a drill:
Materials Needed:
- A metal surface
- A screw
- A pair of pliers
- A marker or pen
- Safety goggles
Step 1: Mark the spot
Start by marking the exact spot where you want to create the hole on the metal surface. Use a marker or pen to make a clear and visible mark.
Step 2: Secure the screw
Take the screw and insert it into the marked spot on the metal surface. Use the pliers to hold the screw tightly in place. Make sure it is secured firmly and will not move during the next steps.

Step 3: Create a starting point
Using the pliers, apply pressure to the tip of the screw and start rotating it clockwise. The screw will begin to create a small indentation on the metal surface. This serves as a starting point for the hole.
Step 4: Increase the pressure
Continue rotating the screw clockwise while applying more pressure with the pliers. This will gradually create a deeper hole in the metal surface. Be careful not to apply too much pressure at once, as it can damage the metal or cause the screw to slip.
Step 5: Adjust the angle
As the hole deepens, you may need to adjust the angle at which you are applying pressure to the screw. This will ensure that the hole is created evenly and accurately. Take your time and make adjustments as necessary.
Step 6: Remove the screw
Once the desired depth is reached, remove the screw from the metal surface using the pliers. You now have a hole in the metal without the need for a drill.
Step 7: Smooth the edges
Depending on the desired finish, you may want to smooth the edges of the hole using a metal file or sandpaper. This will ensure that the hole is clean and free from any sharp edges.
Remember to wear safety goggles throughout the process to protect your eyes from any flying metal particles.
Creating a hole in metal without a drill may require some patience and effort, but it can be done using simple tools like a screw and pliers. Follow these steps carefully to achieve the desired result.
Method 3: Using a hole punch tool
Another creative way to make a hole in metal without a drill is by using a hole punch tool. This method is particularly useful for thinner metal sheets and is commonly used in crafts and DIY projects.
Here’s how you can use a hole punch tool to make a hole in metal:
- Start by positioning the metal sheet on a stable surface. Make sure it is secured in place to prevent any movement while working.
- Choose the appropriate size of the hole punch tool based on your desired hole diameter. These tools usually come in various sizes, so select the one that best suits your needs.
- Place the hole punch tool directly on the spot where you want the hole to be. Make sure to apply pressure evenly on the tool to ensure a clean cut.
- Use a hammer or mallet to strike the top end of the hole punch tool. This force will create a hole in the metal sheet.
- Continue hitting the hole punch tool until it goes entirely through the metal sheet. Be patient and take breaks if necessary to avoid any injuries.
- Once the hole is created, remove the hole punch tool from the metal sheet gently.
This method is relatively quick and straightforward, allowing you to make precise holes in metal without the need for a drill. However, keep in mind that hole punch tools are usually suitable for thinner metal sheets. If you are working with thicker or harder metals, consider using alternative methods or professional equipment.
In conclusion, using a hole punch tool is a practical and accessible way to make a hole in metal, especially for smaller projects. Ensure to follow safety precautions and choose the right size of the hole punch tool for the best results.
Step-by-step guide to using a hole punch tool on metal
1. Gather the necessary materials
Before you begin, make sure you have the following materials ready:
- Metal sheet or object
- Hole punch tool
- Hammer
- Protective gloves and eyewear
2. Choose the right hole punch tool
There are different types of hole punch tools available depending on the size and shape of the hole you need. Consider the size and thickness of your metal sheet and select the appropriate tool.
3. Mark the position of the hole
Using a marker or scribe, mark the exact position where you want the hole to be punched. Double-check your measurements to ensure accuracy.
4. Secure the metal sheet
Place the metal sheet on a stable surface such as a workbench or table. Use clamps or a vise to securely hold the metal sheet in place. This will prevent it from moving or slipping during the punching process.
5. Position the hole punch tool
Align the hole punch tool with the marked position on the metal sheet. Make sure it is centered and placed at the correct angle.
6. Apply pressure
Using a hammer, gently tap the top of the hole punch tool to create an initial indentation in the metal sheet. This will help guide the tool and prevent it from slipping.
7. Punch the hole
Once the initial indentation is created, increase the force of your hammer strikes. Continue hammering the hole punch tool until it fully penetrates the metal sheet and creates a clean hole.
8. Remove the punched metal piece
After the hole is punched, remove the metal piece from the hole punch tool. Use pliers or your hands to gently pull or twist the punched metal piece out of the tool.
9. Clean and finish
Inspect the punched hole for any rough edges or burrs. Use a file or sandpaper to smooth out the edges and ensure a neat finish. You can also use a deburring tool to remove any sharp edges.
10. Repeat the process
If you need to create multiple holes, repeat the above steps for each new hole. Make sure to reposition the hole punch tool accurately each time to maintain consistency.
11. Safety precautions
Remember to wear protective gloves and eyewear throughout the process to avoid any injuries. Metal can be sharp and may cause cuts or splinters.
Using a hole punch tool is an effective and efficient way to create holes in metal without the need for a drill. Follow these step-by-step instructions, and you’ll be able to create precise holes in your metal sheets or objects.
Method 4: Melting holes with a soldering iron
Melting holes in metal using a soldering iron is another creative way to create small holes. This method is particularly useful for thin metal sheets or delicate materials where drilling may cause damage.
Materials needed:
- Soldering iron
- Metal object
- Safety goggles
- Gloves
Steps:
- Put on safety goggles and gloves to protect yourself during the process.
- Choose the location on the metal where you want to create the hole.
- Heat up the soldering iron according to the manufacturer’s instructions.
- Hold the heated tip of the soldering iron against the metal where you want the hole.
- Apply gentle pressure and move the soldering iron tip in a circular motion to melt through the metal.
- Continue melting the metal until you have created the desired hole size.
- Once the hole is made, remove the soldering iron and let the metal cool down.
- Inspect the hole to ensure it is the right size and shape.
Note: It is important to remember to work in a well-ventilated area when melting metal, as the process can release fumes. Additionally, exercise caution when working with a hot soldering iron to avoid burns or other injuries.
Using a soldering iron to melt holes in metal offers a precise and controlled way to create small holes without the need for a drill. However, this method may not be suitable for thicker metals or large-scale projects, as the soldering iron may not generate enough heat to melt through them effectively.
| Pros | Cons |
|---|---|
| Does not require a drill | Not suitable for thicker metals |
| Suitable for delicate materials | May generate fumes |
| Precise and controlled method | Requires caution to avoid burns |
Overall, melting holes with a soldering iron can be a practical solution for creating small holes in metal when drilling is not an option or when working with delicate materials. Just make sure to take the necessary safety precautions and have the proper equipment before attempting this method.
Step-by-step guide to melting holes in metal with a soldering iron
Materials
- Soldering iron
- Metal piece
- Safety goggles
- Gloves
- Marker
Step 1: Safety precautions
Before you start, put on your safety goggles and gloves to protect yourself from any possible injury.
Step 2: Mark the spot
Using a marker, carefully mark the spot on the metal where you want to create a hole. Ensure that your mark is precise and easy to see.
Step 3: Heat up the soldering iron
Plug in your soldering iron and let it heat up. It is important to use a soldering iron with a pointed tip for melting holes in metal.
Step 4: Position the soldering iron
Hold the soldering iron in a vertical position, perpendicular to the metal surface. Make sure the pointed tip is aligned with the marked spot.
Step 5: Apply pressure
Gently apply pressure to the soldering iron, ensuring that the heated tip makes contact with the metal. Do not force the soldering iron; let it melt through the metal with its own heat.
Step 6: Create the hole
Gradually move the soldering iron in a circular motion, enlarging the hole as needed. Be patient and allow the soldering iron’s heat to melt through the metal.
Step 7: Clean up
Once the hole is created, turn off the soldering iron and let it cool down. Clean up any debris or metal shavings around the hole with a cloth or brush.
Step 8: Safety first
Remember to always unplug and safely store your soldering iron after use. Dispose of any waste materials properly and keep your work area clean.
| Benefits | Considerations |
|---|---|
|
|
FAQ:
Can I make a hole in metal without using a drill?
Yes, there are several creative ways to make a hole in metal without using a drill. Some of these methods include using a metal punch, a plasma cutter, a hole saw, or even a soldering iron.
What is a metal punch and how does it work?
A metal punch is a tool that is used to create holes in metal surfaces. It works by exerting pressure on a specific area of the metal, causing it to deform and create a hole. To use a metal punch, you simply align the punch with your desired location on the metal and strike it with a hammer.
Is it possible to use a plasma cutter to make a hole in metal?
Yes, a plasma cutter can be used to make a hole in metal. A plasma cutter uses an electric arc and compressed air or gas to generate a high-temperature plasma that can melt through metal. By guiding the plasma cutter along a specific path, you can create a hole of any desired shape or size.
Can I use a soldering iron to make a hole in metal?
Yes, a soldering iron can be used to make a small hole in metal. By heating the soldering iron and pressing it against the metal surface, you can melt through the metal and create a hole. However, this method is more suitable for thin metals and may not work well for thicker or harder metals.
Video:

How to cite bnf

Harrison Clayton
Meet Harrison Clayton, a distinguished author and home remodeling enthusiast whose expertise in the realm of renovation is second to none. With a passion for transforming houses into inviting homes, Harrison's writing at https://thehuts-eastbourne.co.uk/ brings a breath of fresh inspiration to the world of home improvement. Whether you're looking to revamp a small corner of your abode or embark on a complete home transformation, Harrison's articles provide the essential expertise and creative flair to turn your visions into reality. So, dive into the captivating world of home remodeling with Harrison Clayton and unlock the full potential of your living space with every word he writes.


