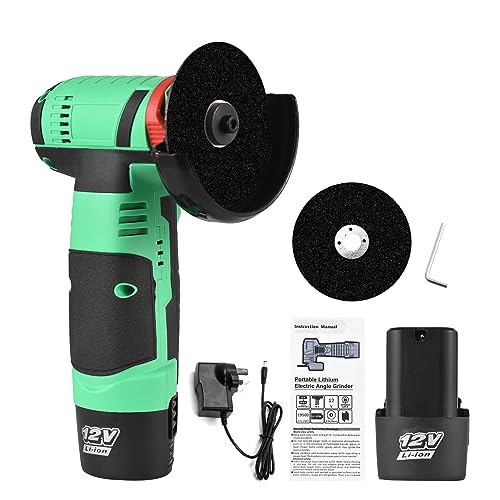
How do you change a tile cutter disc

Tiles are a popular choice for flooring and walls, offering durability and easy maintenance. However, when it comes to cutting tiles to fit around corners or odd shapes, a tile cutter is an essential tool. As with any tool, the cutting disc of a tile cutter can become worn or damaged over time. Changing the disc is a simple process that can be done by following a few steps.
To begin, ensure that the tile cutter is unplugged or the power switch is turned off to avoid any accidents. The next step is to locate the retaining nut that holds the disc in place. This nut is usually located in the center of the disc and can be loosened by using a spanner or wrench. Hold the disc firmly in place while loosening the nut to prevent it from rotating.
Once the nut is loosened, carefully remove the old disc from the tile cutter. Be cautious of any sharp edges or protrusions on the disc. Dispose of the old disc properly to avoid any injuries. Take the opportunity to inspect the blade holder to ensure it is free from any debris or damage. Clean or replace the blade holder as necessary.
Now it’s time to install the new disc. Align the center hole of the new disc with the shaft on the tile cutter. Make sure the disc is sitting flush against the blade holder. Once aligned, tighten the retaining nut with a spanner or wrench. Ensure the nut is securely tightened, but be careful not to overtighten, as this can damage the disc or the tile cutter.
Finally, give the disc a quick test to make sure it spins freely and is securely attached. If everything looks good, you can plug in the tile cutter or turn on the power switch, and you’re ready to start cutting tiles again with a fresh disc. Remember to always wear appropriate safety gear, such as goggles and gloves, when operating a tile cutter to protect yourself from any potential hazards.

The Process of Changing a Tile Cutter Disc
Changing a tile cutter disc is a straightforward process that requires a few simple steps. By following these steps, you can replace a worn-out disc and ensure your tile cutter functions optimally.
1. Safety First: Before beginning the disc-changing process, it is crucial to prioritize safety. Wear protective gloves and goggles to safeguard your hands and eyes from any potential injuries.
2. Power Off: If your tile cutter is electric or battery-powered, make sure to switch it off and unplug it from the power source before proceeding. Safety should always come first.
3. Remove the Water Tray: Many tile cutters come with a water tray that needs to be removed before accessing the disc. Carefully lift the water tray away from the machine and set it aside.
4. Loosen the Disc Nut: Locate the disc nut, which holds the disc in place. Use an appropriate wrench or spanner to loosen the disc nut by turning it counterclockwise. Depending on the tile cutter model, you may need to use a special tool provided in the cutter’s kit.

5. Remove the Old Disc: Once the disc nut is loose, carefully remove the old disc by sliding it off the spindle. Be cautious as the disc may be sharp, so handle it with care to avoid potential injuries.
6. Clean the Spindle: Take a moment to clean the spindle thoroughly to remove any debris or dust. Use a clean cloth or brush to wipe away any dirt and ensure a clean surface for the new disc to attach securely.
7. Install the New Disc: Slide the new disc onto the spindle, making sure it fits properly. Align any holes in the disc with corresponding holes on the spindle if necessary. Ensure the disc is positioned securely, and the mounting holes line up with the holes in the spindle.
8. Tighten the Disc Nut: Using your wrench or spanner, tighten the disc nut by turning it clockwise until it is securely fastened. Ensure the disc is firmly held in place and does not wobble or move when pressure is applied.
9. Reattach the Water Tray: Carefully place the water tray back in its position and secure it to the tile cutter. Make sure it is properly aligned and sits snugly on the machine.

10. Test the Tile Cutter: Once the disc has been changed and all components are reassembled, you can power on the tile cutter and test its functionality. Try making a few cuts on scrap tiles to ensure the new disc performs as expected. If any issues arise, double-check the disc installation or consult the manufacturer’s instructions.
NOTE: The process of changing a tile cutter disc may vary depending on the specific model and manufacturer. Always refer to the user manual provided by the manufacturer for detailed instructions tailored to your tile cutter.
Step 1: Safety Precautions
Before you begin changing the tile cutter disc, it is important to take certain safety precautions to ensure your wellbeing. Follow the steps below to ensure a safe working environment:
| Wear Protective Gear | Put on safety glasses and work gloves to protect your eyes and hands from any potential debris or accidents during the process. |
| Turn Off the Power | Ensure that the tile cutter is unplugged or the power switch is in the OFF position. This will prevent any accidental start-up while you are working on changing the disc. |
| Secure the Tile Cutter | Place the tile cutter on a stable surface or workbench to prevent any wobbling or movement during the disc replacement process. |
| Clear the Work Area | Remove any loose tiles, debris, or obstructions from the work area. This will prevent accidents or damage to the new disc during the replacement process. |
| Read the Instruction Manual | Refer to the instruction manual provided by the manufacturer to understand the specific steps and safety precautions for changing the disc on your tile cutter model. |
By following these safety precautions, you can minimize the risk of accidents and ensure a smooth and safe tile cutter disc replacement process.
Step 2: Gathering the Necessary Tools
Before you begin changing the tile cutter disc, make sure you have all the required tools. Here’s what you’ll need:

- A screwdriver – to remove any screws
- A wrench – to loosen the nuts
- A replacement disc – make sure it’s the right size and type for your tile cutter
- Gloves – to protect your hands
- Safety goggles – to protect your eyes from any flying debris
Having these tools on hand will ensure that you can safely and effectively change the tile cutter disc without any issues. Once you’ve gathered all the necessary tools, you’re ready to move on to the next step.
Step 3: Removing the Old Disc
Once you have selected the appropriate replacement disc for your tile cutter, it’s time to remove the old disc. Follow these steps carefully:
1. Before removing the old disc, make sure to disconnect the tile cutter from any power source to ensure your safety.
2. Locate the disc retaining nut or bolt on the tile cutter. This is usually found near the center of the disc.
3. Use a wrench or an adjustable spanner to loosen the retaining nut or bolt. Turn it counterclockwise until it is loose enough to remove by hand.

4. Once the retaining nut or bolt is loose, carefully remove it and set it aside.
5. Gently lift the old disc off the tile cutter, taking care not to touch the sharp edges.
6. Inspect the disc and the tile cutter’s spindle for any signs of damage or wear. If necessary, clean the spindle before installing the replacement disc.
7. Dispose of the old disc properly according to your local waste management regulations.
Now that you have successfully removed the old disc, you are ready to proceed to the next step: installing the new disc.

Step 4: Installing the New Disc
Now that you have successfully removed the old disc from your tile cutter, it’s time to install the new one. Follow these steps to ensure a proper and secure installation:
-
Prepare the new disc
Start by carefully inspecting the new disc to ensure it is free from any damages or defects. If you notice any issues, it’s best to replace it with a new one.
Once you have confirmed that the new disc is in good condition, place it on a clean and flat surface. Look for the arrow or directional indicator on the disc, as this will help you align it correctly with the cutter.
-
Align the new disc
Pick up the tile cutter and locate the spindle or arbor where the disc will be mounted. Slide the new disc onto the spindle, aligning the arrow on the disc with the corresponding mark on the cutter. Ensure that the disc is centered and seated properly.
-
Tighten the disc
With the new disc in place, use the wrench or spanner included with your tile cutter to tighten the disc securely. Apply firm but controlled pressure to ensure that the disc is properly secured to prevent any wobbling or movement during operation.
Check the disc’s tightness by gently trying to move it. If there is any play or movement, tighten it further until it is completely secure.
Once you have completed these steps, you can be confident that the new disc is properly installed and ready for use. Remember to always wear appropriate safety gear and follow all manufacturer instructions when operating your tile cutter.
Step 5: Testing and Adjusting the Tile Cutter Disc
After you have successfully changed the tile cutter disc, it is essential to test and adjust it to ensure optimal performance. Follow these steps to complete this process:
1. Inspect the Disc
Take a close look at the new disc to ensure that it is securely attached and aligned with the cutter. Look for any signs of damage, such as cracks or chips. If you notice any issues, replace the disc before proceeding.
2. Position the Tile
Place a tile on the cutter, making sure it is properly aligned and secure. Adjust the tile stopper if necessary to hold the tile in place firmly.
![How do you change? [Explicit]](https://m.media-amazon.com/images/I/31brisl6GoL._SL160_.jpg)
3. Practice Cutting
Before working on your actual project, practice making a few cuts on a scrap piece of tile. This will allow you to familiarize yourself with the new disc and ensure that it is functioning correctly.
4. Adjust the Cutting Depth
If necessary, adjust the cutting depth on your tile cutter. Refer to the manufacturer’s instructions for guidance. It is crucial to set the correct cutting depth to avoid damaging the tile or reducing the efficiency of the disc.
5. Test the Cutting Performance
Now it’s time to test the cutting performance of the tile cutter disc. Carefully run the cutter along the edge of the tile, applying firm pressure. Observe the quality of the cut and check for any irregularities or rough edges.
6. Make Adjustments
If you notice any issues with the cut, such as chipping or uneven edges, you may need to make adjustments to the tile cutter disc. Check the alignment of the disc, tighten any loose screws, or consider replacing the disc if necessary.
Remember to wear appropriate safety gear, such as safety glasses and gloves, during the testing and adjusting process. Always follow the manufacturer’s instructions and guidelines to ensure a successful tile cutting experience.
FAQ
What tools do I need to change a tile cutter disc?
To change a tile cutter disc, you will need a wrench, a screwdriver, and a replacement disc.
How often should I change the disc on my tile cutter?
The frequency of changing the disc on a tile cutter depends on the usage and the quality of the disc. It is recommended to inspect the disc regularly and replace it if it becomes worn out or damaged.
What are the steps to change a tile cutter disc?
To change a tile cutter disc, first make sure the tool is unplugged. Then, use a wrench to remove the nut holding the disc in place. Carefully lift the old disc off and replace it with the new one. Finally, tighten the nut securely and make sure it is properly aligned.
Can I change a tile cutter disc by myself or should I call a professional?
Changing a tile cutter disc can be done by most individuals as long as they follow the proper safety precautions and have the necessary tools. However, if you are uncomfortable or unsure about the process, it is always best to consult a professional to ensure the job is done correctly.


Harrison Clayton
Meet Harrison Clayton, a distinguished author and home remodeling enthusiast whose expertise in the realm of renovation is second to none. With a passion for transforming houses into inviting homes, Harrison's writing at https://thehuts-eastbourne.co.uk/ brings a breath of fresh inspiration to the world of home improvement. Whether you're looking to revamp a small corner of your abode or embark on a complete home transformation, Harrison's articles provide the essential expertise and creative flair to turn your visions into reality. So, dive into the captivating world of home remodeling with Harrison Clayton and unlock the full potential of your living space with every word he writes.