Winterize Your RV with an Air Compressor: Easy Steps to Protect Your Vehicle
Winter can be a harsh season for RV owners, with freezing temperatures and harsh weather conditions posing a threat to the integrity of their vehicles. However, with the right precautions, you can ensure that your RV remains in top shape during the winter months. One of the most effective ways to winterize your RV is by using an air compressor.
Using an air compressor to winterize your RV is a quick and easy process that can save you time and money in the long run. By blowing out the water lines and tanks in your RV, you can prevent any leftover water from freezing and causing damage to your plumbing system. This simple step can help you avoid costly repairs and ensure that your RV is ready to hit the road again once the winter season is over.
When winterizing your RV with an air compressor, it’s important to follow a few key steps to ensure that the process is done correctly. First, you’ll need to make sure that your RV is completely drained of all water. This includes draining the tanks, water lines, and faucets. Once this is done, you can connect the air compressor to the water line and blow out any remaining water.
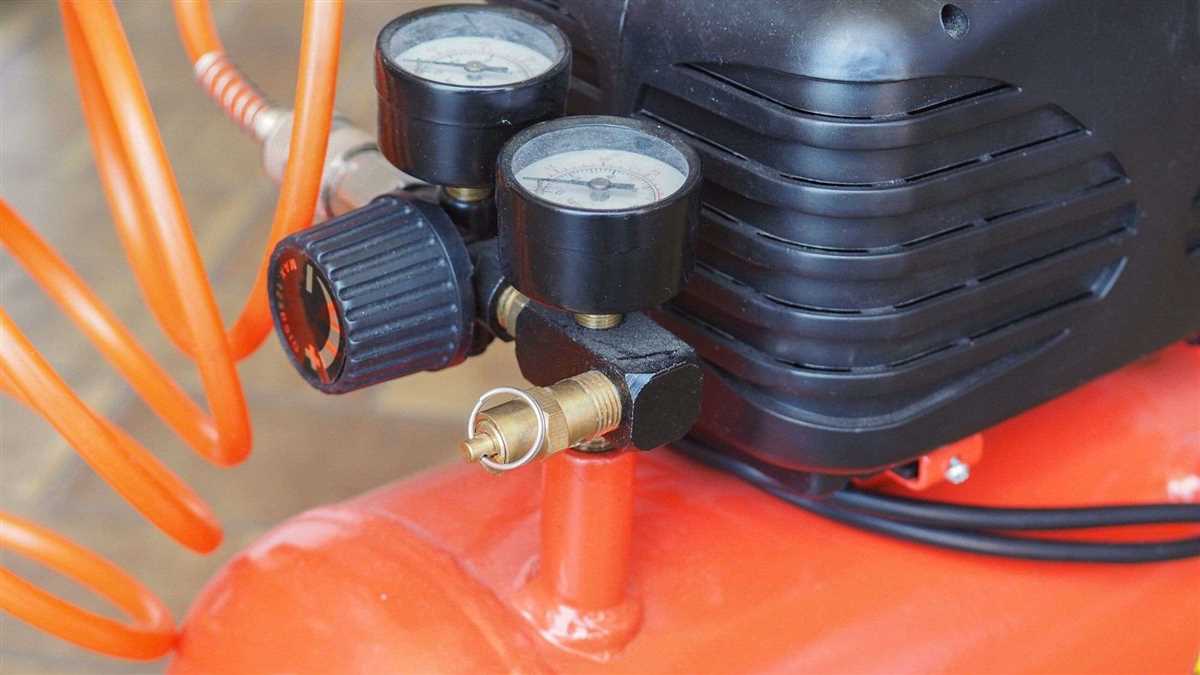
It’s also important to use the correct pressure when using an air compressor to winterize your RV. Too much pressure can damage the plumbing system, while too little pressure may not effectively remove all the water. It’s recommended to use a pressure between 30 and 50 psi to ensure that the water is completely blown out without causing any damage.
By taking the time to winterize your RV with an air compressor, you can protect your vehicle from the harsh winter weather and ensure that it remains in top shape for years to come. With just a few simple steps, you can save yourself from costly repairs and enjoy worry-free travels during the winter season.

Why Winterize Your RV?
Winterizing your RV is an essential task to protect your vehicle from the harsh winter weather. By properly winterizing your RV, you can prevent costly damages and ensure that your vehicle is ready for your next adventure when spring arrives.
Prevent Freezing
The main reason to winterize your RV is to prevent freezing. When temperatures drop below freezing, the water in your RV’s pipes and tanks can freeze, causing them to expand and potentially burst. This can lead to expensive repairs and the need for replacement parts.
Protect from Damage
Winterizing your RV also helps protect it from other forms of damage that can be caused by cold temperatures, snow, and ice. By properly winterizing, you can prevent cracks in the exterior, damage to the roof, and issues with the electrical and plumbing systems.
Save Money
By taking the time to winterize your RV, you can save money in the long run. Winter-related damage can be costly to repair, and it’s much cheaper to invest in the proper winterization steps upfront. By protecting your RV, you can avoid unexpected expenses and ensure that your vehicle lasts longer.

Prepare for Spring
Lastly, winterizing your RV allows you to be prepared for the arrival of spring and the start of camping season. When the warmer weather returns, you won’t have to worry about any winter-related damage to your RV. Instead, you can simply de-winterize and get back on the road without any delays.
Prevent Costly Damage
Protecting your RV from winter weather is essential to avoid costly damage. The freezing temperatures can cause cracks in the plumbing system, damage to the exterior, and deterioration of the internal components. By winterizing your RV with an air compressor, you can prevent these issues and save money on repairs.
Using an air compressor to blow out the water lines in your RV ensures that there is no residual water left behind. When water freezes, it expands and can burst the pipes. This can lead to leaks and water damage inside your RV, which can be expensive to repair.
Winterizing your RV also involves protecting the exterior. By using an air compressor to remove any moisture and debris from the exterior, you can prevent issues such as rust and mold growth. These problems can be costly to fix and can also decrease the value of your RV.
Additionally, the internal components of your RV can be affected by winter weather. By using an air compressor to blow out the air filters and ventilation systems, you can prevent the buildup of dirt and debris. This will improve the overall air quality inside your RV and prevent costly repairs to the ventilation system.

Overall, taking the time to winterize your RV with an air compressor can help prevent costly damage and extend the lifespan of your vehicle. By ensuring that all water is removed from the plumbing system, protecting the exterior from moisture and debris, and cleaning the internal components, you can save money on repairs and enjoy your RV for years to come.
Ensure Longevity
One of the key reasons to winterize your RV with an air compressor is to ensure the longevity of your vehicle. By properly protecting your RV during the winter months, you can prevent costly damage and extend the lifespan of your vehicle.
Prevent Freezing: Winterizing your RV with an air compressor helps prevent freezing of the water lines and tanks. By removing all the water from the system, you reduce the risk of frozen pipes and potential cracks or bursts.
Protect the Plumbing System: The plumbing system of your RV is vulnerable to damage during the winter season. By using an air compressor to blow out any remaining water in the lines, you can protect the plumbing system from freezing and potential leaks.
Prevent Mold and Mildew: Winterizing your RV also helps prevent the growth of mold and mildew. By removing all the moisture from the interior, you can reduce the risk of mold and mildew buildup, which can cause damage to the walls, furniture, and other surfaces.

Prolong the Life of Appliances: The appliances in your RV, such as the refrigerator, water heater, and air conditioner, can also benefit from winterization. By ensuring that these appliances are properly protected and winterized, you can prolong their lifespan and avoid costly repairs or replacements.
Protect the Exterior: Winterizing your RV with an air compressor also helps protect the exterior of the vehicle. By properly cleaning and drying the exterior surfaces, you can prevent damage from ice, snow, and other winter elements. Additionally, using a protective cover can further safeguard your RV from harsh weather conditions.
Overall, by taking the necessary steps to winterize your RV with an air compressor, you can ensure the longevity of your vehicle and protect it from potential damage during the winter months. Proper winterization can save you time, money, and stress in the long run, allowing you to enjoy your RV for years to come.
Using an Air Compressor: Benefits and Precautions
Benefits of Using an Air Compressor
An air compressor can be a valuable tool when it comes to winterizing your RV. It allows you to efficiently and effectively remove any remaining water from the plumbing system, preventing it from freezing and causing damage. By using an air compressor, you can save time and effort compared to manually draining each individual water line.

Furthermore, an air compressor can help you maintain the proper pressure in your RV’s tires. By regularly inflating them to the recommended levels, you can improve fuel efficiency, ensure better handling, and extend the lifespan of your tires. This can enhance the overall safety and performance of your RV on the road.
Precautions to Take
While using an air compressor, it is important to take certain precautions to prevent any damage or accidents. First, make sure to use the appropriate attachment for the job and follow the manufacturer’s instructions. Different air tools may require different fittings and accessories.
It is also crucial to regulate the air pressure to avoid overinflating the tires or causing damage to the RV’s plumbing system. Consult the owner’s manual or seek professional advice to determine the optimal pressure levels for your specific RV model.
Additionally, wear protective gear such as safety goggles and gloves to protect yourself from any potential hazards or flying debris. Keep a safe distance from the air compressor and ensure proper ventilation to prevent the buildup of fumes or exhaust gases.
Lastly, regularly inspect your air compressor for any signs of wear or damage. Proper maintenance and cleaning will help prolong the life of the compressor and ensure its safe and efficient operation.
In conclusion, using an air compressor can provide various benefits when winterizing your RV and maintaining its tires. However, it is essential to take precautions to prevent any accidents or damage. By following the appropriate procedures and safety guidelines, you can effectively protect your RV and enjoy worry-free travels during the winter season.
Efficient and Effective
When it comes to winterizing your RV, using an air compressor is both efficient and effective. Unlike other methods, such as using antifreeze, an air compressor allows you to easily remove all of the water from your RV’s plumbing system, ensuring that no water is left behind to freeze and potentially cause damage.
Using an air compressor is also a quick and straightforward process. Simply connect the compressor to your RV’s water inlet and open each faucet and valve, allowing the compressed air to blow out any remaining water. This method not only removes any water from your plumbing system, but it also helps to clear out any debris or sediment that may have accumulated.
Another benefit of using an air compressor to winterize your RV is that it can be used on multiple vehicles. Whether you have a motorhome, travel trailer, or fifth wheel, an air compressor can effectively remove water from all types of RVs. This versatility makes it a convenient option for RV owners who may have multiple vehicles or who plan on upgrading their RV in the future.
In addition to winterizing your RV, an air compressor can also be used for other maintenance tasks. From inflating tires to blowing out dust and debris from hard-to-reach areas, an air compressor is a versatile tool that can be useful for all types of RV owners. Investing in an air compressor can save you time and money in the long run by allowing you to complete these tasks yourself, without the need to hire a professional.
In conclusion, when it comes to winterizing your RV, using an air compressor is an efficient and effective method. It allows you to easily remove all water from your plumbing system and can be used on multiple types of RVs. Additionally, an air compressor is a versatile tool that can be used for other maintenance tasks as well. Consider investing in an air compressor to protect your RV and save both time and money in the long run.
Proper Equipment and Technique
Choose the Right Air Compressor
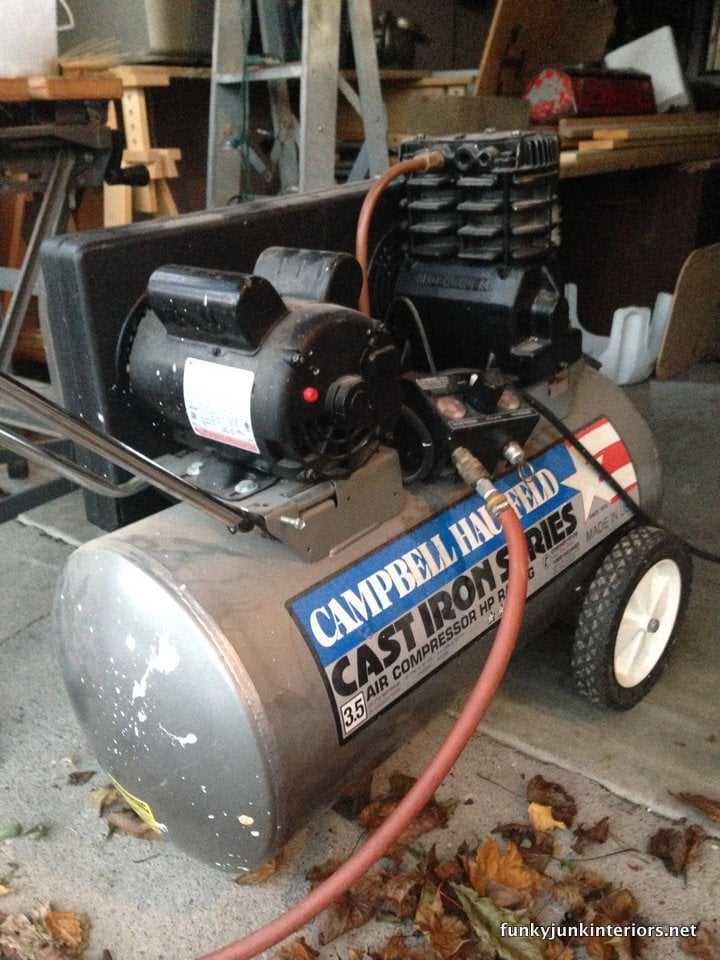
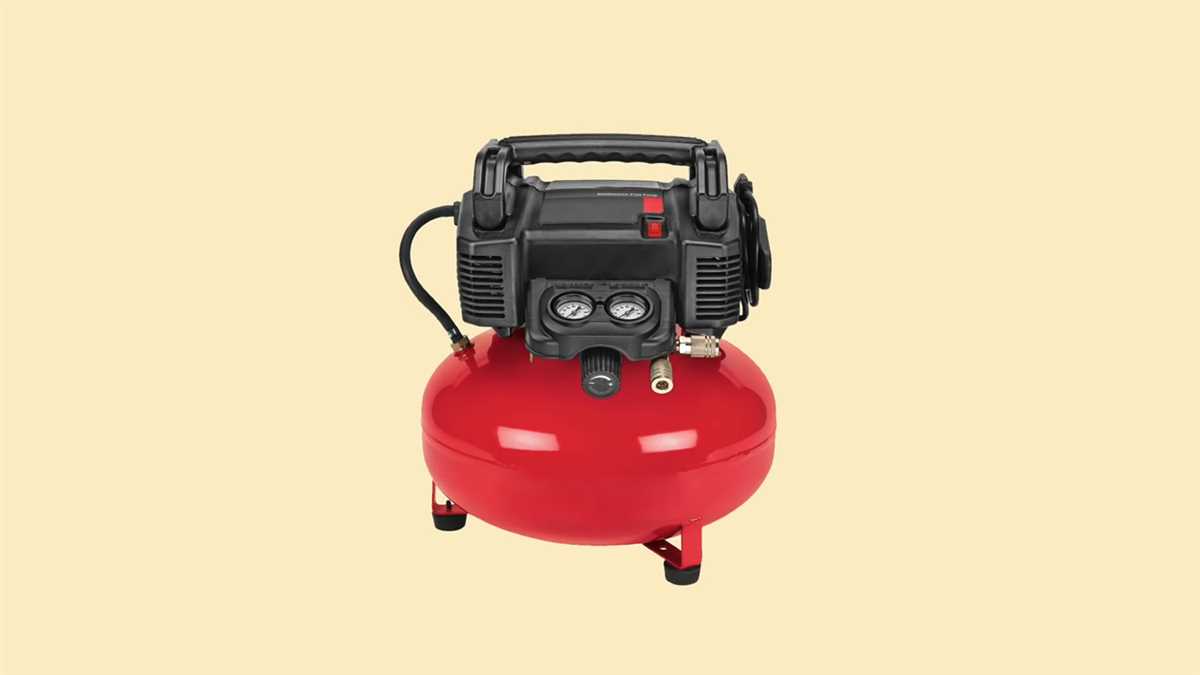
When winterizing your RV with an air compressor, it’s important to select the right equipment. Look for an air compressor with a minimum air pressure rating of 60 PSI and a maximum air pressure rating of 100 PSI. This will provide enough power to blow out any remaining water in your RV’s plumbing system. Additionally, make sure the compressor has a large enough tank capacity to supply a continuous flow of air without needing to constantly refill it.
Use the Correct Attachments
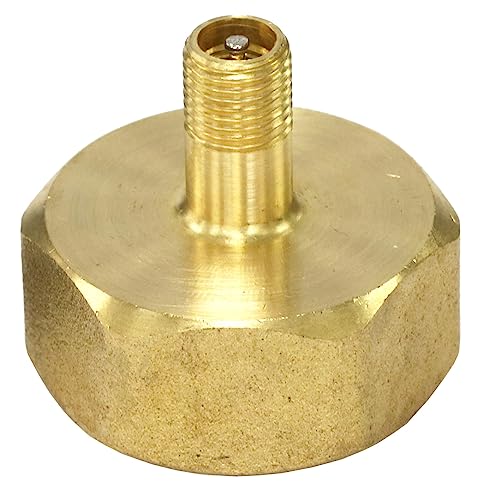
To effectively remove water from your RV’s plumbing system, you’ll need the right attachments for your air compressor. The most common attachment used for winterizing an RV is a blow out plug. This connects to the city water inlet and allows air to be blown through the system. Another useful attachment is a blow gun, which can be used to blow air into smaller pipes or tight spaces. Make sure to have these attachments on hand before starting the winterization process.
Follow a Step-by-Step Technique
Before using the air compressor, it’s important to follow a step-by-step technique to ensure proper winterization. Start by draining all the water from your RV’s fresh water system, including the water heater and holding tanks. Then, close all the faucets and drain valves. Next, connect the air compressor to the city water inlet using the blow out plug attachment. Gradually increase the air pressure, starting with 30 PSI, and blow air through each faucet and fixture until only air comes out. Finally, run the air compressor at 60 PSI for a few minutes to ensure all water has been removed.
Step-by-step Guide to Winterizing Your RV
Gather Your Supplies
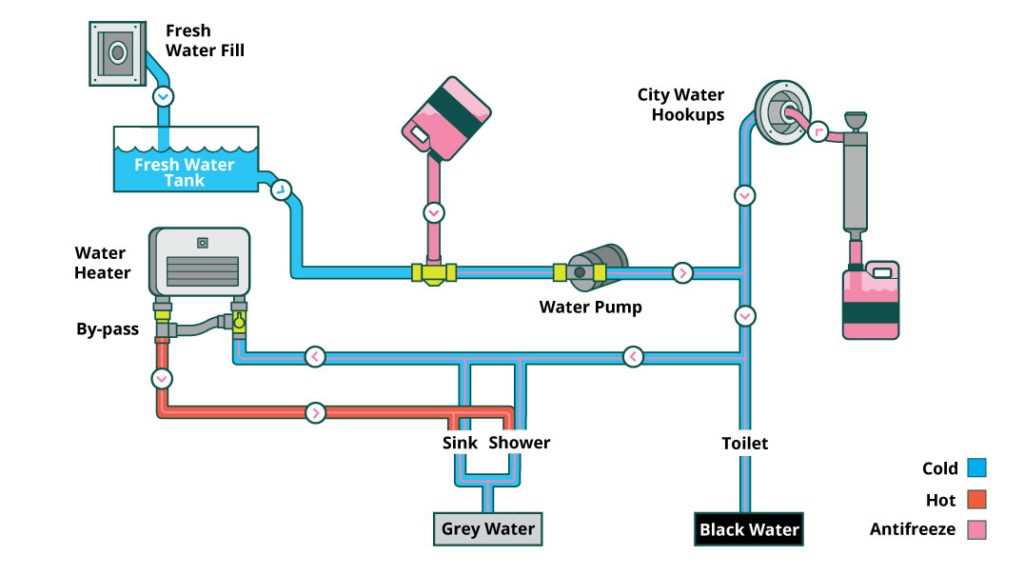
Before you begin the winterizing process, gather all the necessary supplies. You will need an air compressor, RV antifreeze, a bypass kit, a water pump converter kit, a water heater bypass kit, a water pump and heater bypass hose, and a water pressure regulator. It is important to have all these supplies on hand to ensure a thorough and efficient winterization process.
Drain the Water System
The first step in winterizing your RV is to drain the water system. Start by draining the fresh water tank and the hot water heater. Make sure to open all the faucets and valves to remove any remaining water. Once the water is drained, close all the faucets and valves.
Blow Out the Water Lines
Next, use the air compressor to blow out the water lines. Attach the air compressor to the city water inlet of your RV using a blowout plug. Set the air pressure to around 30-40 psi and slowly open each faucet and valve one by one. This will remove any remaining water from the lines. Make sure to flush the toilet and run the shower to clear out the water from the plumbing fixtures as well.
Add RV Antifreeze
After blowing out the water lines, it is time to add RV antifreeze. Connect a hose to the water pump converter kit and place the other end of the hose into a container of RV antifreeze. Turn on the water pump and open each faucet and valve one at a time until you see the antifreeze coming out. Make sure to run the shower and flush the toilet as well to ensure all the plumbing fixtures are filled with antifreeze.
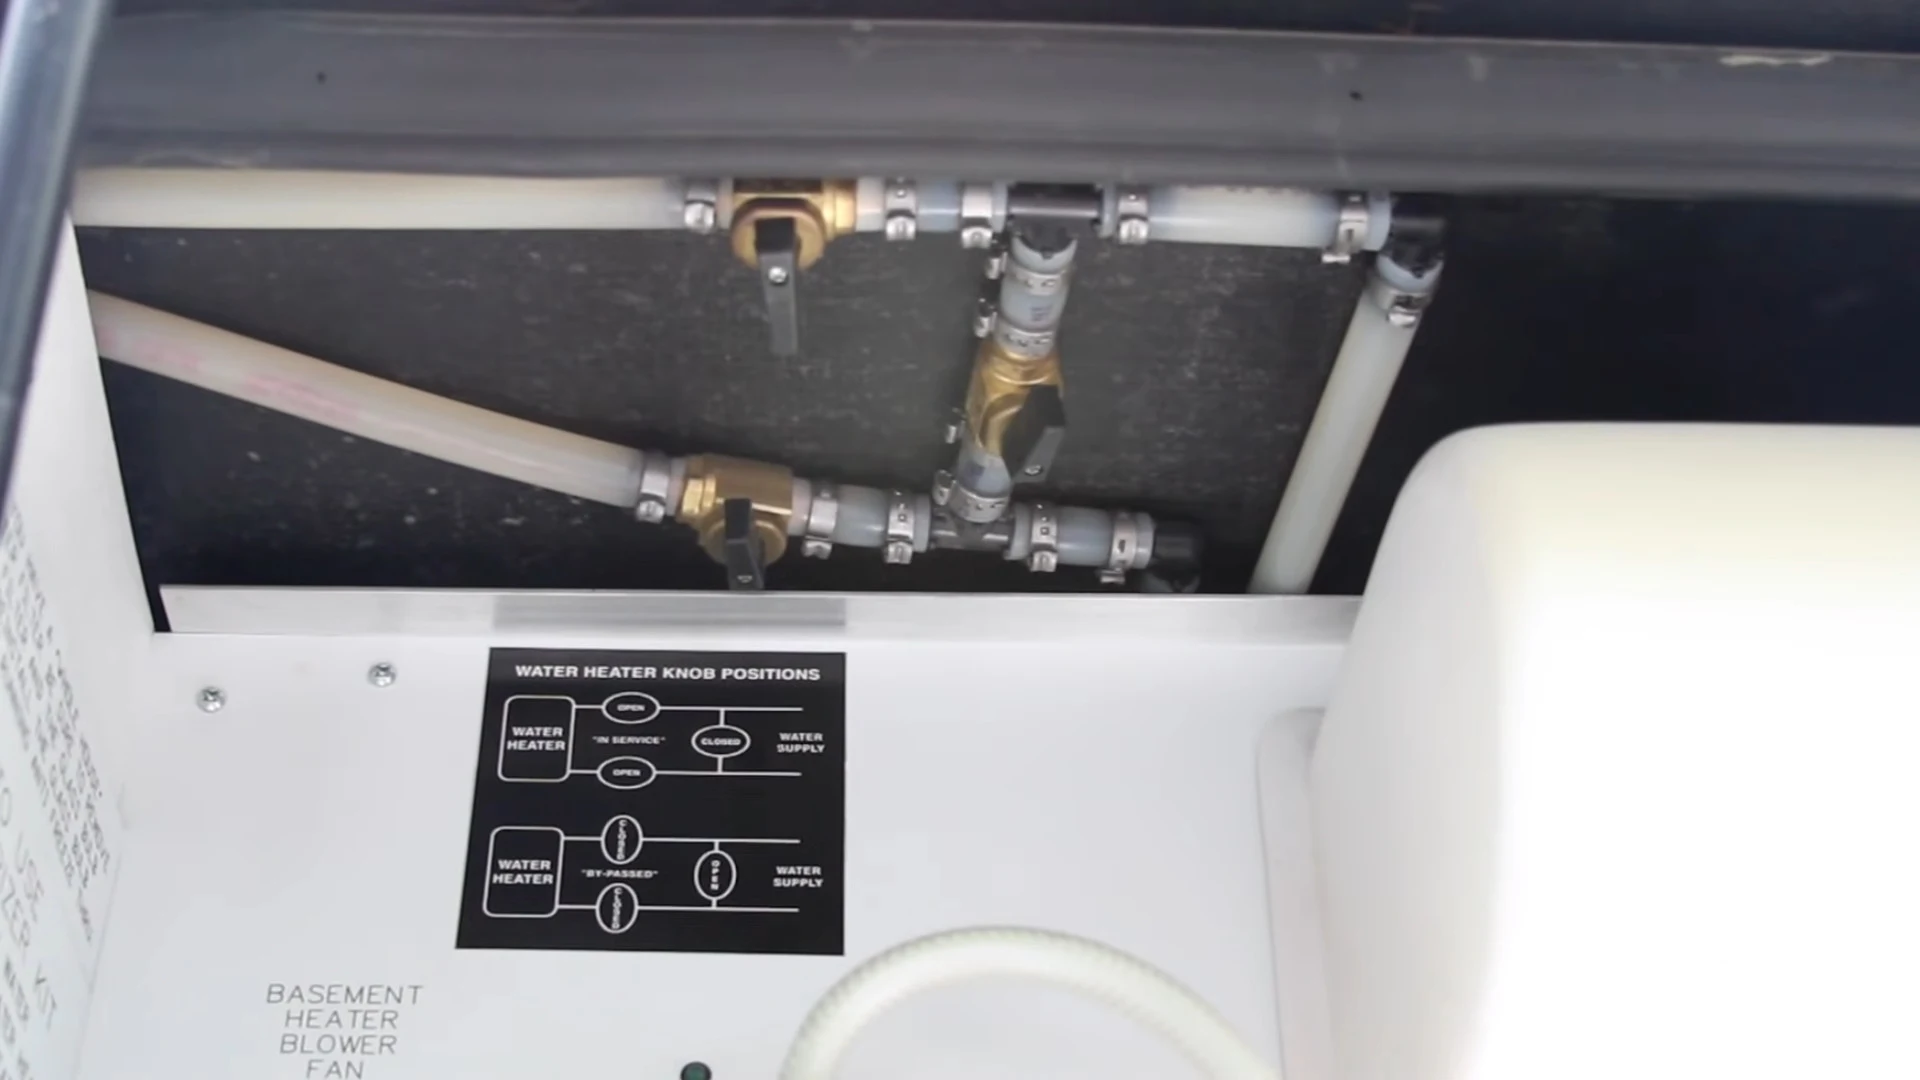
Protect the Water Heater
To protect the water heater, bypass it using a water heater bypass kit. This will prevent antifreeze from entering the water heater tank. Follow the instructions provided with the bypass kit to properly bypass the water heater.
Secure the Exterior
Lastly, secure the exterior of your RV for winter. Make sure all vents, windows, and doors are tightly sealed to prevent any drafts or heat loss. If necessary, use insulation or covers to protect any exposed areas from the cold. It is also a good idea to remove any batteries and store them in a warm, dry place.
Following these steps will ensure that your RV is properly winterized and protected from the harsh winter conditions. It is important to take the time to properly winterize your RV to prevent any damage and prolong its lifespan.
Drain Water Systems
Before winterizing your RV, it is essential to drain all the water systems to prevent any damage that may occur due to freezing temperatures. This includes draining the fresh water tanks, water lines, and hot water heater.
1. Fresh Water Tanks: Start by emptying the fresh water tanks completely. Locate the drain valve and open it to allow all the water to flow out. It is important to remove any residue or sediment that may have accumulated in the tanks.
2. Water Lines: Next, you need to drain the water lines in your RV. Begin by turning off the water supply and opening all faucets, both hot and cold, to release any residual water. Don’t forget to include the outside shower and flushing the toilet to ensure that all water is drained.
3. Hot Water Heater: To drain the hot water heater, first, turn off the power or gas supply. Locate the drain plug or valve on the bottom of the tank and open it to release the water. Ensure the pressure relief valve is open to allow air to enter and help the tank drain completely.
Note: It is important to ensure that all the water has been drained from the system, as even a small amount of water left behind can freeze and cause damage.
Flush and Clean Holding Tanks
Flushing and cleaning the holding tanks is an important step in winterizing your RV to ensure the longevity and proper functioning of your vehicle’s plumbing system. The holding tanks are responsible for storing and disposing of waste water from your RV’s kitchen and bathroom.
To begin, empty all the waste water from the holding tanks by locating the drainage valve and opening it to release the contents. Use a sewer hose and a dump station if available for proper disposal. Make sure to wear protective gloves and follow all sanitation guidelines during this process.
Next, fill the tanks with clean water and add an appropriate amount of RV-specific holding tank cleaner. This cleaner is designed to break down waste and remove any build-up, ensuring that the tanks are thoroughly cleaned and sanitized.
Once the cleaner is added, close all the tank valves and let the solution sit for the recommended amount of time. This will allow the cleaner to effectively dissolve any remaining waste and bacteria.
After the recommended time has elapsed, open the tank valves again and drain the tanks completely. This will ensure that all the cleaner and waste residues are properly flushed out of the system and prevent any unpleasant odors or clogs during storage.
Finally, rinse out the tanks with clean water to remove any remaining cleaner residues. Repeat this process if necessary until the water runs clear. This will ensure that the tanks are free from any residual chemicals and ready for storage.
By properly flushing and cleaning your RV’s holding tanks, you can ensure that they are free from waste residues and prepared for the winter season. This will help prevent any damage or malfunctions in your plumbing system and ensure a smooth and problem-free experience when you next use your RV.
Protect Plumbing and Fixtures
When winterizing your RV with an air compressor, it is essential to protect your plumbing and fixtures. The cold temperatures can cause water to freeze and expand, leading to costly damage. Here are several steps to help you protect your plumbing and fixtures:
1. Drain the Water System
Start by draining the water system in your RV. This includes emptying the fresh water tank, draining the hot water heater, and opening all faucets and valves to remove any remaining water. Be sure to also drain the water lines leading to your fixtures.
2. Blow Out Water Lines
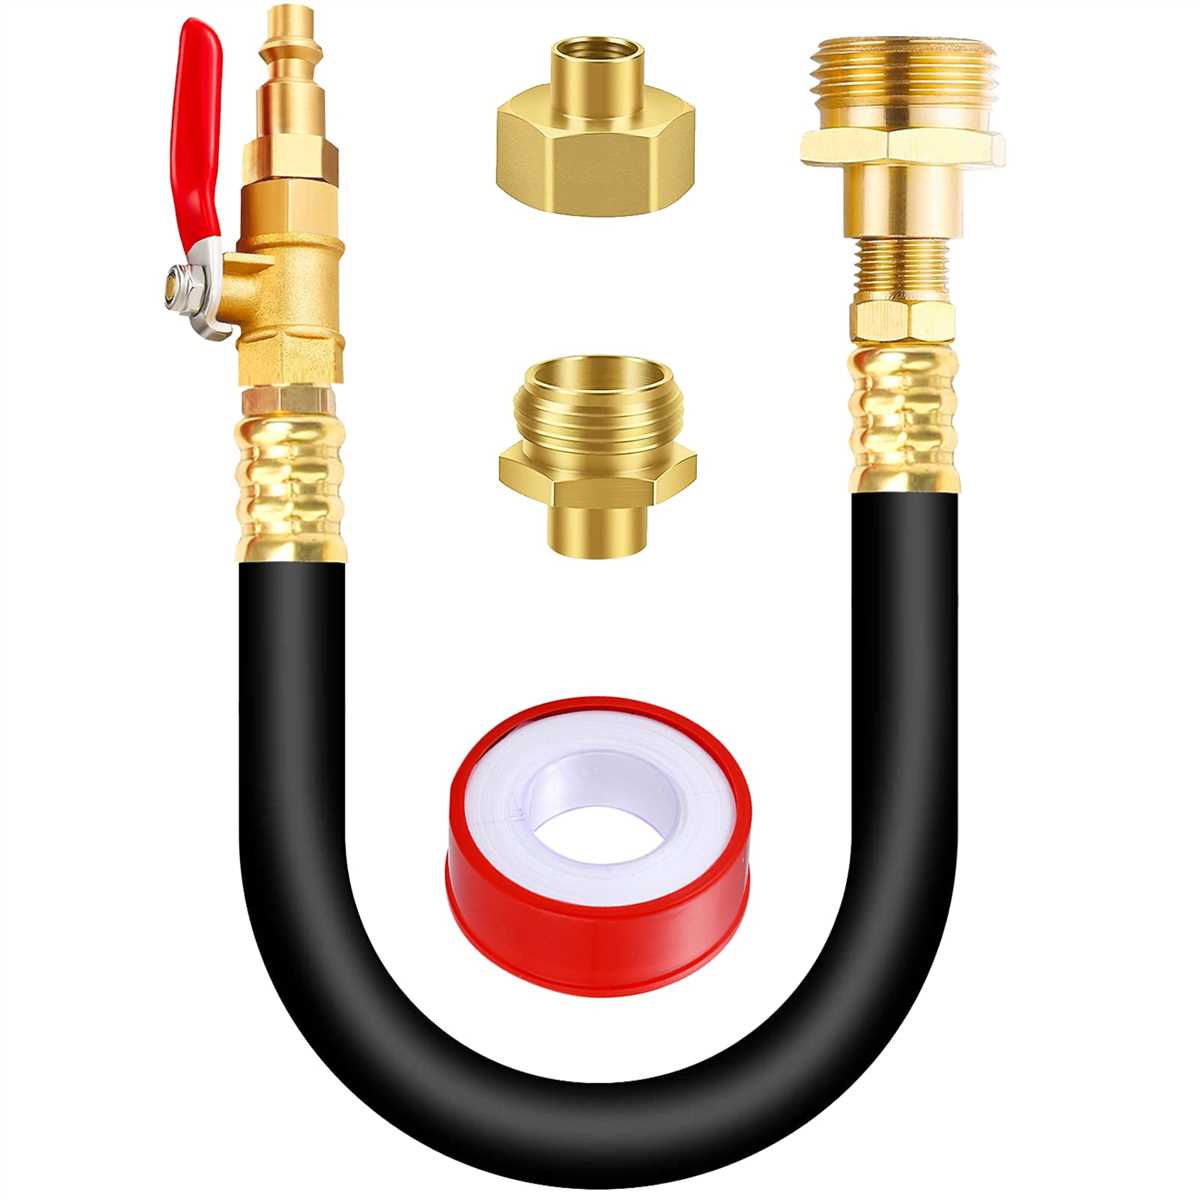
Next, use the air compressor to blow out the water lines in your RV. Begin by attaching the compressor to the city water inlet using a blowout plug or adapter. Slowly increase the air pressure and open the faucets one by one, starting with the faucet furthest from the compressor. This will help to remove any remaining water and prevent it from freezing.
3. Add Antifreeze
Add antifreeze to your plumbing system to provide an extra layer of protection against freezing temperatures. Use a non-toxic RV antifreeze and pour it into the traps of all sinks, showers, and toilets. This will ensure that the P-traps remain filled with antifreeze and prevent any remaining water from freezing.
4. Insulate Exposed Plumbing
If you have any exposed plumbing in your RV, it is important to insulate it properly. Use foam pipe insulation or heat tape to protect vulnerable pipes from freezing. Focus on areas such as external water supply lines and connections to prevent any potential damage.
By following these steps, you can effectively protect your RV’s plumbing and fixtures during the winter months. Taking the time to winterize your RV will help prevent costly repairs and extend the life of your vehicle.
FAQ:
Can I winterize my RV without an air compressor?
Yes, you can winterize your RV without an air compressor, but using an air compressor makes the process much easier and more efficient.
Do I need any special tools to winterize my RV with an air compressor?
No, you don’t need any special tools. All you need is an air compressor, a blow-out plug, and some RV antifreeze.
How long does it take to winterize an RV with an air compressor?
The time it takes to winterize an RV with an air compressor depends on the size and complexity of your RV’s plumbing system. On average, it can take anywhere from 30 minutes to an hour.
Is it necessary to winterize my RV if I live in a mild climate?
Even if you live in a mild climate, it’s still a good idea to winterize your RV. Freezing temperatures can still occur unexpectedly, and it’s better to be safe than sorry.
Can I use a regular air compressor to winterize my RV?
Yes, you can use a regular air compressor to winterize your RV. Just make sure it has enough pressure and volume to effectively blow out the water from your RV’s plumbing system.
Video:


Meet Harrison Clayton, a distinguished author and home remodeling enthusiast whose expertise in the realm of renovation is second to none. With a passion for transforming houses into inviting homes, Harrison's writing at https://thehuts-eastbourne.co.uk/ brings a breath of fresh inspiration to the world of home improvement. Whether you're looking to revamp a small corner of your abode or embark on a complete home transformation, Harrison's articles provide the essential expertise and creative flair to turn your visions into reality. So, dive into the captivating world of home remodeling with Harrison Clayton and unlock the full potential of your living space with every word he writes.


