Step-by-Step Guide on Using an Air Compressor to Fill Tires

Proper tire inflation is essential for both safety and optimal performance of your vehicle. One of the most convenient and efficient ways to fill your tires is by using an air compressor. An air compressor is a versatile tool that can provide a steady supply of compressed air to inflate tires and perform a variety of other tasks. In this step-by-step guide, we will walk you through the process of using an air compressor to fill your tires, ensuring that they are properly inflated for a smooth and safe ride.
Step 1: Ensure Safety
Before you begin, it is important to ensure your safety. Park your vehicle on a level surface and engage the parking brake. Make sure the engine is turned off and that the tire you are going to fill is cool to the touch to avoid any potential accidents.
Step 2: Gather the Necessary Equipment
To fill your tires using an air compressor, you will need a few essential pieces of equipment. First, you will need the air compressor itself, along with a hose and a tire pressure gauge. It is recommended to have a gauge that is compatible with both the pressure range of your tires and the air compressor. Additionally, it is a good idea to have a valve stem cap and a tire inflation chuck on hand.

Step 3: Connect the Air Compressor
Start by connecting the hose to the air compressor. Tighten the connections securely to prevent any air leakage. Then, attach the other end of the hose to the tire inflation chuck, making sure it is securely attached. If your air compressor has a pressure regulator, adjust it to the desired pressure for your tires.
Step 4: Inflate the Tire
With the air compressor and hose properly connected, you can now begin inflating the tire. Unscrew the valve stem cap and firmly attach the tire inflation chuck to the valve stem. Once connected, turn on the air compressor and allow it to fill the tire. Keep an eye on the pressure gauge and stop inflating once you reach the desired tire pressure.
Step 5: Check the Tire Pressure

After filling the tire, it is essential to check the tire pressure using a tire pressure gauge. This will ensure that you have reached the correct tire pressure and that there are no leaks. If the pressure is too low, continue inflating the tire until you reach the recommended pressure. If the pressure is too high, you can use the tire pressure gauge to release some air until you reach the desired pressure.
Step 6: Disconnect and Secure
Once you have achieved the correct tire pressure, turn off the air compressor and disconnect the hose from the tire inflation chuck. Secure the valve stem cap back onto the valve stem to prevent any air leakage. Repeat these steps for each tire that needs to be filled, and remember to periodically check your tire pressure to ensure safe and optimal performance.
By following this step-by-step guide, you can easily and safely use an air compressor to fill your tires. Regularly checking and maintaining the correct tire pressure will not only improve the performance of your vehicle but also contribute to your overall safety on the road. Don’t underestimate the importance of proper tire inflation, and feel free to confidently tackle this task with the help of an air compressor.
Understanding the Basics of an Air Compressor
Before you start using an air compressor to fill your tires, it’s important to understand the basics of how the air compressor works.

Air Compressor Components
An air compressor consists of several key components that work together to compress air and deliver it at high pressure. One of the main components is the motor, which provides the power to drive the compressor. The motor is typically electrically powered and can vary in horsepower depending on the size and capacity of the compressor.
Another important component is the air tank, which is where the compressed air is stored. The tank acts as a reservoir, allowing the compressor to store compressed air that can be used later. It’s important to note that the tank needs to be periodically drained to remove any moisture that may have accumulated.
Additionally, the compressor includes a pressure switch that monitors and regulates the pressure in the tank. When the pressure drops below a certain level, the switch activates the motor to start compressing air until the desired pressure is reached.
Types of Air Compressors
There are different types of air compressors available, including reciprocating piston compressors, rotary screw compressors, and centrifugal compressors. Reciprocating piston compressors are the most common type and work by using a reciprocating piston to compress air. Rotary screw compressors use two interlocking screws to compress air continuously, while centrifugal compressors use centrifugal force to increase air pressure. The type of compressor you use will depend on your specific needs and the type of application you have.
Understanding CFM and PSI
Two key terms to understand when using an air compressor are CFM (cubic feet per minute) and PSI (pounds per square inch). CFM refers to the amount of air that the compressor can deliver in terms of volume, while PSI indicates the pressure at which the compressor can deliver the air. Different tools and equipment require different levels of CFM and PSI, so it’s important to ensure that your compressor meets the requirements of the application you’re using it for.

Overall, understanding the basics of an air compressor is crucial for using it effectively and safely. Familiarize yourself with the various components, types, and performance metrics so that you can make informed decisions when it comes to using an air compressor to fill your tires or for any other application.
Familiarizing Yourself with the Different Types of Air Compressors
When it comes to filling tires, it’s important to be familiar with the different types of air compressors available. Each type has its own advantages and disadvantages, and understanding their differences can help you make an informed decision when choosing one.
1. Reciprocating Air Compressors: This type of air compressor uses a piston and cylinder to compress air. It is often used for heavy-duty applications and is capable of generating high-pressure air. However, reciprocating air compressors can be noisy and require regular maintenance.
2. Rotary Screw Air Compressors: These air compressors use two rotors to compress air. They are known for their efficiency and are often used in industrial applications. Rotary screw air compressors are relatively quiet and require minimal maintenance.

3. Centrifugal Air Compressors: This type of air compressor uses centrifugal force to compress air. It is typically used for large-scale applications and can generate a large volume of air. However, centrifugal air compressors are less efficient at low-pressure applications and can be expensive to operate.
4. Portable Air Compressors: As the name suggests, these air compressors are designed to be easily portable. They are often used for small-scale applications or in situations where mobility is important. Portable air compressors are lightweight and compact, making them convenient to transport.
5. Oil-Free Air Compressors: These air compressors are designed to operate without the use of oil. They are often used in applications where oil contamination is a concern, such as in the automotive and food industries. Oil-free air compressors require less maintenance but may have lower efficiency compared to oil-lubricated compressors.
6. Oil-Lubricated Air Compressors: This type of air compressor uses oil for lubrication and cooling. They are often used for high-pressure applications and can provide a more consistent supply of air. However, oil-lubricated air compressors require regular maintenance and may produce oil mist that can contaminate the compressed air.
By understanding the different types of air compressors available, you can choose the one that best suits your needs when it comes to filling tires. Consider factors such as the intended application, noise level, maintenance requirements, and portability before making a decision.

Gathering the Necessary Tools and Materials
1. Air Compressor
A reliable air compressor is the key tool you will need to fill your tires. Make sure to choose a compressor with the appropriate pressure capacity and a long enough hose to reach your vehicle’s tires. Check the air compressor’s instruction manual to familiarize yourself with its operation and safety guidelines.
2. Tire Pressure Gauge
A tire pressure gauge is essential for accurately measuring the air pressure in your tires. Look for a gauge with a clear and easy-to-read display. It is recommended to have a digital gauge for more precise readings. Keep in mind that tire pressure gauges can vary, so choose one that suits your preference and budget.
3. Tire Valve Adapter
A tire valve adapter is necessary to connect the air compressor hose to the tire valve stem. There are different types of valve adapters available depending on the valve stem design of your vehicle’s tires. Make sure to check your tire valves and choose the appropriate adapter to ensure a secure and leak-free connection.
4. Extension Cord (if needed)
If the power outlet in your desired location is not within reach of the air compressor’s cord, you may need an extension cord. Ensure that the extension cord is of the appropriate gauge and length to safely power your air compressor. Always follow the manufacturer’s recommendations for using extension cords with your specific air compressor model.

5. Personal Protective Equipment (PPE)
Ensure your safety by wearing the necessary personal protective equipment (PPE). This may include safety glasses to protect your eyes from debris, gloves to provide a better grip and protect your hands, and ear protection if the air compressor produces loud noise. PPE is essential for preventing injuries and ensuring a safe working environment.
6. Tire Inflator Attachment (optional)
Some air compressors come with a built-in tire inflator attachment, eliminating the need for a separate tire valve adapter. This attachment allows you to connect the air compressor hose directly to the tire valve stem. If your compressor has this feature, it can make the inflation process more straightforward and convenient.
Prepping Your Air Compressor for Use
Before using your air compressor to fill tires, it’s important to make sure it is properly prepped and ready for use. This involves a few simple steps to ensure the compressor is in good working condition and can safely inflate your tires.
Check the Power Source
First, check that your air compressor is properly connected to a power source. Ensure that the power cord is securely plugged into a grounded electrical outlet. If you are using a portable air compressor, make sure it has a full charge or is connected to a reliable power supply.
Inspect the Air Hoses
Next, inspect the air hoses connected to the compressor. Look for any signs of damage such as cracks, leaks, or loose fittings. If you notice any issues, it’s important to replace or repair the hoses before use to prevent any air leaks or accidents.
Check the Pressure Settings
Check the pressure settings on your air compressor to ensure they are appropriate for the tires you will be filling. Most air compressors have a pressure gauge or a digital display that allows you to adjust the desired pressure level. Refer to your vehicle’s owner manual or the tire manufacturer’s guidelines to determine the recommended tire pressure.
Lubricate if Necessary
Some air compressors may require lubrication to ensure smooth and efficient operation. Check the manufacturer’s instructions or user manual to determine if your compressor needs lubrication and, if so, the appropriate type and amount to use. Apply the lubricant as directed before using the compressor.
Test for Functionality
Before using your air compressor to fill tires, it’s a good idea to test its functionality. Turn on the compressor and let it run for a few minutes to ensure it is working properly and building pressure. Listen for any abnormal sounds or vibrations that may indicate a mechanical issue. If you notice any problems, it’s best to address them before attempting to fill your tires.
By following these prepping steps, you can ensure your air compressor is ready for use and will provide you with safe and efficient tire inflation. Remember to always prioritize safety and consult the manufacturer’s instructions when using any type of machinery.
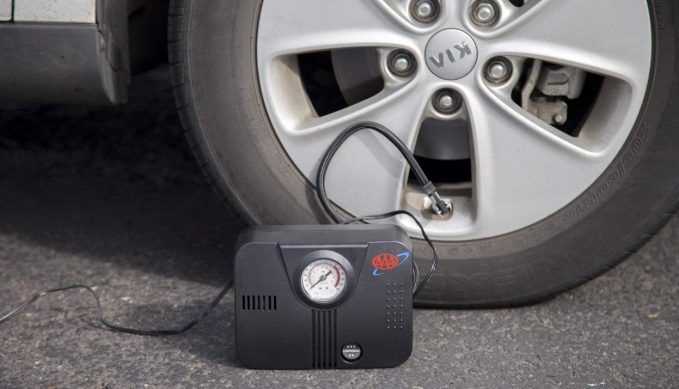
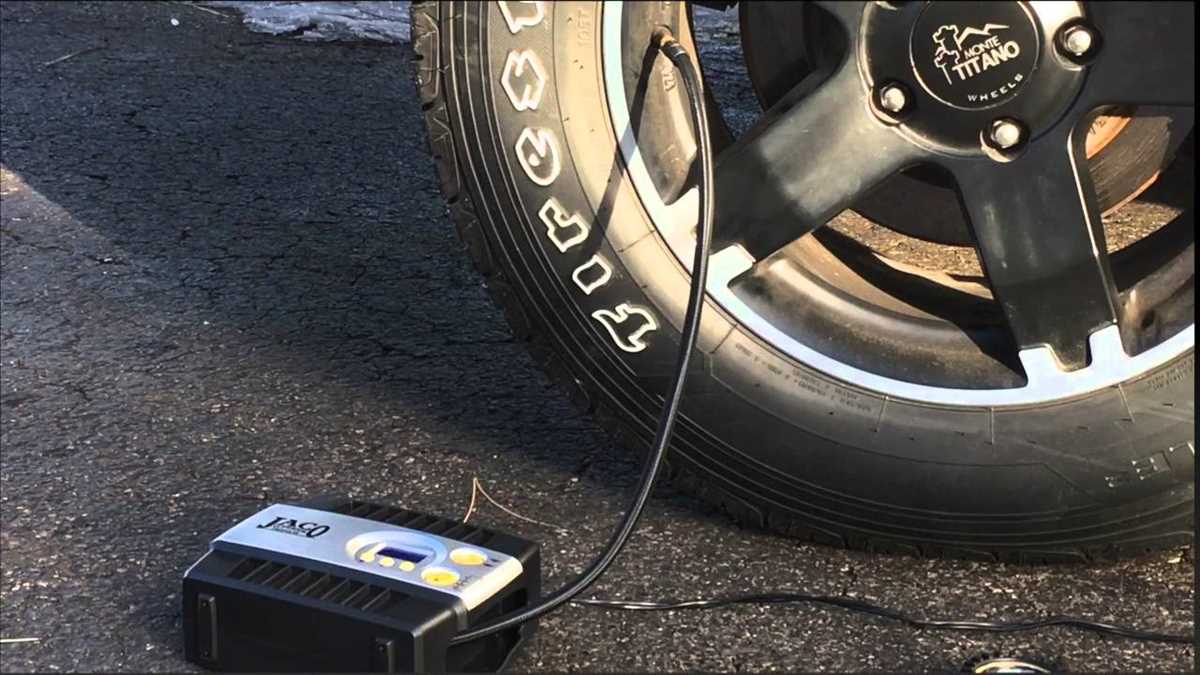
Connecting the Air Compressor to Your Tire
When it comes to filling your tires with an air compressor, the first step is to connect the compressor to your tire. This can be done in a few simple steps.
Step 1: Prepare the Air Compressor
Before connecting the air compressor, ensure it is in good working condition. Check that it is properly plugged in and that the pressure gauge is functioning properly. Also, make sure the compressor tank is filled with the recommended amount of air.
Step 2: Locate the Tire Valve Stem
The next step is to locate the valve stem on your tire. This is typically a small, cylindrical-shaped metal or rubber component sticking out from the tire. It is usually covered by a valve cap to protect it from dirt and debris.
Step 3: Remove the Valve Cap
Using your fingers, twist off the valve cap on your tire’s valve stem. Set the valve cap aside in a safe place so it does not get lost during the process.
Step 4: Attach the Air Hose to the Valve Stem
Take the air hose from the air compressor and securely attach it to the valve stem. You will need to firmly press the hose’s nozzle onto the valve stem to create a tight seal. Ensure there are no leaks or gaps between the hose and the valve stem.
Step 5: Inflate the Tire
Once the air compressor is connected to the tire, it’s time to start inflating. Turn on the air compressor and set it to the desired pressure. Keep an eye on the pressure gauge to monitor the pressure as it increases.
Note: It is advisable to start with a lower pressure and gradually increase it to avoid over-inflating the tire.
Step 6: Monitor the Tire Pressure
While inflating the tire, periodically check the tire pressure using a tire pressure gauge. This will help ensure that you are filling the tire to the correct pressure level recommended by the manufacturer.
Note: Over-inflating or under-inflating the tire can affect the stability and performance of the vehicle.
Step 7: Disconnect the Air Compressor
Once the tire is properly inflated, turn off the air compressor and remove the air hose from the valve stem. Make sure to replace the valve cap on the valve stem to protect it from dirt and debris.
Note: It is important to secure the valve cap tightly to prevent air from leaking out of the tire.
Following these steps will help ensure a proper and safe connection between the air compressor and your tire, allowing for efficient and effective tire inflation.
Setting the Appropriate Tire Pressure
When using an air compressor to fill your tires, it’s important to set the appropriate tire pressure to ensure optimal performance and safety. The correct tire pressure can vary depending on the specific make and model of your vehicle, so it’s important to consult your owner’s manual or the tire sidewall for the recommended pressure.
Step 1: Find the recommended tire pressure for your vehicle. This information can typically be found on a sticker located on the driver’s side door jamb or in the owner’s manual. The recommended pressure is measured in pounds per square inch (psi).
Step 2: Before filling the tires, it’s important to check the current tire pressure using a tire pressure gauge. This will give you an idea of how much air needs to be added or released. Attach the gauge to the valve stem and press down firmly until the gauge gives a reading.
Step 3: If the current tire pressure is below the recommended level, it’s time to fill the tires using the air compressor. Attach the nozzle of the air compressor to the valve stem and press down to release air into the tire. Keep an eye on the pressure gauge as you fill the tire, and stop when it reaches the recommended pressure.
Step 4: If the current tire pressure is above the recommended level, you’ll need to release some air from the tire. To do this, use the tire pressure gauge to press down on the valve stem, releasing air until you reach the desired pressure.
Step 5: After filling or releasing air, always double-check the tire pressure with a gauge to ensure it matches the recommended level. This will help prevent overinflating or underinflating the tires, which can affect your vehicle’s handling and fuel efficiency.
Step 6: Repeat the process for each tire, making sure to fill or release air as necessary to achieve the recommended pressure. Once all tires are properly inflated, check the pressure one final time and tighten the valve stem caps to prevent air leakage.
Setting the appropriate tire pressure is a crucial step in using an air compressor to fill your tires. By following these steps and regularly maintaining the correct tire pressure, you can ensure a smooth and safe driving experience.
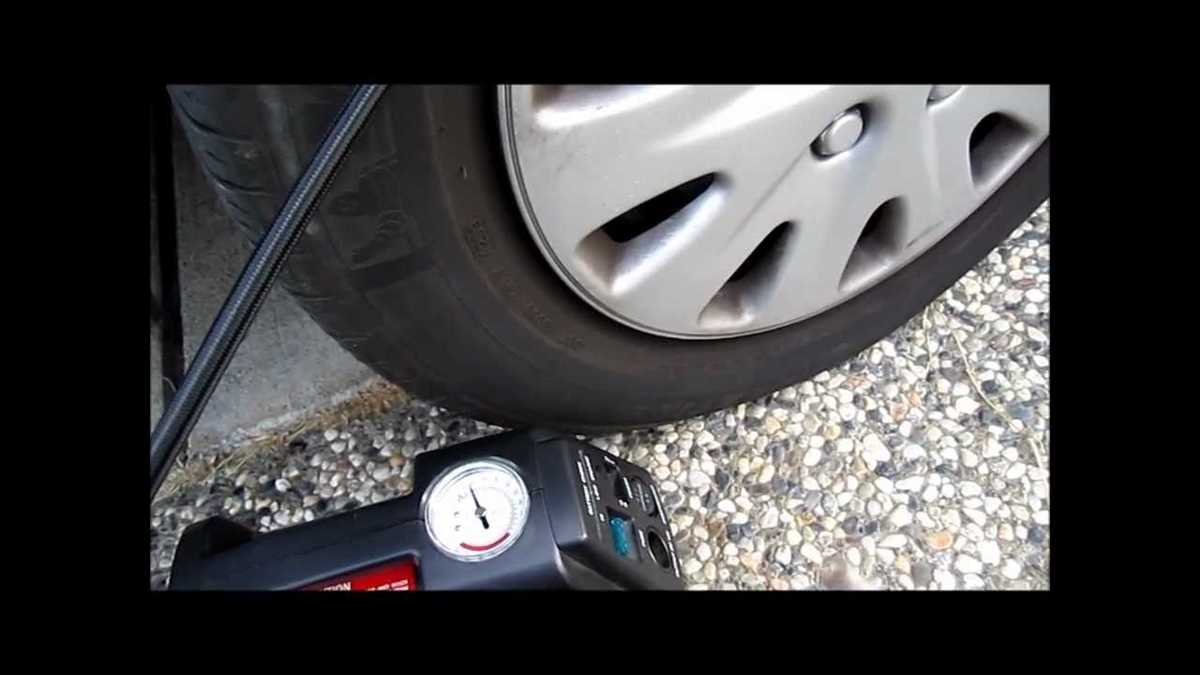
Filling Your Tire with Air
Properly filling your tire with air is essential for maintaining optimal tire pressure and ensuring safe driving conditions. Here’s a step-by-step guide on how to fill your tire with air using an air compressor.
Step 1: Prepare your equipment
Before you start filling your tire, make sure you have all the necessary equipment ready. This includes an air compressor with a pressure gauge, a tire inflator attachment, and a tire valve stem cap remover. Check the air compressor to ensure it is in good working condition and that the pressure gauge is accurate.
Step 2: Check the recommended tire pressure

Refer to your vehicle’s owner’s manual or the label on the driver’s side door jamb to find the recommended tire pressure for your specific vehicle. It is important to fill your tire to the recommended pressure for optimal performance and safety.
Step 3: Remove the valve stem cap
Using a tire valve stem cap remover, unscrew the valve stem cap on the tire you intend to fill. This will allow air to flow into the tire when connected to the air compressor.
Step 4: Connect the air compressor
Attach the tire inflator attachment to the end of the air hose on the air compressor. Insert the nozzle firmly onto the valve stem of the tire you are filling, ensuring a tight seal.
Step 5: Inflate the tire
Turn on the air compressor and monitor the pressure gauge as you inflate the tire. Add air in short bursts, checking the pressure periodically to avoid overinflating the tire. Stop inflating once the pressure reaches the recommended level.
Step 6: Check the pressure and deflate if necessary
After inflating the tire, use the pressure gauge to check the tire pressure. If the pressure is too high, you can release some air by pressing the needle inside the valve stem gently. Ensure the tire pressure matches the recommended level.
Step 7: Replace the valve stem cap
Once the tire is filled to the recommended pressure, screw back on the valve stem cap to protect the valve from dust and debris.
By following these steps, you can properly fill your tire with air using an air compressor. Regularly checking and maintaining the tire pressure is crucial for a safe and comfortable driving experience.
Disconnecting and Storing Your Air Compressor
Once you have finished filling your tires with air using the air compressor, it is important to disconnect and store the compressor properly to ensure its longevity and safety. Follow these steps to disconnect and store your air compressor:
- Turn off the air compressor: Before disconnecting any hoses or accessories, make sure the air compressor is switched off and unplugged from the power source to prevent any accidental releases of compressed air.
- Release the pressure: To safely disconnect the hoses, you must first release the pressure from the air compressor. Locate the pressure release valve, typically located near the pressure gauge, and open it to release any remaining air in the tank.
- Disconnect the hoses: Once the pressure has been released, carefully disconnect the hoses from the air compressor. Start by removing the nozzle or chuck from the tire valve stem, followed by disconnecting any additional hoses or couplers.
- Drain the tank: To prevent any moisture buildup or rust, it is important to drain the moisture from the air compressor tank. Locate the drain valve, typically at the bottom of the tank, and open it to let any accumulated moisture and condensation drain out. Remember to close the drain valve once the tank is empty.
- Clean and store the accessories: Clean any dirt or debris from the hoses, couplers, and other accessories using a clean cloth or brush. Once they are clean and dry, store them in a clean and dry area, away from any potential damage or contamination.
- Store the air compressor: Find a suitable location to store your air compressor, ideally in a dry and well-ventilated area. Make sure there is enough space around the compressor to prevent any obstructions or potential hazards. If possible, store the compressor off the ground to minimize the risk of moisture or dirt accumulation.
- Maintain your air compressor: Regularly check and maintain your air compressor according to the manufacturer’s instructions. This may include tasks such as changing oil, cleaning filters, and inspecting for any signs of wear or damage. Proper maintenance will help prolong the lifespan of your air compressor and ensure its optimal performance.
By following these steps, you can safely disconnect and store your air compressor after filling your tires, ensuring that it remains in good condition for future use.
FAQ:
How do I connect the air compressor to my car tires?
To connect the air compressor to your car tires, first, locate the tire valve stem on each tire. Remove the dust cap from the valve stem and attach the air chuck from the compressor to the valve stem. Make sure the connection is secure.
What pressure should I set the air compressor to when filling my tires?
The recommended tire pressure can usually be found on a sticker inside the driver’s door jamb or in the owner’s manual. Set the air compressor’s pressure gauge to the desired pressure and check the tire pressure using a separate gauge. Adjust the pressure as necessary.
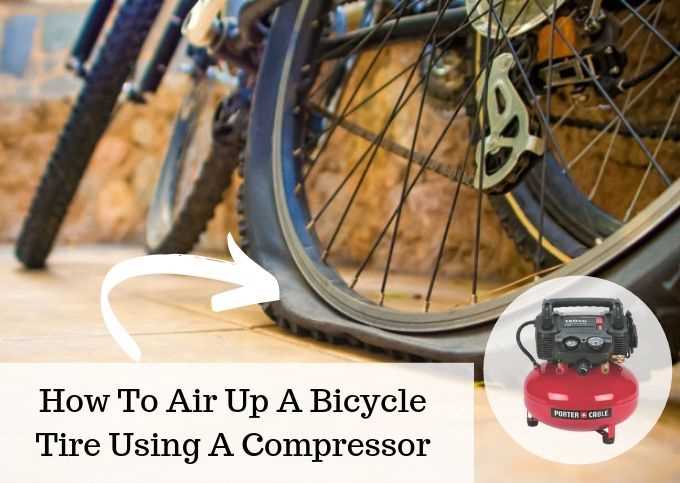
Can I use an air compressor to fill other inflatable objects apart from car tires?
Yes, an air compressor can be used to fill other inflatable objects such as sports balls, bicycle tires, inflatable mattresses, and pool floats. Just make sure to adjust the pressure accordingly and use the appropriate attachments.
How long does it take to fill a tire using an air compressor?
The time it takes to fill a tire using an air compressor can vary depending on the size of the tire and the pressure required. Generally, it takes a few minutes to fill a tire. However, if the tire is completely flat, it may take longer.
Is it safe to fill tires with an air compressor?
Yes, it is safe to fill tires with an air compressor as long as you follow the manufacturer’s instructions and take necessary precautions. Make sure to check the pressure regularly and avoid overinflating the tires. Additionally, always wear safety goggles and stand clear of the tire during the filling process.
What should I do if the air compressor is not filling the tires properly?
If the air compressor is not filling the tires properly, first double-check that the connection between the air chuck and the valve stem is secure. If the connection is fine, check for any leaks in the hose or the compressor itself. It is also possible that the compressor’s pressure gauge is not accurate, so you may need to use a separate gauge to check the tire pressure.
Video:


Meet Harrison Clayton, a distinguished author and home remodeling enthusiast whose expertise in the realm of renovation is second to none. With a passion for transforming houses into inviting homes, Harrison's writing at https://thehuts-eastbourne.co.uk/ brings a breath of fresh inspiration to the world of home improvement. Whether you're looking to revamp a small corner of your abode or embark on a complete home transformation, Harrison's articles provide the essential expertise and creative flair to turn your visions into reality. So, dive into the captivating world of home remodeling with Harrison Clayton and unlock the full potential of your living space with every word he writes.


