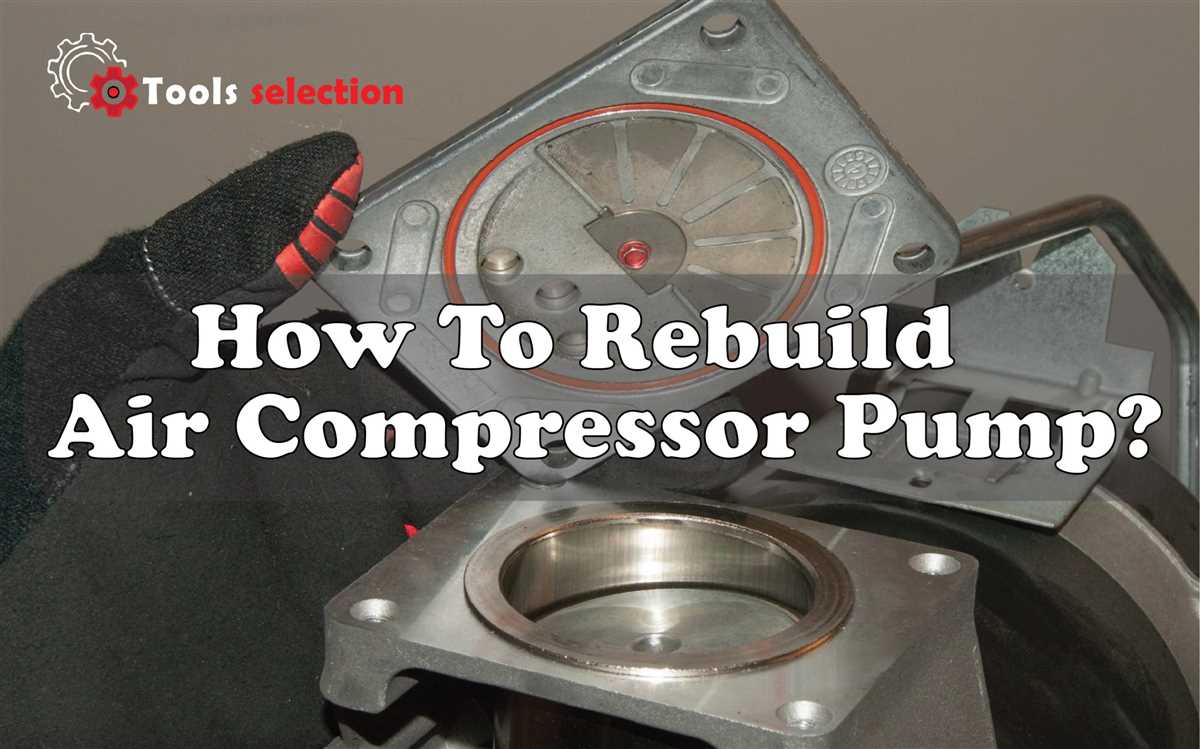
Step-by-Step Guide on How to Rebuild an Air Compressor Pump

Is your air compressor pump not working as efficiently as it used to? It might be time for a rebuild. Rebuilding an air compressor pump can save you money on the cost of a new pump, and it can also extend the life of your current pump. While the process may seem daunting, it can be done with the right tools and a step-by-step guide.
The first step in rebuilding an air compressor pump is to gather all the necessary tools and equipment. This may include wrenches, screwdrivers, a socket set, and a rebuild kit for your specific pump model. It’s important to have all the necessary parts and tools on hand before starting the rebuild process.
Once you have all your tools and equipment ready, the next step is to disconnect the air compressor pump from its power source and relieve any built-up pressure. This can be done by opening the drain valve and allowing any remaining air to escape. Safety goggles and gloves should be worn during this process to protect against any potential hazards.
With the pump disconnected and the pressure relieved, you can now begin disassembling the pump. This may involve removing bolts, screws, or any other fasteners that are holding the pump together. It’s important to keep track of where each component is removed from and to take note of any specific instructions or diagrams provided by the manufacturer.
What is an Air Compressor Pump?
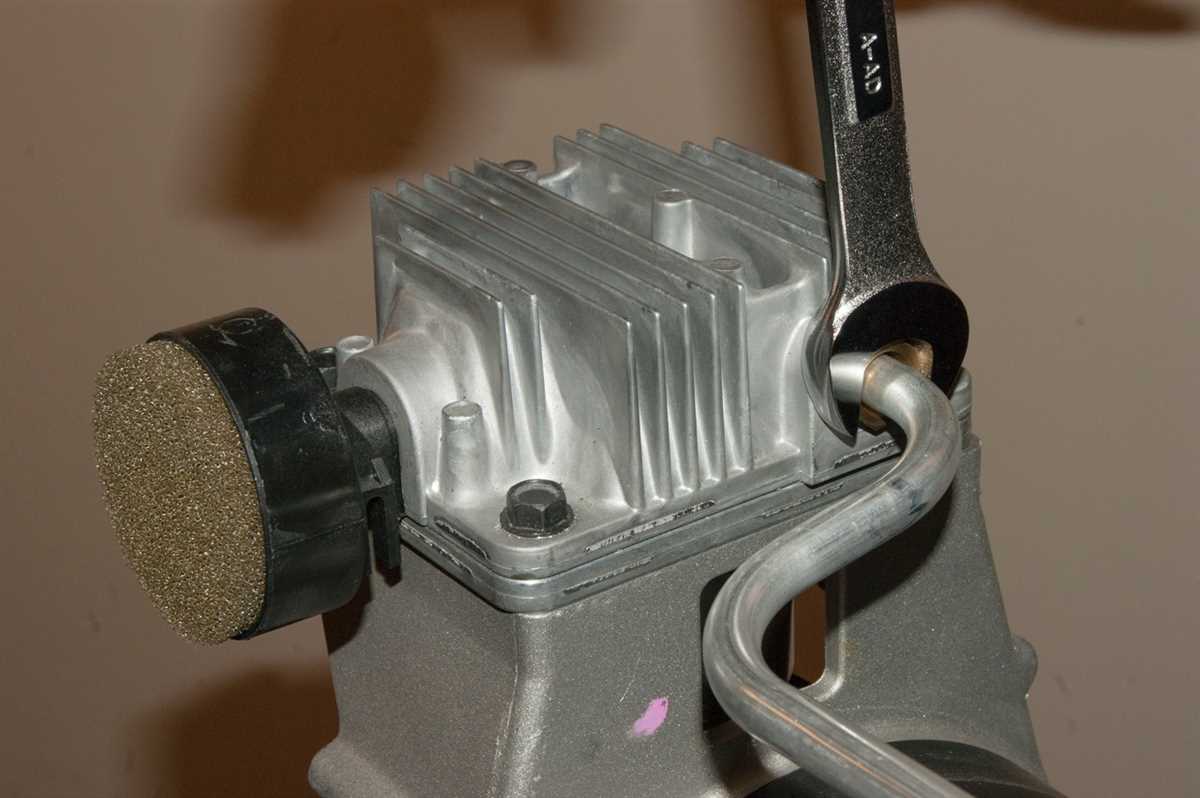
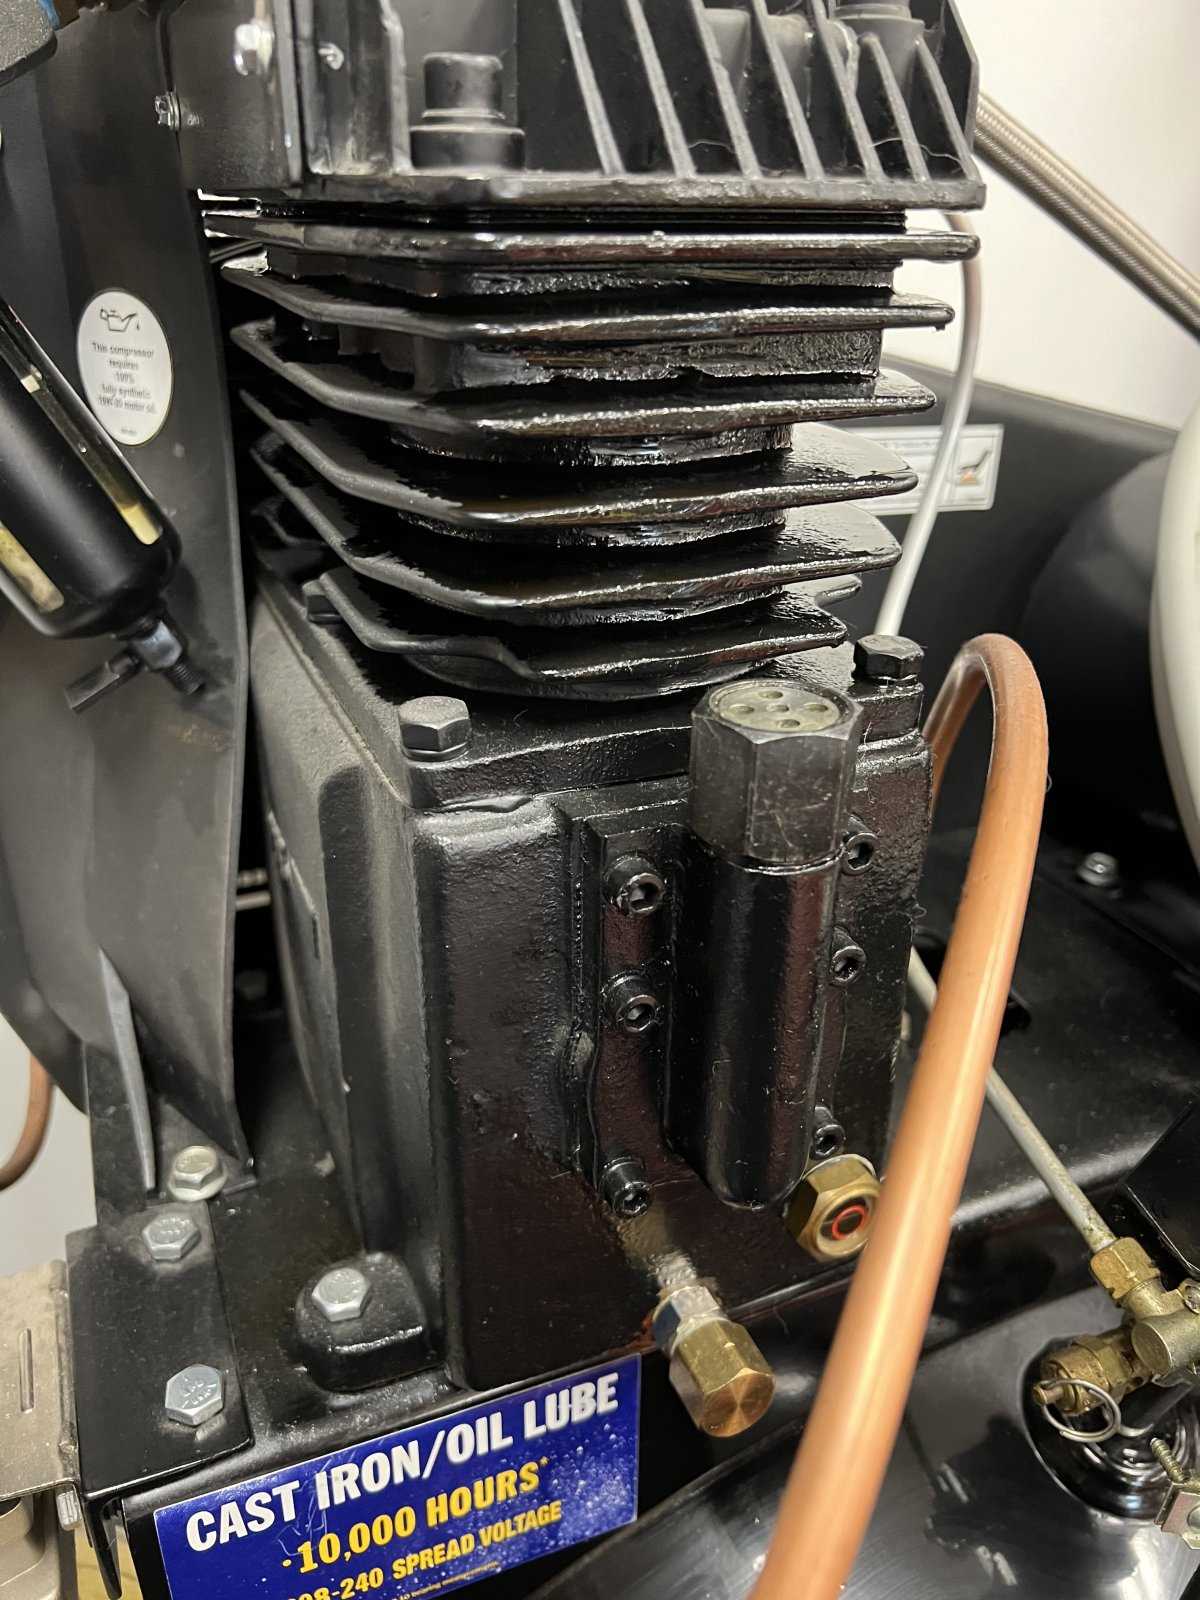
An air compressor pump is a vital component of an air compressor that is responsible for compressing air and delivering it at high pressure. It typically consists of a piston or a set of vanes that move up and down or rotate inside a cylinder, creating a vacuum to draw in air and then compressing it.

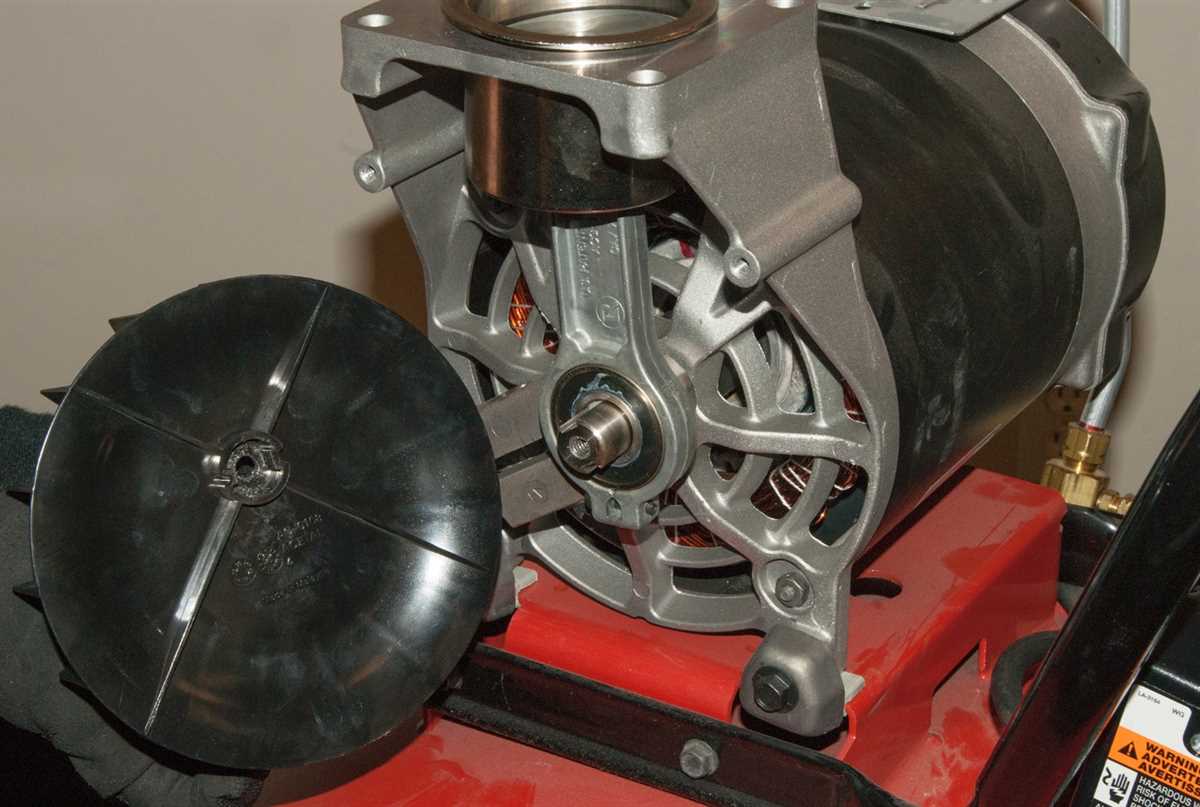
The pump is powered by an electric motor or a gas engine, which provides the necessary energy to drive the piston or vanes. As the piston or vanes move, they compress the air, increasing its pressure and forcing it into a tank or through an outlet to be used for various applications.
The compressed air can be used for a wide range of purposes, including powering pneumatic tools, inflating tires, operating machinery, and even supplying air for breathing apparatus. The performance of an air compressor largely depends on the efficiency and reliability of its pump.
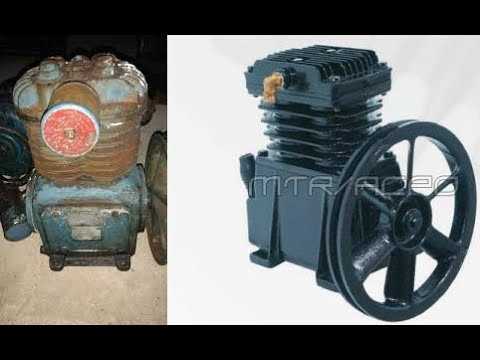
There are different types of air compressor pumps available, including reciprocating pumps, rotary screw pumps, and centrifugal pumps. Each type has its own advantages and is suitable for different applications. When rebuilding an air compressor pump, it is important to understand the specific type and model of the pump and follow the manufacturer’s instructions to ensure proper disassembly, cleaning, inspection, and reassembly.
Importance of Rebuilding an Air Compressor Pump
An air compressor pump is a crucial component of an air compressor system. Over time, the pump may start to wear down and develop faults, leading to decreased performance and potential breakdowns. This is why rebuilding the air compressor pump is of utmost importance.

Improved Performance:
Rebuilding an air compressor pump ensures that it is in optimal condition, which directly translates to improved performance. By addressing any worn-out or damaged parts, the pump can operate at its full potential, delivering higher air pressure and flow rates.
Cost-Effectiveness:
Rebuilding your air compressor pump can be a cost-effective solution compared to purchasing a new pump. The cost of repairing and replacing specific parts is generally lower than buying a brand new pump. Moreover, by investing in rebuilding, you can extend the lifespan of your compressor, saving you money in the long run.
Reliability and Durability:
A rebuilt air compressor pump can offer improved reliability and durability. By replacing worn-out parts, you can ensure that the components are functioning properly and are less likely to break down unexpectedly. This helps to avoid downtime and ensures a smooth and uninterrupted workflow.
Eco-Friendly Option:

Rebuilding an air compressor pump is also an eco-friendly option as it reduces waste. Instead of discarding the entire pump and contributing to landfill waste, rebuilding allows for the reuse of functional components. This helps to minimize the environmental impact of the air compressor system.
In conclusion, rebuilding an air compressor pump is essential for maintaining optimal performance, cost-effectiveness, reliability, and promoting environmental sustainability. Investing in rebuilding rather than purchasing a new pump can provide numerous benefits and ensure the longevity of your air compressor system.
Step 1: Gather the Necessary Tools
Before you can start rebuilding an air compressor pump, you will need to gather the necessary tools. Having the right tools on hand can make the process much smoother and more efficient. Here are some of the tools you will need:
- Socket Wrench Set: This will be used to remove bolts and nuts from the pump.
- Screwdrivers: You will need various sizes and types of screwdrivers for different parts of the pump.
- Adjustable Wrench: This can be used to tighten or loosen fittings and connections.
- Allen Wrench Set: Many air compressor pumps have allen screws that need to be removed and tightened during the rebuilding process.
- Hammer and Punch Set: These tools can be used to remove and install pins or other components.
- Shop Towels or Rags: Keeping your work area clean is important, so having some shop towels or rags on hand will help you wipe away any dirt or debris.
- Parts Cleaning Solvent: You will need this to clean the parts of the pump before reassembly.
- Replacement Parts: Depending on what needs to be rebuilt, you may need to have replacement parts on hand, such as gaskets, valves, or seals.
By gathering these tools before you begin, you will be well-prepared to start rebuilding your air compressor pump.

Understanding the Tools Needed for Rebuilding
Before starting the process of rebuilding an air compressor pump, it is important to have a clear understanding of the tools that will be needed. These tools are essential for disassembling and reassembling the pump, as well as for inspecting and replacing any worn or damaged parts.
Socket Set
A socket set is a versatile tool that will be used throughout the rebuilding process. It is important to have a set that includes both metric and standard sizes, as different parts of the pump may require different socket sizes. The sockets should be made from high-quality materials to ensure durability and avoid stripping bolts or damaging the pump.
Wrench Set
A wrench set is another essential tool for rebuilding an air compressor pump. It is recommended to have both open-end and adjustable wrenches in different sizes to accommodate various bolts and nuts. Similar to the socket set, the wrenches should be made from durable materials to prevent any damage during the rebuilding process.
Screwdrivers
A set of screwdrivers with different sizes and types of heads is necessary for removing and installing screws. Make sure to have both flathead and Phillips screwdrivers, as different parts of the pump may require different types. It is important to choose screwdrivers with comfortable handles for better grip and control.

Valve Spring Compressor
A valve spring compressor is a specialized tool that will be needed to remove and install the valve springs in the air compressor pump. This tool allows for safe and easy compression of the springs, making it easier to remove and install valves without damaging them or the pump.
Feeler Gauges
Feeler gauges are used to measure the clearance between parts of the pump, such as the piston rings and cylinder walls. These gauges come in different thicknesses and are essential for ensuring proper fit and alignment during the rebuilding process. It is important to choose high-quality feeler gauges that provide accurate measurements.
Where to Source the Tools
1. Local Hardware Store
One of the easiest and most convenient places to source the tools needed for rebuilding an air compressor pump is your local hardware store. These stores typically have a wide selection of tools and equipment, including wrenches, pliers, screwdrivers, and sockets, which are essential for disassembling and reassembling the pump.
2. Online Retailers


If you prefer to shop online, there are numerous retailers that specialize in selling tools and equipment. Websites such as Amazon, Home Depot, and Lowe’s offer a variety of brands and choices. Make sure to check customer reviews and product descriptions to ensure you are purchasing high-quality tools that are suitable for the task.
3. Automotive Supply Stores
Another option for sourcing the tools needed for rebuilding an air compressor pump is visiting an automotive supply store. These stores often carry a selection of tools that are commonly used for vehicle repairs and maintenance, such as ratchets, sockets, and wrenches. While not specific to air compressor pump rebuilding, these tools can still be used for the task.
4. Borrowing from Friends or Family
If you do not want to invest in purchasing all the necessary tools or prefer to save money, consider borrowing them from friends or family. Ask around if anyone you know has the tools you need and would be willing to lend them to you. This can be a cost-effective option, especially if you only plan to use the tools for this particular project.
5. Renting Tools
In some cases, certain tools may be too expensive to purchase for a one-time use. If this is the case, you can check if any local tool rental shops have the tools you need available for rent. This option allows you to use high-quality tools without the need to invest in purchasing them outright.
6. Online Classifieds and Marketplaces
Lastly, you can also explore online classifieds and marketplaces such as Craigslist or Facebook Marketplace. These platforms often have individuals selling used tools at a lower cost compared to new ones. Remember to inspect the tools carefully before purchasing to ensure they are in good working condition.

Step 2: Disconnect and Remove the Air Compressor Pump
To begin the process of rebuilding an air compressor pump, it is necessary to disconnect and remove the pump from the air compressor unit. This step requires a few tools and careful attention to detail.
- Turn off the power: Before starting any work, make sure to turn off the power to the air compressor and unplug it from the electricity source to avoid any potential electrical hazards.
- Drain the air tank: Release the pressure in the air compressor tank by slowly opening the drain valve. This will prevent any accidental discharge of air during the pump removal process.
- Disconnect the fittings and hoses: Use a wrench or pliers to loosen and remove the fittings and hoses connected to the pump. Carefully disconnect each one, taking note of their positions for reassembly later.
- Remove the mounting bolts: Locate the mounting bolts that secure the pump to the air compressor unit. Use the appropriate tool to remove them, being careful not to damage the surrounding components.
- Lift and remove the pump: Once all the connections and fittings are detached, carefully lift the pump off of its mounting surface. It may be helpful to have a friend assist in this step, as the pump can be heavy.
Once the air compressor pump is disconnected and removed, it can be inspected and repaired as needed. The next steps in the rebuilding process will involve cleaning, replacing worn parts, and reassembling the pump before reinstalling it onto the air compressor unit.
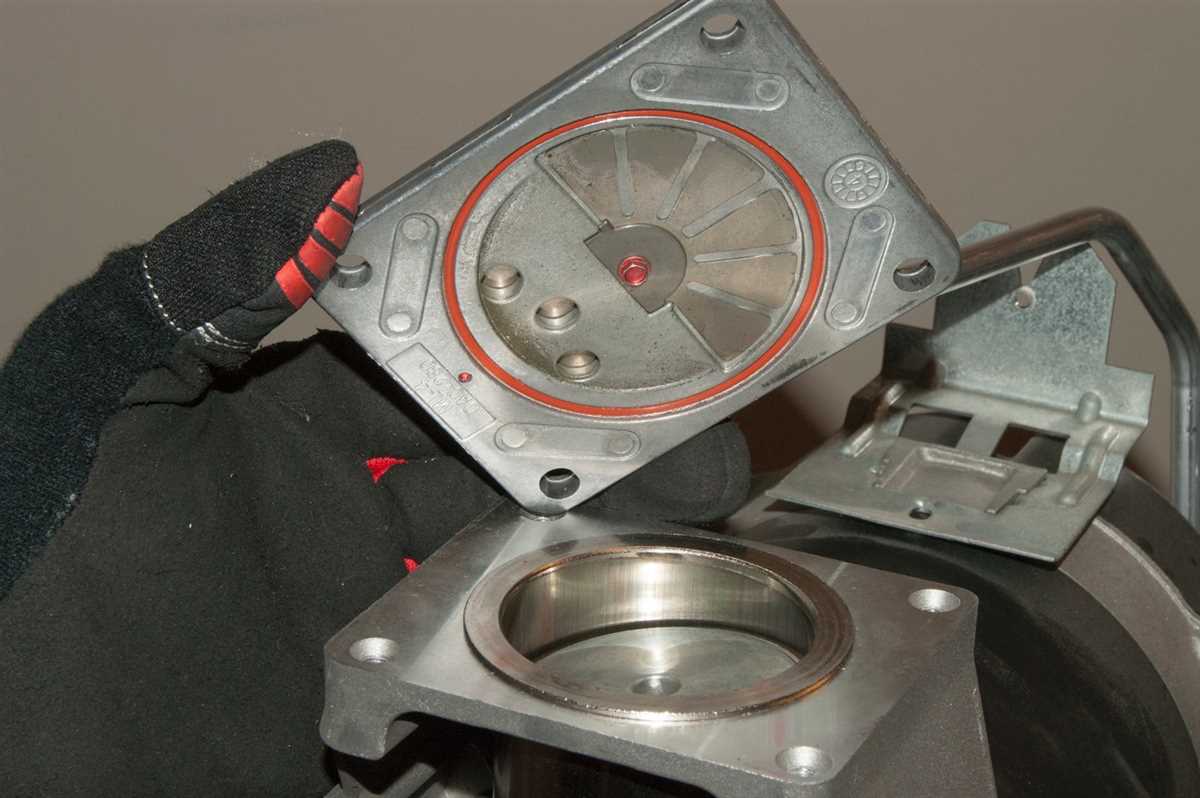
Step 3: Disassemble the Air Compressor Pump
To begin the process of rebuilding an air compressor pump, it is necessary to first disassemble the pump. This step involves carefully removing the components of the pump in order to access and assess their condition. Here is a detailed guide on how to disassemble an air compressor pump:
Gather the necessary tools and equipment
Before starting the disassembly process, gather all the necessary tools and equipment. These may include a wrench set, socket set, pliers, screwdrivers, and a rubber mallet. Having all the required tools on hand will make the disassembly process much easier and more efficient.
Disconnect the power source and release pressure
Prior to disassembling the pump, it is important to disconnect the power source and release any pressure that may be present in the air compressor. This will prevent any accidental activation of the pump during the disassembly process, ensuring the safety of the individual performing the repair.
Remove the pump cover
Using the appropriate tools, carefully remove the pump cover. This may involve unscrewing bolts or removing clips, depending on the specific design of the air compressor pump. Take note of the location and arrangement of the components as the cover is removed, as this will be helpful during the reassembly process.
Disassemble the pump components
Once the pump cover is removed, proceed to disassemble the individual components of the pump. This may include removing the pistons, connecting rods, crankshaft, valves, and gaskets. Follow the manufacturer’s instructions or refer to a repair manual if necessary, as the disassembly process can vary depending on the specific model of air compressor pump.
Inspect the components for damage or wear
As each component is removed, carefully inspect it for any signs of damage or wear. Look for cracks, corrosion, excessive wear, or any other issues that may affect the performance of the air compressor pump. Note any components that need to be replaced or repaired during the rebuilding process.
By following these steps and taking the time to carefully disassemble the air compressor pump, you will be one step closer to successfully rebuilding the pump and restoring its functionality.
Step 4: Clean and Inspect the Components
Once you have disassembled the air compressor pump, it is important to thoroughly clean and inspect each component before reassembly. This step is crucial in identifying any damage or wear that may need to be addressed.
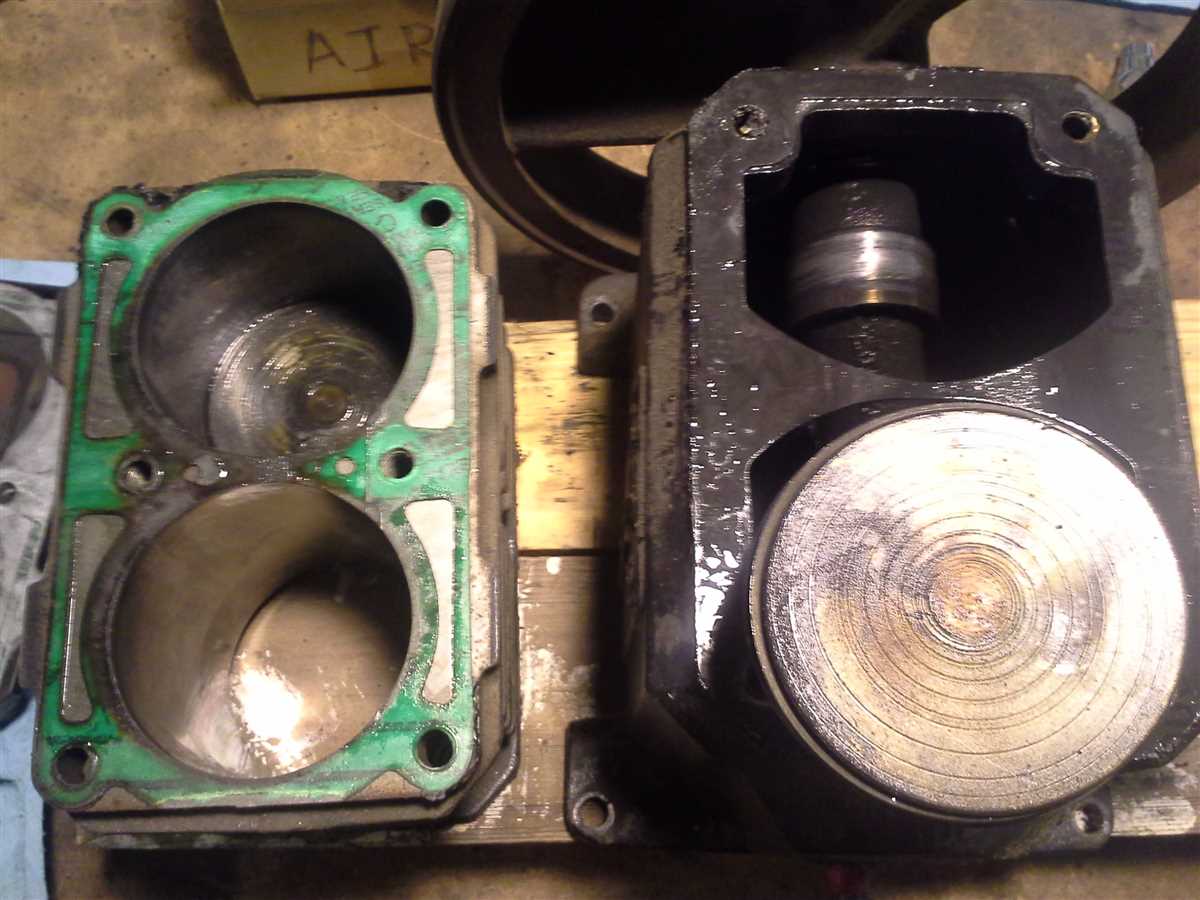
Begin by using a mild detergent or cleaning solution and a soft brush to clean the various parts of the pump. Remove any dirt, debris, or oil buildup that may have accumulated over time. Pay special attention to the pistons, cylinders, and valves, as these are the key components that allow the pump to function properly.
After cleaning, carefully inspect each component for any signs of damage or wear. Look for cracks, dents, or excessive wear on the pistons, cylinders, and valves. Check the gasket and seals for any signs of deterioration or leakage. If any components appear to be in poor condition, they may need to be replaced.
Additionally, check the bearings and connecting rods for any signs of damage or wear. Ensure that they move freely and without any resistance. Lubricate the bearings and connecting rods if necessary. The overall goal of this step is to ensure that all components are in good working condition and free from any damage that can hinder the performance of the air compressor pump.
Step 5: Replace Faulty Parts
Once you have thoroughly inspected the air compressor pump and identified the faulty parts, it is time to replace them. This step is crucial for ensuring the proper functioning of the pump and extending its lifespan.
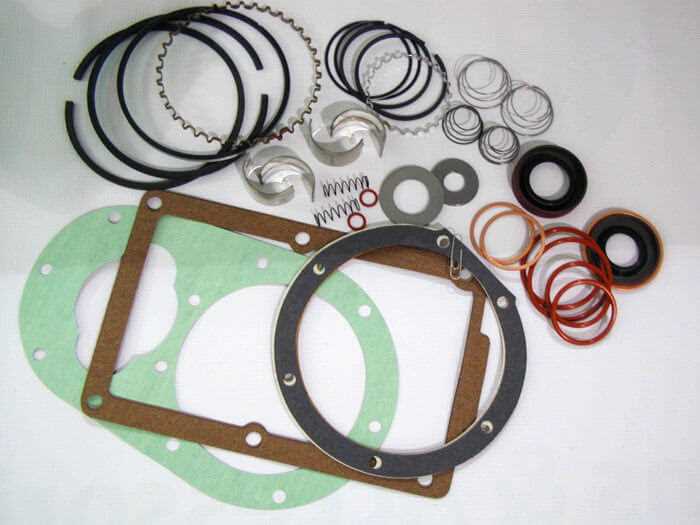
1. Purchase the replacement parts: Before you start the replacement process, make sure you have the necessary replacement parts on hand. These may include valves, gaskets, seals, pistons, and rings. It is important to buy high-quality parts that are compatible with your specific air compressor model.
2. Disconnect the power: To replace the faulty parts safely, it is important to disconnect the power supply to the air compressor. This will prevent any accidental starts or electrical shocks during the replacement process.
3. Remove the damaged parts: Begin by removing the damaged or faulty parts from the air compressor pump. Use the appropriate tools, such as wrenches or screwdrivers, to carefully remove the components without causing any further damage.
4. Install the new parts: Once the damaged parts have been removed, carefully install the new replacement parts. Refer to the manufacturer’s instructions or an air compressor repair manual for the proper installation steps. Pay attention to any specific torque specifications or sealants that may be required.
5. Reassemble the pump: After all the new parts have been installed, reassemble the air compressor pump. Make sure all the components are properly aligned and secured. Double-check all the connections and fittings to ensure they are tight and leak-free.
6. Test the pump: Once the pump has been reassembled, reconnect the power supply and test the air compressor. Listen for any unusual sounds or vibrations. Check for proper pressure build-up and efficient operation.
7. Perform routine maintenance: After replacing the faulty parts, it is important to establish a regular maintenance routine for your air compressor pump. This may include regular oil changes, filter replacements, and inspections to prevent future issues.
By replacing faulty parts promptly and following proper maintenance practices, you can ensure the longevity and reliable performance of your air compressor pump.
Step 6: Reassemble the Air Compressor Pump
Once you have completed all necessary repairs or replacements, it is time to reassemble the air compressor pump. Follow these steps to ensure proper reassembly:
Gather all the necessary parts and components
Before starting the reassembly process, make sure you have all the required parts, components, and tools. Lay them out in front of you for easy access and organization.
Refer to the manufacturer’s manual or guide
Consult the manufacturer’s manual or guide to understand the proper sequence and order of reassembling the air compressor pump. This will help ensure that you do not miss any crucial steps.
Attach the pump head to the cylinder block

Start by attaching the pump head to the cylinder block. Use the appropriate bolts or screws to secure the two components together. Tighten them according to the manufacturer’s specifications.
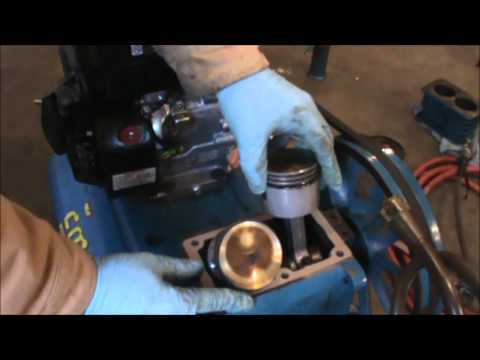
Connect the connecting rod and piston
Next, connect the connecting rod to the piston. Make sure they are aligned properly and insert the piston into the cylinder. Secure the connecting rod to the crankshaft using the specified fasteners.
Install the valves
Install the intake and discharge valves in their respective positions. Take note of any gaskets or seals that need to be in place before attaching the valves. Make sure they are properly aligned and secured.
Reattach any other necessary components
Reattach any other components that were removed during the disassembly process, such as gaskets, seals, or tubing. Pay attention to the proper placement and alignment of these items to ensure optimal functionality.
Test the reassembled air compressor pump
Once everything is reassembled, test the air compressor pump to ensure it is functioning properly. Check for any leaks, unusual noises, or vibrations. Make any necessary adjustments or repairs before putting the pump back into regular use.
Following these steps will help you successfully reassemble your air compressor pump and restore it to optimal working condition.
FAQ:
What are the common problems with an air compressor pump?
Common problems with an air compressor pump include worn-out seals, damaged check valves, and malfunctioning pressure switches.
How do I know that my air compressor pump needs to be rebuilt?
You may need to rebuild your air compressor pump if you notice a decrease in performance, a drop in pressure, or if there are excessive vibrations and noises coming from the pump.
What tools do I need to rebuild an air compressor pump?
You will need a set of wrenches, socket sets, pliers, a rubber mallet, a torque wrench, and some cleaning supplies like degreaser and rags.
What is the first step in rebuilding an air compressor pump?
The first step is to disconnect the air compressor from the power source and release any pressure from the tank. Then, remove the pump from the rest of the compressor unit.
Can I rebuild an air compressor pump without any prior experience?
While prior experience in mechanical work can be helpful, it is possible to rebuild an air compressor pump with the guidance of a step-by-step guide and some basic tools.
How long does it usually take to rebuild an air compressor pump?
The time it takes to rebuild an air compressor pump can vary depending on the extent of the damage and the level of expertise. On average, it can take anywhere from a few hours to a full day.
Where can I find replacement parts for my air compressor pump?
You can find replacement parts for your air compressor pump at hardware stores, online retailers, or directly from the manufacturer.
Video:


Harrison Clayton
Meet Harrison Clayton, a distinguished author and home remodeling enthusiast whose expertise in the realm of renovation is second to none. With a passion for transforming houses into inviting homes, Harrison's writing at https://thehuts-eastbourne.co.uk/ brings a breath of fresh inspiration to the world of home improvement. Whether you're looking to revamp a small corner of your abode or embark on a complete home transformation, Harrison's articles provide the essential expertise and creative flair to turn your visions into reality. So, dive into the captivating world of home remodeling with Harrison Clayton and unlock the full potential of your living space with every word he writes.


