Step-by-Step Guide: How to Use an Air Compressor to Inflate Tires

Inflating car tires is an essential maintenance task that ensures optimal safety and performance on the road. While there are various methods to inflate tires, using an air compressor is a fast, efficient, and convenient option. This step-by-step guide will walk you through the process of using an air compressor to inflate your tires.
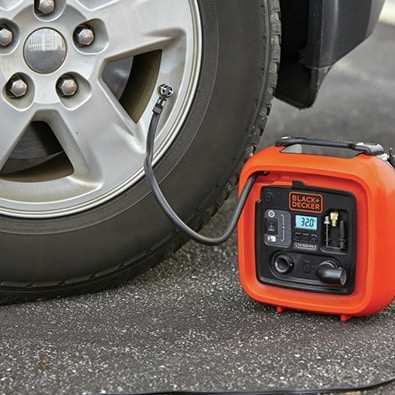
Step 1: Prepare the Air Compressor
The first step is to gather all the necessary tools and equipment. Make sure you have an air compressor with a pressure gauge and appropriate attachments for your tires. Check the user manual for specific instructions on how to set up and operate your particular air compressor model. It is vital to ensure that the compressor is in proper working condition and that the pressure gauge is accurate.
Step 2: Prepare the Tires
Prior to inflating the tires, it is important to check their current pressure using a tire pressure gauge. This will help you determine the amount of air needed to reach the correct pressure level. Refer to your vehicle’s manual or the sticker located on the driver’s side door jamb for the recommended tire pressure. Remove the valve cap from each tire and keep them in a safe place.

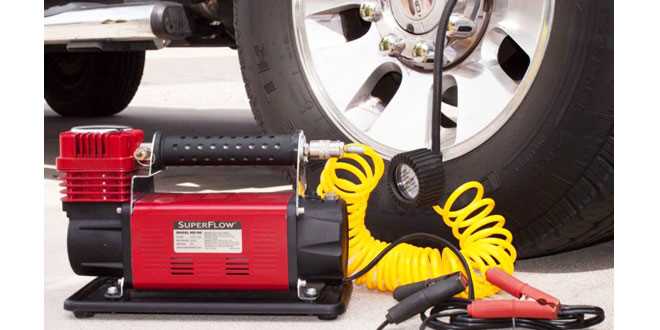
Step 3: Connect the Air Compressor
Next, attach the appropriate nozzle to the air compressor. The nozzle should fit snugly onto the tire’s valve stem. Be sure to secure it tightly to avoid any air leaks. Once the nozzle is attached, turn on the air compressor and allow it to build up pressure.
Step 4: Inflate the Tires
Start inflating the first tire by pressing the compressor nozzle onto the valve stem. Monitor the tire pressure closely by checking the pressure gauge on the air compressor or using a separate digital tire pressure gauge. Inflate the tire until it reaches the recommended pressure level. Repeat this process for each tire.
Step 5: Check the Tire Pressure

After inflating all the tires, use a tire pressure gauge to double-check the pressure levels. If any tire is overinflated, release some air by pressing the pin inside the valve stem with a small tool. If any tire is still underinflated, add more air until the desired pressure is reached.
Step 6: Replace Valve Caps and Inspect Tires
Once all the tires are properly inflated, replace the valve caps securely. Take a few moments to visually inspect each tire for any signs of damage or excessive wear. It is also a good time to check the tread depth and rotate the tires if necessary.
Remember, regularly checking and maintaining the proper tire pressure is crucial for your vehicle’s safety, fuel efficiency, and tire longevity. By following this step-by-step guide, you can confidently use an air compressor to inflate your tires and enjoy a smooth and safe ride.
Step 1: Familiarize Yourself with the Air Compressor
Before using an air compressor to inflate your tires, it is important to familiarize yourself with the equipment. Understanding how the air compressor works and its various components will ensure a safe and effective inflation process.

1. Check the power source: Air compressors can be powered by electricity, gasoline, or diesel. Make sure you have the appropriate power source available and that it is compatible with your compressor.
2. Examine the pressure gauge: The pressure gauge is an essential component of the air compressor that indicates the amount of pressure being generated. Familiarize yourself with the gauge and make sure it is functioning properly.
3. Understand the safety features: Air compressors come with various safety features, such as an automatic shut-off valve or a pressure relief valve. Take the time to understand how these features work and how to activate them in case of an emergency.
4. Locate the air intake filter: The air intake filter prevents debris and dust from entering the compressor’s motor. It is crucial to keep this filter clean to ensure optimal performance. Locate the filter and learn how to remove and clean it.
5. Learn about the compressor’s airflow: Understanding the airflow of the compressor is important for efficient tire inflation. Familiarize yourself with the air outlets and connectors, as well as any hoses or pipes that may be necessary for connecting the compressor to the tire.

By familiarizing yourself with the air compressor, you will be better equipped to use it safely and effectively for inflating your tires. This knowledge will ensure a smoother and more efficient inflation process, as well as reduce the risk of any accidents or damage to the equipment.
Step 2: Prepare the Air Compressor for Use
Before using an air compressor to inflate tires, it is important to properly prepare the compressor for use. Follow these steps to ensure that your air compressor is ready to go:
- Check the oil level: Start by checking the oil level in your air compressor. Refer to the user manual for instructions on how to do this. If the oil level is low, add the recommended oil type until it reaches the proper level.
- Inspect the air filter: Next, inspect the air filter of your air compressor. A dirty or clogged air filter can reduce the efficiency and performance of the compressor. Clean or replace the air filter as needed.
- Check the pressure switch: The pressure switch controls the operation of the air compressor. Ensure that it is set to the appropriate pressure range for inflating tires. Adjust the pressure switch if necessary.
- Connect the air hose: Connect the air hose securely to the air compressor’s outlet. Make sure it is tightly attached to prevent air leaks during operation.
- Plug in the air compressor: Plug the air compressor into a power source. Ensure that the power source can provide the required voltage and amperage for the compressor.
- Let the compressor build pressure: Allow the air compressor to build pressure until it reaches the desired level for inflating tires. This can usually be monitored using the built-in pressure gauge.
Following these steps will help ensure that your air compressor is properly prepared for use when inflating tires. It is important to always refer to the user manual provided by the manufacturer for specific instructions on preparing and operating your air compressor.
Step 3: Check the Tire Pressure


Before you start inflating your tires, it’s important to check the current tire pressure. This will help you determine how much air your tires need and ensure they are properly inflated. Here are the steps to check the tire pressure:
- Prepare the pressure gauge: Get a pressure gauge, which is a tool used to measure the tire pressure. Make sure the gauge is functioning properly and has been calibrated.
- Remove the valve cap: Locate the valve stem on the tire and remove the valve cap. This will allow you to access the valve and attach the pressure gauge.
- Attach the pressure gauge: Press the pressure gauge onto the valve firmly until you hear a hissing sound. This means that the gauge is properly attached and you can start measuring the pressure.
- Read the pressure: Look at the gauge’s display to see the current tire pressure. The pressure will be displayed in PSI (pounds per square inch) or in kPa (kilopascals).
It’s important to note that the recommended tire pressure for your vehicle can usually be found on a sticker located on the driver’s side door jamb or in the owner’s manual. Make sure to check this information before inflating your tires.
Once you’ve checked the tire pressure, you’ll have a better idea of how much air your tires need. If the pressure is too low, you can use the air compressor to inflate the tires to the recommended pressure. If the pressure is too high, you can release some air using the pressure gauge or a small valve tool.
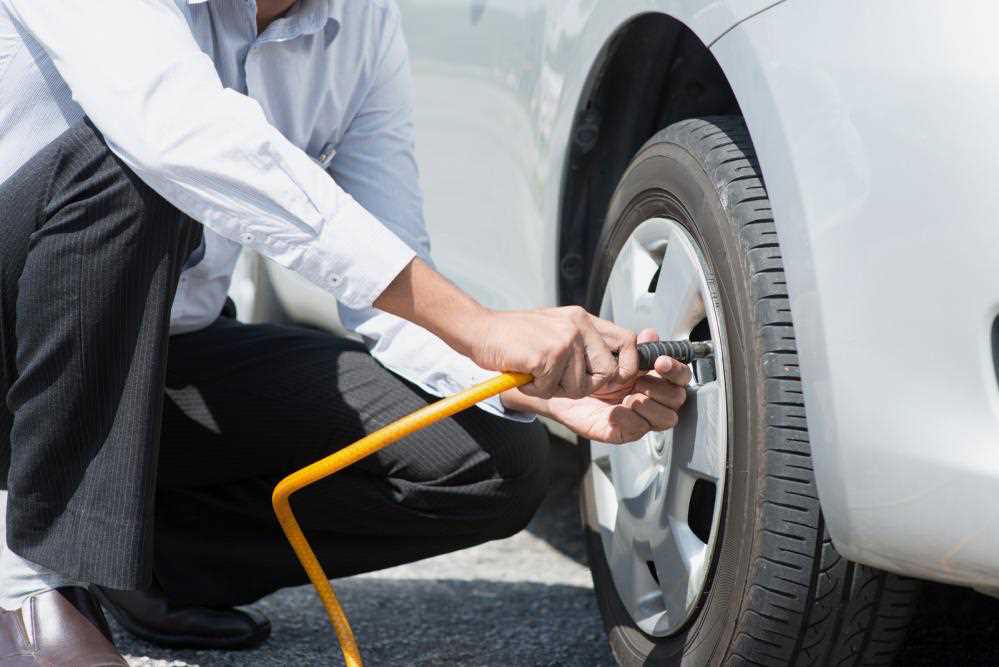
Step 4: Attach the Air Hose to the Tire Valve

To begin inflating your tire, you will need to attach the air hose to the tire valve. The tire valve is typically a small, metal rod located on the side of the tire. It may be covered with a small plastic cap that you will need to remove before proceeding.

Once you have located the tire valve and removed the cap, take the air hose and press it firmly onto the valve. You should hear a hissing sound as the valve is opened. Make sure the hose is securely attached by giving it a little tug.
Note: Be careful not to push too hard or force the air hose onto the valve, as this could damage the valve or cause it to break.
After attaching the air hose, it is important to check that the connection is secure and airtight. You can do this by applying a small amount of pressure to the hose and listening for any leaks. If you hear a steady hissing sound, the connection may not be secure and you will need to reattach the hose or tighten it further.
Once the connection is secure and airtight, you are ready to start inflating the tire. Proceed to the next step to learn how to turn on the air compressor and adjust the pressure for your specific tire.
Step 5: Set the Desired Tire Pressure

Once you have connected the air compressor to the tire and turned it on, you will need to set the desired tire pressure. This will ensure that your tires are properly inflated and perform optimally.
To set the desired tire pressure, refer to the recommended pressure found on the sidewall of your tire or in your vehicle’s owner’s manual. This information is crucial as it varies depending on the type and size of your vehicle’s tires.
Using the pressure gauge, carefully monitor the current pressure reading of the tire as the air compressor operates. Compare this reading to the desired tire pressure value and adjust accordingly.
If the tire pressure is too low, add air by holding the air chuck firmly onto the valve stem while the compressor is running. You can use the pressure gauge to check the tire pressure and stop adding air once the desired pressure is reached.
If the tire pressure is too high, you can release air by pressing down on the valve stem using a small tool like a screwdriver or pen. Again, use the pressure gauge to monitor the tire pressure and stop releasing air once it reaches the desired level.
Remember, it is important not to overinflate your tires as this can lead to decreased traction, uneven wear, and potential blowouts. Likewise, underinflated tires can impact fuel efficiency, handling, and tire lifespan.
Once you have achieved the desired tire pressure, disconnect the air chuck from the valve stem and turn off the air compressor. Double-check the tire pressure using the pressure gauge to ensure that it remains within the recommended range before moving on to the next tire.
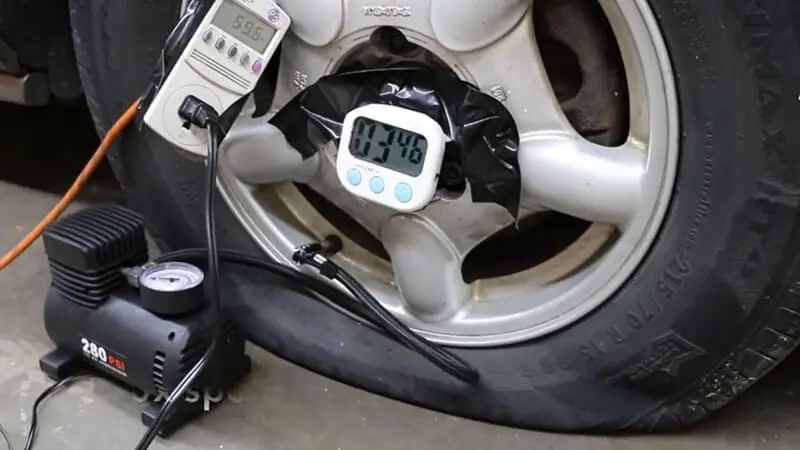
Step 6: Inflate the Tire

Once you have properly connected the air compressor to the tire and set the desired pressure on the pressure gauge, it is time to start inflating the tire. Here is how you can do it step by step:
- Turn on the air compressor by flipping the switch or pressing the power button.
- Wait for the compressor to build up pressure. You will hear the motor running and the pressure gauge will start to rise.
- Keep a close eye on the pressure gauge as you don’t want to overinflate the tire. Once the gauge reaches the desired pressure, you can move on to the next step.
- Push the nozzle of the air hose firmly onto the valve stem of the tire. Make sure it is a tight and secure connection to prevent any air leaks.
- Depress the lever or trigger on the air hose to start the airflow. You will hear the hissing sound as air starts to flow into the tire.
- Monitor the pressure gauge as you inflate the tire. If the pressure goes beyond the desired level, release some air by pressing the small pin in the center of the valve stem with a small tool or the end of the air hose.
- Continue inflating the tire until you reach the desired pressure. This information can usually be found in your vehicle’s owner’s manual or on a sticker located on the inside of the driver’s side door.
- Once you have reached the desired pressure, release the lever or trigger on the air hose to stop the airflow.
- Disconnect the air hose from the valve stem by pulling it off gently. Be cautious as the hose and valve may still be under pressure.
- Check the tire pressure again using a tire pressure gauge to ensure it matches the desired level.
By following these steps, you can safely and effectively inflate your tire using an air compressor. Remember to always double-check the pressure and not to exceed the recommended psi for your tires.
Step 7: Monitor the Tire Pressure
After connecting the air compressor to the tire, it’s important to monitor the tire pressure as you inflate it. This will ensure that you don’t overinflate the tire, which can lead to damage or a blowout.
1. Use a tire pressure gauge: Insert a tire pressure gauge into the valve stem of the tire to measure the pressure. This will give you an accurate reading of the tire’s current pressure.
2. Compare the pressure to the recommended PSI: Check the recommended PSI for your tire, which can usually be found on a sticker inside the driver’s door jamb or in the owner’s manual. Compare the measured pressure to the recommended PSI to ensure that the tire is being inflated properly.
3. Adjust the inflation as necessary: If the tire pressure is too low, continue to inflate the tire until it reaches the recommended PSI. If the pressure is too high, release air from the tire using the pressure release valve on the air compressor.
4. Repeat the process for all tires: Monitor the tire pressure for each tire individually, as they may vary. Use the same process to inflate all the tires to the recommended PSI.
Remember: It’s crucial to keep an eye on the tire pressure throughout the inflation process to ensure that your tires are properly inflated for safe driving.
Step 8: Detach the Air Hose and Check the Tire Pressure
After you have finished inflating the tire, it is important to detach the air hose from the valve stem. To do this, simply twist the release valve counterclockwise to release any remaining pressure in the hose. Once the pressure has been released, carefully remove the hose from the valve stem.
After detaching the air hose, it is crucial to check the tire pressure to ensure that it is at the recommended level. To do this, you will need a tire pressure gauge. Attach the gauge to the valve stem and press firmly to get an accurate reading. The gauge will display the current pressure in the tire.
If the tire pressure is within the recommended range, you can proceed to the next step. However, if the pressure is too low, you will need to add more air using the air compressor. On the other hand, if the pressure is too high, you will need to release some air by pressing the small pin in the center of the valve stem with a tool or the tip of a pen.
Once you have adjusted the tire pressure to the correct level, double-check it with the tire pressure gauge. It is important to ensure that the pressure is accurate before driving. Driving with underinflated or overinflated tires can lead to poor vehicle performance, decreased fuel efficiency, and even tire blowouts.
By following these steps, you can safely and effectively use an air compressor to inflate your tires. Regularly checking and maintaining the proper tire pressure is an important part of vehicle maintenance and can help to extend the lifespan of your tires while ensuring optimal performance and safety on the road.
FAQ:
What is an air compressor?
An air compressor is a device that converts power into potential energy stored in pressurized air. It uses an electric or gas-powered motor to compress air and then delivers it in a controlled manner.
Why should I use an air compressor to inflate my tires?
Using an air compressor to inflate your tires is more convenient and efficient than using a manual pump. It can provide higher pressure levels and inflate the tires faster, saving you time and effort.
What equipment do I need to inflate my tires with an air compressor?
To inflate your tires with an air compressor, you will need an air compressor unit, an air hose with a tire nozzle, and a tire pressure gauge to measure the pressure as you inflate.
Can I damage my tires if I overinflate them with an air compressor?
Yes, overinflating your tires can cause damage. It can lead to uneven tread wear, reduced traction, and an increased risk of a blowout. It is important to check the recommended tire pressure and not exceed it.
How do I use an air compressor to inflate my tires?
First, plug in the air compressor and turn it on. Attach the air hose to the outlet valve on the air compressor and connect the tire nozzle to the other end of the hose. Then, press the nozzle firmly onto the valve stem of the tire and release the air into the tire. Use the tire pressure gauge to monitor the pressure and stop inflating when the desired pressure is reached.
Video:


Harrison Clayton
Meet Harrison Clayton, a distinguished author and home remodeling enthusiast whose expertise in the realm of renovation is second to none. With a passion for transforming houses into inviting homes, Harrison's writing at https://thehuts-eastbourne.co.uk/ brings a breath of fresh inspiration to the world of home improvement. Whether you're looking to revamp a small corner of your abode or embark on a complete home transformation, Harrison's articles provide the essential expertise and creative flair to turn your visions into reality. So, dive into the captivating world of home remodeling with Harrison Clayton and unlock the full potential of your living space with every word he writes.


