Step-by-Step Guide: How to Fill a Paintball Tank with an Air Compressor

Filling a paintball tank with an air compressor is a simple process that can be easily done at home or at a paintball field. Paintball tanks need to be filled with compressed air in order to power the paintball markers. While most paintball fields have air filling stations available, it can be convenient to have the ability to fill your tank at home, especially if you play paintball frequently.
Before starting the process of filling your paintball tank with an air compressor, it is important to first ensure that your tank is in good condition and properly certified. Paintball tanks are made of high-quality materials and are designed to withstand the pressures associated with compressed air. However, tanks can deteriorate over time or if not properly maintained, so it is crucial to check for any signs of damage or expiration date.
To begin the filling process, you will need an air compressor that is capable of delivering high-pressure air. Make sure that the air compressor is in good working condition and properly maintained. It is also important to have a fill station or adapter that is compatible with your paintball tank. This can be a fill nipple adapter or a fill station with a gauge and bleeder valve.
Once you have all the necessary equipment, connect the fill station or adapter to the air compressor. Ensure that all connections are tight and secure. Place your paintball tank on a stable surface and screw the fill nipple adapter or fill station onto the tank’s air fill nipple. Make sure it is properly aligned and tightened.
Step 1: Gather the Required Equipment
Before you can fill a paintball tank with an air compressor, you’ll need to gather some essential equipment. Here is a list of what you’ll need:

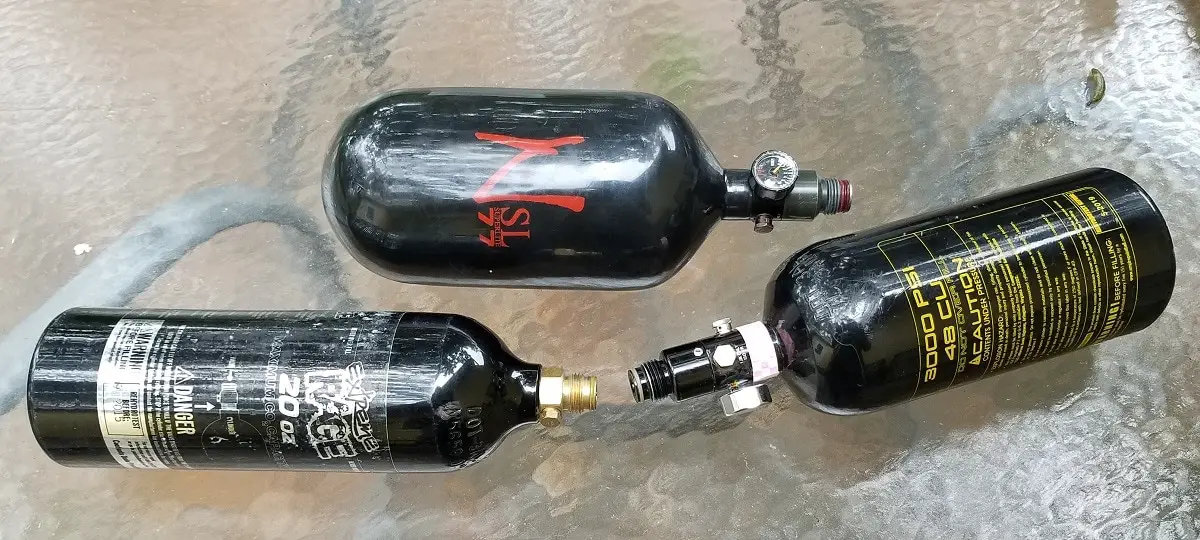
- A paintball tank: Make sure you have a paintball tank that is designed to withstand the pressure of the air compressor.
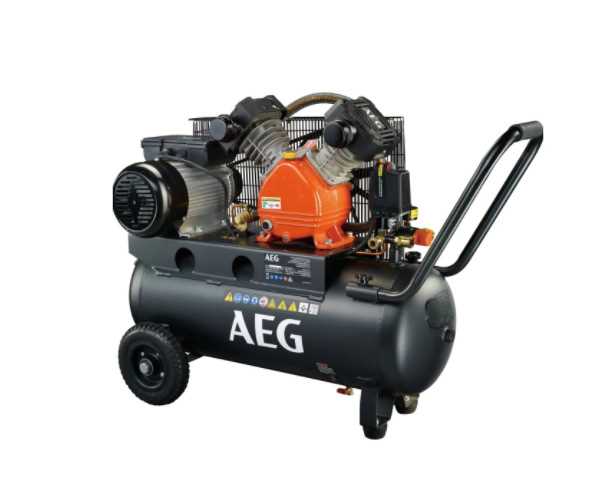
- An air compressor: You will need an air compressor with a high enough PSI (pounds per square inch) to fill the paintball tank.
- A paintball fill station: This is a specialized device that connects the air compressor to the paintball tank and allows for safe filling.
- A pressure gauge: This will help you monitor the pressure in the paintball tank and ensure that it does not exceed the safe limits.
- A hose: You will need a hose that can connect the paintball fill station to the air compressor and allow for the transfer of air.
Once you have gathered all of these items, you will be ready to move on to the next step in the process of filling a paintball tank with an air compressor.
Step 2: Attach the Paintball Tank to the Air Compressor
To fill a paintball tank with an air compressor, the first step is to attach the paintball tank to the air compressor. This is a crucial step in preparing the tank for filling and ensuring a safe and effective fill-up process.
Gather the necessary equipment
Before attaching the paintball tank to the air compressor, make sure you have all the necessary equipment handy. This includes the paintball tank itself, the air compressor, and any fittings or adapters required for connection. Check that all equipment is in good working condition and free from any damage or leaks.

Locate the valve on the paintball tank
The next step is to locate the valve on the paintball tank. This valve is typically located at the top of the tank and is used to control the flow of air into and out of the tank. Take a moment to familiarize yourself with the valve and ensure it is in the closed position before proceeding.
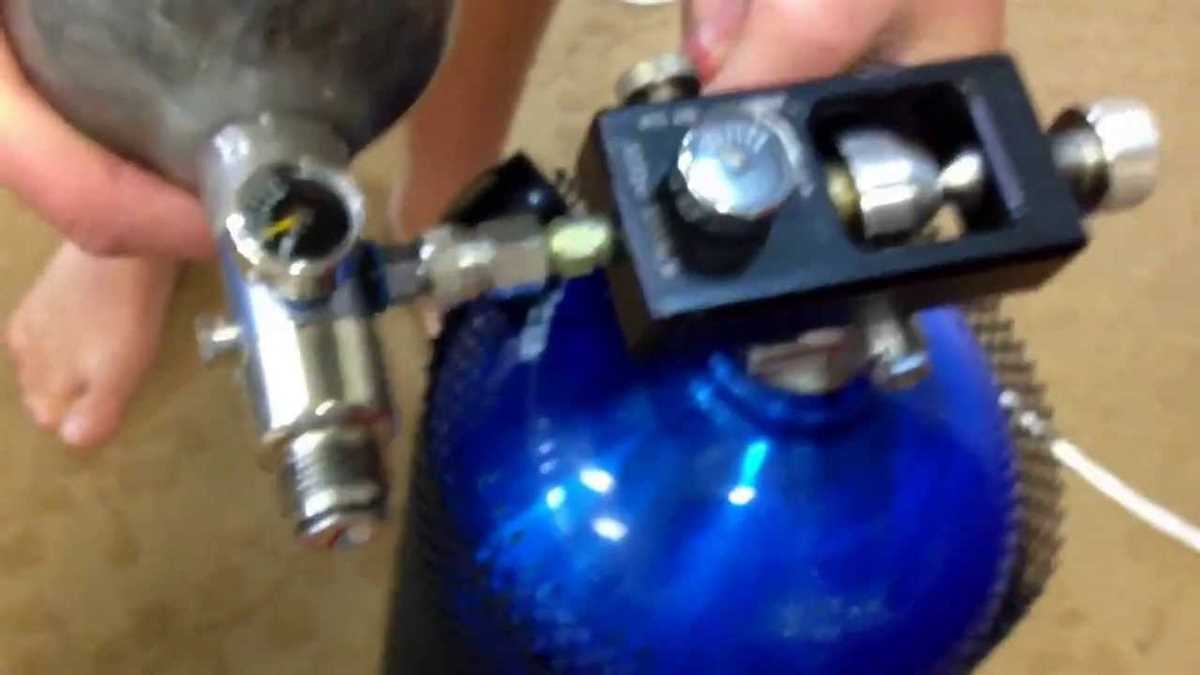
Connect the paintball tank to the air compressor
Now it’s time to connect the paintball tank to the air compressor. Start by identifying the appropriate fitting or adapter for the connection. This may vary depending on the specific tank and compressor you are using. Once you have the correct fitting or adapter, attach it securely to the valve on the paintball tank.
With the fitting or adapter in place, carefully attach the other end of the connection to the air compressor. Ensure a tight and secure connection to prevent any leaks during the filling process. It is important to follow the manufacturer’s instructions for your specific air compressor to ensure proper attachment.

Once the paintball tank is securely attached to the air compressor, you are ready to move on to the next step in the filling process. But before proceeding, double-check all connections to ensure they are tight and secure. This will help prevent any air leaks and ensure a safe and efficient fill-up.
Step 3: Set the Pressure on the Air Compressor
Once you have securely attached the paintball tank to the air compressor, the next step is to set the pressure on the air compressor. This is an important step as it determines the amount of air that will be filled in the tank.
Before setting the pressure, it is crucial to refer to the manufacturer’s instructions or guidelines. Different paintball tanks may require different pressures, so it is essential to follow the specific instructions for your tank.
Most air compressors have a pressure gauge that allows you to set the desired pressure. Begin by turning on the air compressor and letting it build up pressure. Once it reaches the desired pressure, use the pressure adjustment knob or lever on the compressor to set the pressure accordingly.

It’s important to note that overfilling the paintball tank can be dangerous and may cause damage to the tank or the paintball marker. To ensure safety, stay within the recommended pressure range specified by the manufacturer.
Once you have set the pressure on the air compressor, you are ready to begin filling the paintball tank. This involves turning the valve or lever on the air compressor to allow air to flow into the tank. Keep an eye on the pressure gauge to ensure that the tank is filling up to the desired pressure.
Step 4: Open the Valve on the Paintball Tank

After connecting the paintball tank to the air compressor, the next step is to open the valve on the paintball tank. This valve controls the flow of air into the tank and will allow the tank to fill with compressed air.
Before opening the valve, it is important to ensure that all connections are secure and tight. This will prevent any leakage during the filling process and ensure a safe and efficient fill. Check that the tank is properly seated and the valve is fully closed before proceeding.

To open the valve, turn it counterclockwise. It may take a few rotations before the valve fully opens. As you open the valve, you will hear a hissing sound, indicating that the compressed air is now flowing into the tank.
It is important to monitor the tank’s pressure while filling. Use a pressure gauge to check the pressure regularly. The tank should be filled to the recommended pressure level as specified by the manufacturer. Once the desired pressure is reached, you can close the valve to stop the filling process.
Step 5: Monitor the Pressure Gauge
Once you have connected your paintball tank to the air compressor, it is important to monitor the pressure gauge. The pressure gauge on your air compressor will display the current pressure inside the tank. This is crucial because filling the tank with too much pressure can be dangerous and potentially cause damage to the tank.
As you fill the tank, keep an eye on the pressure gauge and make sure that the pressure does not exceed the recommended limit. The recommended pressure limit for most paintball tanks is typically around 3000-4500 PSI (pounds per square inch). If the pressure gauge approaches or exceeds this limit, you should stop filling the tank and disconnect it from the air compressor.
Additionally, it is important to remember that the pressure gauge may have a slight delay in displaying the true pressure. Therefore, it is advisable to fill the tank with air in short bursts and check the pressure gauge after each burst to ensure that it does not quickly exceed the recommended limit.

If you notice any abnormalities with the pressure gauge, such as it not displaying any pressure at all or showing a rapid increase in pressure, you should immediately stop filling the tank and consult the instruction manual or seek professional assistance. It is better to be safe than sorry when it comes to handling pressurized tanks.
By monitoring the pressure gauge throughout the filling process, you can ensure that your paintball tank is filled safely and correctly. Once the pressure gauge indicates the desired pressure range, you can proceed to the next step of disconnecting the tank from the air compressor and preparing for your paintball game.
Step 6: Shut Off the Air Compressor
Once the paintball tank has reached its desired fill level, it is important to shut off the air compressor to prevent any further air from entering the tank. Leaving the air compressor running could cause overfilling and potentially damage the paintball tank.
Locate the power switch or valve on the air compressor and turn it off. This will stop the flow of air into the tank and ensure that it is filled to the correct pressure. Make sure to follow the instructions provided by the manufacturer of the air compressor for safe shutdown procedures.
Once the air compressor is shut off, listen for any hissing sounds coming from the tank. If you hear any leaks or air escaping, it may indicate a problem with the tank or the filling process. In this case, it is important to stop filling and address the issue before continuing.

Take a moment to double-check that the tank is securely attached to the air compressor and that all connections are tight. This will help prevent any air leaks and ensure that the tank remains at the desired pressure.
Once everything is checked and secured, you can proceed to disconnect the paintball tank from the air compressor. Carefully unscrew the fill nipple or valve from the tank and remove it. Be cautious as there may still be some pressure inside the tank, so it is best to do this slowly and with care.
With the air compressor shut off and the paintball tank disconnected, you have successfully filled the tank with compressed air. It is now ready to be used for your paintball activities. Remember to always follow proper safety precautions when handling compressed air tanks.
Step 7: Detach the Paintball Tank
Once the paintball tank is filled with air from the compressor, it is important to detach it properly to ensure safety and prevent any damage.
1. Turn off the air compressor: Before detaching the paintball tank, make sure to turn off the air compressor to prevent any accidental release of air or pressure.
2. Release the pressure: To ensure safety, release the pressure from the paintball tank by slowly turning the bleeder valve counterclockwise. This will allow any remaining air to be released in a controlled manner.
3. Unscrew the fill adapter: Once the pressure is fully released, unscrew the fill adapter from the paintball tank. Use a wrench or adjustable pliers if necessary, but be careful not to damage the tank or the adapter.
4. Inspect the tank and adapter: After detaching the paintball tank, inspect both the tank and the fill adapter for any signs of damage or wear. Check for any leaks, cracks, or other issues that may affect the performance or safety of the tank.
5. Store the tank properly: Once detached, store the paintball tank in a cool and dry place, away from any direct sunlight or extreme temperatures. Make sure to follow the manufacturer’s guidelines for proper storage and maintenance of the tank.
By following these steps, you can safely and properly detach the paintball tank from the air compressor after it has been filled.
FAQ:
What is a paintball tank?
A paintball tank is a container that holds compressed air or CO2 gas which is used to power paintball guns.
Why would I need to fill a paintball tank with an air compressor?
You would need to fill a paintball tank with an air compressor if you are playing paintball and need a refill on air to continue playing.
What is an air compressor?
An air compressor is a device that converts power from an electric motor or a gasoline engine into potential energy stored in pressurized air.
Are there different types of air compressors?
Yes, there are different types of air compressors. Some common types include reciprocating compressors, rotary screw compressors, and centrifugal compressors.
Where can I find an air compressor to fill my paintball tank?
You can find an air compressor at a paintball field, a paintball store, or some sporting goods stores. Additionally, you may be able to find one at a local hardware store or online.
Can I fill my paintball tank with a regular bicycle pump?
No, you cannot fill a paintball tank with a regular bicycle pump. Paintball tanks require high-pressure air, and a regular bicycle pump does not have the necessary pressure capacity.
Is there a specific PSI that a paintball tank needs to be filled to?
Yes, paintball tanks generally need to be filled to a specific PSI (pound per square inch) rating, which is typically indicated on the tank. Common fill pressures for paintball tanks range from 3,000 to 4,500 PSI.
Video:


Meet Harrison Clayton, a distinguished author and home remodeling enthusiast whose expertise in the realm of renovation is second to none. With a passion for transforming houses into inviting homes, Harrison's writing at https://thehuts-eastbourne.co.uk/ brings a breath of fresh inspiration to the world of home improvement. Whether you're looking to revamp a small corner of your abode or embark on a complete home transformation, Harrison's articles provide the essential expertise and creative flair to turn your visions into reality. So, dive into the captivating world of home remodeling with Harrison Clayton and unlock the full potential of your living space with every word he writes.


