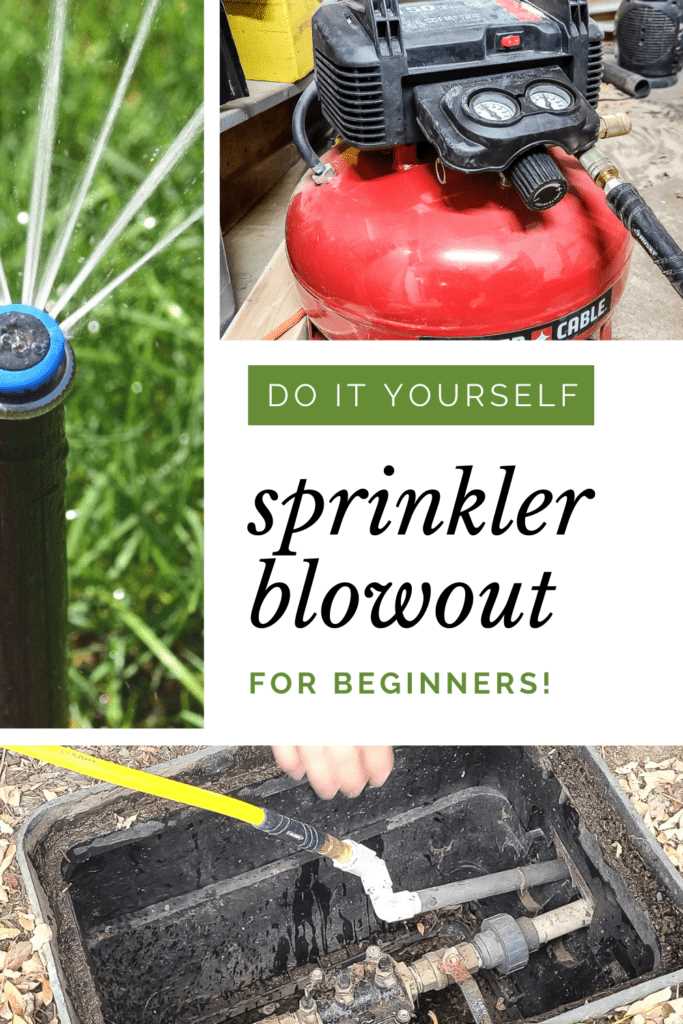
How to Winterize Your Sprinkler System Without Using an Air Compressor
Winterizing your sprinkler system is an important step to ensuring that it is protected from the freezing temperatures and potential damage that can occur during the colder months. While many people choose to use an air compressor to blow out the water from their system, there are alternative methods that can be just as effective.
One method is to use a manual valve to drain the water from the system. This involves shutting off the main water supply to the sprinkler system and opening each valve individually to release any excess water. By opening the valves one at a time, you can ensure that the water is drained completely from each zone before moving on to the next.
Another option is to use a manual drain valve. This is a valve that is installed at the lowest point of the sprinkler system and allows for easy drainage. By opening this valve, you can allow the water to drain out of the system naturally, without the need for an air compressor.
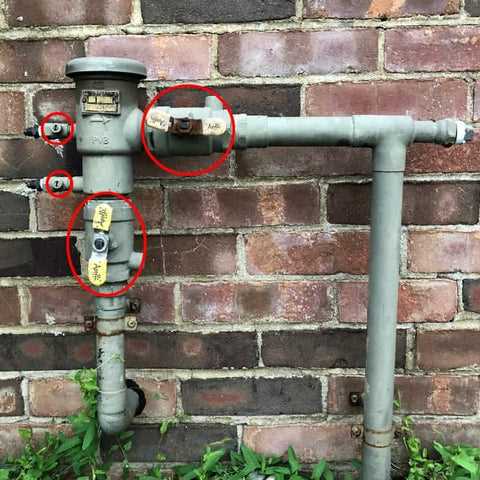
Additionally, it is important to protect your backflow preventer from freezing. This can be done by installing a backflow preventer insulation cover, which will help to keep it warm and prevent any damage from occurring. It is also a good idea to insulate any exposed pipes or valves with pipe insulation or heat tape to provide further protection against freezing temperatures.
By following these alternative methods, you can effectively winterize your sprinkler system without the need for an air compressor. This will help to ensure that your system is protected from freezing temperatures and potential damage, allowing it to function properly when the warmer weather returns.

Why Winterize your Sprinkler System?
Winterizing your sprinkler system is essential for protecting it from potential damage caused by freezing temperatures. Winter can be harsh on the components of your sprinkler system, including pipes, valves, and fittings. If water is left in the system during the freezing temperatures, it can expand and cause the pipes to burst, leading to costly repairs in the spring.
By winterizing your sprinkler system, you can prevent these problems and ensure that your system remains in good working order for the upcoming spring and summer seasons. Winterizing involves removing all the water from the system, preventing any leftover water from freezing and causing damage. There are various methods to winterize your sprinkler system, and not all of them require an air compressor.
One method is to use a manual valve to drain the water from the system. This involves closing the main water valve and opening the individual zone valves to allow the water to drain. It’s important to follow proper procedures and ensure all the water is completely drained to avoid any residual water freezing and causing damage.
Another option is to use a manual drain valve located at the lowest point of the system. This valve can be opened to allow water to drain, but it’s important to make sure the valve is completely closed after draining to prevent water from entering and freezing over the winter.
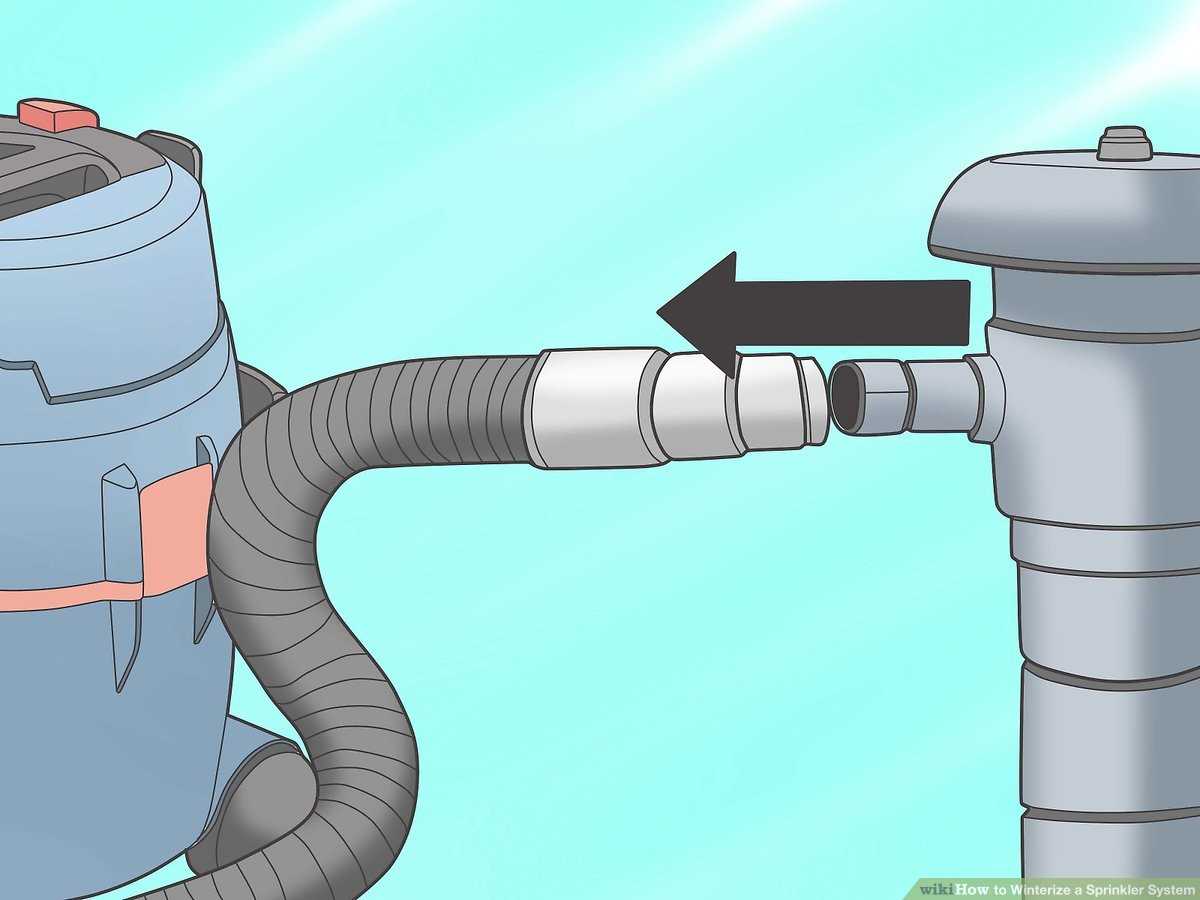
If you don’t have access to an air compressor, there are alternative methods you can use to blow out the water from your sprinkler system. These methods involve using a shop vacuum, a garden hose, or a portable pump to force the water out of the system. It’s important to follow the manufacturer’s instructions and take the necessary precautions to ensure a proper winterization process.

In conclusion, winterizing your sprinkler system is crucial to protect it from freezing temperatures and potential damage. Whether you choose to use an air compressor or alternative methods, it’s important to properly drain and remove all the water from the system to prevent any issues in the future. Taking the time to winterize your sprinkler system will save you time, money, and headaches in the long run.
Steps to Winterize your Sprinkler System
1. Shut off the water supply
Before you begin the winterization process, make sure to turn off the water supply to your sprinkler system. Locate the main water shut-off valve and close it to prevent any water from flowing into the system.
2. Drain the water from the system

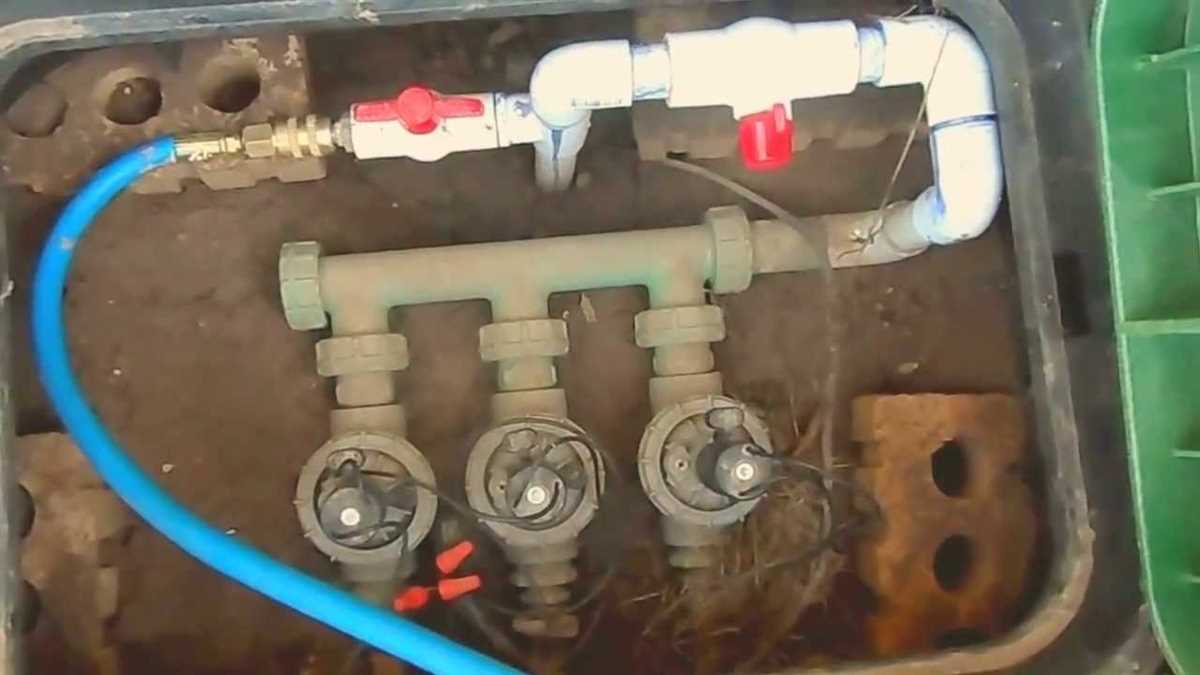
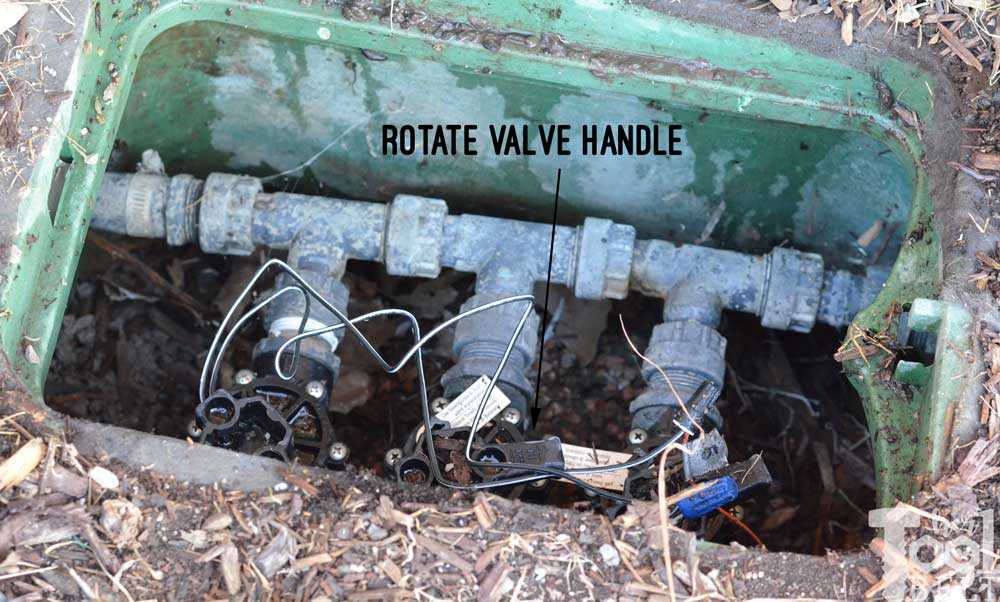
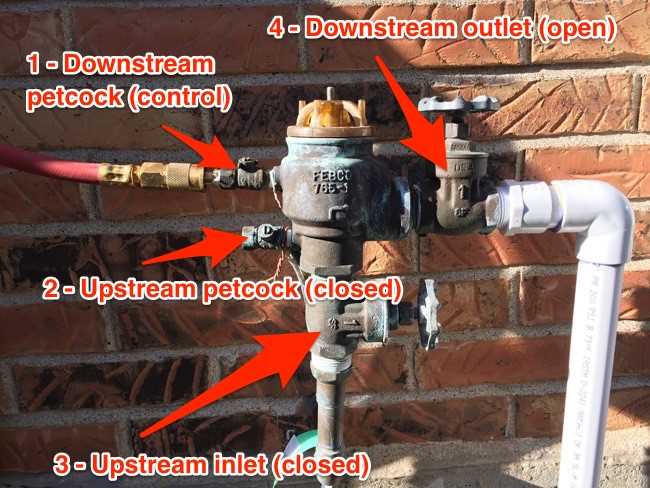
To remove any remaining water from the sprinkler system, open the drain valves or petcocks. These valves are usually located at the low points in the system, such as at the mainline, lateral lines, and valve manifolds. Allow the water to drain completely.
3. Blow out the remaining water
If you don’t have an air compressor, you can use a shop vacuum or a handheld blower to blow out the remaining water from the system. Attach the vacuum or blower to the drain valve and turn it on. Move to each zone and repeat the process until no water is coming out.

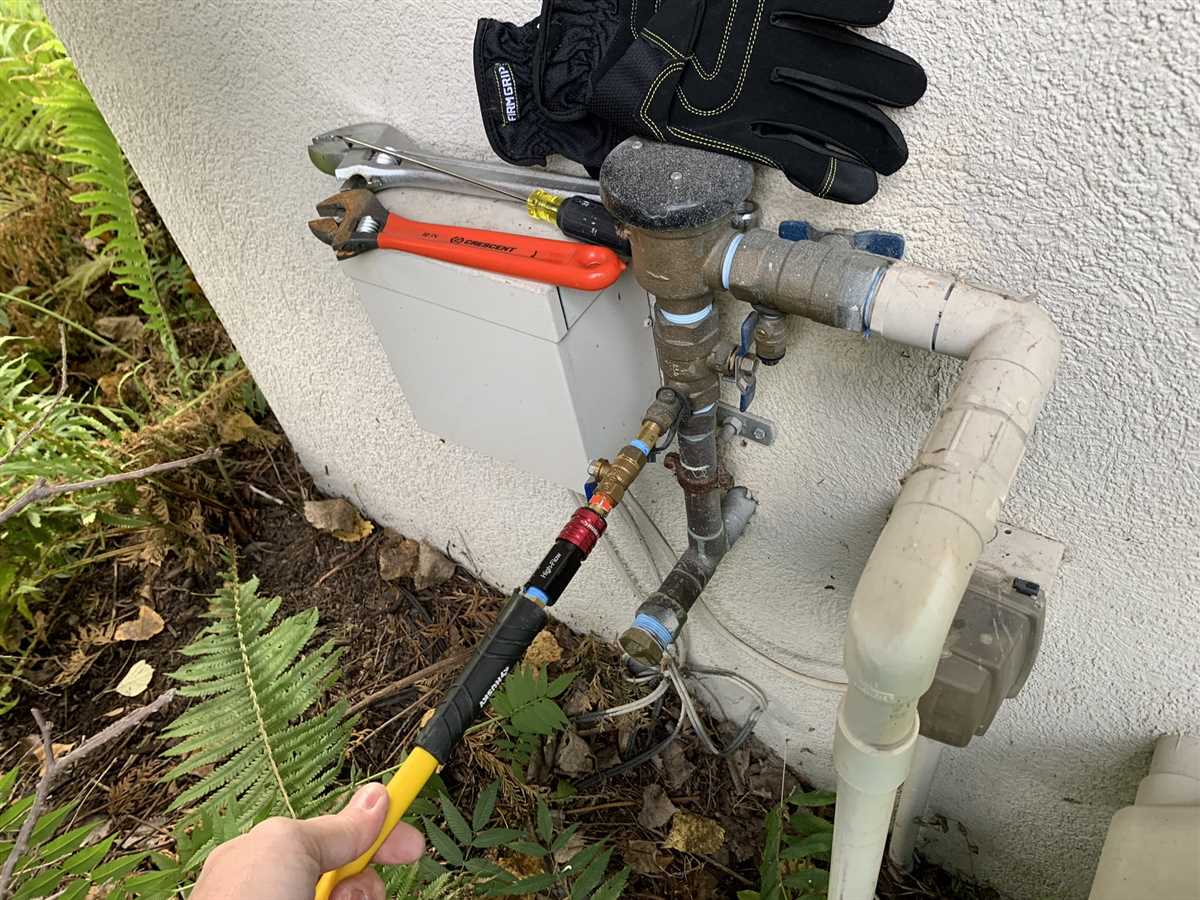
4. Isolate and insulate backflow preventer
If you have a backflow preventer, isolate it from the rest of the sprinkler system by closing the valves on both sides. This will prevent water from entering the backflow preventer and potentially causing damage. Additionally, insulate the backflow preventer with an insulation bag or cover to protect it from freezing temperatures.
5. Protect above-ground components
Wrap any above-ground components, such as valves, pressure regulators, and filter housings, with insulation tape or foam sleeves. This will provide an extra layer of protection against freezing temperatures and prevent any potential damage.
6. Store sprinkler system accessories
Remove any accessories from the sprinkler system, such as sprinkler heads, and store them in a dry, indoor location for the winter. This will prevent them from getting damaged by freezing temperatures and ensure they are in good condition for the next irrigation season.
7. Mark and protect sprinkler heads
Mark the location of each sprinkler head with a stake or flag to prevent accidental damage during the winter. Additionally, protect the sprinkler heads by covering them with a foam dome or inverted bucket. This will help insulate them and prevent water from freezing inside.

8. Monitor weather conditions
Keep an eye on the weather forecast throughout the winter season. If a cold snap or freeze is expected, take additional precautions, such as running the sprinkler system for a short period of time to prevent freezing or covering the entire system with a sprinkler system cover.
9. Spring startup
When the winter season is over and temperatures start to rise, it’s time to start up your sprinkler system. Before doing so, remove any insulation and covers, reattach the accessories, and slowly turn on the water supply. Check the system for any leaks or issues and make any necessary repairs before fully using it.
With these steps, you can effectively winterize your sprinkler system without the need for an air compressor. By taking the time to properly prepare your system for the winter, you can ensure its longevity and avoid expensive repairs in the future.
Tools and Materials needed
Tape measure

Use a tape measure to measure the distance from the main water shutoff valve to the sprinkler system. This will help you determine the length of pipe needed for the winterization process.
Pipe cutter
A pipe cutter is necessary to cut the PVC pipes in your sprinkler system. This tool allows for clean and precise cuts, ensuring that the pipes can be easily reassembled when spring comes.
PVC pipe fittings
Make sure to have an assortment of PVC pipe fittings on hand. These fittings will be used to connect the PVC pipes, valves, and other components of the sprinkler system. It’s important to choose fittings that are compatible with your specific system.
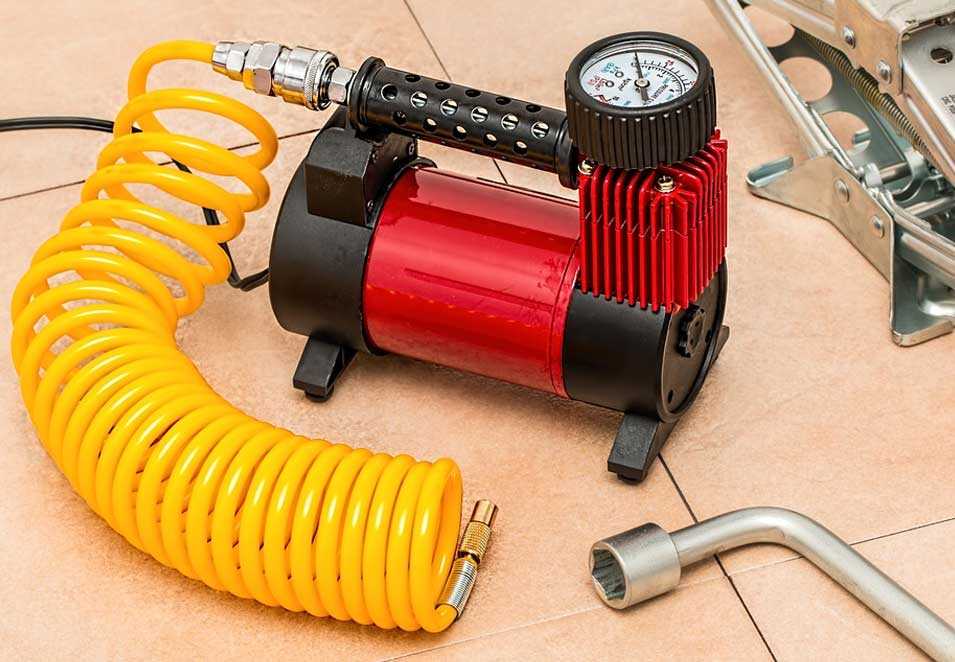
Blowout plug or sprinkler system tubing
If you don’t have an air compressor, you’ll need either a blowout plug or special tubing designed for winterizing sprinkler systems. The blowout plug screws into the sprinkler system’s blowout port, while the tubing can be attached to the system’s drain valve.
Bucket or large container
Having a bucket or large container on hand will make it easier to collect any water that may come out of the sprinkler system during the winterization process. This will help prevent water damage to your property and ensure a thorough winterization.
Adjustable wrench
An adjustable wrench is a versatile tool that will come in handy when working with nuts and bolts in your sprinkler system. This tool allows you to tighten or loosen fittings as needed during the winterization process.
Pipe sealant tape
To create a watertight seal, use pipe sealant tape on all threaded connections in your sprinkler system. This will prevent any leaks or drips from occurring and ensure a successful winterization.
Owner’s manual
Always refer to the owner’s manual for your specific sprinkler system to ensure you’re following the correct winterization steps. The manual will provide detailed instructions and may include specific tools or materials that are required for your system.
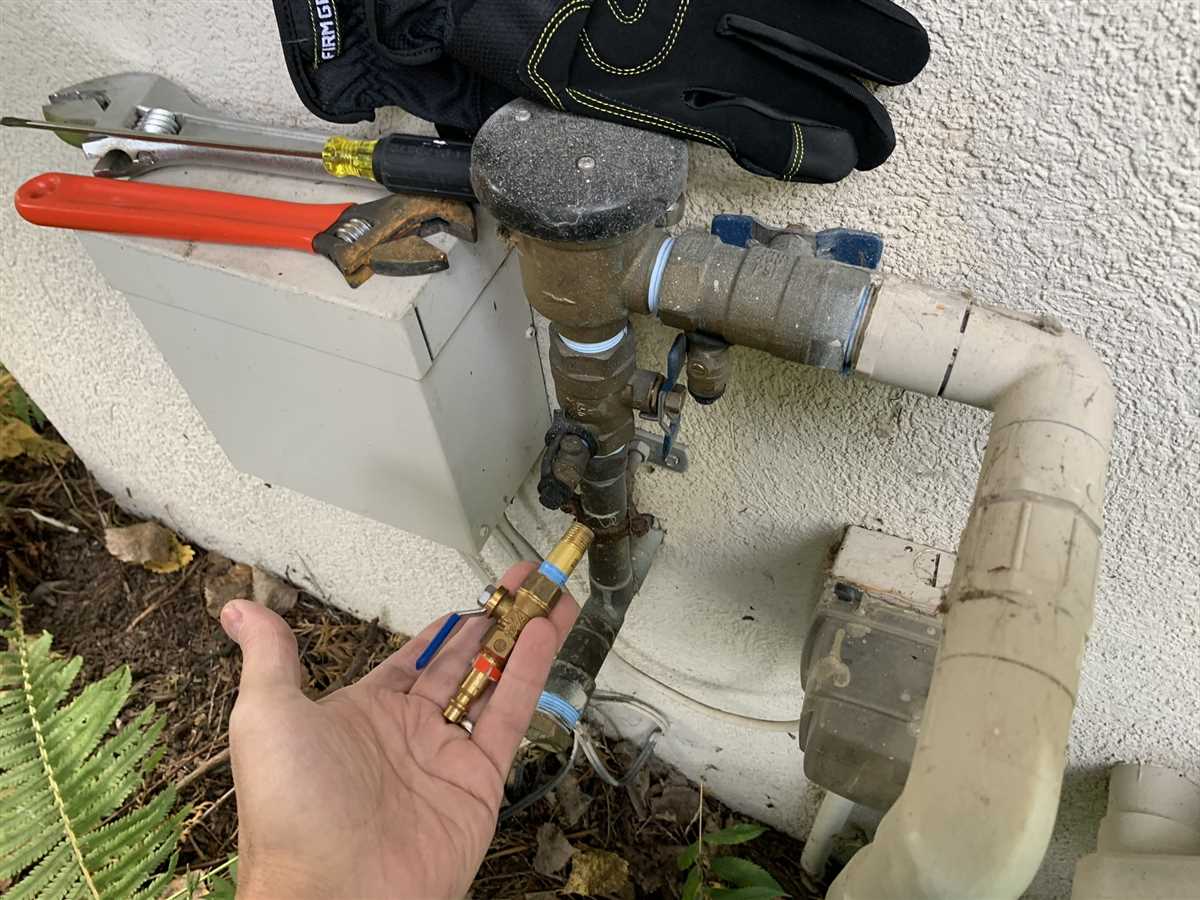
Drain the Water from the System
One of the most important steps to winterize your sprinkler system without using an air compressor is to drain all the water from the system. Water left inside the pipes can freeze and cause damage. Here are the steps you need to follow to drain the water:
- Shut off the water supply: Locate the main shut-off valve for your sprinkler system and turn it off. This will stop the flow of water to the system.
- Open the drains: Find the drain valves on your sprinkler system and open them. These are usually located at the lowest points of the system. By opening the valves, you will allow the water to drain out of the pipes.
- Use manual drain valves: If your sprinkler system has manual drain valves, make sure to open them as well. These valves are typically located near the backflow preventer. Opening them will allow any remaining water to be drained.
- Release pressure: To ensure all the water is drained, you may need to release any pressure in the system. You can do this by activating a few sprinkler heads or opening the test cocks on the backflow preventer.
- Monitor the draining process: Keep an eye on the drains and valves to ensure that the water is flowing out properly. If you notice any areas where water is not draining, it may indicate a blockage in the system that needs to be addressed.
By following these steps, you can effectively drain the water from your sprinkler system and protect it from winter damage. It is recommended to perform this winterization process before the first freeze of the season to ensure the best results.
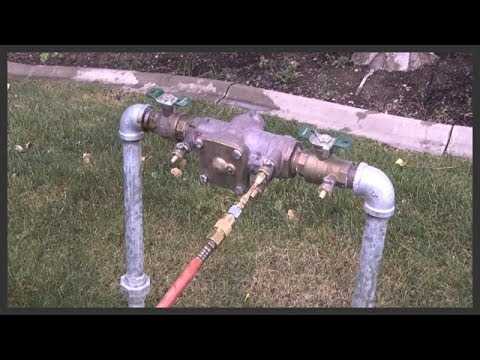
Clear the Sprinkler Lines
When winterizing your sprinkler system without using an air compressor, it is important to clear the sprinkler lines of any water to prevent freezing and potential damage. There are several methods you can use to achieve this.
- Drain the water manually: Start by closing the main water valve that supplies water to your sprinkler system. Next, open each zone valve manually to relieve any pressure and allow the water to drain out. You can do this by locating the solenoid valve for each zone and twisting it counterclockwise. Be sure to have a bucket or hose nearby to catch the water.
- Use a drain valve: If your sprinkler system has a drain valve, this can be a convenient method for clearing the lines. Simply locate the drain valve, which is usually located at the lowest point in the system, and open it to allow the water to flow out. Keep in mind that this may take some time, so be patient and ensure that all the water has completely drained out.
- Blow out the lines with a shop vacuum: If you have a wet/dry shop vacuum with a blow function, you can use it to blow out the water from the sprinkler lines. Attach the vacuum hose to the drain valve or zone valve and set the vacuum to blow mode. Gradually increase the power until the water is forced out of the lines. This method may require multiple attempts, especially for larger systems.
- Use a manual pump or siphon: Another option is to use a manual pump or siphon to remove the water from the sprinkler lines. This method may take more time and effort, but it can be effective for smaller systems. Attach the pump or siphon to the drain valve or zone valve and manually pump or suction out the water until the lines are clear.
Insulate the System
Insulating the sprinkler system is an important step in winterizing it without using an air compressor. This will help protect the system from freezing temperatures and potential damage. There are several ways to insulate the system:
- Wrap exposed pipes: Use insulation sleeves or foam pipe wrap to cover any exposed pipes. This will help prevent heat loss and keep the pipes from freezing.
- Insulate the backflow preventer: The backflow preventer is a critical component of the sprinkler system and should be properly insulated. Use a backflow preventer insulation cover to protect it from freezing.
- Protect the valves: Insulate the valves by wrapping them with insulation tape or using valve covers. This will help keep the valves from freezing and causing damage to the system.
Use heat cables: For added protection, consider installing heat cables along the pipes and backflow preventer. These cables are designed to provide heat and prevent freezing.
Disconnect and drain: Before insulating the system, make sure to disconnect and drain all water from the sprinkler system. This will help reduce the risk of freezing and damage to the pipes.
By properly insulating the sprinkler system, you can ensure its protection during the winter months without the need for an air compressor. It is important to follow these steps to avoid any potential damage and costly repairs.
Final Steps and Maintenance Tips
1. Inspect the System Regularly
After winterizing your sprinkler system, it’s important to regularly inspect it for any potential issues. Check for leaks, broken or damaged components, and make any necessary repairs or replacements. This will help ensure that your system is in good working condition when you need it again in the spring.
2. Remove any Debris
Clearing away any debris that may have accumulated in and around your sprinkler system is essential for maintaining its functionality. Leaves, grass clippings, and other debris can block water flow and cause damage to the system. Use a broom or leaf blower to clear the area around the sprinkler heads and ensure that they are free from obstruction.
3. Adjust and Clean the Sprinkler Heads
Periodically, adjust the sprinkler heads to ensure they are spraying water evenly and in the desired direction. Clean any clogged or dirty sprinkler heads to maintain optimal water distribution. This will help prevent uneven watering and ensure that your plants receive the necessary hydration.
4. Check the Water Pressure
Monitoring the water pressure in your sprinkler system is important for its proper functioning. Use a pressure gauge to check the pressure and make any necessary adjustments. High water pressure can damage the sprinkler components, while low pressure may result in inadequate water distribution. Aim for a pressure within the recommended range for your specific system.
5. Schedule Regular Maintenance
Consider scheduling professional maintenance for your sprinkler system at least once a year. A professional can perform a thorough inspection, make any necessary repairs or adjustments, and ensure that your system is working at its best. Regular maintenance will help extend the lifespan of your sprinkler system and keep it functioning efficiently.
6. Drain the System in the Fall
Before the winter season arrives, be sure to drain your sprinkler system to prevent any remaining water from freezing and causing damage. Refer to the manufacturer’s instructions or consult a professional for the proper drainage procedure. By taking this step, you’ll be prepared to winterize your system without the need for an air compressor when the time comes again.
FAQ:
What is the importance of winterizing a sprinkler system?
Winterizing a sprinkler system is important because it protects the system from freezing temperatures, which can cause serious damage to the pipes, valves, and other components. By properly winterizing the system, you can prevent costly repairs and ensure that it is ready to use again in the spring.
Do I need to use an air compressor to winterize my sprinkler system?
No, you don’t necessarily need to use an air compressor to winterize your sprinkler system. There are alternative methods that can be just as effective and easier to use, such as using a manual drain valve or a blow-out plug.
What is a manual drain valve and how does it work?
A manual drain valve is a valve that is installed at the lowest point of the sprinkler system. To use it, you simply turn off the water supply to the system and then open the valve to drain the water out. This allows you to remove most of the water from the system, preventing it from freezing and causing damage.
What is a blow-out plug and how does it work?
A blow-out plug is a fitting that is screwed into the sprinkler system’s inlet and allows you to blow compressed air through the system to remove any remaining water. To use it, you connect an air compressor to the plug and then use the compressor to blow out the water. This method can be effective in removing all the water from the system.
Are there any other steps to winterize a sprinkler system without using an air compressor?
Yes, there are a few additional steps you can take to ensure that your sprinkler system is fully winterized. These include insulating any exposed pipes, turning off the water supply to the system, and draining any water from the backflow prevention device. By following these steps, you can further protect your system from freezing temperatures.
Is it possible to winterize a sprinkler system without hiring a professional?
Yes, it is possible to winterize a sprinkler system without hiring a professional. With the right tools and knowledge, homeowners can effectively winterize their own sprinkler systems using alternative methods that don’t require an air compressor. However, if you’re unsure or uncomfortable with the process, it’s always best to consult a professional to ensure that it’s done correctly.
How often should a sprinkler system be winterized?
A sprinkler system should be winterized once a year, before the first freeze of the season. This is typically done in late fall or early winter, depending on your region. By winterizing your sprinkler system annually, you can prevent damage and extend the lifespan of the system.
Video:


Meet Harrison Clayton, a distinguished author and home remodeling enthusiast whose expertise in the realm of renovation is second to none. With a passion for transforming houses into inviting homes, Harrison's writing at https://thehuts-eastbourne.co.uk/ brings a breath of fresh inspiration to the world of home improvement. Whether you're looking to revamp a small corner of your abode or embark on a complete home transformation, Harrison's articles provide the essential expertise and creative flair to turn your visions into reality. So, dive into the captivating world of home remodeling with Harrison Clayton and unlock the full potential of your living space with every word he writes.


