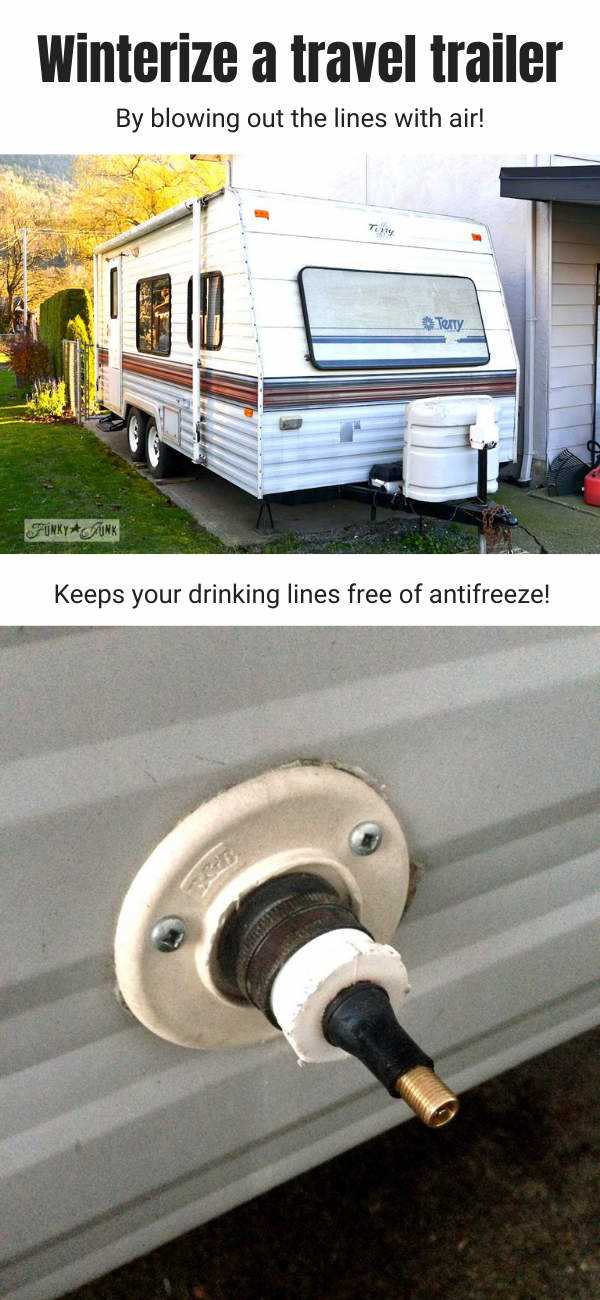
How to Winterize Your RV: Blowing Out Water Lines with an Air Compressor

As winter approaches, it’s essential to take the necessary steps to protect your RV from potential damage caused by freezing temperatures. One of the most important tasks in winterizing your RV is blowing out the water lines. This process helps prevent any trapped water from freezing and expanding, which can lead to cracked pipes and costly repairs.
Using an air compressor is an effective and efficient way to blow out the water lines in your RV. By creating a high-powered stream of air, you can remove any water that may be lurking in the pipes, ensuring a dry and protected system during the winter months.
Before you begin the blowing out process, it’s crucial to ensure that your RV is properly prepared. This includes draining all tanks, including the fresh water, gray water, and black water tanks. It’s also important to open all faucets and valves, including the hot water heater, to release any remaining water.
Once your RV is prepped, you can connect the air compressor to the city water inlet using a blow-out plug or adapter. It’s recommended to set the pressure on the air compressor to around 30-50 PSI to avoid damaging the RV’s plumbing system. Starting with the faucet that is furthest from the water inlet, open it and let the compressed air flow through until all the water has been expelled. Repeat this process for each faucet and toilet until there is no more water coming out.
By properly blowing out the water lines in your RV using an air compressor, you can ensure that your RV’s plumbing system stays protected and in good working condition throughout the winter season. Don’t forget to also take other necessary winterization steps, such as insulating exposed pipes and removing any water filters or cartridges. With these precautions in place, you can rest easy knowing that your RV is ready to withstand the cold temperatures and avoid costly repairs in the spring.

Winterizing Your RV: Step-by-Step Guide with an Air Compressor
Gather Your Supplies
Before you begin the winterizing process, gather all the necessary supplies. You will need an air compressor with a regulated pressure gauge, RV antifreeze, a water heater bypass kit, a water pump converter kit, and a blowout plug. It is also a good idea to have a set of wrenches and a screwdriver handy.
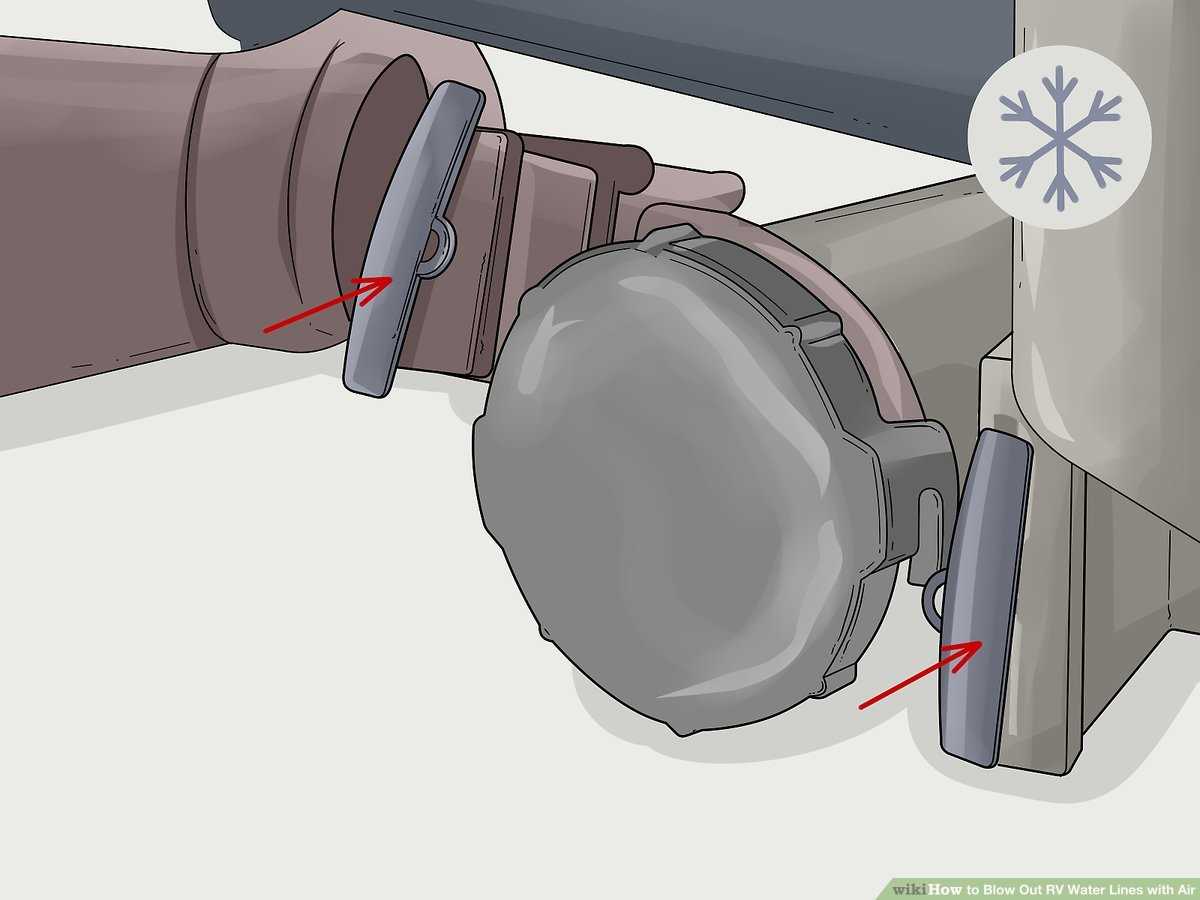
Drain and Bypass the Water Heater
The first step in winterizing your RV is to drain and bypass the water heater. Turn off the water heater and disconnect any power or gas sources. Open the pressure relief valve and carefully open the drain valve to allow the water to drain completely. Once the water has drained, close the drain valve and install the water heater bypass kit to prevent any remaining water from entering the tank.
Blow Out the Water Lines
Next, it’s time to blow out the water lines using an air compressor. Connect the blowout plug to the city water inlet on your RV and set the air compressor to a regulated pressure of around 30-40 PSI. Begin opening the faucets one by one, starting from the highest point in your RV and working your way down. Allow the compressed air to blow out any remaining water from the lines until no more water comes out.
Add RV Antifreeze
Once the water lines are blown out, it’s time to add RV antifreeze to protect against any remaining water in the system. Pour the antifreeze into the fresh water holding tank or use a hand pump to pump it into the lines. Start with the faucets farthest from the pump and open them one by one until the pink antifreeze comes out. Repeat this process for all the faucets, including the shower, toilet, and outdoor shower.

Protect the Water Pump
To protect the water pump from freezing, install a water pump converter kit. This kit allows you to pump RV antifreeze directly into the water pump. Disconnect the inlet side of the pump and connect it to the kit, then insert the hose into a bottle of antifreeze. Turn on the pump and open the faucets one by one until the pink antifreeze comes out.
Finish Up
Once you have completed the above steps, it’s important to double-check that all the faucets are closed and the drain valves are shut. Dispose of any leftover antifreeze properly and make sure you have removed all water filters. Finally, disconnect any external water connections and ensure all valves and drains are closed tightly. Your RV is now properly winterized and ready for the cold weather.
Understanding the Importance of Winterizing
Winterizing your RV is an essential step in ensuring its longevity and performance. When the temperatures drop below freezing, there is a risk of water freezing in the pipes and tanks of your RV. This can lead to costly damage, such as burst pipes and cracked tanks.
By winterizing your RV, you are taking proactive measures to protect it from the potential damage that freezing temperatures can cause. It involves removing any water from the system and adding antifreeze to prevent freezing. Winterizing your RV is especially crucial if you live in an area that experiences cold winters or if you plan on storing your RV during the winter months.
One of the main reasons to winterize your RV is to prevent water damage. When water freezes, it expands, which can put a significant amount of pressure on the pipes and tanks. This pressure can cause the pipes to burst or the tanks to crack, leading to leaks and potentially costly repairs. Winterizing your RV helps to ensure that water is removed from the system, reducing the risk of freezing and subsequent damage.
Another important reason to winterize your RV is to protect the plumbing system. Water freezing in the pipes can not only cause them to burst, but it can also lead to blockages and damage to valves and fittings. By properly winterizing your RV, you can prevent these issues and maintain the integrity of your plumbing system.
Winterizing your RV is also a crucial step in protecting your investment. RVs are a significant financial investment, and taking the time to winterize it can prolong its lifespan and value. By preventing damage from freezing temperatures, you are ensuring that your RV will be in good condition for many years to come.
In conclusion, understanding the importance of winterizing your RV is essential for ensuring its longevity, preventing water damage and plumbing issues, and protecting your investment. Taking the time to properly winterize your RV can save you from costly repairs and allow you to enjoy your RV for years to come.
Gathering the Necessary Supplies
Before you begin the process of blowing out the water lines in your RV, it is important to gather all the necessary supplies. Having everything organized and readily available will make the winterization process much smoother and more efficient.

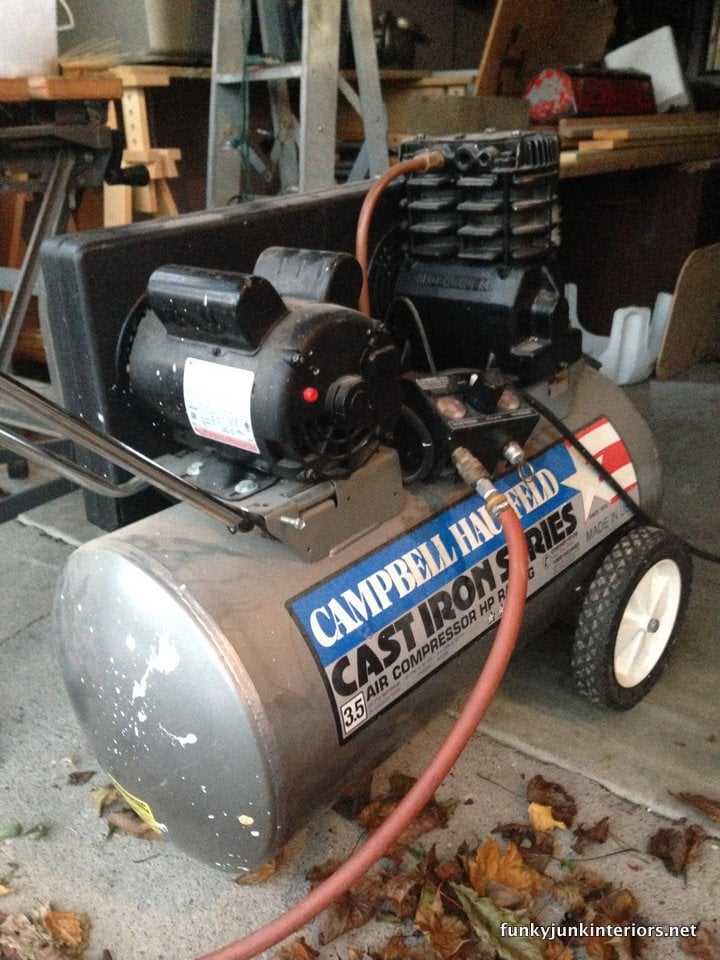
Air Compressor
The most crucial tool you will need is an air compressor. Make sure it has enough power to generate at least 35-40 psi of air pressure. This will be sufficient to blow out the water lines in your RV.
Air Line Fitting
To connect the air compressor to your RV’s water system, you will need an air line fitting. This fitting should match the type of connection on your RV, whether it’s a quick-connect fitting or a threaded fitting.
RV Water Heater Bypass Kit
To properly winterize your RV, you will need to bypass the water heater. This can be done using an RV water heater bypass kit. These kits typically include valves and connectors that allow you to redirect the flow of water away from the water heater.
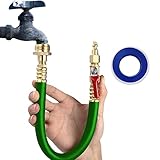
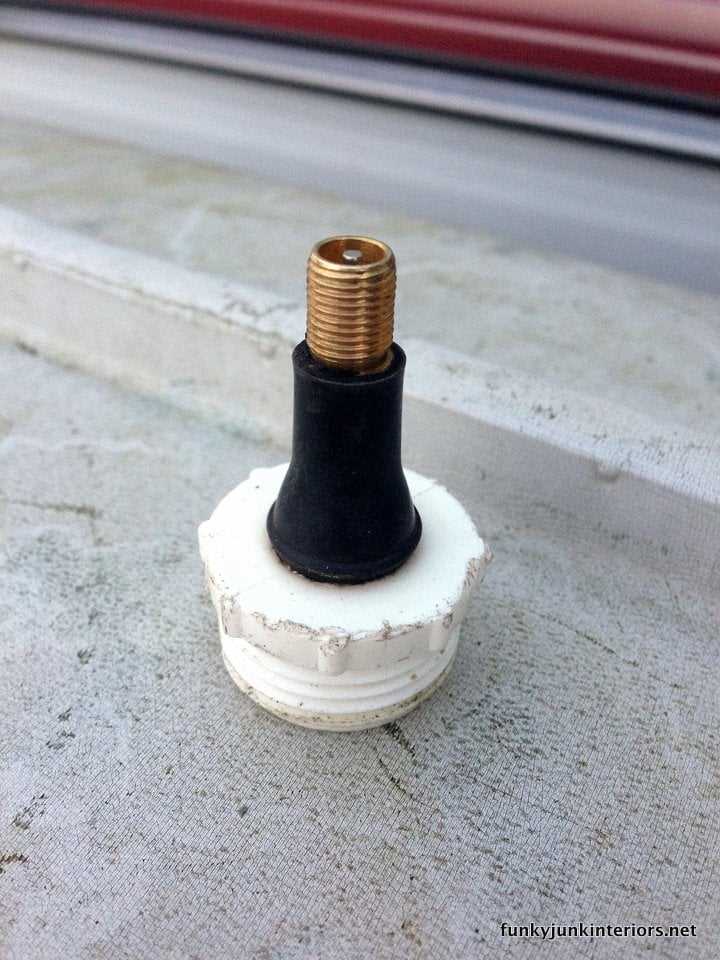
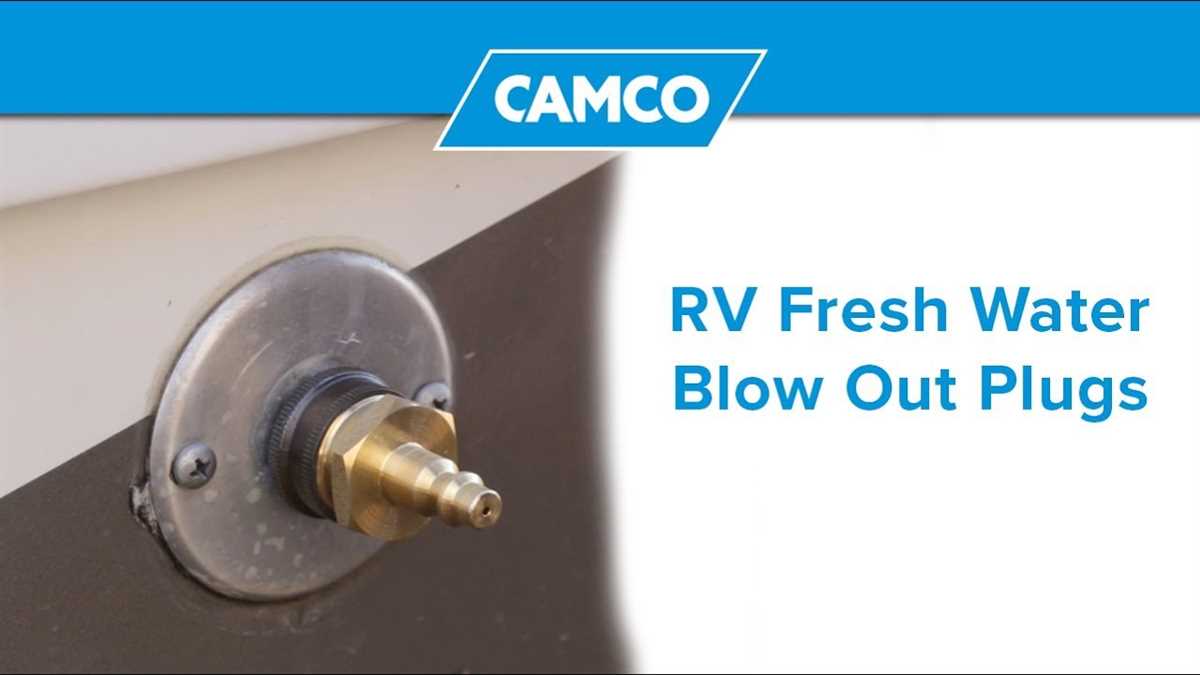
Blow Out Plug
A blow out plug is another essential tool for winterizing your RV. It screws into the city water inlet on your RV and provides a connection point for the air compressor. It is important to choose a blow out plug that is compatible with the inlet on your RV.
RV Antifreeze

Although this method focuses on blowing out the water lines, it is still important to use RV antifreeze in certain areas of your RV’s plumbing system. Make sure to have enough RV antifreeze on hand to complete the winterization process.
By gathering all these necessary supplies, you will be well-prepared to winterize your RV and protect it from any potential damage during the cold winter months.
Draining the Freshwater Tank
Draining the freshwater tank is an essential step in winterizing your RV. To prevent any potential damage from freezing temperatures, it is crucial to properly empty the tank. Here are the steps to drain the freshwater tank:
- Turn off the water supply: Before starting the draining process, make sure to turn off the water supply to the RV. This will prevent any new water from entering the tank while you are trying to drain it.
- Locate the drain valve: The freshwater tank will have a drain valve typically located at the bottom of the tank. It may be labeled, so look for a valve or lever that is easily accessible.
- Prepare a container: Place a container or bucket underneath the drain valve to catch the water as it comes out. This will prevent any mess and allow for easy disposal.
- Open the drain valve: Use a wrench or pliers if necessary to open the drain valve. Be cautious as the water may come out with some force. Allow the tank to completely empty into the container.
- Flush the tank: After the tank is drained, it is a good idea to flush it with clean water. This will help remove any remaining particles or debris. You can do this by filling the tank with water, then draining it again.
Following these steps will ensure that your freshwater tank is properly drained and ready for winter storage. It is important to note that the drained water should be disposed of properly to comply with local regulations.
Flushing and Cleaning the Water Lines
Flushing and cleaning the water lines in your RV is an essential step in winterizing your vehicle. This ensures that all the water is removed from the pipes and tanks, preventing any potential freezing and damage.
To begin, you will need to drain the fresh water tank completely. This can be done by opening the drain valve and letting all the water flow out. Make sure to also open all faucets and valves to allow for complete drainage.
Once the tank is empty, it is recommended to flush the water lines with a mixture of clean water and RV antifreeze. You can do this by connecting a hose to the input side of your water pump and placing the other end into a bucket filled with the antifreeze solution. Turn on the pump and run each faucet until the antifreeze starts to come out. This ensures that the entire water line system is filled with antifreeze.
After the antifreeze has run through the lines, make sure to flush the system again with clean water. This will remove any remaining antifreeze and prepare the system for use in the spring. You can do this by connecting the hose to a water source and running it through each faucet until the water runs clear.
Lastly, don’t forget to clean and sanitize the water lines. This can be done by using a RV-specific water line cleaner and following the instructions on the product. Cleaning the lines will help remove any residue or build-up, ensuring that your water is fresh and safe to use.
By properly flushing and cleaning the water lines in your RV, you can ensure that your vehicle is protected during the winter months and ready for use when spring comes around.
Adding Antifreeze to Your Plumbing System
When winterizing your RV, it is important to add antifreeze to your plumbing system to prevent the water lines from freezing and causing damage. Antifreeze acts as a protective barrier, ensuring that your pipes and fixtures remain intact during the cold winter months.
Prepare the Antifreeze
Before adding antifreeze to your plumbing system, make sure you choose the correct type for your RV. It is recommended to use non-toxic antifreeze specifically designed for RV use. This type of antifreeze is safe for your plumbing system and won’t harm the environment.
Close Water Supply Valves
Prior to adding antifreeze, it is crucial to close all water supply valves and drain the water from your plumbing system. This includes turning off the main water supply valve and opening all faucets and drains to allow any remaining water to flow out.
Start Adding Antifreeze
Once your RV’s plumbing system is drained, you can begin adding antifreeze. Attach a hose to the antifreeze container and connect it to the RV’s water inlet. Slowly pour the antifreeze into the inlet until it reaches all the faucets, toilet, and shower.
Run the Faucets
After the antifreeze has been added, turn on each faucet one by one, including the shower and toilet, until you see antifreeze coming out. This ensures that all the water lines are filled with antifreeze and there is no remaining water that could freeze and cause damage.
Flush the Toilet
Don’t forget to flush the toilet with antifreeze as well. Simply pour antifreeze into the toilet bowl and flush repeatedly until you see the antifreeze in the toilet trap. This step is important to protect your RV’s toilet from freezing and cracking.
Final Steps
After adding antifreeze to your plumbing system, make sure to close all the faucets and valves. You can also consider adding antifreeze to your holding tanks, as they can also be susceptible to freezing. Additionally, it is a good idea to label all faucets and drains with a clear indication that they have been winterized with antifreeze.
By following these steps and adding antifreeze to your plumbing system, you can ensure that your RV is properly protected from freezing temperatures during the winter season. This will help prevent costly repairs and ensure that your RV is ready for use when spring arrives.
Protecting your RV’s Exterior
1. Clean and Wax
One of the best ways to protect your RV’s exterior is to regularly clean and wax it. This helps to remove dirt, debris, and road grime that can cause damage to the paint and finish. Use a gentle cleanser and a soft cloth or sponge to clean the surface, and then apply a high-quality wax to provide a protective barrier. This will help to prevent oxidation, fading, and other forms of damage from the elements.
2. Cover it Up
Another way to protect your RV’s exterior is to cover it with a specially designed RV cover. These covers are made from durable materials that are resistant to UV rays, moisture, and other environmental factors. They provide a barrier between your RV and the elements, helping to prevent damage from sun exposure, rain, snow, and more. Make sure to choose a cover that fits your RV properly and secure it tightly to prevent any movement or damage.
3. Seal the Seams
RVs have seams and joints where water can penetrate and cause damage. To protect your RV’s exterior from water damage, it’s important to regularly inspect and seal these seams. Use a high-quality silicone sealant to fill in any cracks or gaps, paying special attention to areas around windows, doors, vents, and other openings. This will help to prevent water from seeping in and causing rot, mold, or other forms of damage.
4. Protect the Tires
Don’t forget to protect your RV’s tires, as they are an important part of its exterior. Keep your tires properly inflated to prevent excessive wear and cracking, and regularly inspect them for any signs of damage or deterioration. Use tire covers to protect them from UV rays and other environmental factors when the RV is not in use. This will help to prolong the life of your tires and ensure they are in good condition when you’re ready to hit the road.
5. Keep it Clean
Maintaining a clean exterior is essential in protecting your RV from the elements. Regularly wash your RV with soap and water to remove dirt, bird droppings, and other debris that can cause damage over time. Pay attention to the roof, awnings, and other hard-to-reach areas, as they are prone to collecting dirt and debris. Additionally, keep the gutters and drainage system clear to prevent water buildup and potential damage.
In conclusion, protecting your RV’s exterior requires regular cleaning, waxing, covering, sealing, and tire maintenance. These measures will help to prevent damage from dirt, UV rays, water, and other environmental factors, ensuring that your RV stays in top condition for years to come.
Preparing the Interior for Winter
Before winterizing your RV, it is important to prepare the interior to ensure that everything is protected from the cold temperatures. Here are some steps you should take:
1. Empty and Clean the Refrigerator
Start by removing all the food from the refrigerator and freezer compartments. Throw away any perishable items and clean the interior of the fridge thoroughly. Leave the doors open to prevent any mold or mildew from forming.
2. Remove All Food and Toiletries
Take out any food, toiletries, and other perishable items from the cabinets and storage areas. Dispose of any expired goods and clean the shelves and compartments.
3. Clean and Dry the Plumbing System
Flush out all the water from the plumbing system to prevent freezing and potential damage. Start by draining the fresh water tank and water heater. Then, open all faucets and flush the toilet until no more water flows out. Use compressed air to blow out any remaining water in the lines.
4. Insulate Windows and Doors
To prevent cold drafts and heat loss, you should insulate the windows and doors of your RV. Use weatherstripping tape to seal any gaps and cracks. You can also cover the windows with thermal curtains or install insulated window coverings.
5. Protect the Upholstery and Flooring
Cover the furniture and upholstery with plastic covers or sheets to protect them from dust and moisture. Remove any carpets or rugs that could be damaged by water or freezing temperatures. Make sure the flooring is clean and dry before covering it with protective mats or rugs.
By taking these steps to prepare the interior of your RV for winter, you can ensure that it stays protected and in good condition during the colder months. Remember to also check the exterior and perform any necessary maintenance before storing your RV for an extended period.
Storing Your RV for the Winter
When the winter season approaches, it’s important to properly store your RV to protect it from the harsh weather conditions. Here are some tips on how to store your RV for the winter:
1. Clean and prepare your RV
Before storing your RV, make sure to thoroughly clean both the interior and exterior. Remove all food items, clean the appliances, and empty and clean the holding tanks. It’s also a good idea to apply a protective wax on the exterior to prevent damage from the winter elements.
2. Check for leaks and repairs
Inspect your RV thoroughly for any leaks or damages that need to be repaired. Check the roof, windows, and seals for any signs of water infiltration. Repair any leaks or damages before storing your RV to prevent further issues during the winter months.
3. Empty and winterize the water system

Drain the water system completely and add antifreeze to prevent any remaining water from freezing and causing damage. This includes draining and winterizing the water heater, plumbing lines, and black and gray tanks. Follow the manufacturer’s instructions or consult a professional for proper winterization procedures.
4. Protect the tires and battery
Properly inflate the tires and cover them to protect them from the cold and prevent flat spots. If possible, store the RV on blocks or use tire covers to elevate the tires off the ground. Disconnect and remove the battery, and store it in a cool and dry location, periodically checking its charge to prevent it from draining completely.
5. Choose a suitable storage location
Find a secure and covered storage facility or park your RV in a dry, well-ventilated area. Make sure the storage location is protected from harsh weather conditions, such as extreme cold or excessive moisture. Consider using a breathable cover to protect the RV from dust and debris.
6. Perform regular maintenance checks
During the winter months, make sure to periodically check on your stored RV. Inspect for any signs of pests, water leaks, or damage. Start the engine and run it for a few minutes to keep it in good working condition. It’s also a good idea to rotate the tires every few months to prevent flat spots.
By following these steps, you can ensure that your RV is properly stored and protected during the winter season. When spring arrives, you’ll be ready to hit the road again with a well-maintained and ready-to-use RV!
FAQ:
What is the purpose of winterizing an RV?
The purpose of winterizing an RV is to protect the water lines and plumbing system from freezing temperatures that can cause them to burst.
Can I use antifreeze to winterize my RV instead of blowing out the water lines?
Yes, you can use antifreeze to winterize your RV, but blowing out the water lines with an air compressor is a more thorough and effective method.
How do I know if I have blown out all the water lines in my RV?
You can check if you have blown out all the water lines in your RV by opening all the faucets and drains and ensuring that no water is coming out. You can also use an air pressure gauge to test the pressure in the lines.
What should I do if I don’t have an air compressor to blow out the water lines in my RV?
If you don’t have an air compressor, you can use a hand pump or a portable pump to blow out the water lines. However, an air compressor is the most efficient tool for this task.
Video:


Harrison Clayton
Meet Harrison Clayton, a distinguished author and home remodeling enthusiast whose expertise in the realm of renovation is second to none. With a passion for transforming houses into inviting homes, Harrison's writing at https://thehuts-eastbourne.co.uk/ brings a breath of fresh inspiration to the world of home improvement. Whether you're looking to revamp a small corner of your abode or embark on a complete home transformation, Harrison's articles provide the essential expertise and creative flair to turn your visions into reality. So, dive into the captivating world of home remodeling with Harrison Clayton and unlock the full potential of your living space with every word he writes.


