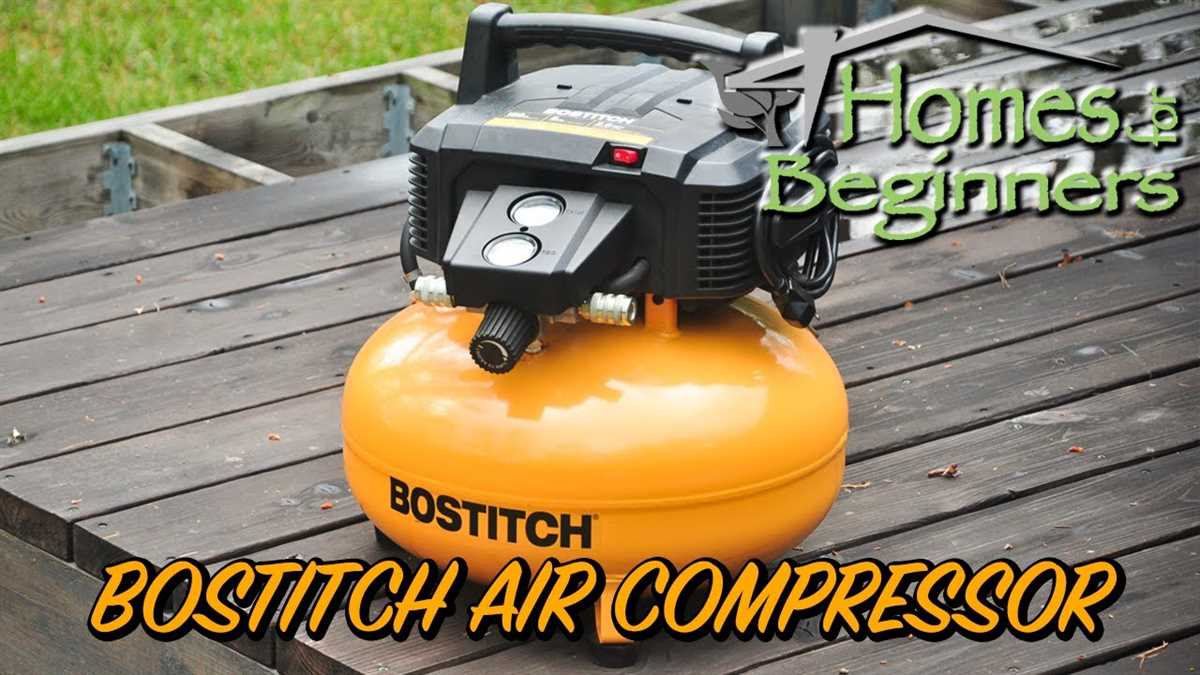
How to Use a Bostitch Air Compressor: A Step-by-Step Guide

If you have recently purchased a Bostitch air compressor or you are simply looking to learn how to operate one, you have come to the right place. Bostitch air compressors are known for their durability and reliability, making them a popular choice among professionals and DIY enthusiasts alike. In this step-by-step guide, we will walk you through the process of properly using a Bostitch air compressor, ensuring that you get the most out of your investment.
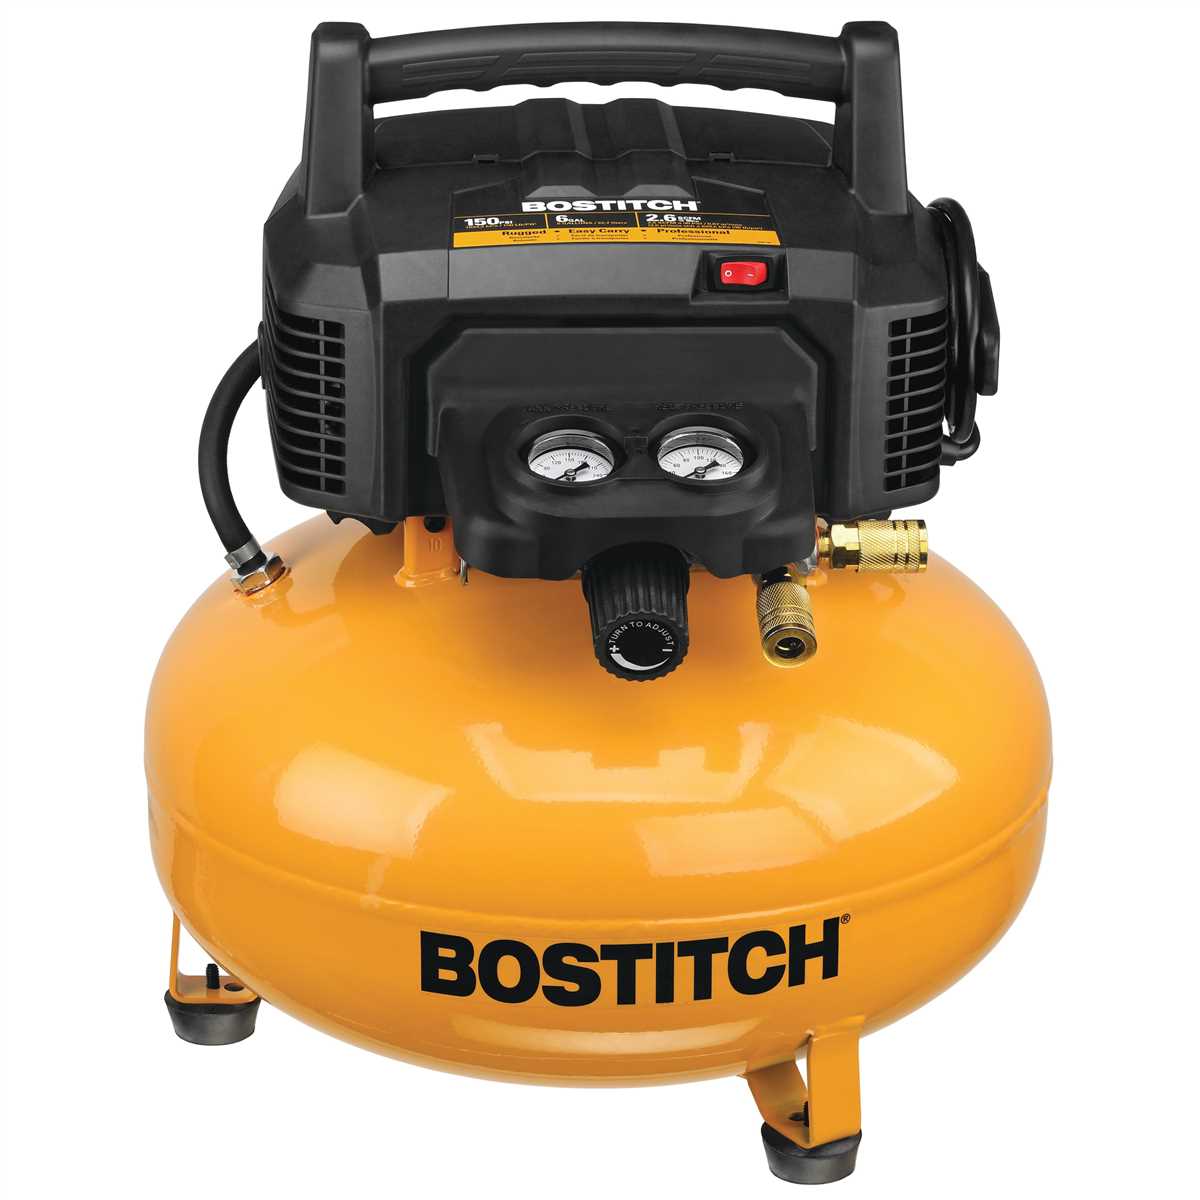
The first step in using a Bostitch air compressor is to familiarize yourself with its various components. These may include the air tank, pressure gauge, on/off switch, regulator knob, and air hose. It is important to know the location and function of each of these parts before attempting to operate the compressor. The user manual that came with your Bostitch air compressor will provide detailed information on each component, so be sure to consult it if you have any questions.
Once you are familiar with the components of your Bostitch air compressor, the next step is to prepare it for use. Start by checking the oil level and adding more if necessary. It is important to use the recommended oil for your specific model, as this will ensure proper lubrication and prevent damage to the compressor. Additionally, make sure that the air tank is drained of any condensation, as this can affect the performance of the compressor. Finally, connect the air hose to the compressor and ensure that all connections are secure.
Step 1: Familiarize Yourself with the Bostitch Air Compressor
Before using the Bostitch Air Compressor, it is important to become familiar with its components and features. This will ensure that you can operate the compressor safely and effectively.

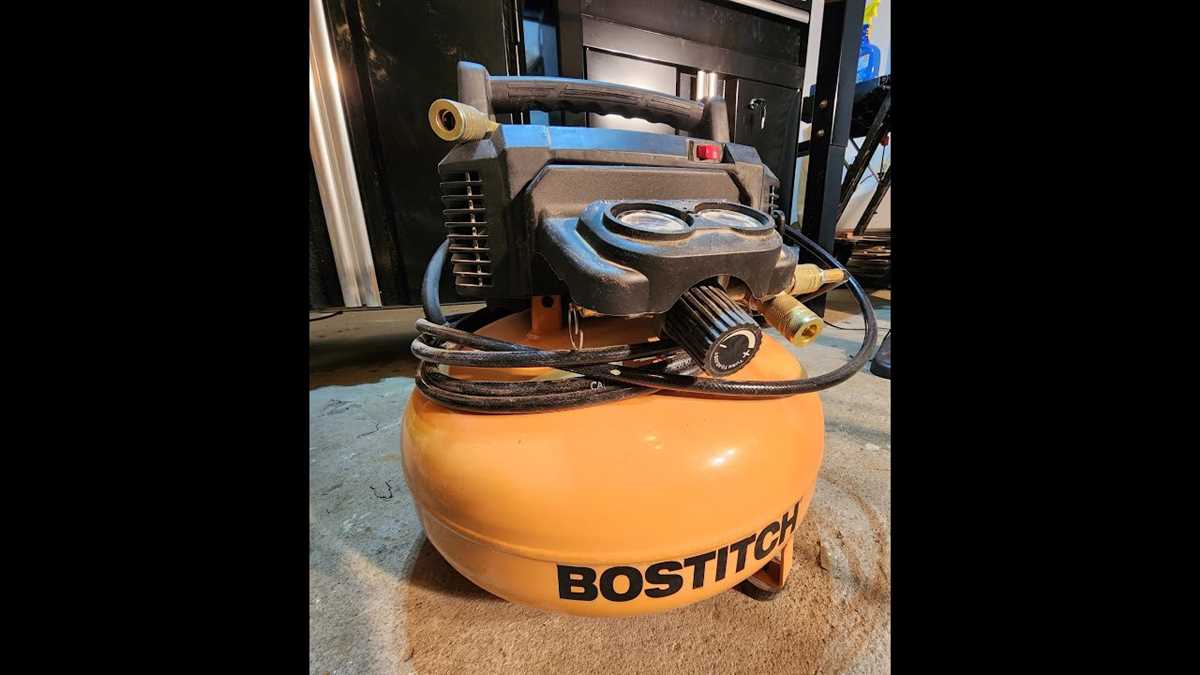
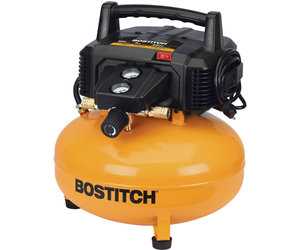
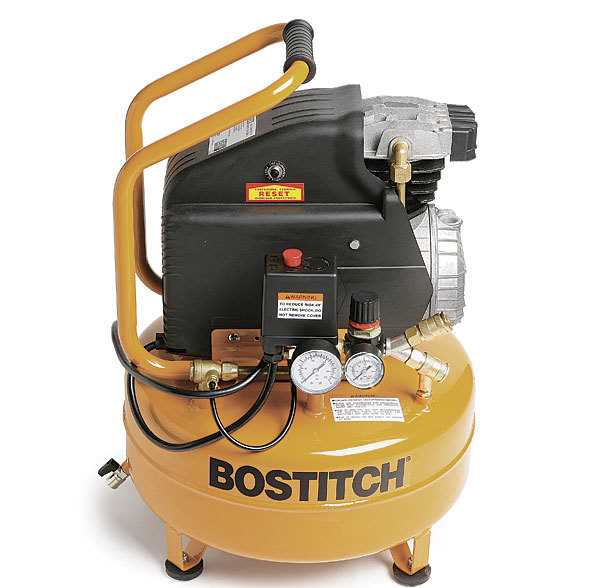
1.1 Identify the main parts of the Bostitch Air Compressor
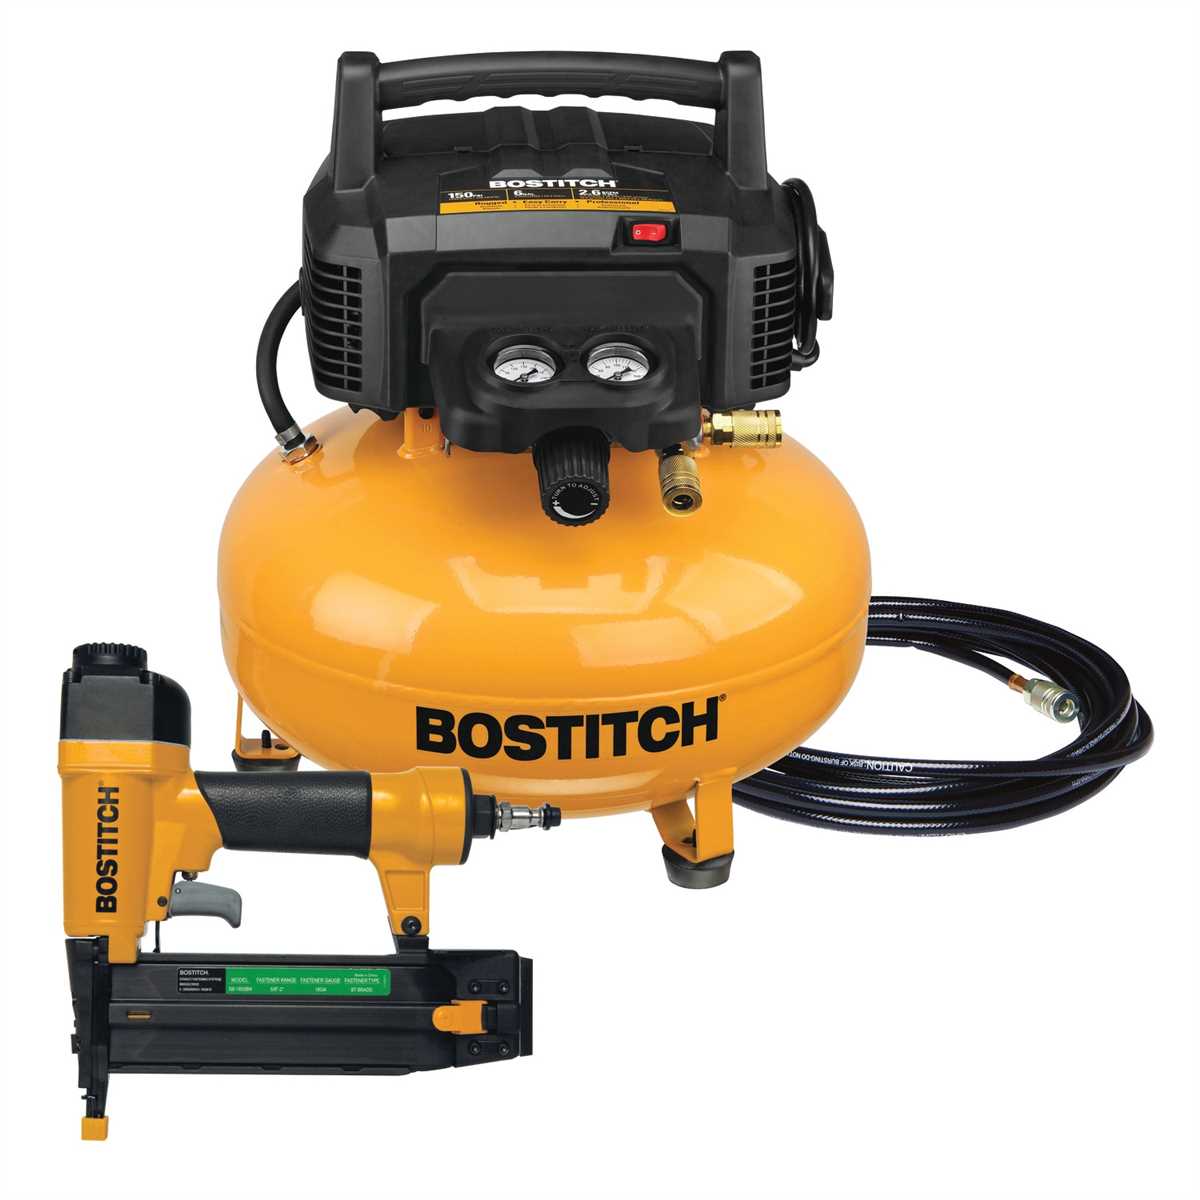
Take a few moments to identify the main parts of the Bostitch Air Compressor. These include the tank, motor, pressure gauge, regulator, on/off switch, and outlet. Understanding the function of each part is essential for proper operation of the compressor.
1.2 Understand the safety precautions

Prior to using the Bostitch Air Compressor, it is crucial to familiarize yourself with the safety precautions. These may include wearing safety goggles, gloves, and ear protection, as well as ensuring proper ventilation in the workspace. Additionally, make sure to read and understand the user manual, which will provide detailed safety instructions.
1.3 Learn about the compressor’s specifications
Take the time to review the Bostitch Air Compressor’s specifications. This includes information such as the maximum pressure it can reach, the type of power it requires, and the recommended operating temperature. Understanding these specifications will help you maximize the performance and longevity of the compressor.

1.4 Familiarize yourself with the compressor’s controls
Take a moment to familiarize yourself with the various controls on the Bostitch Air Compressor. These may include the pressure adjustment knob, the on/off switch, and the regulator. Understanding how to properly adjust and control these settings will allow you to customize the compressor’s performance to meet your specific needs.
By taking the time to familiarize yourself with the Bostitch Air Compressor and its components, safety precautions, specifications, and controls, you will be well-equipped to use the compressor effectively and efficiently. This knowledge will ensure that you can complete your tasks with confidence and without any issues with the compressor.
Learn about the key components and features
1. Air Compressor Pump
The air compressor pump is the main component of the Bostitch air compressor. It is responsible for compressing the air and delivering it to the desired location. The pump is usually made of high-quality materials to ensure durability and efficient performance. It may have a single-stage or two-stage design, depending on the specific model.

2. Motor
The motor is another important component of the Bostitch air compressor. It provides the power needed to operate the compressor pump. The motor may be electric or gas-powered, depending on the model. Electric motors are more common for smaller, portable compressors, while gas-powered motors are typically used for larger, stationary compressors. The motor’s horsepower rating determines the compressor’s overall power and performance.
3. Pressure Control Switch
The pressure control switch is a key feature of the Bostitch air compressor. It allows the user to set the desired pressure level for the compressed air. Once the pressure reaches the pre-set level, the switch automatically shuts off the compressor to prevent overpressurization. This feature ensures safe and efficient operation of the compressor.
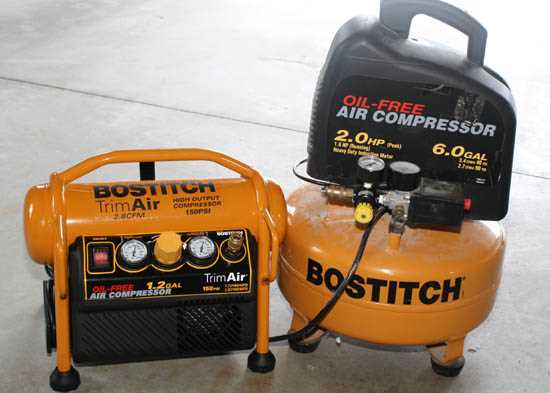
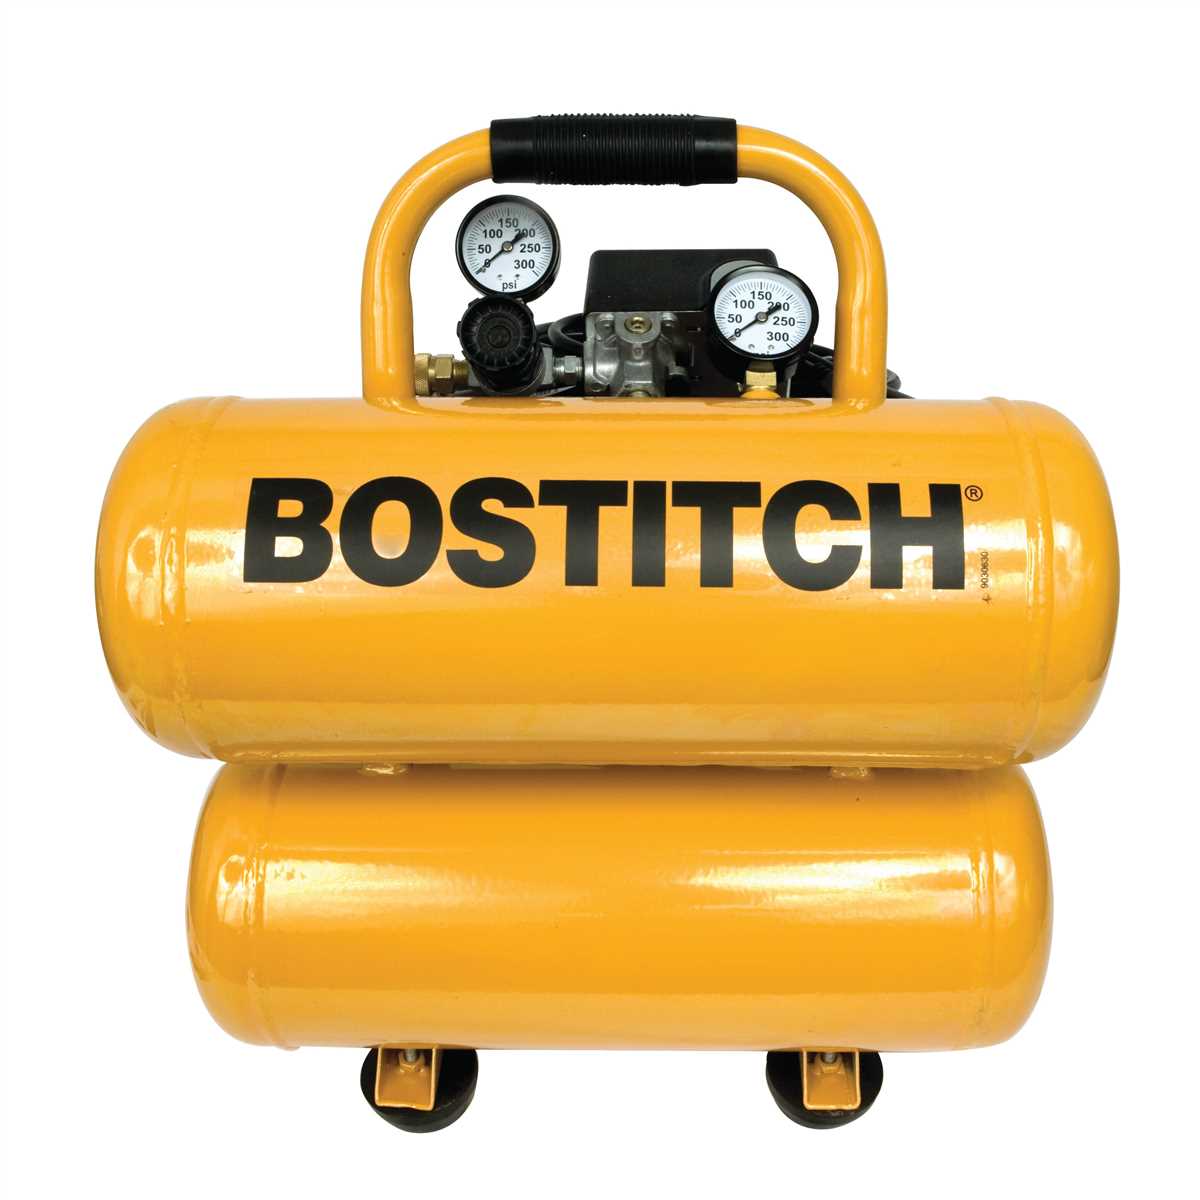
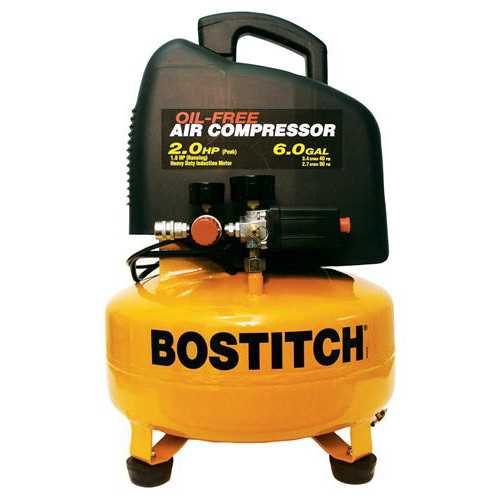
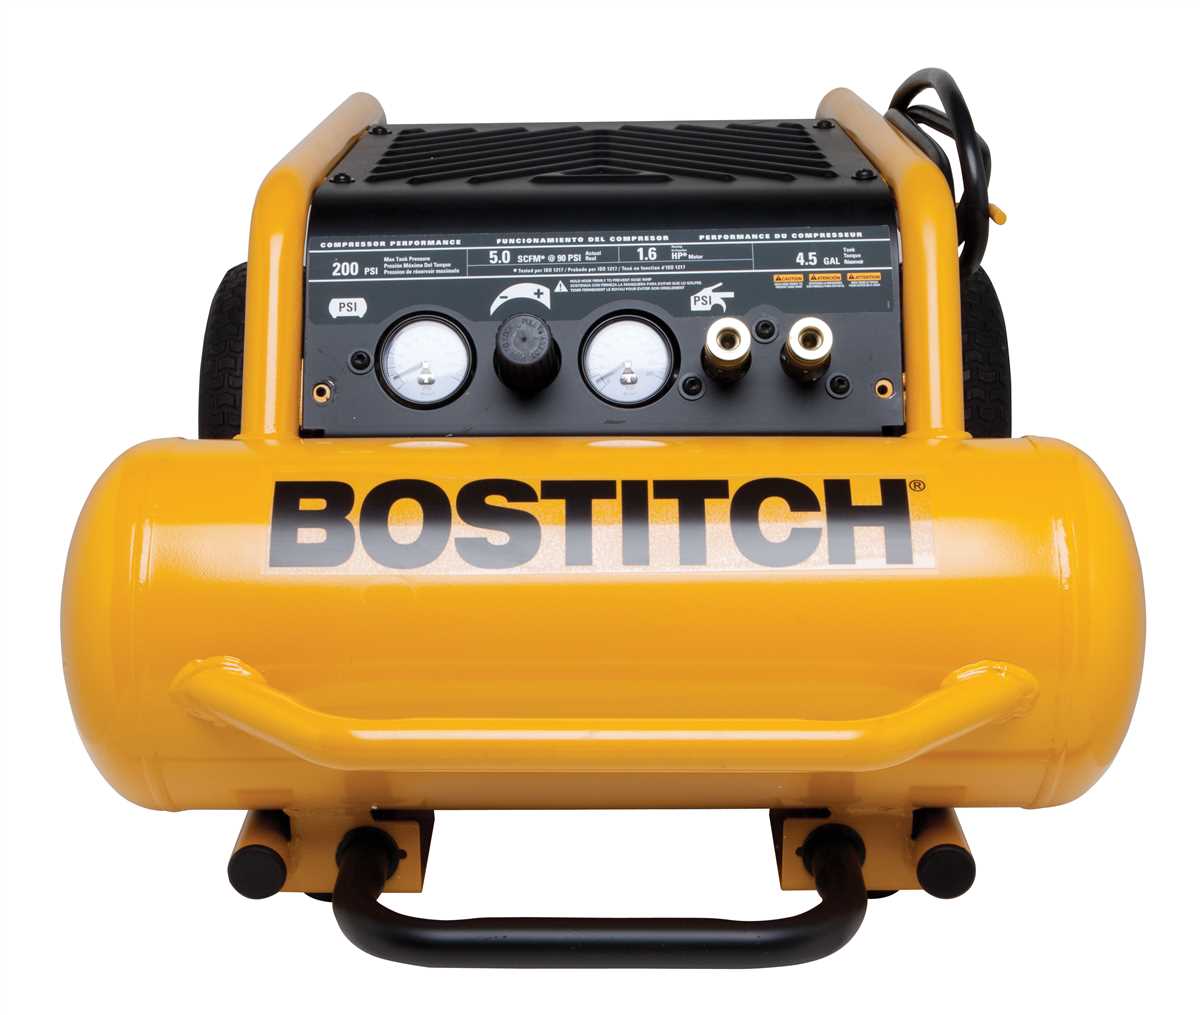
4. Tank
The tank is where the compressed air is stored in the Bostitch air compressor. It acts as a reservoir, allowing the user to have a ready supply of compressed air for various applications. The tank’s size determines the amount of compressed air that can be stored and used before the compressor needs to turn on again to refill the tank.

5. Pressure Gauge
The pressure gauge is a useful feature that allows the user to monitor the pressure inside the tank. It typically displays the pressure in psi (pounds per square inch). This information helps ensure that the compressor is operating within the desired pressure range and enables the user to make any necessary adjustments.
6. Safety Valve
The safety valve is an important safety feature of the Bostitch air compressor. It is designed to prevent overpressurization in the event of a malfunction or pressure buildup. If the pressure exceeds the predetermined limit, the safety valve opens and releases the excess air, protecting the compressor and the user from potential damage or injury.
Step 2: Prepare the Bostitch Air Compressor
Before using the Bostitch air compressor, there are a few steps you need to take to ensure it is prepared and ready for use.
Check the oil level
Start by checking the oil level in the compressor. This is important because insufficient oil can cause damage to the compressor. Refer to the user manual for the specific type and amount of oil required for your model.
Adjust the pressure settings
Next, you will need to adjust the pressure settings on the Bostitch air compressor. This will depend on the specific task you will be using it for. Most Bostitch air compressors have adjustable pressure settings that can be easily adjusted using the pressure regulator knob.

Inspect the air hoses and fittings
Take a close look at the air hoses and fittings on the Bostitch air compressor. Ensure that they are not damaged or worn out. If you notice any leaks or cracks, replace or repair them before using the compressor. It is also important to check that the fittings are properly tightened to prevent air leakage.
Connect the power source
Before you can use the Bostitch air compressor, you need to connect it to a power source. Make sure to use the appropriate power supply, such as a standard electrical outlet or a generator. Double-check that the power cord is not damaged and is securely plugged in.
By following these steps, you can properly prepare the Bostitch air compressor for use and ensure its optimal performance.
Check the oil and fill it up if necessary
One of the most important maintenance tasks for your Bostitch air compressor is checking the oil level. This ensures that the compressor runs smoothly and prevents any damage to the internal parts.
To check the oil level, locate the oil fill cap on the compressor. It is typically located on the top or side of the compressor. Take off the cap and use a dipstick or sight glass to determine the oil level.
If the oil level is below the recommended level, it is important to fill it up. Use the appropriate type of oil as recommended by the manufacturer. Pour the oil slowly into the oil fill hole until it reaches the correct level on the dipstick or sight glass.
After filling up the oil, make sure to screw the oil fill cap back on tightly. This prevents any oil leaks or contamination of the compressor. It is also a good idea to clean up any spills or drips of oil to ensure a safe and clean working environment.
Remember to check the oil level regularly, especially before each use of the air compressor. This will help prolong the lifespan of your Bostitch air compressor and keep it running efficiently.
Your owner’s manual will have more specific instructions on how to check and fill up the oil for your particular model. Be sure to consult the manual for any additional maintenance tasks or recommendations.
Step 3: Connect the Air Compressor to the Power Source
To use a Bostitch air compressor, you will need to connect it to a power source. Follow these steps to ensure a proper connection:
- Locate a suitable power outlet: Find a nearby power outlet that matches the voltage requirements of your air compressor. The voltage requirements can typically be found on the compressor itself or in the user manual.
- Prepare the power cord: Uncoil the power cord and ensure that it is free from any tangles or knots. Make sure there are no damages to the cord, such as fraying or cuts.
- Plug in the power cord: Insert the power cord plug into the power outlet securely. You may need to apply slight pressure to ensure a proper connection.
- Turn on the power: Locate the power switch or button on the air compressor and switch it on. This will activate the compressor and allow it to start building up air pressure.
It is important to ensure that the power source you are using is stable and grounded to prevent any electrical accidents. Also, always check the power cord for any damages before plugging it in. If you notice any issues, it is best to have a professional inspect and repair it before using the air compressor.
Use the appropriate power cord and outlet
When using a Bostitch air compressor, it is crucial to use the appropriate power cord and outlet to ensure safe and efficient operation. The power cord should be of the correct gauge and length to handle the electrical load required by the compressor. Using an inadequate power cord can lead to overheating and potential damage to the compressor.
Before plugging in the compressor, make sure the power outlet is grounded and in good condition. A grounded outlet is essential to prevent electrical shocks and ensure the safe operation of the equipment. If the outlet is not grounded or is damaged, it should be repaired or replaced before using the compressor.
In addition, it is important to avoid using extension cords whenever possible. Extension cords can reduce the power supply to the compressor, resulting in reduced performance and potential damage. If using an extension cord is unavoidable, make sure it is of the correct gauge and length to handle the electrical load.
It is also worth mentioning that the power cord and outlet should be positioned in a way that prevents tripping hazards and accidental damage. Ensure that the cord is not tangled or obstructed and that it is kept away from heat sources or sharp objects that could cause damage.
Step 4: Set the Pressure Regulator
After connecting your air tools to the compressor, it’s important to set the pressure regulator to ensure that you’re getting the desired amount of air pressure for your specific project. The pressure regulator is a knob or dial located on the front or top of the compressor.
To set the pressure regulator, follow these steps:
- Start by identifying the desired PSI (pounds per square inch) for your air tool. The PSI requirements can usually be found in the tool’s user manual or on the tool itself.
- Turn on the compressor and wait for it to build up pressure. You can check this by looking at the pressure gauge, typically located near the pressure regulator.
- Once the compressor has reached the desired pressure, rotate the pressure regulator knob or dial to the appropriate PSI setting. This will control the amount of pressure that is being released to your air tools.
- Check the pressure gauge again to ensure that the pressure is set correctly. If necessary, make adjustments to the pressure regulator to reach the desired PSI.
Note: It’s important to set the pressure regulator within the recommended range for your particular air tool. Too much pressure can damage the tool, while insufficient pressure may result in reduced performance.
By properly setting the pressure regulator, you’ll be able to optimize your air tools’ performance and ensure that they operate safely and effectively.
Adjust the pressure according to your needs
When using a Bostitch air compressor, it’s important to adjust the pressure to suit your specific needs. The pressure of the compressor directly affects how much power it generates and how well it performs. By adjusting the pressure, you can ensure that you are using the compressor at the optimal level for your task.
Determining the right pressure
To determine the right pressure for your needs, you should consider the type of tool or equipment you will be using with the compressor. Different tools require different levels of pressure to function properly. For example, a nail gun may require a lower pressure setting, while a paint sprayer may require a higher pressure setting. Refer to the manufacturer’s specifications for the recommended pressure range for each tool.
Adjusting the pressure
To adjust the pressure on your Bostitch air compressor, locate the pressure regulator knob or dial, which is typically found on the control panel of the compressor. Turn the knob or dial clockwise to increase the pressure or counterclockwise to decrease the pressure. It’s important to make small adjustments and test the pressure before making any major changes. This will help you fine-tune the pressure to your desired level without causing any damage to your tools or equipment.
Monitoring the pressure
Once you have adjusted the pressure, it’s important to monitor it throughout your task. Use a pressure gauge to regularly check the pressure and make sure it remains within the desired range. If you notice any significant changes in pressure, it may indicate a problem with the compressor or your tools. Address any issues immediately to prevent any further damage. By monitoring the pressure, you can ensure that your Bostitch air compressor is always operating at its optimal level.
Step 5: Attach and Prepare the Air Hose
Once you have the air compressor and power supply ready, it’s time to attach and prepare the air hose. The air hose is the connection between the air compressor and the tool or equipment you’ll be using.
To attach the air hose, locate the hose connector on the air compressor. It is usually located on the side or at the back of the compressor. The connector will have a threaded end where you can screw in the air hose. Make sure the connector is clean and free from debris before attaching the hose.
Tip: Before attaching the air hose, it’s a good idea to apply a small amount of thread seal tape to the threaded end of the connector. This will help create a tight seal and prevent any air leaks.
Once you have applied the thread seal tape, take one end of the air hose and insert it onto the threaded end of the connector. Twist the hose in a clockwise direction to ensure a secure fit. Use a wrench or pliers to tighten the hose if necessary, but be careful not to overtighten and damage the threads.
Note: If your air hose has quick-release fittings, you can simply push the fitting onto the connector and it will snap into place. No twisting or tightening is needed in this case. Just make sure the fitting is securely attached.
After attaching the air hose, check for any visible damage or wear. Inspect the entire length of the hose for cuts, leaks, or cracks. If you notice any damage, it’s best to replace the hose to ensure safe operation.
Warning: Do not use a damaged air hose as it can lead to air leaks or burst under pressure.
Finally, check the other end of the air hose and make sure it is compatible with the tool or equipment you’ll be using. Some tools may require additional adapters or fittings to connect to the hose. Refer to the manufacturer’s instructions for proper attachment.
Now that the air hose is attached and prepared, you can move on to the next step, which is powering on the air compressor and adjusting the pressure settings.
Ensure a secure connection and check for leaks
Before using a Bostitch air compressor, it is crucial to ensure a secure connection between the compressor and the tool or accessory you plan to use. A loose connection can result in poor performance and even accidents. Start by choosing the appropriate fittings for your specific tool or accessory. The Bostitch air compressor typically comes with a set of connectors and adapters to accommodate various tools.
To ensure a secure connection, attach the appropriate connector or adapter to the air hose and tighten it firmly. Use a wrench or pliers if necessary, making sure not to overtighten. Check that the connector is properly seated and aligned with the tool or accessory’s inlet port. This will help prevent air leaks that can affect the compressor’s efficiency and overall performance.
Once the connection is secure, it is essential to check for any potential air leaks. Leaks can lead to a drop in pressure and reduce the effectiveness of your equipment. Start by visually inspecting the entire length of the air hose, looking for any signs of damage or loose connections.
To check for leaks, you can perform a simple test. Fill the compressor’s tank and set the pressure regulator to the desired level. Turn on the compressor and look for any noticeable drops in pressure. Listen for any hissing or unusual sounds indicating air leakage. You can also run your hand along the fittings and connectors, feeling for any traces of air escaping. If you detect any leaks, tighten the connections or replace any damaged parts immediately.
In addition to visual and auditory inspections, you can use a soapy water solution to identify leaks more accurately. Apply the solution to the fittings, connectors, and hoses, and look for any bubbles forming. Bubbles indicate air leakage, allowing you to pinpoint the exact location and take appropriate measures to address the issue.
By ensuring a secure connection and checking for leaks, you can optimize the performance of your Bostitch air compressor and ensure safe and efficient operation of your tools and accessories.
FAQ:
What is a Bostitch air compressor?
A Bostitch air compressor is a machine that uses compressed air to power a variety of tools and equipment.
How do I set up a Bostitch air compressor?
Setting up a Bostitch air compressor is easy. First, make sure you have a suitable location with proper ventilation. Then, place the compressor on a level surface and connect it to a power source. Finally, attach any necessary hoses or accessories.
What maintenance is required for a Bostitch air compressor?
To keep your Bostitch air compressor in good working condition, regular maintenance is required. This includes checking and replacing oil, cleaning or replacing air filters, and inspecting for any leaks or damage.
How do I use a Bostitch air compressor to inflate tires?
Using a Bostitch air compressor to inflate tires is simple. First, connect the compressor to the tire valve using a compatible air hose. Then, turn on the compressor and wait for it to build up pressure. Finally, monitor the tire pressure using a gauge and stop inflating when the desired pressure is reached.
Can I use a Bostitch air compressor for painting?
Yes, you can use a Bostitch air compressor for painting. To do so, you will need a suitable paint sprayer attachment. Connect the sprayer to the compressor and fill it with paint. Adjust the air pressure and spray pattern according to your needs, and then start painting.
Video:


Meet Harrison Clayton, a distinguished author and home remodeling enthusiast whose expertise in the realm of renovation is second to none. With a passion for transforming houses into inviting homes, Harrison's writing at https://thehuts-eastbourne.co.uk/ brings a breath of fresh inspiration to the world of home improvement. Whether you're looking to revamp a small corner of your abode or embark on a complete home transformation, Harrison's articles provide the essential expertise and creative flair to turn your visions into reality. So, dive into the captivating world of home remodeling with Harrison Clayton and unlock the full potential of your living space with every word he writes.


