How to Test an Air Ride Compressor: A Step-By-Step Guide

If you own a vehicle equipped with an air ride suspension, it’s important to regularly test and maintain the air ride compressor. The air ride compressor is responsible for pressurizing the air suspension system, ensuring a smooth and comfortable ride. Testing the compressor is essential to identify any potential issues or malfunctions before they become major problems. In this step-by-step guide, we will walk you through the process of testing an air ride compressor.
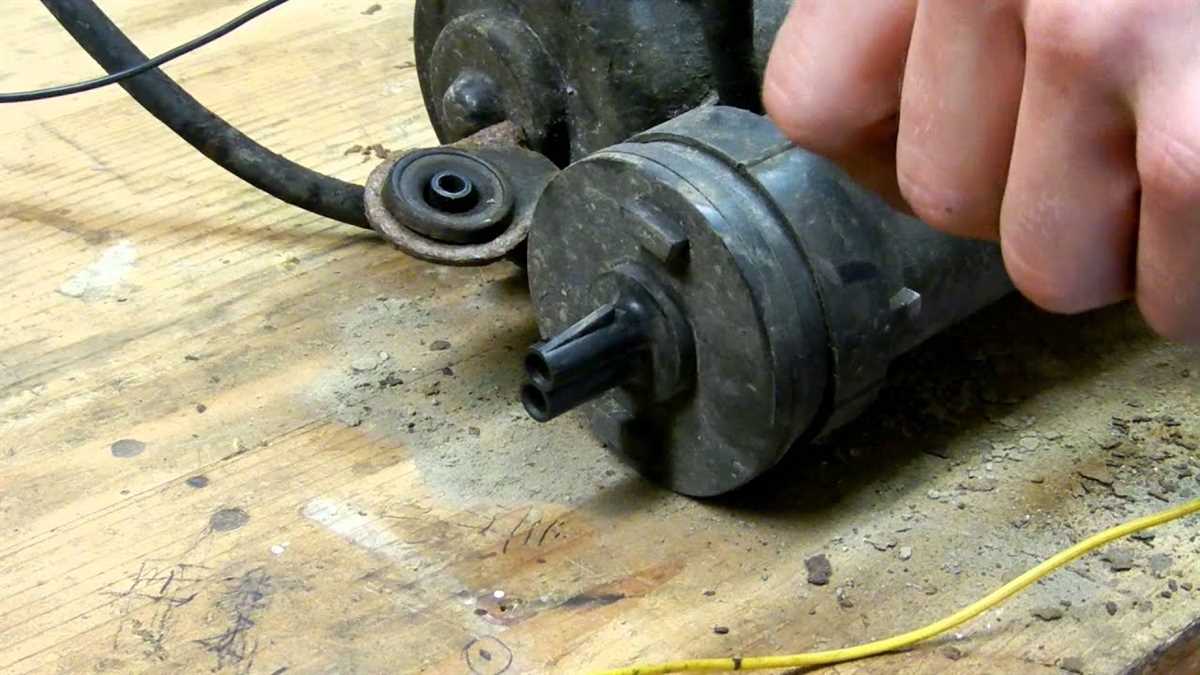
First, it’s important to locate the air ride compressor in your vehicle. In most vehicles, the compressor is typically found in the rear of the vehicle, near the air suspension components. Once you have located the compressor, visually inspect it for any signs of damage or leakage. Look for any loose or damaged connections, as well as cracked or worn out hoses. These issues can cause the compressor to malfunction and should be addressed before testing.
Next, you will need to connect a diagnostic tool to the vehicle’s onboard computer system. This tool will allow you to access and monitor the air suspension system. Once connected, start the vehicle and let it run for a few minutes to allow the compressor to build up pressure. Pay attention to any unusual sounds or vibrations coming from the compressor. These can indicate a problem.
Now it’s time to test the compressor by activating the air ride suspension system. Use the diagnostic tool to command the suspension system to raise or lower the vehicle. Observe how the compressor responds to these commands. It should activate and pressurize the system, causing the vehicle to raise or lower accordingly. If the compressor fails to activate or the vehicle doesn’t respond as expected, there may be an issue with the compressor or another component of the air ride system.
Finally, you will need to check the pressure and pressure relief valve of the air ride compressor. Using a pressure gauge, measure the pressure in the air suspension system. Compare the reading to the manufacturer’s specifications to ensure it falls within the acceptable range. Additionally, check the pressure relief valve to ensure it is properly functioning. The valve should release excess pressure when necessary, preventing damage to the system.

In conclusion, testing your air ride compressor is a crucial step in maintaining the performance and safety of your vehicle’s air ride suspension system. By following this step-by-step guide, you can identify any problems or malfunctions and take the necessary steps to address them. Regular testing and maintenance of your air ride compressor will help extend its lifespan and ensure a comfortable and smooth ride.
What is an Air Ride Compressor?
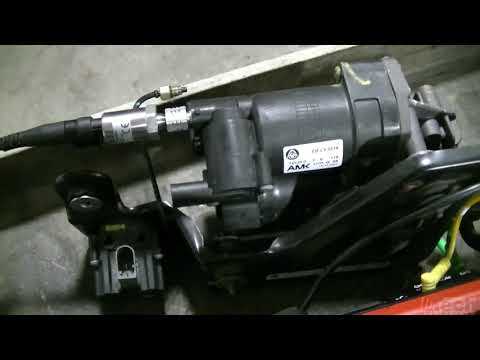
An air ride compressor, also known as an air suspension compressor or air compressor, is a crucial component of an air ride suspension system. This system is commonly found in vehicles such as trucks, SUVs, and luxury cars. The air ride compressor is responsible for supplying compressed air to the air suspension system, which helps to adjust the ride height and provide a smoother, more comfortable driving experience.
The air ride compressor works by drawing in air from the atmosphere and compressing it to a higher pressure. It then stores the compressed air in a reservoir or air tank. The compressed air is then distributed to the air suspension system, where it is used to inflate air springs or air bags, depending on the specific design of the suspension system.
The air ride compressor is typically powered by the vehicle’s electrical system. It is equipped with an electric motor that drives a compressor pump. The pump has pistons or diaphragms that compress the air, and it may also have valves to control the airflow and pressure. The compressor is usually mounted in the engine bay or under the vehicle.
Without a properly functioning air ride compressor, the air suspension system will not be able to adjust the ride height, resulting in a harsher and less comfortable ride. Additionally, a malfunctioning compressor can cause the air suspension system to become unresponsive or fail altogether. Therefore, it is important to regularly test and maintain the air ride compressor to ensure optimal performance and longevity of the air suspension system.
Why is Compressor Testing Important?

Compressor testing is an essential step in maintaining the performance and reliability of an air ride system. By testing the compressor regularly, you can identify any potential issues or malfunctions before they cause major problems. This preventative approach can save you time and money in the long run.
One of the main reasons why compressor testing is important is to ensure that the compressor is operating at the optimal level. A compressor that is not working properly may not be able to provide the necessary air pressure to support the air suspension system. This can lead to reduced comfort, stability, and overall performance.
Additionally, compressor testing allows you to detect any leaks or air pressure loss in the system. Even a small leak can result in a significant loss of air pressure over time, affecting the suspension’s ability to adjust and maintain the desired ride height. By identifying and fixing these leaks early on, you can prevent further damage and ensure the system functions properly.
Furthermore, compressor testing provides an opportunity to assess the overall health of the air ride system. This includes checking the responsiveness of the compressor, evaluating the performance of other components like valves and air lines, and ensuring proper electrical connections. By conducting comprehensive testing, you can identify and address any potential issues that may compromise the system’s functionality.
In conclusion, compressor testing is crucial for the proper functioning and longevity of an air ride system. It allows you to identify and address any potential issues before they worsen and impact performance. By maintaining a regular testing schedule, you can ensure that your air ride system operates at its best, providing a smooth and comfortable ride.

Step 1: Prepare the Tools
To test an air ride compressor, you will need a few tools to ensure accuracy and efficiency. Here is a list of tools you will need:
- A volt meter to measure electrical current
- A pressure gauge to measure air pressure
- A spark plug wrench to remove the spark plug
- A multimeter to test electrical connections
- A wrench set to remove and install components
Having these tools readily available will make the testing process much easier and allow you to diagnose any issues with the compressor more effectively.
Gather the Required Tools
Before you begin testing your air ride compressor, there are a few essential tools that you will need to gather. These tools will help you assess the performance and functionality of the compressor, allowing you to identify any potential issues or malfunctions.
Air Pressure Gauge
An air pressure gauge is a crucial tool for testing an air ride compressor. This gauge measures the pressure inside the airbags or air suspension system. It allows you to determine whether the compressor is generating sufficient pressure to inflate the airbags properly. Make sure to choose a gauge that is compatible with the pressure range of your air suspension system.

Pressure Regulator
A pressure regulator is another important tool for testing the air ride compressor. This device allows you to control and adjust the air pressure within the system. By adjusting the pressure, you can simulate different load conditions and assess the compressor’s performance under varying circumstances. Make sure to choose a regulator that can handle the pressure range required by your air suspension system.
Power Supply Tester
A power supply tester is a handy tool for checking the electrical connection and voltage supply to the air ride compressor. It helps you ensure that the compressor is receiving the correct power input, which is essential for its proper functioning. This tool helps identify any issues with the power supply that may be causing the compressor to underperform or malfunction.
Test Leads
Test leads are necessary for connecting the power supply tester to the air ride compressor. Make sure to choose leads that are compatible with the connectors on both the tester and the compressor. These leads are an essential component for accurately assessing the electrical connection and voltage supply to the compressor.
Other Tools
Additionally, you may also need some basic hand tools such as screwdrivers, pliers, and wire cutters for accessing and inspecting the compressor and its components. These tools will allow you to perform any necessary repairs or maintenance tasks during the testing process.

Ensure Safety Precautions
When testing an air ride compressor, it is important to prioritize safety precautions to prevent accidents and injuries. Here are some steps to follow to ensure a safe testing process:
- Wear protective gear: Before starting the test, put on safety goggles, gloves, and any other appropriate protective gear. This will help protect you from potential hazards and injuries.
- Read the manual: Familiarize yourself with the air ride compressor’s user manual to understand its proper operation and safety guidelines. Pay attention to any warnings or cautions mentioned in the manual.
- Inspect the compressor: Before testing, visually inspect the compressor for any signs of damage or wear. Ensure that all connections are secure and there are no leaks in the air hoses or fittings.
- Disconnect power supply: Before performing any tests, make sure to disconnect the power supply to the compressor. This will minimize the risk of electric shocks or accidents during the testing process.
- Clear the testing area: Remove any obstacles or potential hazards from the testing area. Make sure there is enough space to safely operate the compressor and that there are no flammable materials nearby.
- Use a grounded outlet: When reconnecting the power supply, ensure that the compressor is plugged into a properly grounded outlet. This will help prevent electrical issues and ensure safe operation.
- Follow proper testing procedures: Before conducting any tests, carefully follow the recommended testing procedures mentioned in the compressor’s manual. This will ensure accurate results and minimize the risk of accidents.
Remember, safety should always be the top priority when testing an air ride compressor. By following these safety precautions, you can help ensure a safe testing process and avoid any potential accidents or injuries.
Step 2: Disconnect the Power
Before beginning the testing process, it is important to disconnect the power to the air ride compressor. This ensures safety and prevents any electrical shocks or accidents.
To disconnect the power, locate the main power switch or circuit breaker for the air ride compressor. This is typically found near the compressor or in an electrical panel. Switch off the power by either flipping the switch or turning off the circuit breaker.
After the power is disconnected, it is a good idea to use a multimeter to verify that there is no electrical current going to the air ride compressor. Set the multimeter to the voltage setting and check the wires that connect to the compressor. If there is no reading on the multimeter, this confirms that the power has been successfully disconnected.
Locate the Power Source
Before testing an air ride compressor, you will first need to locate the power source. The power source is typically the battery of the vehicle or a separate power supply specifically for the compressor.
Start by opening the hood of the vehicle and locating the battery. The battery is usually located near the front of the engine compartment. It will be a rectangular-shaped box with two terminal connections, one positive (+) and one negative (-).
If the compressor has a separate power supply, it may be located in the trunk or under the vehicle. Look for any wiring or cables connected to the compressor, as this will indicate the location of the power source.
Once you have located the power source, make sure the vehicle is turned off before proceeding with the testing. This will prevent any electrical accidents or damage to the compressor.
Turn Off the Power
Before beginning the process of testing an air ride compressor, it is crucial to ensure the safety of yourself and others by turning off the power. Locate the power switch or circuit breaker associated with the air ride compressor and make sure it is switched off. This will prevent any potential electrical accidents or malfunctions while performing the test.
Caution: Always follow proper safety procedures when working with electrical equipment. If you are unsure about how to turn off the power, consult the user manual or seek assistance from a professional.
Step 3: Locate the Compressor
Once you have gathered the necessary tools and safety gear, it’s time to locate the air ride compressor. The compressor is typically located near the rear of the vehicle, close to the air suspension system. It may be housed in a protective casing or mounted on a bracket.
To find the compressor, you can refer to the vehicle’s owner’s manual for specific instructions or consult an online guide for your make and model. You may need to remove some components or panels to gain access to the compressor.
Be sure to take note of any labels or markings on the compressor so that you can easily identify it during the testing process. It may have a unique serial number or manufacturer’s logo that can help you confirm its identity.
If you are having trouble locating the compressor, you can also visually inspect the air lines and suspension components. Look for any signs of wear, leaks, or damage that may indicate the presence of the compressor nearby.
Once you have located the compressor, you can move on to the next step in the testing process, which will involve checking the power source and connections.
Find the Compressor Location
Before testing the air ride compressor, you need to locate it in your vehicle. The compressor is responsible for supplying the air to the air springs, which control the suspension. The location of the compressor may vary depending on the make and model of your vehicle. Here are a few common places to check:
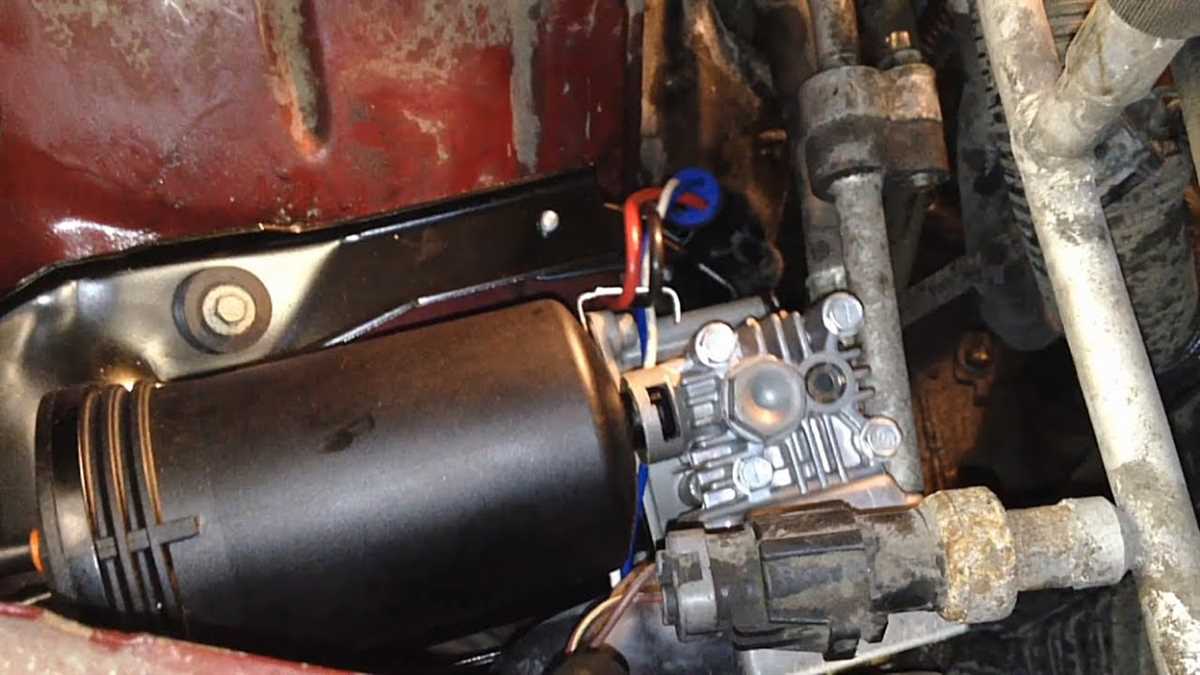
- Under the hood: In many vehicles, the air ride compressor is located under the hood, usually on one side of the engine compartment. It may be mounted to the firewall or a bracket.
- In the trunk: Some vehicles have the air ride compressor located in the trunk. Look for it near the spare tire or along the side walls.
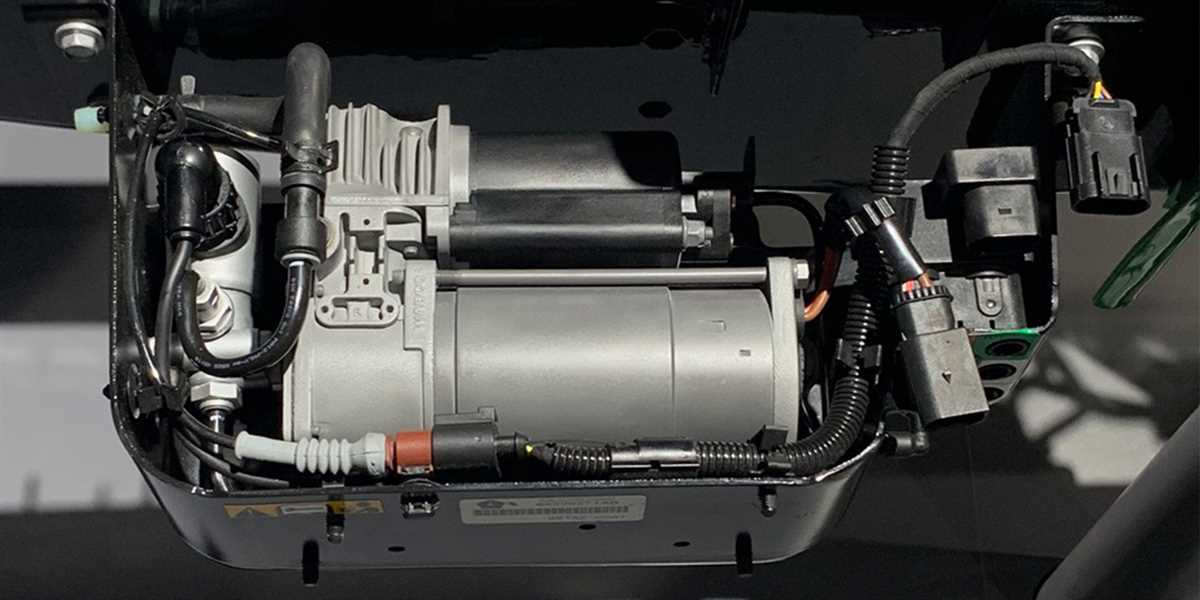
- Underneath the vehicle: In certain cases, the air ride compressor may be located underneath the vehicle, usually near the suspension system or the rear axle. You may need to get under the vehicle to access it.
If you are having trouble locating the compressor, consult your vehicle’s manual or contact the manufacturer for assistance. Once you have found the compressor, you can proceed with testing it to ensure that it is functioning properly.
FAQ:
What is an air ride compressor?
An air ride compressor is a device that pressurizes air and sends it to the air springs of a vehicle’s suspension system, helping to provide a smooth and adjustable ride.
Why would I need to test my air ride compressor?
Testing your air ride compressor is important to ensure that it is functioning properly and providing the necessary air pressure for your vehicle’s suspension system. Regular testing can help identify any issues before they become bigger problems.
How can I test my air ride compressor?
To test your air ride compressor, you will need to follow a few steps. First, make sure your vehicle is parked on a level surface and the engine is turned off. Then, locate the air ride compressor and check for any visible damage or leaks. Next, turn on the ignition and listen for the compressor to engage. If you don’t hear anything, it could indicate a problem with the compressor. Finally, use a pressure gauge to check the air pressure being produced by the compressor. Compare this reading to the manufacturer’s specifications to determine if the compressor is functioning correctly.
What are some common signs of a faulty air ride compressor?
There are a few common signs that your air ride compressor may be faulty. These include a bumpy or uneven ride, the vehicle sagging or sitting too low, unusual noises coming from the compressor, and the vehicle taking longer to raise or lower when adjusting the suspension. If you notice any of these signs, it is important to have your air ride compressor tested and potentially repaired or replaced.
Can I test my air ride compressor myself or do I need to take it to a mechanic?
You can test your air ride compressor yourself by following the steps outlined in the article. However, if you are not comfortable or experienced with vehicle maintenance, it may be best to take your vehicle to a mechanic who can properly diagnose and repair any issues with the air ride compressor.
What should I do if my air ride compressor fails the test?
If your air ride compressor fails the test, it is recommended to have it inspected and repaired by a qualified mechanic. They will be able to diagnose the problem and determine if the compressor can be repaired or if it needs to be replaced. Continuing to use a faulty air ride compressor can lead to further damage to your vehicle’s suspension system.
Video:


Harrison Clayton
Meet Harrison Clayton, a distinguished author and home remodeling enthusiast whose expertise in the realm of renovation is second to none. With a passion for transforming houses into inviting homes, Harrison's writing at https://thehuts-eastbourne.co.uk/ brings a breath of fresh inspiration to the world of home improvement. Whether you're looking to revamp a small corner of your abode or embark on a complete home transformation, Harrison's articles provide the essential expertise and creative flair to turn your visions into reality. So, dive into the captivating world of home remodeling with Harrison Clayton and unlock the full potential of your living space with every word he writes.


