How to Safely Shut Down an Air Compressor: A Step-by-Step Guide

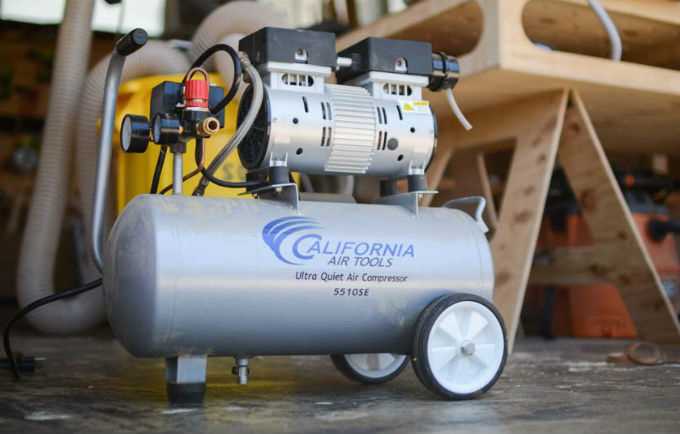
Shutting down an air compressor properly is an essential step in maintaining its longevity and safety. Whether you are using an air compressor for professional or personal use, knowing how to safely shut it down can prevent accidents and extend the life of the machine. In this step-by-step guide, we will walk you through the proper procedure for shutting down an air compressor.
Step 1: Release the Pressure
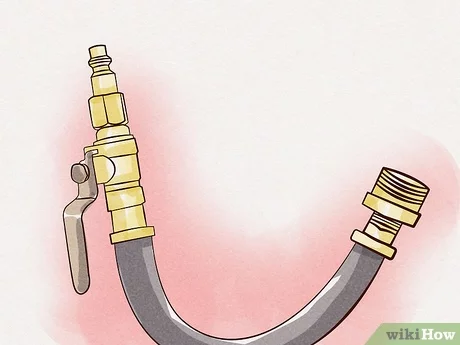
Before shutting down the air compressor, it is crucial to release the pressure that has built up inside the tank. This is necessary to avoid any unintended bursts or leaks. To release the pressure, locate the pressure release valve on the tank and turn it counterclockwise. Alternatively, you can also turn the regulator valve counterclockwise to release the pressure gradually.
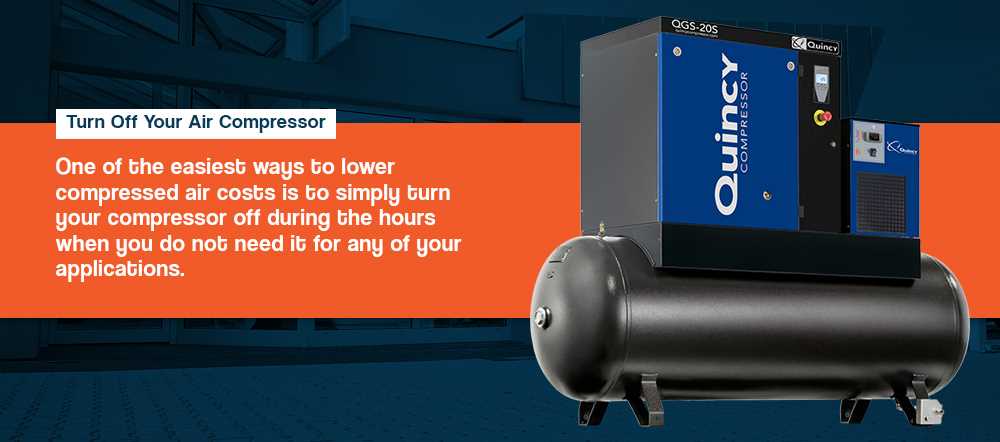
Step 2: Turn off the Power
After releasing the pressure, it is important to turn off the power supply to the air compressor. This will prevent any accidental start-ups while you are performing maintenance or inspecting the machine. Locate the power switch and make sure it is in the off position.

Step 3: Drain the Moisture
To prevent the accumulation of moisture inside the tank, it is necessary to drain it regularly. Locate the drain valve, usually located at the bottom of the tank, and open it by turning it counterclockwise. Allow the moisture to drain completely before closing the valve tightly.
Step 4: Clean and Maintain
Once the pressure is released, the power is turned off, and the moisture is drained, it is time to clean and maintain the air compressor. Use a clean cloth or brush to remove any debris or dirt from the exterior of the machine. Check the oil level and top it up if necessary. Inspect all the connections, hoses, and fittings for any signs of wear or damage.
Step 5: Store Properly

Finally, it is important to store the air compressor properly to protect it from dust, moisture, and other elements. Make sure the machine is in a clean and dry environment. Cover it with a protective covering or store it in a suitable container, such as a cabinet or a shed.
Remember, shutting down an air compressor safely is not only important for your own safety, but also for the longevity of the machine. By following these simple steps, you can ensure that your air compressor will continue to operate efficiently for years to come.
Step 1: Turn off the Power
The first step in safely shutting down an air compressor is to turn off the power. This will help prevent any accidental starts or malfunctions while you are working on the compressor.
1. Locate the power switch: Before turning off the power, you need to find the power switch or button on the air compressor. It is usually located on the control panel or near the power cord.
2. Turn off the power: Once you have located the power switch, press or flip it to the “Off” position. This will completely shut off the electrical supply to the compressor, ensuring that it cannot turn on unexpectedly.
3. Unplug the power cord: After turning off the power, it is important to unplug the power cord from the electrical outlet. This will eliminate any potential risk of electrocution or accidents while you are working on the compressor.

4. Lockout/Tagout: If you are working in an industrial or commercial setting, it is essential to follow proper lockout/tagout procedures. This involves placing a lock on the power switch or control panel and tagging it with your name and the date. This will inform others that the compressor is being serviced and should not be operated.
5. Wait for the compressor to cool down: Before proceeding with any further steps, it is important to allow the air compressor to cool down. This will help prevent any potential burns or injuries that could occur from touching hot components.
Step 2: Release the Pressure
After turning off the power to the air compressor, the next step is to release the pressure built up in the tank. This is an important safety measure to prevent any accidents or injuries.
1. Locate the Pressure Release Valve
Look for the pressure release valve typically located near the main control panel of the compressor. It is usually a small lever or knob that can be easily turned or pulled.

2. Position a Container or Rag
Before releasing the pressure, place a container or rag underneath the pressure release valve to catch any excess moisture or debris that may come out. This will help keep your work area clean and prevent any damage.
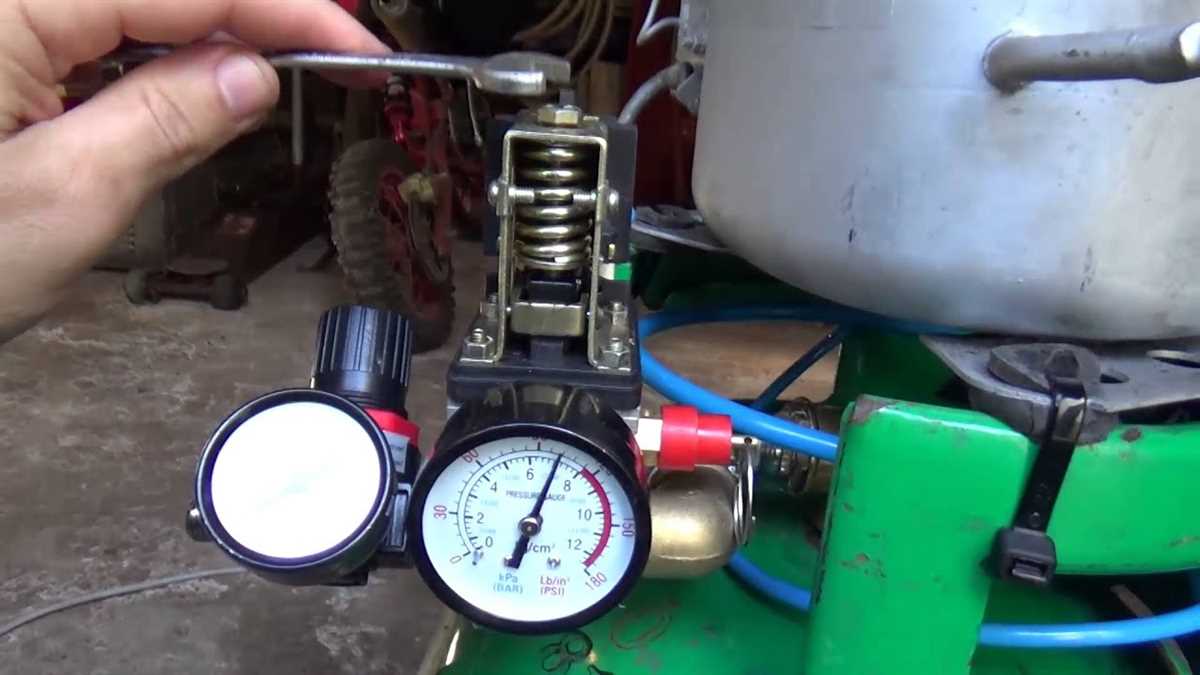
3. Slowly Release the Pressure
Turn or pull the pressure release valve to slowly release the pressure from the tank. Open it gradually to avoid sudden and forceful bursts of air. Monitor the pressure gauge to ensure that the pressure is being released properly.
Note: Do not attempt to release the pressure all at once, as this can be dangerous. Take your time and allow the air to escape gradually.
4. Check for Any Remaining Pressure
After releasing the pressure, use a pressure gauge to confirm that there is no residual pressure left in the tank. This is an important step to ensure that the compressor is completely depressurized before proceeding with any maintenance or repairs.

Tip: If there is still pressure in the tank even after releasing it, it may indicate a problem with the pressure release valve or another component. In this case, it is recommended to consult a professional for assistance.
By following these steps to release the pressure from your air compressor, you can safely shut it down and reduce the risk of accidents or damage. Remember to always prioritize safety when working with any machinery or equipment.
Step 3: Drain the Tank
To safely shut down an air compressor, it is important to drain the tank properly. This step is crucial as it helps prevent any moisture from accumulating inside the tank, which can lead to corrosion and damage. Here is a step-by-step guide on how to drain the tank of an air compressor:
- Turn off the compressor: Before starting the process, make sure the compressor is turned off. This ensures that there is no power running to the machine during the draining process.
- Release the pressure: Next, locate the pressure release valve on the air compressor. This valve is typically located on the side or the bottom of the tank. Slowly and carefully turn the valve counterclockwise to release any remaining pressure in the tank. It is essential to release the pressure before proceeding to drain the tank.
- Position a container: Place a suitable container or bucket beneath the drain valve of the tank. This container will collect the water or condensation as it drains from the tank.
- Open the drain valve: Using a wrench or adjustable pliers, turn the drain valve counterclockwise to open it. Be cautious not to damage the valve while doing this. The water or condensation from the tank will start to flow into the container.
- Allow the tank to fully drain: It may take a few minutes for the tank to fully drain. Make sure to keep an eye on the draining process to ensure that all water or condensation is properly drained from the tank.
- Close the drain valve: Once the tank is fully drained, you can close the drain valve by turning it clockwise. Ensure that the valve is securely closed to prevent any air or moisture from entering the tank.
By following these steps, you can safely and effectively drain the tank of an air compressor, ensuring its longevity and optimal performance.
Step 4: Clean and Maintain the Air Compressor
Proper cleaning and maintenance of your air compressor is essential for its longevity and optimal performance. Regular cleaning helps prevent dust and debris buildup, while maintenance ensures that all components are functioning properly.
Cleaning the Air Compressor
To clean the air compressor, start by turning off the power and releasing any remaining pressure in the tank. Use a clean, dry cloth or brush to remove any dust or dirt from the exterior of the compressor. Pay special attention to the intake vents and cooling fins, as these areas tend to accumulate debris.
Next, clean the air filter. Refer to the compressor’s user manual to locate the air filter and remove it. Gently tap the filter to remove excess dirt and use compressed air or a soft brush to clean it thoroughly. If the filter is damaged or excessively dirty, it may need to be replaced.
Lastly, clean the compressor’s tank by draining any remaining moisture or condensation. Open the tank’s drain valve and wait for all the water to fully drain out. Wipe the interior of the tank with a clean cloth to remove any residue, and close the drain valve once the tank is dry.
Maintaining the Air Compressor
In addition to regular cleaning, proper maintenance is crucial for the performance of your air compressor. Here are some maintenance tasks you should consider:
- Check the oil levels regularly if your compressor is oil lubricated. Top up the oil if necessary or change it according to the manufacturer’s instructions.
- Inspect the belts and replace them if they appear worn out or damaged.
- Check the hoses and fittings for any signs of leaks or damage. Tighten or replace as needed.
- Inspect the pressure switch and safety valve. Ensure they are functioning correctly and replace if necessary.
- Keep the compressor’s intake vents and cooling fins clear of debris at all times.
By following these cleaning and maintenance steps, you can ensure that your air compressor continues to operate efficiently and last for years to come.
Step 5: Store the Air Compressor Properly
Proper storage of your air compressor is essential to ensure its longevity and prevent any damage or accidents. Follow these steps to store your air compressor properly:
1. Find a Clean and Dry Area
When selecting a storage location for your air compressor, make sure to choose a clean and dry area. Moisture and dust can cause damage to the compressor and its components. It’s also important to avoid storing the compressor near any flammable materials or chemicals.
2. Drain the Moisture
Before storing the air compressor, make sure to drain any moisture that may have accumulated in the tank. Moisture can lead to rust or corrosion, which can affect the overall performance of the compressor. Refer to the manufacturer’s instructions on how to properly drain the moisture from your specific model.
3. Secure the Compressor
When storing the air compressor, ensure that it is placed on a stable and secure surface. This will prevent any accidental tipping or falling that could damage the compressor or cause injury. You may also consider using straps or other restraints to secure the compressor in place.
4. Protect from Extreme Temperatures
Avoid storing the air compressor in areas where it will be exposed to extreme temperatures. Extreme heat or cold can affect the performance and lifespan of the compressor. It’s best to store the compressor in a temperature-controlled environment whenever possible.
5. Cover the Compressor
To protect the air compressor from dust, debris, and other contaminants, it’s recommended to cover it with a suitable protective cover. This will help preserve the compressor’s appearance and prevent any potential damage.
By following these steps, you can ensure that your air compressor is stored properly and will be ready for use when needed. Proper storage will also help extend the lifespan of your compressor and prevent any unnecessary repairs or replacements.
Step 6: Check for Any Leaks or Damage
Inspect for Leaks
After shutting down the air compressor, it is important to check for any leaks in the system. Leaks can cause a loss of air pressure and reduce the efficiency of the compressor. Start by visually inspecting all the connections, hoses, and fittings for any signs of air leakage. Look for any hissing sounds or bubbles forming when you apply soapy water to the suspected areas.
Inspect for Damage
In addition to checking for leaks, it is crucial to inspect the air compressor for any signs of damage. This includes checking the condition of the tank, hoses, belts, and other components. Look for any cracks, rust, or wear and tear that may compromise the safety and performance of the compressor. If you notice any damage, it is recommended to have it repaired or replaced before using the compressor again.
Ensure Proper Maintenance
To prevent leaks and damage in the future, it is essential to maintain the air compressor properly. Regularly inspect all components for wear and tear, tighten loose connections, and clean any dirt or debris that may accumulate. Follow the manufacturer’s guidelines for maintenance and replace any faulty or worn-out parts as needed. By taking care of your air compressor, you can ensure its longevity and safety.
In conclusion, after shutting down the air compressor, always check for any leaks or damage to maintain its efficiency and safety. Inspect the connections and fittings for air leakage and visually examine the compressor for any signs of damage. Additionally, make sure to perform regular maintenance to prevent future issues. By following these steps, you can safely shut down and maintain your air compressor.
Step 7: Follow Manufacturer’s Guidelines
When it comes to safely shutting down an air compressor, it is crucial to follow the guidelines provided by the manufacturer. Every air compressor is different and may have specific steps or precautions that need to be followed for a safe shut down process.
The manufacturer’s guidelines often include specific instructions on how to properly turn off the air compressor, the order in which certain steps should be taken, and any additional safety measures that need to be considered.
By following the manufacturer’s guidelines, you can ensure that you are shutting down the air compressor in a way that is both safe and effective. These guidelines are typically designed to prevent any potential damage to the equipment and to minimize the risk of injuries during the shut down process.
It is important to carefully read and understand the manufacturer’s guidelines before attempting to shut down an air compressor. If you are unsure about any of the steps or instructions provided, it is recommended to contact the manufacturer or seek professional assistance to ensure that you are following the correct procedures.
Remember, the manufacturer’s guidelines are there for a reason – to help you safely and effectively shut down your air compressor. So, be sure to consult them and follow their instructions to ensure a smooth and safe shut down process.
Step 8: Regularly Maintain and Inspect Your Air Compressor
Proper and regular maintenance of your air compressor is essential to ensure its longevity and efficient performance. By conducting routine inspections and addressing any issues promptly, you can prevent bigger problems and costly repairs in the future.
Inspect the Air Filters: Check the air filters regularly to ensure they are clean and free from debris. Dirty filters can restrict airflow and decrease the efficiency of your compressor. Clean or replace the filters as necessary to maintain optimal performance.
Monitor Oil Levels: Most air compressors require regular oil changes. Check the oil levels frequently to ensure they are within the recommended range. Refer to the manufacturer’s guidelines for the specific type and frequency of oil changes required for your compressor.
Inspect Belts and Hoses: Inspect the belts and hoses for signs of wear, cracks, or leaks. Replace any damaged or worn-out belts and hoses to avoid sudden failures that can lead to downtime and potential damage to the compressor.
Check for Air Leaks: Perform regular checks for air leaks in the compressor system. Leaks can result in inefficient operation and increased energy consumption. Use soap and water solution or a leak detection spray to identify any leaks and repair them promptly.
Clean the Compressor Exterior: Keep the exterior of your air compressor clean by removing any dirt, dust, or debris. This will help prevent any buildup or blockage that can impede airflow and affect the cooling of the compressor.
Refer to the User Manual: Always refer to the user manual provided by the manufacturer for specific maintenance instructions and guidelines. Following the recommended maintenance schedule and procedures will help ensure the optimal performance and longevity of your air compressor.
By regularly maintaining and inspecting your air compressor, you can extend its lifespan, prevent breakdowns, and ensure that it continues to operate safely and efficiently.
FAQ:
Why is it important to safely shut down an air compressor?
It is important to safely shut down an air compressor to prevent any accidents or damage to the equipment. Properly shutting down the compressor helps to relieve built-up pressure and avoid any potential hazards.
Can I shut down an air compressor without waiting for the pressure to reduce?
No, it is not recommended to shut down an air compressor without waiting for the pressure to reduce. This can be dangerous as there may still be high pressure in the system, which could cause damage or injury when releasing the air.
What happens if the air compressor is not shut down properly?
If an air compressor is not shut down properly, there is a risk of damage to the equipment, such as overheating or excessive wear. Additionally, failing to release the built-up pressure can pose a safety hazard and may result in accidents or injury.
How often should I perform a shutdown procedure for my air compressor?
The frequency of performing a shutdown procedure for an air compressor depends on the usage and manufacturer’s recommendations. However, it is generally recommended to perform a shutdown procedure after each use or at regular intervals to ensure proper maintenance and safety.
Video:


Harrison Clayton
Meet Harrison Clayton, a distinguished author and home remodeling enthusiast whose expertise in the realm of renovation is second to none. With a passion for transforming houses into inviting homes, Harrison's writing at https://thehuts-eastbourne.co.uk/ brings a breath of fresh inspiration to the world of home improvement. Whether you're looking to revamp a small corner of your abode or embark on a complete home transformation, Harrison's articles provide the essential expertise and creative flair to turn your visions into reality. So, dive into the captivating world of home remodeling with Harrison Clayton and unlock the full potential of your living space with every word he writes.


