How to Inflate Tire with Air Compressor: Easy Steps and Pro Tips

Tire maintenance is an essential part of keeping your vehicle safe and running smoothly. One key aspect of tire maintenance is ensuring that your tires are properly inflated. While many people opt to visit a gas station or tire shop to inflate their tires, knowing how to use an air compressor can save you time and money.
Using an air compressor to inflate your tires is a simple process if you follow the right steps. First, locate the valve stem on your tire and remove the dust cap. Then, connect the air compressor hose to the valve stem securely. You may hear a slight hissing sound, which is normal. Once the hose is attached, turn on the air compressor and adjust the pressure according to the recommended PSI for your tires.
It’s important to regularly check the PSI of your tires to ensure they are at the proper pressure. Underinflated tires can lead to decreased fuel efficiency and poor handling, while overinflated tires can be prone to blowouts. Using an air compressor allows you to easily and accurately inflate your tires to the correct PSI, ensuring optimal performance and safety on the road.
Pro tips for using an air compressor to inflate your tires include checking the air compressor’s pressure gauge for accuracy, as well as using a tire pressure gauge to double-check the pressure after inflating. Additionally, it’s recommended to inflate your tires when they are cold, as tire pressure can increase with heat. Regularly inspecting your tires for any signs of damage or wear is also crucial for safe driving.
By learning how to inflate your tires with an air compressor, you can take control of your tire maintenance and keep your vehicle running smoothly. With these easy steps and pro tips, you’ll be able to confidently inflate your tires to the proper pressure, ensuring optimal performance and safety on the road.
Step 1: Gather Required Materials

Before you can begin inflating your tire with an air compressor, it’s important to gather all the necessary materials. Having everything you need on hand will make the process go much smoother. Here are the essential items you’ll need:
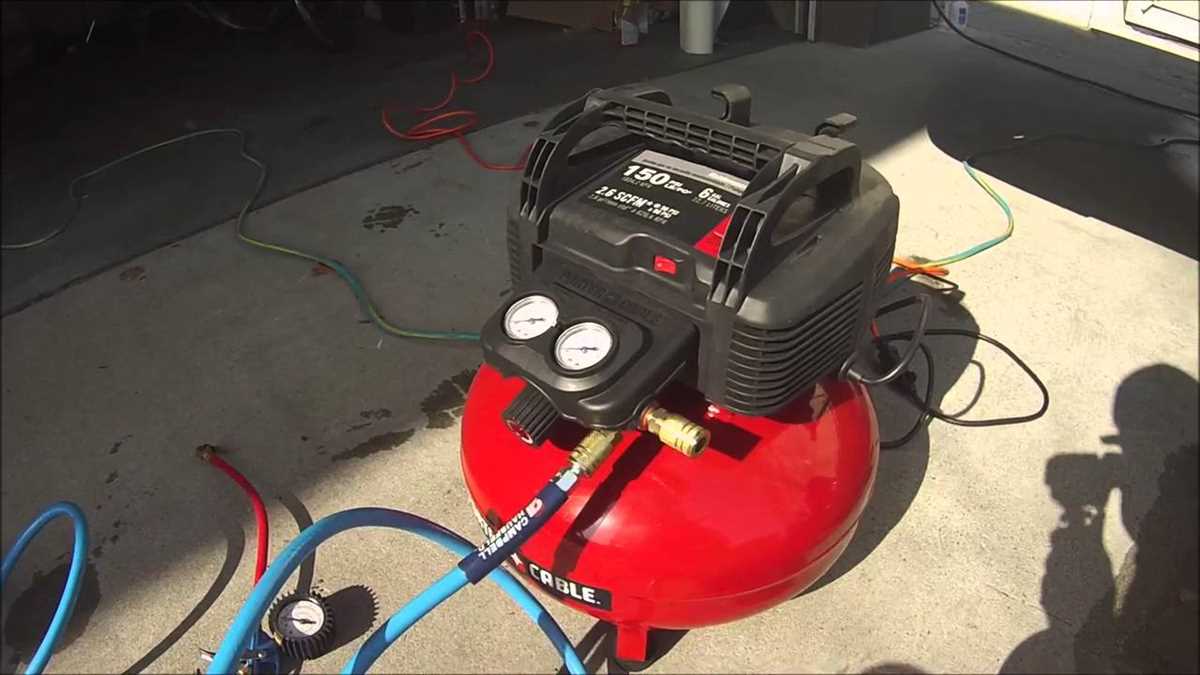
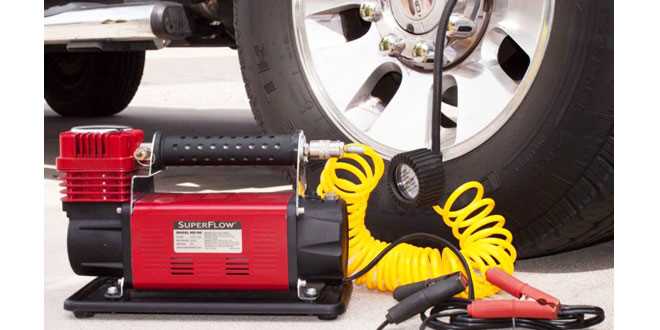
- An air compressor: Make sure you have a functioning air compressor that is compatible with your tire valve. Check the pressure rating to ensure it can handle the PSI required for your tire.
- A tire pressure gauge: This tool is essential for checking the current pressure of your tire. It will help you determine how much air you need to add.
- A tire valve adapter: Depending on the type of tire valve you have, you may need an adapter to connect the air compressor hose to the valve. Check the valve type before purchasing the adapter.
- A hose with a pressure gauge: Some air compressors come with a hose that has a built-in pressure gauge. If yours doesn’t, make sure to get a separate hose with a pressure gauge.
- A tire inflator attachment: This attachment connects to the end of the hose and allows you to control the airflow into the tire. Make sure it is compatible with your tire valve.
- A power source: Ensure you have a power source nearby to plug in the air compressor. Most air compressors require electricity to operate. If you’re using a portable compressor, make sure the battery is charged.
Once you have gathered all these materials, you’ll be ready to move on to the next step of inflating your tire with an air compressor.
Step 2: Prepare the Air Compressor
To properly inflate your tire with an air compressor, it is essential to prepare the compressor beforehand. Follow these steps to ensure that your air compressor is ready for use:
- Check the compressor manual: Before using the air compressor, consult the user manual provided by the manufacturer. This will give you a better understanding of the specific instructions, safety precautions, and any unique features of your particular model.
- Inspect the compressor: Thoroughly examine the air compressor for any signs of damage, such as cracks, leaks, or worn-out components. If you notice any issues, it is important to address them before attempting to inflate your tires.
- Connect the compressor to a power source: Plug in the air compressor to an appropriate power outlet or connect it to a suitable power supply. Ensure that the power source can handle the electrical requirements of the compressor and that the power cord is in good condition.
- Check the compressor’s pressure gauge: Many air compressors come equipped with a built-in pressure gauge. Before use, verify that the gauge is functioning correctly by comparing its reading with a known reliable gauge. This will help ensure the accuracy of the pressure readings during inflation.
- Attach the air hose: Connect the air hose to the air compressor using the appropriate fittings. Make sure the connection is secure and airtight to prevent air leakage during the inflation process. Some air compressors may require the use of adapters or additional accessories to properly fit the hose.
- Set the desired pressure: Determine the recommended tire pressure for your specific vehicle by referring to the owner’s manual or the tire placard located on the driver’s side doorjamb. Adjust the pressure settings on the air compressor accordingly to match the desired inflation level.
- Prepare the compressor for operation: Ensure that all valves, switches, and controls on the air compressor are in the correct position for inflation. This may involve turning on the motor, adjusting the regulator knob, or activating any necessary safety features. Refer to the user manual for specific instructions related to your compressor model.
Once you have prepared the air compressor, you will be ready to proceed with inflating your tire. Following these steps will help ensure a safe and efficient inflation process.

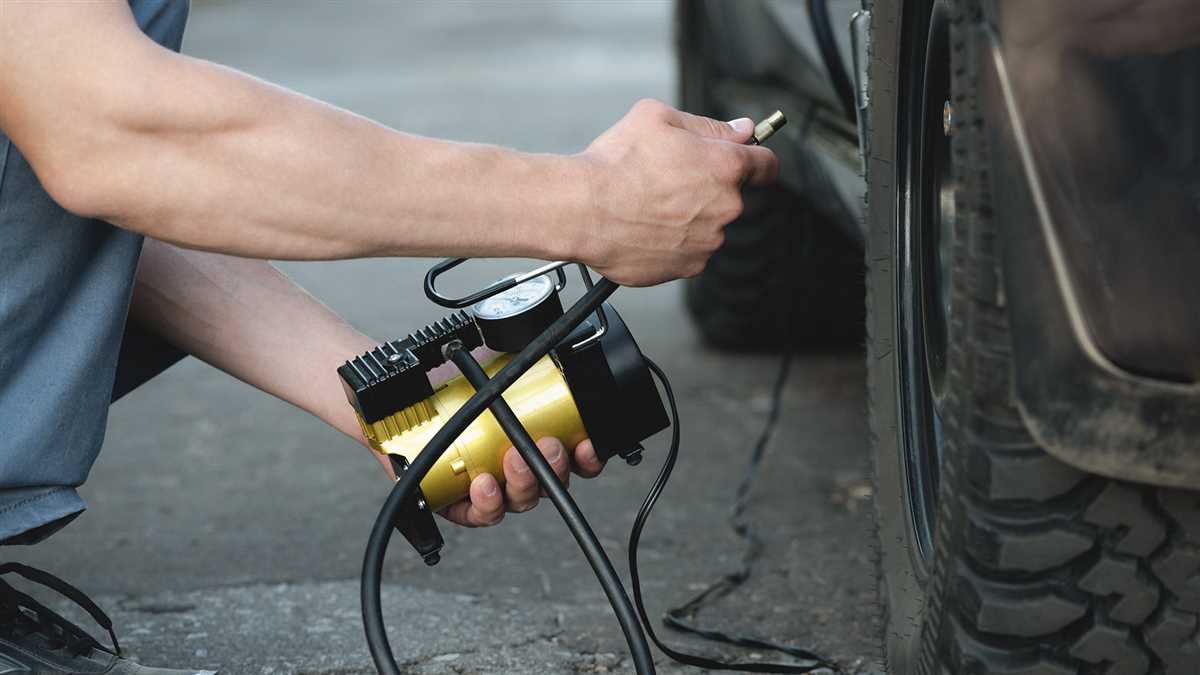
Step 3: Remove the Tire Valve Cap
Once you have connected the air compressor hose to the tire valve stem, the next step is to remove the tire valve cap. The valve cap is a small cap that covers the tire valve to keep dirt and debris out. It usually unscrews easily by hand, but you may need to use a valve cap removal tool if it’s difficult to loosen.
Removing the valve cap allows the air to flow freely into the tire. Make sure to place the valve cap in a secure location so that you don’t lose it. It is essential to keep the valve clean and free from dirt, as any debris can affect the seal and cause air leakage.
In some cases, the valve cap may be stuck or difficult to remove. If this happens, try using a pair of pliers or a wrench to loosen it. Be careful not to damage the valve stem or the cap in the process. If you’re still having trouble, it may be wise to consult a professional for assistance.
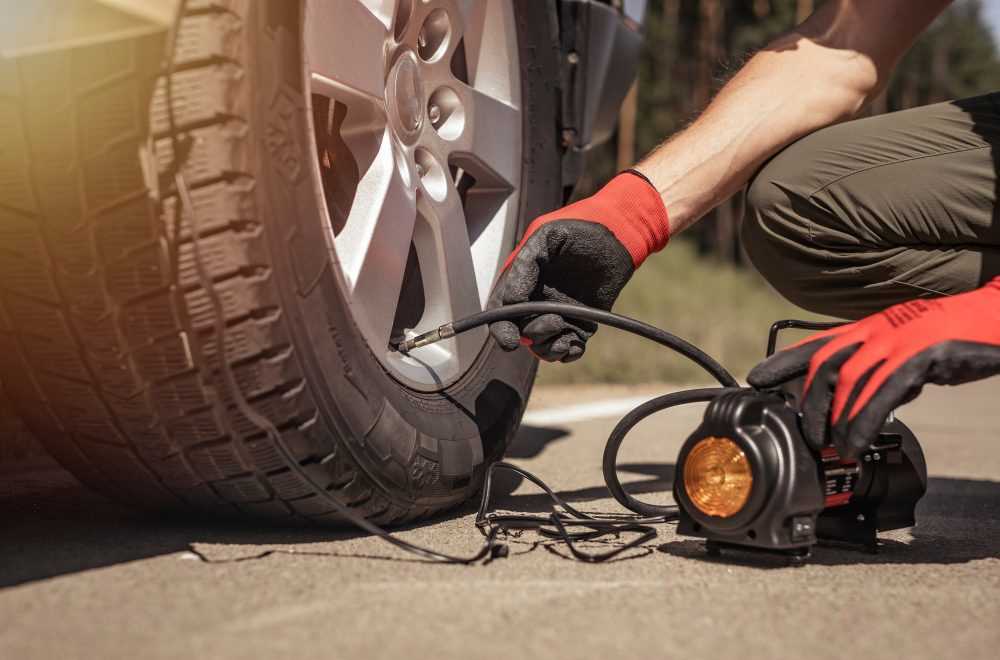
Step 4: Attach the Air Hose to the Tire Valve
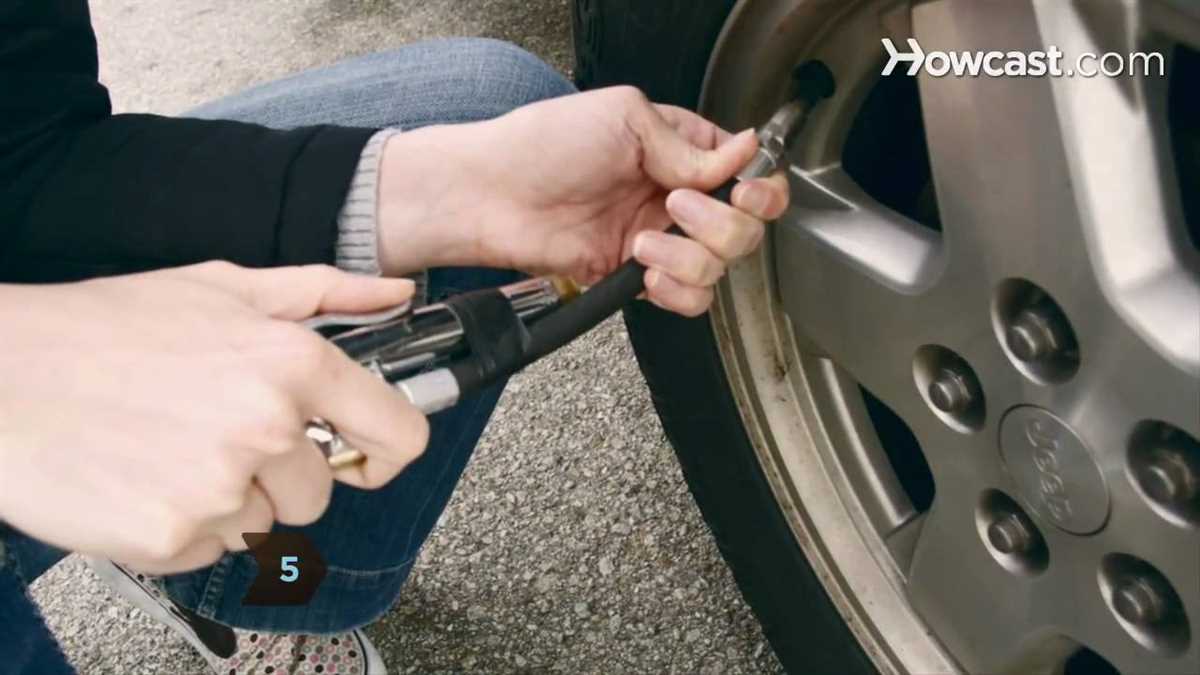
Once you have positioned the air compressor near the tire, it’s time to attach the air hose to the tire valve. Follow these easy steps:

- Locate the tire valve on the side of your tire. It is usually a small, cylindrical metal stem.
- Remove the valve cap by unscrewing it counterclockwise. Keep the valve cap in a safe place so you don’t lose it.
- Take the air hose and securely attach it to the tire valve. Push the collar of the air hose onto the valve and twist it clockwise until it is tight. Make sure it is properly sealed to prevent any air leakage.
- Check the connection between the tire valve and the air hose to make sure it is secure. Gently tug on the air hose to ensure that it is properly attached.
Pro tip: It is good practice to use a pressure gauge to measure the current pressure of your tire before inflating it. This will help you ensure that you don’t overinflate the tire and avoid any potential risks.
Step 5: Set the Desired Tire Pressure
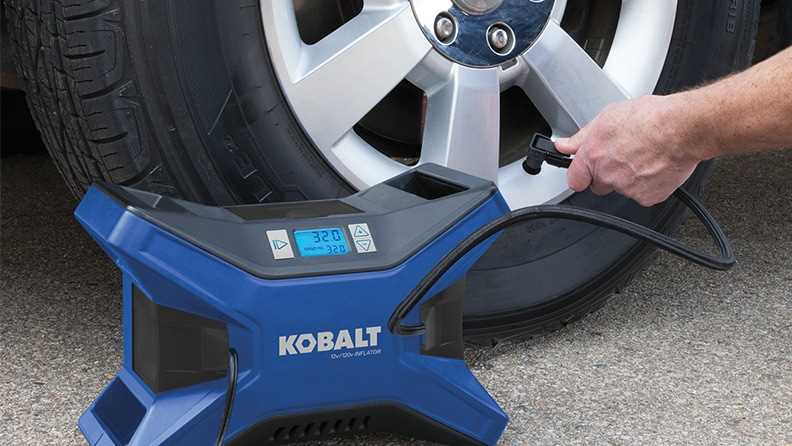
After connecting the air compressor to the tire and turning it on, the next step is to set the desired tire pressure. This is an important step to ensure that your tire is properly inflated.
Here are the steps to set the desired tire pressure:
- Refer to your vehicle’s manual: The recommended tire pressure for your vehicle can usually be found in the owner’s manual or on a sticker located on the driver’s side door jamb. It is important to follow this recommended pressure as it is specific to your vehicle’s make and model.
- Use a pressure gauge: To check the current tire pressure, use a pressure gauge. Simply press the gauge onto the valve stem until you get a reading. This will help you determine how much air you need to add or remove from the tire.
- Adjust the pressure: If the current tire pressure is lower than the recommended pressure, you will need to add air. Use the air compressor to add air to the tire, and periodically check the pressure with the pressure gauge until it reaches the recommended level. If the current pressure is higher than recommended, you can release air by pressing down on the valve stem.
It is important to set the correct tire pressure as overinflated or underinflated tires can affect your vehicle’s performance and safety. Too much pressure can cause the tire to wear unevenly and reduce traction, while too little pressure can lead to poor fuel efficiency and increase the risk of a blowout.

Step 6: Start Inflating the Tire
Once you have securely attached the air compressor hose to the valve stem of the tire, you can begin inflating. Turn on the air compressor and make sure it reaches the desired pressure level specified by the tire manufacturer.
1. Monitor the pressure: Keep an eye on the pressure gauge attached to the air compressor. As the air is being pumped into the tire, the gauge will show a rise in pressure. Make sure to inflate the tire to the recommended pressure level for your specific vehicle.
2. Inflate in short bursts: Instead of continuously pumping air into the tire, it is recommended to inflate in short bursts. This prevents overinflating the tire and reduces the risk of damaging it. Release the air compressor trigger periodically and check the pressure gauge to ensure you are not exceeding the recommended pressure level.
3. Rotate the tire: While inflating the tire, it is a good idea to rotate it occasionally. This helps distribute the air evenly and ensures that all parts of the tire are inflated properly. Rotate the tire a few times during the inflation process to achieve optimal inflation.

4. Check for leaks: As you are inflating the tire, listen for any hissing sounds or air leaks. If you notice any, stop the inflation process and check for any issues, such as a loose valve stem or a damaged tire sidewall. Fix any leaks or issues before continuing to inflate the tire.
5. Use a pressure gauge: While using the air compressor gauge is helpful, it is also recommended to use a separate pressure gauge to verify the pressure. This ensures accuracy and reduces the risk of overinflation. Remove the air compressor hose and use the pressure gauge to check the pressure of the tire. Adjust if necessary.
By following these steps, you can successfully inflate your tire using an air compressor. Remember to always follow the safety guidelines and consult your vehicle’s owner manual for the recommended tire pressure. Regularly checking and maintaining the proper tire pressure is essential for safe driving and prolonging the lifespan of your tires.
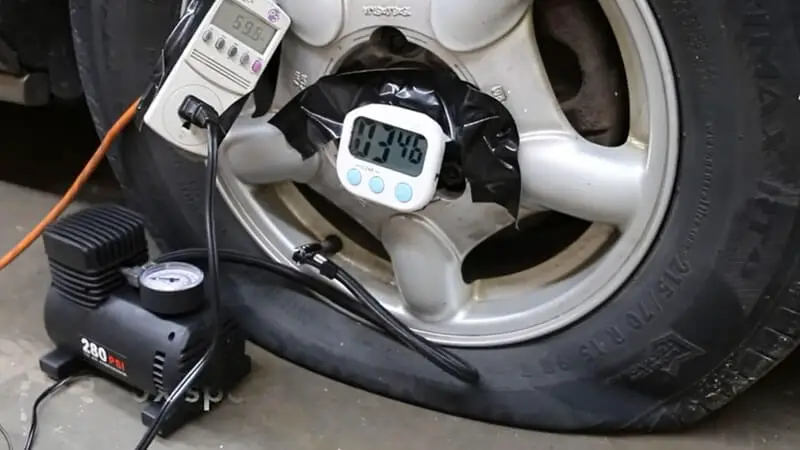
Step 7: Monitor the Tire Pressure
After inflating the tire with the air compressor, it is crucial to monitor the tire pressure to ensure that it is at the recommended level. This step is essential for the safety and performance of the vehicle.
There are several ways to check the tire pressure. One of the common methods is by using a tire pressure gauge. Simply remove the valve cap from the tire stem and firmly press the tire pressure gauge onto the stem. The gauge will provide a reading that indicates the current tire pressure.
Compare the reading to the recommended tire pressure specified by the vehicle manufacturer. If the tire pressure is too low, use the air compressor to add more air. If the tire pressure is too high, release some air by gently pressing the gauge onto the stem until the desired pressure is achieved.
It is important to note that tire pressure should be checked when the tires are cold, as the pressure increases when the tires are heated from driving. It is recommended to check the tire pressure at least once a month to maintain optimal performance and prolong the lifespan of the tires.
Properly inflated tires not only improve fuel efficiency but also enhance vehicle handling and braking. It also reduces the risk of tire blowouts and improves overall safety on the road. By regularly monitoring the tire pressure, you can avoid potential problems and enjoy a smooth and safe driving experience.
Step 8: Disconnect the Air Hose and Replace the Valve Cap
Once you have finished inflating the tire to the desired pressure, it is time to disconnect the air hose from the tire valve. This is an important step to ensure that you don’t accidentally release any more air from the tire and to prevent any damage to the valve.
To disconnect the air hose, simply twist the connector counterclockwise until it loosens and can be easily removed from the valve. Be sure to hold onto the connector tightly to avoid any sudden releases of air pressure.
After disconnecting the air hose, it is important to replace the valve cap to protect the valve from dust, dirt, and other debris. The valve cap helps to maintain the integrity of the valve and prevents any leakage of air.
Simply place the valve cap back onto the valve and screw it on clockwise until it is tight. Make sure that the cap is secure and snug to ensure that no air can escape.
It is also a good idea to check the tire pressure one final time after disconnecting the air hose and replacing the valve cap. This will ensure that the tire is properly inflated and ready for use.
FAQ:
What is the best way to inflate a tire with an air compressor?
The best way to inflate a tire with an air compressor is to first check the recommended tire pressure for your vehicle, which can usually be found in the owner’s manual or on a sticker located on the driver’s side door jamb. Then, connect the air compressor to the tire valve stem and turn it on. Slowly inflate the tire, periodically checking the pressure with a tire pressure gauge until it reaches the recommended level. Make sure to also keep an eye on the tire as it inflates to prevent over-inflation.
Is it necessary to have an air compressor to inflate a tire?
No, it is not necessary to have an air compressor to inflate a tire. There are alternative methods that can be used, such as using a portable tire inflator, visiting a gas station with an air pump, or calling a roadside assistance service for help. However, having an air compressor can be convenient and allows for quick and easy inflation.
Are there any safety precautions to keep in mind when inflating a tire with an air compressor?
Yes, there are some safety precautions to keep in mind when inflating a tire with an air compressor. It is important to wear safety goggles to protect your eyes from any debris that may be dislodged during the inflation process. Additionally, make sure to stand clear of the tire and the air compressor while inflating to avoid any potential injuries in case of an accident. Finally, never over-inflate the tire, as this can lead to tire damage or a blowout.
Can an air compressor be used to inflate other things besides tires?
Yes, an air compressor can be used to inflate a variety of other things besides tires. It can be used to inflate sports balls, inflatable pools, air mattresses, and even inflatable toys. However, it is important to make sure that the air compressor is set to the appropriate pressure for the item being inflated, as different items may require different levels of air pressure.
Video:


Harrison Clayton
Meet Harrison Clayton, a distinguished author and home remodeling enthusiast whose expertise in the realm of renovation is second to none. With a passion for transforming houses into inviting homes, Harrison's writing at https://thehuts-eastbourne.co.uk/ brings a breath of fresh inspiration to the world of home improvement. Whether you're looking to revamp a small corner of your abode or embark on a complete home transformation, Harrison's articles provide the essential expertise and creative flair to turn your visions into reality. So, dive into the captivating world of home remodeling with Harrison Clayton and unlock the full potential of your living space with every word he writes.


