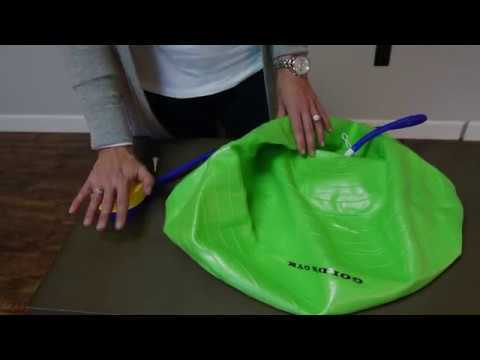
How to Inflate Exercise Ball with Air Compressor

Inflating an exercise ball can be a tedious task, especially if you don’t have the right tools. However, if you have an air compressor, the process becomes much simpler and quicker. In this article, we will guide you step-by-step on how to properly inflate an exercise ball using an air compressor.
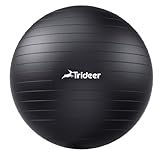
Before you start, make sure you have the correct size exercise ball for your needs. Most exercise balls have a diameter listed on the packaging or on the ball itself. It’s important to choose the right size as inflating it too much or too little can affect its stability and effectiveness during workouts.
First, locate the air valve on the exercise ball. It is usually located near the inflation hole, which may be covered by a small plastic cap. Remove the cap and attach the air compressor nozzle to the valve. Make sure it is securely attached to avoid any air leaks.
Once the nozzle is attached, turn on the air compressor. Slowly inflate the exercise ball, monitoring the pressure as you go. It’s best to inflate the ball in short bursts to prevent over-inflation. Keep an eye on the pressure gauge and stop inflating when the ball reaches the desired firmness.
After inflating the exercise ball, remove the air compressor nozzle from the valve and quickly reseal it with the plastic cap. Give the ball a gentle squeeze to ensure it is properly inflated and has no leaks. If you notice any air escaping, check the valve and nozzle for any issues.

Now that your exercise ball is properly inflated, you can use it for various activities such as yoga, Pilates, or balance exercises. Remember to regularly check the firmness of the ball and reinflate it if necessary. With an air compressor, maintaining the optimal inflation of your exercise ball becomes a breeze.
Choosing the Right Air Compressor
When it comes to inflating an exercise ball with an air compressor, it is important to choose the right one for the job. Using the wrong air compressor can result in a ball that is not properly inflated and may not provide the necessary support during exercise.
Air Compressor Specifications:
First, you need to consider the specifications of the air compressor. Look for a compressor that has a pressure range suitable for inflating exercise balls. Most exercise balls require a pressure of around 8-10 PSI. Therefore, an air compressor with a pressure range of at least 10 PSI would be ideal.
Air Flow Rate:
In addition to pressure, you should also consider the air flow rate of the compressor. The air flow rate determines how quickly the compressor can inflate the exercise ball. Look for a compressor with a high air flow rate to quickly inflate the ball without wasting too much time.
Portability:
Portability is another important factor to consider when choosing an air compressor for inflating exercise balls. You may need to move the compressor around, so it should be lightweight and easy to carry. Consider a portable air compressor that is compact in size and has a convenient handle for easy transportation.
Noise Level:
When using an air compressor, the noise level can be a significant consideration. If you plan to inflate your exercise ball in a residential area or in a space with noise restrictions, it is important to choose a compressor with a low noise level. Look for compressors that specifically advertise quiet operation.
Reliability and Durability:
Finally, you want to choose an air compressor that is reliable and durable. Look for a compressor from a reputable brand with positive reviews. Read about the materials used in its construction and ensure that it is built to withstand frequent use.
By considering the air compressor’s specifications, air flow rate, portability, noise level, and reliability, you can choose the right air compressor for inflating your exercise ball with ease and confidence.
Gathering the Necessary Equipment
Before inflating your exercise ball with an air compressor, you will need to gather the necessary equipment to ensure a successful inflation process. Here are the items you will need:
- Exercise Ball: Make sure you have an exercise ball that is compatible with an air compressor. Check the manufacturer’s instructions or the ball’s packaging for any specific guidelines or restrictions.
- Air Compressor: You will need an air compressor to provide the necessary air pressure to inflate the exercise ball. Ensure that the air compressor is in good working condition and has the appropriate attachments for inflating the ball.
- Air Hose: The air compressor will require an air hose to connect to the exercise ball. Make sure you have a suitable air hose that is long enough to reach the ball and has the correct fittings to connect to the air compressor.
- Pressure Gauge: It is important to monitor the air pressure of the exercise ball during inflation to prevent over-inflation. Use a pressure gauge to check the pressure as you inflate the ball.
- Tape Measure: To ensure that you are inflating the exercise ball to the correct size, have a tape measure handy. Measure the diameter of the ball before and during inflation to make any necessary adjustments.
- Protective Gear: While not necessary, it is always a good idea to wear protective gear, such as safety glasses, when using an air compressor. This will help protect your eyes from any debris or accidental releases of air pressure.
By gathering all the necessary equipment beforehand, you can ensure a smooth and efficient inflation process for your exercise ball using an air compressor.
Preparing the Exercise Ball
Gather the necessary materials
Before you start inflating your exercise ball with an air compressor, make sure you have all the necessary materials ready. You will need an exercise ball, an air compressor, and a nozzle attachment. Ensure that the nozzle attachment fits the air compressor and the exercise ball valve.
Clean the exercise ball
Before inflating your exercise ball, it’s important to clean it thoroughly to remove any dirt or dust that may have accumulated on its surface. Use a mild soap and water solution to wipe down the entire exercise ball, and then rinse it off with clean water. This will help ensure a clean and hygienic exercise ball for your workouts.

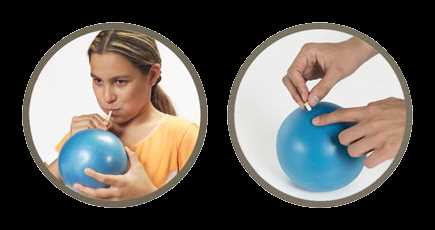
Locate the valve
The valve is the opening through which you will insert the nozzle attachment to inflate your exercise ball. It is typically located on the top or bottom of the ball, near the perimeter. Take a close look at your exercise ball to find the valve. Once you locate it, ensure that it is free from any dirt, debris, or obstructions that may hinder the inflation process.
Prepare the air compressor
If you haven’t done so already, connect the nozzle attachment to the air compressor. Make sure it is securely attached to prevent any air leakage during the inflation process. Check the air compressor to ensure it is in proper working condition and has sufficient air pressure to inflate the exercise ball. Adjust the pressure settings if necessary.
Position the exercise ball
Before inflating the exercise ball, place it on a flat, stable surface. This will provide the ball with the necessary support and stability during the inflation process. Ensure that there is enough space around the exercise ball to maneuver the air compressor and nozzle attachment comfortably.
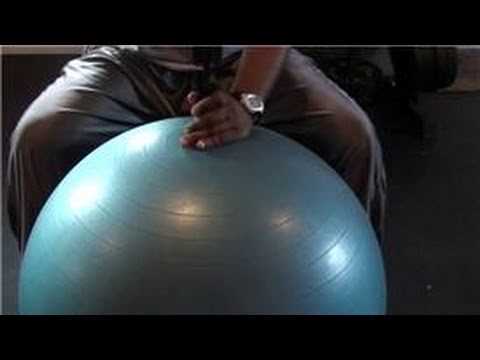
Attaching the Air Compressor
Before you can inflate your exercise ball with an air compressor, you need to make sure that the air compressor is properly attached to the ball. Follow these steps to attach the air compressor:

- First, make sure that the air compressor is turned off and unplugged.
- Locate the air valve on the exercise ball. This is usually a small rubber or plastic piece that can be unscrewed.
- Once you have located the air valve, take the appropriate adapter for the air compressor and screw it onto the valve. Make sure it is secure.
- Next, attach the hose from the air compressor to the adapter on the exercise ball. Again, make sure it is securely attached.
- Once everything is properly attached, you can plug in the air compressor and turn it on.
Note: It is important to pay attention to the recommended PSI (pound per square inch) for your exercise ball. Overinflating the ball can cause it to burst. Refer to the manufacturer’s instructions for the correct PSI for your specific ball.
Adjusting the Air Pressure
To ensure that your exercise ball is properly inflated and comfortable to use, it’s important to adjust the air pressure according to your preferences and needs.
Check the recommended pressure: Before adjusting the air pressure of your exercise ball, refer to the manufacturer’s guidelines or instructions to determine the recommended pressure range. This will help you understand the optimal level of inflation for your ball.
Release excess air: If the exercise ball is too firm or overinflated, it can be uncomfortable to use and may affect your balance and stability during workouts. To release excess air, carefully insert the tip of an air nozzle or needle into the inflation hole and press down on the ball to let out the air slowly. Continuously monitor the firmness of the ball while releasing the air to avoid deflating it too much.
Add air if necessary: If the exercise ball feels too soft or underinflated, you can use an air compressor to increase the air pressure. Attach the air compressor’s nozzle to the inflation hole, and slowly inflate the ball to the desired firmness. Be cautious not to overinflate the ball, as it can become unstable and more prone to bursting or damage.
Test the firmness: Once you have adjusted the air pressure, it is essential to test the firmness of the exercise ball by sitting or pressing on it. The ball should feel comfortable and provide proper support for your body weight. Adjust the air pressure accordingly if needed.
Regularly check and maintain: It is important to regularly check the air pressure of your exercise ball to ensure its stability and performance. Use a pressure gauge to measure the firmness and adjust as necessary. Over time, the ball may naturally lose some air, so be prepared to inflate it periodically.
By adjusting the air pressure of your exercise ball, you can optimize its comfort and functionality for various workouts and exercises. Remember to follow safety precautions and guidelines provided by the manufacturer to ensure proper inflation and prolong the lifespan of your exercise ball.
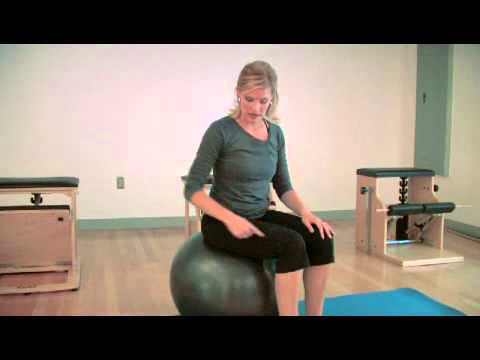
Inflating the Exercise Ball
When it comes to inflating an exercise ball, an air compressor can be a very useful tool. An exercise ball, also known as a stability ball or Swiss ball, is commonly used for exercises and physical therapy. To properly inflate the ball using an air compressor, there are a few steps you need to follow.
Step 1: Gather the Required Materials
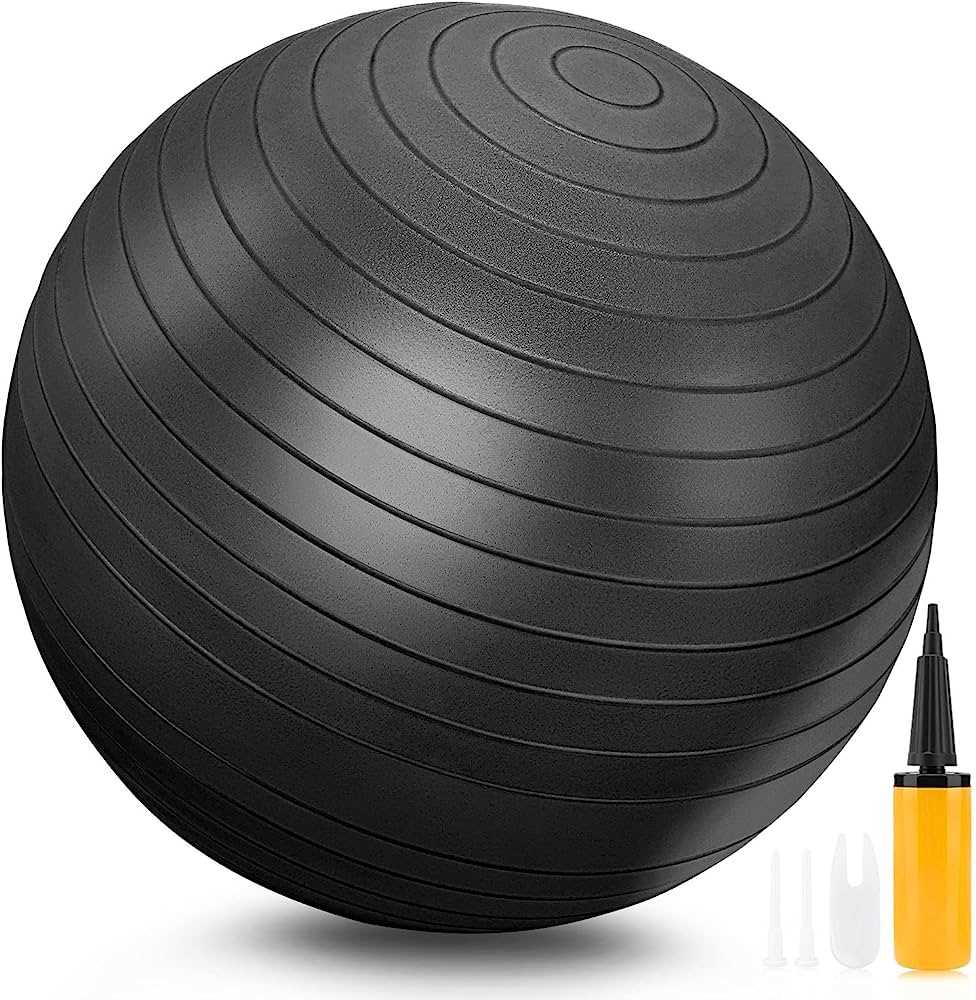
Before you begin inflating the exercise ball, make sure you have all the necessary materials. These include the exercise ball itself, an air compressor with a pressure gauge, a ball pump needle, and a ball pump adapter.
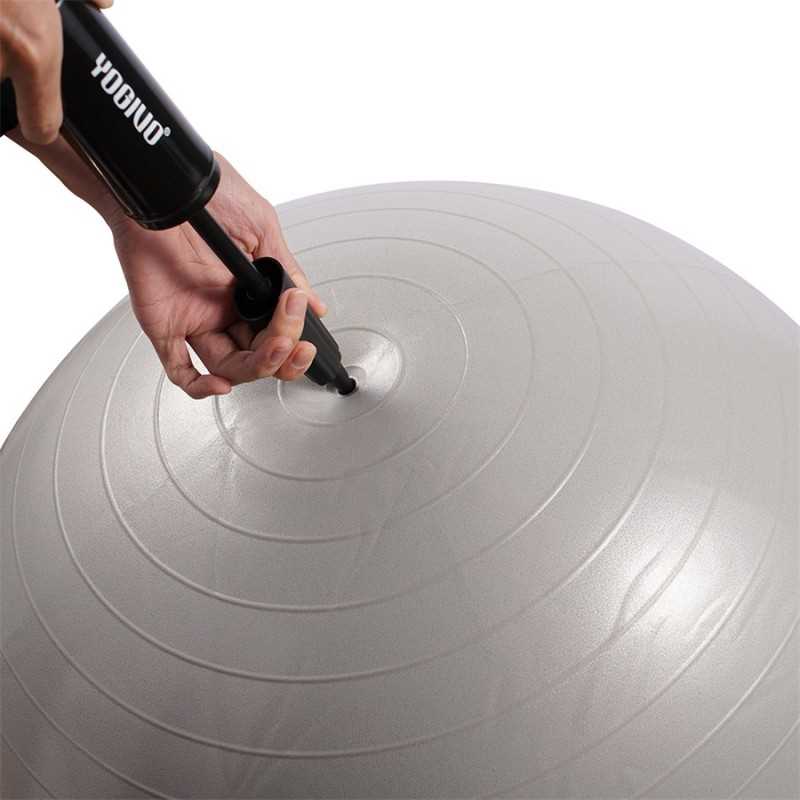
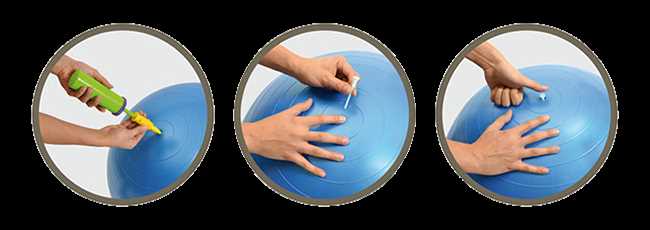
Step 2: Attach the Ball Pump Needle
To inflate the exercise ball using an air compressor, you will first need to attach the ball pump needle to the adapter. The adapter is used to connect the needle to the air compressor hose. Make sure the needle is securely attached to the adapter.
Step 3: Insert the Needle into the Ball
With the needle attached to the adapter, you can now insert it into the exercise ball. Look for the air valve on the ball, usually located near the top. Insert the needle into the valve, making sure it goes all the way in.
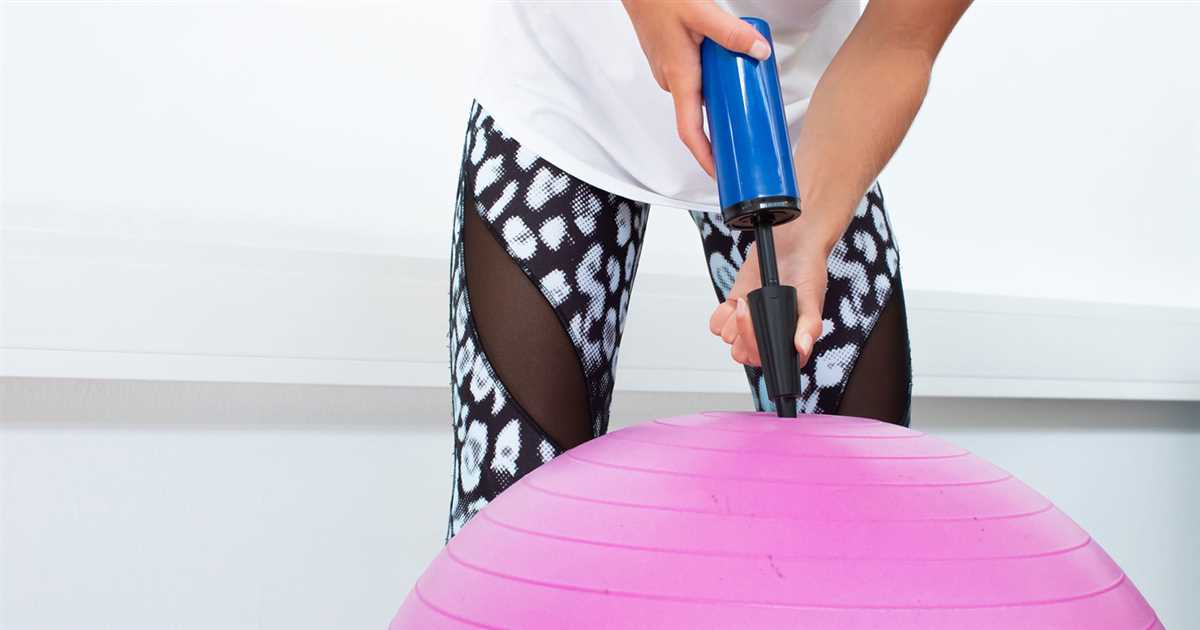
Step 4: Turn on the Air Compressor
Once the needle is securely inserted into the exercise ball, you can turn on the air compressor. The pressure gauge on the compressor will help you monitor the level of inflation. Slowly start the compressor and watch as the ball starts to inflate.
Step 5: Inflate to the Desired Size
As the ball is inflating, keep an eye on the pressure gauge to ensure the ball does not overinflate. It is important to inflate the ball to the desired size for your exercise routine or therapy. Once the ball reaches the desired size, turn off the air compressor.
Step 6: Remove the Needle
After inflating the exercise ball, you can remove the needle from the valve. Hold onto the valve to prevent any air from escaping, and carefully pull the needle out. Make sure to replace the valve cap to keep the air inside the ball.
By following these steps, you can easily inflate an exercise ball using an air compressor. Remember to always check the manufacturer’s instructions for any specific guidelines or precautions before inflating the ball.
Testing the Ball for Proper Inflation
Step 1: Visual Inspection
Once you have inflated your exercise ball, the first step in testing for proper inflation is to visually inspect the ball for any visible signs of deflation or damage. Carefully examine the entire surface of the ball, looking for any areas that appear saggy or wrinkled.
Step 2: Press Test
To further test the inflation level of the exercise ball, you can perform a press test. Gently press your hands down on different areas of the ball to check if it gives too much under the pressure. If the ball feels too soft or squishy, it may require further inflation.
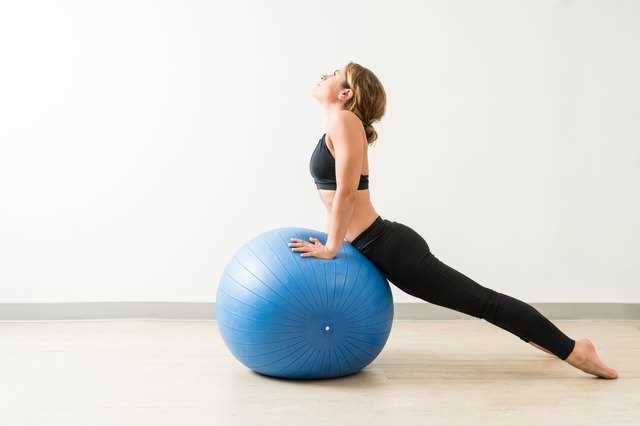
Step 3: Stability Test
The stability test is another important way to determine if the exercise ball is properly inflated. Sit or stand on the ball, ensuring that your feet are flat on the ground. If the ball feels unstable or wobbles excessively, it may need additional inflation to provide the necessary support.
Step 4: Measurement Test
For a more precise measurement of the ball’s inflation level, you can use a tape measure to check its diameter. Refer to the manufacturer’s guidelines or the exercise ball’s instructions to determine the recommended diameter for proper inflation. Measure the ball’s diameter and compare it to the recommended measurement to confirm if it needs more or less air.
Step 5: Repeat Inflation
If any of the above tests indicate that the exercise ball is not properly inflated, deflate the ball and repeat the inflation process using an air compressor or other suitable method. Repeat the testing process until the ball passes all the visual, press, stability, and measurement tests.
Remember, proper inflation is crucial for safety and functionality during exercise or fitness routines. Take the time to test the ball’s inflation and make any necessary adjustments to ensure optimal performance.
Proper Storage and Maintenance
1. Clean and Dry
After using your exercise ball, it is important to clean and dry it before storing. Wipe the surface of the ball with a damp cloth to remove any sweat or dirt. Make sure to dry it thoroughly to prevent the growth of mold or mildew.
2. Deflate and Store
To save space and prevent damage, deflate the exercise ball before storing. Remove the air by inserting the nozzle into the valve and pressing down to release the air. Once deflated, fold the ball carefully and store it in a cool and dry place. Avoid storing it in direct sunlight or near any sharp objects that could puncture the ball.
3. Avoid Extreme Temperatures
Extreme temperatures can affect the durability of the exercise ball. It is best to store it in a temperature-controlled environment, away from heat sources such as radiators or heaters. High temperatures can cause the ball to expand while low temperatures can make it brittle and more prone to bursting.
4. Regular Inspections
Regularly inspect your exercise ball for any signs of wear and tear. Look for any punctures, leaks, or cracks in the surface. If you find any damage, it is important to repair or replace the ball immediately to ensure safe and effective usage.
5. Proper Inflation
When inflating the exercise ball, make sure to follow the manufacturer’s guidelines for the recommended inflation size. Over-inflating the ball can cause it to burst, while under-inflating it can affect its stability and performance. Use a pump or air compressor with a pressure gauge to ensure proper inflation.
6. Safe Handling
When using the exercise ball, make sure to handle it with care and avoid any sharp or rough surfaces that could cause damage. Do not sit or jump on the ball with excessive force, as this can put unnecessary strain on the material and increase the risk of injury.
By following these proper storage and maintenance tips, you can extend the lifespan of your exercise ball and ensure safe and effective workouts for years to come.
FAQ:
Can I inflate my exercise ball with an air compressor?
Yes, you can inflate your exercise ball with an air compressor. An air compressor is a convenient and efficient way to inflate large objects like exercise balls.
What pressure should I use to inflate my exercise ball with an air compressor?
It is recommended to use a pressure of around 2 PSI (14 kPa) to inflate an exercise ball with an air compressor. However, it’s important to check the manufacturer’s instructions or the recommended pressure range for your specific exercise ball, as different models may have different inflation requirements.
Are there any precautions I should take when inflating my exercise ball with an air compressor?
Yes, there are a few precautions you should take when inflating your exercise ball with an air compressor. First, make sure to use a pressure gauge to monitor the pressure and avoid over-inflating the ball. Secondly, be careful not to puncture the ball with the compressor nozzle or any sharp objects. Finally, inflate the ball in a well-ventilated area to avoid inhaling any fumes from the compressor.
Is it possible to inflate an exercise ball without an air compressor?
Yes, it is possible to inflate an exercise ball without an air compressor. You can use a hand pump or a bicycle pump to inflate the ball manually. This method may take more time and effort compared to using an air compressor, but it can still be effective.
Video:


Harrison Clayton
Meet Harrison Clayton, a distinguished author and home remodeling enthusiast whose expertise in the realm of renovation is second to none. With a passion for transforming houses into inviting homes, Harrison's writing at https://thehuts-eastbourne.co.uk/ brings a breath of fresh inspiration to the world of home improvement. Whether you're looking to revamp a small corner of your abode or embark on a complete home transformation, Harrison's articles provide the essential expertise and creative flair to turn your visions into reality. So, dive into the captivating world of home remodeling with Harrison Clayton and unlock the full potential of your living space with every word he writes.


