How to Drain Water from an Air Compressor: A Step-by-Step Guide

If you own an air compressor, it’s essential to regularly drain the water that accumulates inside the tank. Water can build up due to condensation, which can lead to rust and corrosion, reducing the performance and lifespan of your compressor. Properly draining the water from your air compressor will help ensure its longevity and efficiency.
Here is a step-by-step guide to help you effectively drain the water from your air compressor:
- Prepare the necessary tools: Before getting started, gather the tools you’ll need, including a wrench, a bucket or container to collect the water, and safety glasses to protect your eyes.
- Turn off the compressor: Ensure that the compressor is completely turned off and unplugged from the power source. This is crucial for your safety while working on the compressor.
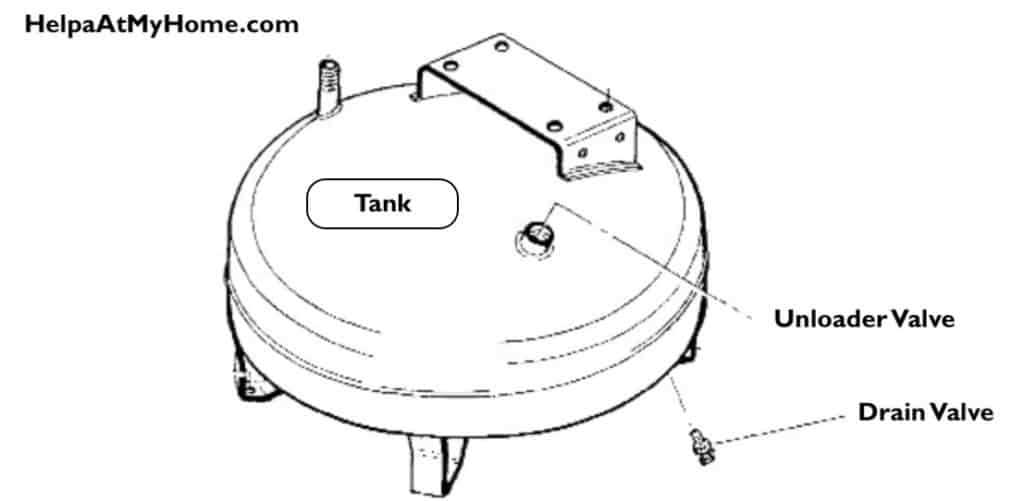
- Release the pressure: Locate the pressure release valve on your air compressor and open it to release any built-up pressure inside the tank. This step is essential to avoid any accidents or injuries during the draining process.
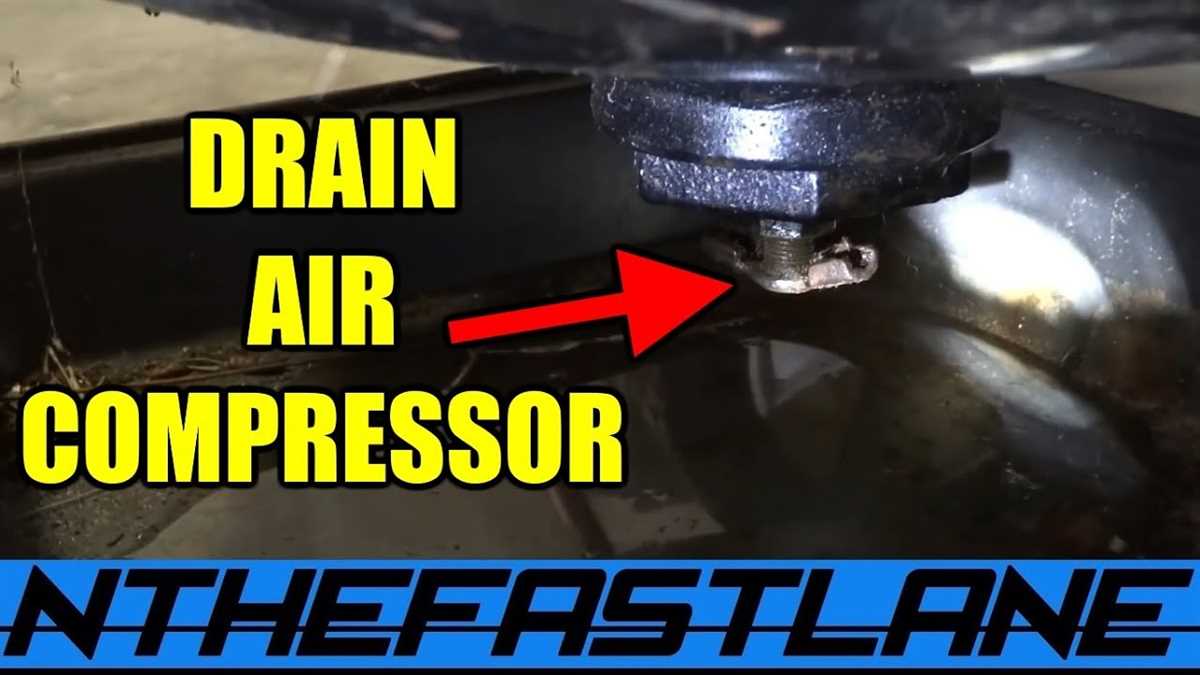
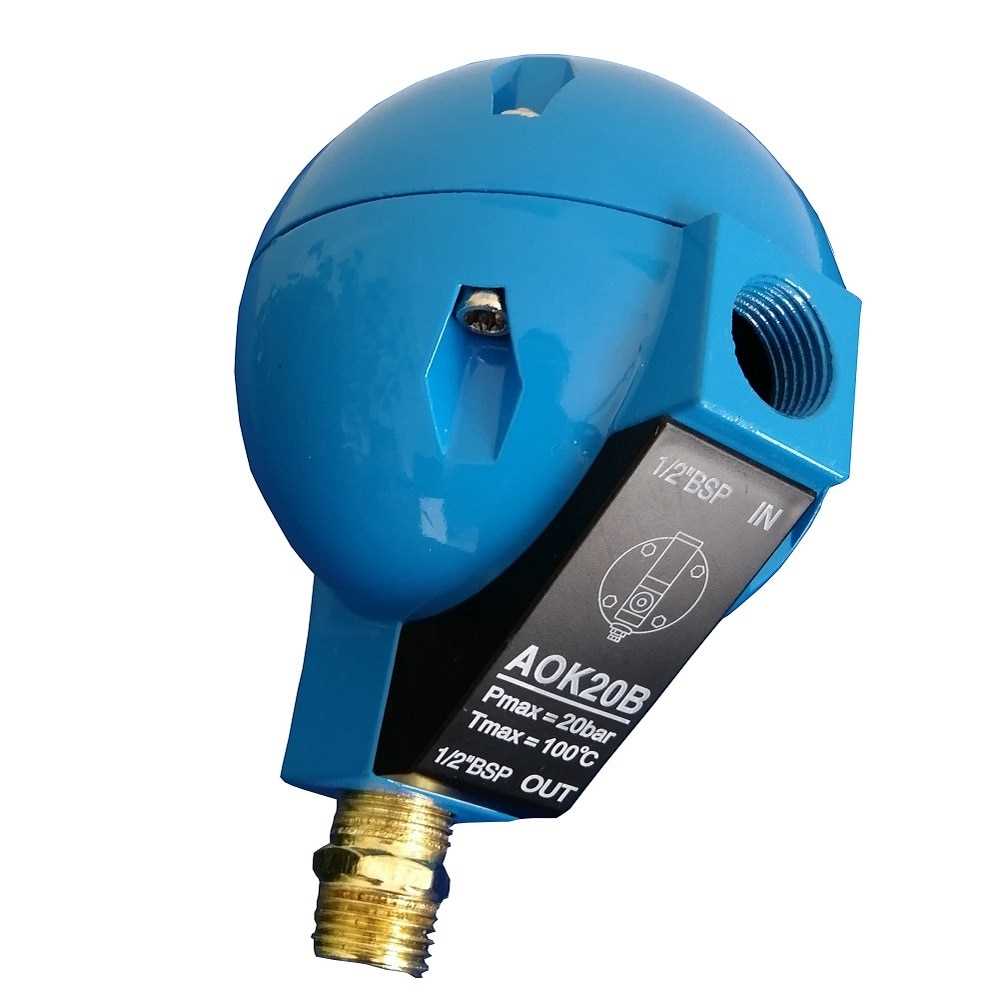
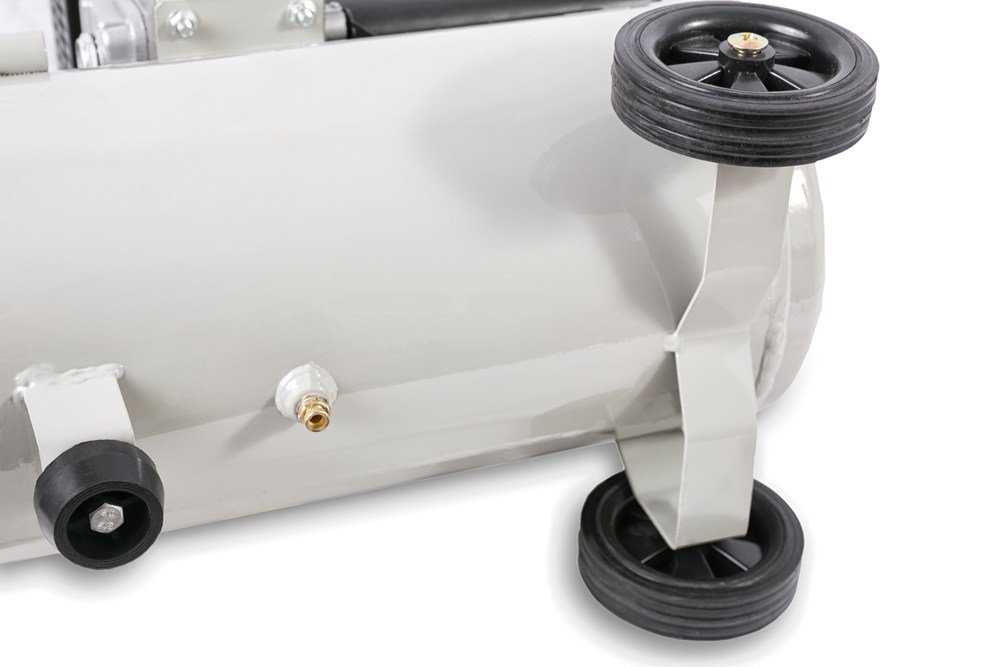
- Locate the drain valve: Look for the drain valve at the bottom of the compressor tank. The drain valve is usually a small brass or chrome valve with a hexagonal or square head.
- Position the bucket: Place the bucket or container underneath the drain valve to collect the water that is drained from the tank. Ensure that it is large enough to hold the expected amount of water.
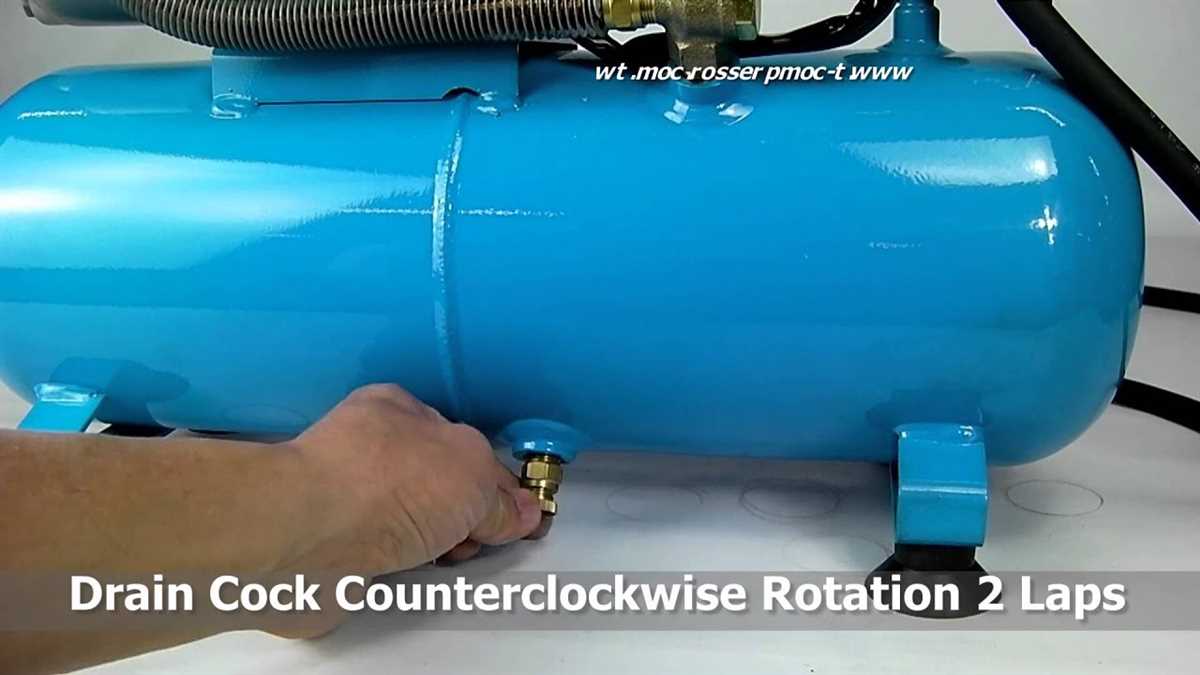
- Open the drain valve: Using a wrench, carefully turn the drain valve counterclockwise to open it. Be cautious not to apply excessive force as this can damage the valve.
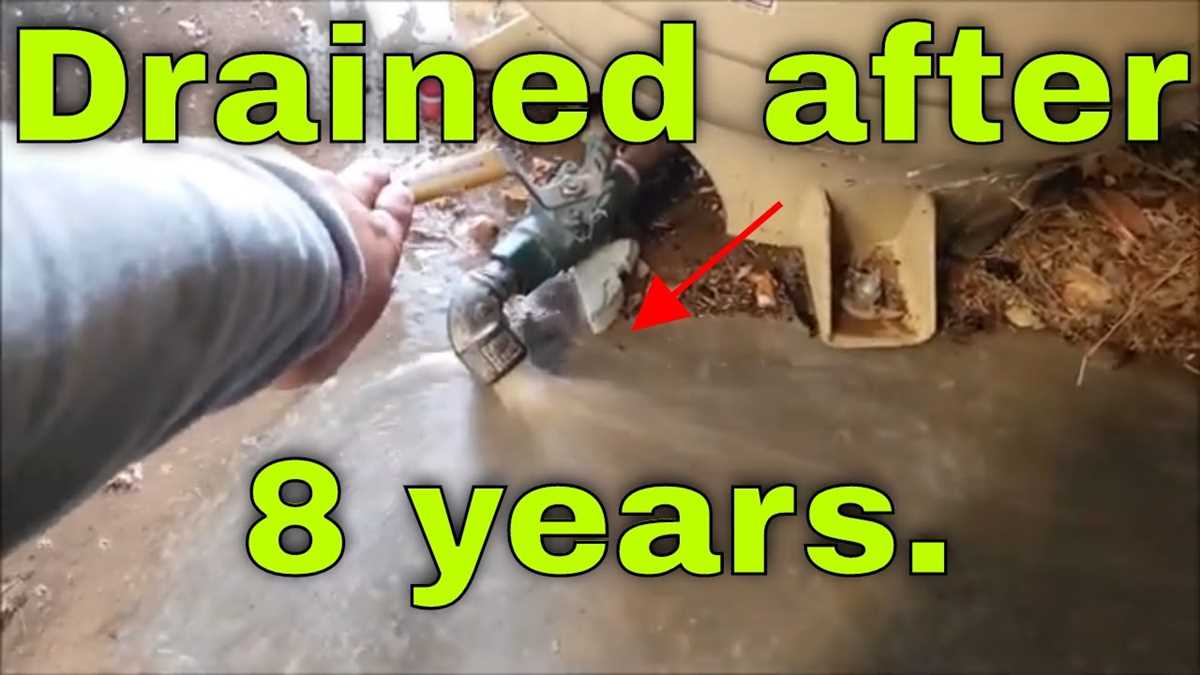
- Allow the water to drain: Let the water flow freely from the drain valve into the bucket. The draining process may take some time depending on the amount of water accumulated in the tank.
- Close the drain valve: Once the water has completely drained, close the drain valve by turning it clockwise. Ensure it is securely closed to prevent any air or water leaks.
- Check for any leaks: Inspect the drain valve and tank for any signs of leaks. Tighten any loose connections if necessary.
- Restart the compressor: After confirming that there are no leaks, you can now restart your air compressor and resume its regular operation.
Following these simple steps to drain the water from your air compressor will help maintain its performance and prolong its lifespan. Regular maintenance, including draining the water, is essential to keep your air compressor running smoothly and efficiently.
Disclaimer: Always refer to the manufacturer’s instructions and guidelines before performing any maintenance or repairs on your air compressor. If you are unsure or uncomfortable with any of the steps, it is advisable to seek professional assistance.
Step 1: Gather Your Supplies

Before you begin draining the water from your air compressor, make sure you have all the necessary supplies on hand. Having everything ready will save you time and make the process more efficient. Here’s what you’ll need:
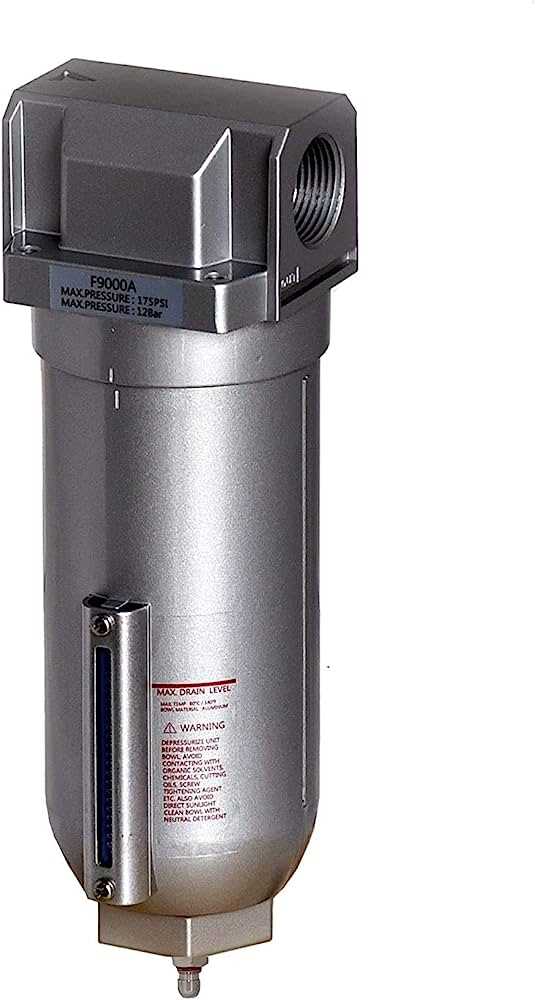
- Drain valve: Most air compressors come equipped with a drain valve, but if your compressor doesn’t have one, you’ll need to purchase one separately. The drain valve is essential for removing the water from the tank.
- Bucket or container: You’ll need a bucket or container to collect the water that drains from the compressor. Make sure it’s large enough to hold all the water that will be expelled.
- Teflon tape: Teflon tape is used to create a watertight seal when attaching the drain valve to the compressor. It helps prevent leaks and ensures a secure connection.
- Wrench or pliers: You’ll need a wrench or pliers to loosen and tighten the drain valve. Make sure you have the appropriate tool for the type of valve your compressor has.
- Safety goggles and gloves: It’s always important to prioritize safety when working with an air compressor. Wear safety goggles to protect your eyes from any debris, and gloves to shield your hands from any sharp edges or hot surfaces.
Once you have all these supplies gathered, you’ll be ready to move on to the next step of draining the water from your air compressor.
Step 2: Turn Off and Unplug the Air Compressor
Once you have located the drain valve, the first thing you need to do is turn off the air compressor. This is essential for your safety and to ensure that the draining process goes smoothly. Turning off the air compressor will prevent any accidents or unexpected releases of pressure while you are working on draining the water.
After turning off the air compressor, you should also unplug it from the power source. This is an important step as it eliminates the risk of accidentally turning the compressor back on during the draining process.
By unplugging the air compressor, you can be confident that it will not start running while you are attempting to drain the water. This step is crucial for your safety as well as the longevity of your air compressor.

Step 3: Locate the Drain Valve
In order to drain water from your air compressor, you’ll need to locate the drain valve. This valve is usually located at the bottom of the air compressor tank and is designed specifically for draining accumulated water. It may be a small knob or a larger lever, depending on the specific model of your air compressor.
First, check the user manual for your air compressor, as it will usually have a section dedicated to locating and identifying the drain valve. If you don’t have the manual, don’t worry – the drain valve is usually easy to spot. Look for a small valve or lever at the lowest point of the tank.
Pro tip: The drain valve is often made of brass or steel and may have a red or blue color for easy identification. It may also have a square or hexagonal shape, allowing you to use a wrench or pliers for easier twisting or lever action.
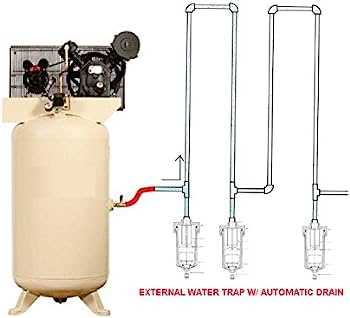
If you’re having trouble finding the drain valve, you can also try tracing the air lines or hoses that connect to the tank. These lines usually lead directly to the drain valve, making it easier to locate. Alternatively, you can consult the manufacturer’s website or contact customer support for assistance in finding the drain valve on your specific air compressor model.
Once you have located the drain valve, you are ready to move on to the next step in the process of draining water from your air compressor. Make sure to follow the instructions and safety precautions in the user manual to ensure a smooth and safe draining procedure.

Step 4: Position a Bucket or a Drain Pan
Before starting the drainage process, it is important to position a bucket or a drain pan beneath the air compressor. This will catch the water that is being drained, preventing it from creating a mess on the floor or other surfaces.
Ensure that the bucket or drain pan is large enough to hold the expected amount of water that will be drained from the air compressor. It is recommended to use a container with a capacity that exceeds the volume of the compressor’s tank, to avoid overflow.
Place the bucket or drain pan directly beneath the drain valve of the compressor. The drain valve is usually located at the bottom of the tank. By positioning the container directly beneath the valve, it will capture the water as it is released.
Make sure the container is stable and secure, as water can sometimes flow out forcefully. This will prevent any accidents or spills during the drainage process. Some people find it helpful to place a towel or absorbent mat beneath the container to catch any potential drips or splashes.

Once the bucket or drain pan is properly positioned, you can proceed to the next step of opening the drain valve to begin draining the water from the air compressor.
Step 5: Open the Drain Valve
Once you have located the drain valve on your air compressor, it’s time to open it. The drain valve is typically a small, lever-like handle or a screw-type valve that is designed to release water from the tank. Before opening the valve, ensure that you have a tray or container placed underneath to catch the water.
1. Lever-type valve: If your air compressor has a lever-type valve, simply pull the lever upwards or downwards to open the valve. This will allow the water to flow out of the tank. Hold the valve in the open position until all the water has been drained.
2. Screw-type valve: If your air compressor has a screw-type valve, use a wrench or pliers to turn the valve counterclockwise. This will gradually open the valve and allow the water to escape. Keep turning the valve until all the water has been drained.
It’s important to drain the water completely to prevent any build-up or damage to the air compressor. Once all the water has been drained, close the drain valve securely to ensure a tight seal.

Step 6: Allow the Water to Drain Completely
Once you have opened the drain valve, you will need to wait for the water to completely drain from the air compressor tank. This step is crucial as any remaining water can lead to damage and corrosion of the tank over time.
Depending on the size of your air compressor and the amount of water present, the draining process may take several minutes to complete. It’s important to be patient and ensure that all the water has been removed.
An effective way to ensure that all the water has drained is to place a container or bucket below the drain valve to collect the water. This will allow you to visually monitor the draining process and determine when it has finished.
As the water begins to drain, you may notice some sediments or debris being flushed out as well. It’s important to be aware of this and ensure that the drain valve remains open until the water runs clear and free of any impurities.
Remember to exercise caution when handling the water that is being drained, as it may still be hot or under high pressure. Use appropriate safety measures such as wearing gloves and protective eyewear to prevent any accidents or injuries during the process.
Once all the water has been successfully drained from the air compressor tank, you can proceed with closing the drain valve and continuing with any necessary maintenance or storage procedures for your air compressor.
Step 7: Close the Drain Valve
Once you have drained all the water from your air compressor, it is important to close the drain valve to prevent any air or water from escaping. Leaving the drain valve open can lead to air leaks and a decrease in overall compressor performance.
First, ensure that all the water has been drained properly by observing the flow from the drain valve. If you notice any remaining water, allow it to drain completely before proceeding.
Next, locate the drain valve handle or knob and turn it clockwise to close the valve. Make sure to tighten the valve securely to prevent any leakage. Remember to use caution, as the valve may be hot if the air compressor has been running recently. If necessary, use a pair of pliers or an adjustable wrench to ensure a tight closure.
Once the drain valve is closed, you can proceed with turning on your air compressor and resuming your tasks. Regularly checking and closing the drain valve will help prolong the lifespan of your compressor and maintain optimal performance.
Step 8: Test the Air Compressor
After draining the water from your air compressor, it’s important to test it to ensure that it is functioning properly. Here are some steps to follow when testing your air compressor:
1. Turn on the Power
First, make sure that the power is turned off before connecting your air compressor to the power source. Once the power is on, you can proceed to the next step.
2. Check for Leaks
Inspect the air compressor for any signs of leaks. This could include air or water leaking from any connections or valves. If you notice any leaks, tighten the connections or replace the faulty parts before proceeding.
3. Set the Pressure Regulator
Adjust the pressure regulator on your air compressor to the desired pressure setting. This will depend on the specific tools or equipment you plan to use with the compressor.
4. Test the Air Tools
Connect your air tools or equipment to the air compressor using the appropriate fittings. With the power on and the pressure regulator set, test the tools to ensure that they are receiving the correct amount of air and are functioning properly.
5. Monitor the Air Tank
During the testing process, keep an eye on the air tank pressure gauge. Ensure that the pressure remains within the recommended range and that the compressor kicks in to refill the tank as needed.
By following these steps to test your air compressor, you can ensure that it is ready to be used for all your air-powered tasks.
FAQ:
Why is it necessary to drain water from an air compressor?
It is necessary to drain water from an air compressor because water can accumulate in the tank over time, which can lead to corrosion and damage to the internals of the compressor. Additionally, water in the compressed air can cause issues with air tools and decrease their performance.
How often should I drain the water from my air compressor?
The frequency of draining the water from an air compressor depends on several factors, such as the climate and usage conditions. In general, it is recommended to drain the water from the compressor tank every day or at least once a week to prevent the build-up of excessive moisture.
Is there a specific technique to open the drain valve of an air compressor?
Yes, there is a specific technique to open the drain valve of an air compressor. It is important to open the valve slowly and cautiously to prevent any sudden bursts of air or water. By opening the valve slowly, you can release the water in a controlled manner and avoid any potential accidents or injuries.
Can I use an air compressor with water in it?
Using an air compressor with water in it is not recommended. Water in the compressor tank can lead to corrosion and damage the internal components of the compressor. Additionally, the presence of water in the compressed air can cause issues with air tools and reduce their performance. It is important to drain the water from the air compressor regularly to maintain its efficiency and prolong its lifespan.
What should I do if water continues to accumulate in the air compressor tank?
If water continues to accumulate in the air compressor tank even after regular draining, there may be an issue with the compressor’s drain valve or other components. In such cases, it is recommended to consult the manufacturer’s manual or contact a professional technician to inspect and repair the compressor. It is important to address any issues as soon as possible to prevent further damage to the compressor.
Video:


Meet Harrison Clayton, a distinguished author and home remodeling enthusiast whose expertise in the realm of renovation is second to none. With a passion for transforming houses into inviting homes, Harrison's writing at https://thehuts-eastbourne.co.uk/ brings a breath of fresh inspiration to the world of home improvement. Whether you're looking to revamp a small corner of your abode or embark on a complete home transformation, Harrison's articles provide the essential expertise and creative flair to turn your visions into reality. So, dive into the captivating world of home remodeling with Harrison Clayton and unlock the full potential of your living space with every word he writes.


