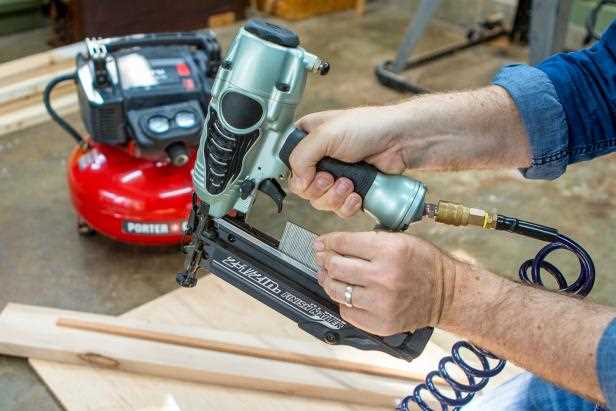
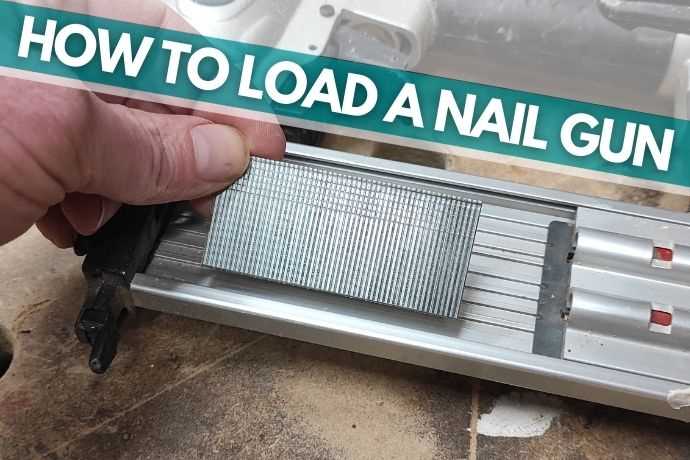
Step-by-Step Guide: How to Load a Nail Gun Easily

Are you ready to tackle your next DIY project but feeling a little intimidated by the nail gun? Don’t worry, we’ve got you covered! In this step-by-step guide, we will walk you through the process of loading a nail gun with ease. Whether you’re a beginner or an experienced DIYer, these simple instructions will help you get your nail gun up and running in no time.
Step 1: Safety First
Before we dive right into loading the nail gun, it’s important to prioritize safety. Make sure you are wearing appropriate protective gear such as safety goggles and gloves. Clear your work area of any debris or obstructions, and ensure that the nail gun is disconnected from any power source before starting the loading process.
Step 2: Choose the Right Nails
Next, you’ll want to select the right nails for your project. Different nail guns require different nail sizes, so refer to your nail gun’s manual or consult with a professional to determine the correct nail size and type. It’s crucial to use the appropriate nails to ensure proper performance and prevent any potential damage.
Step 3: Prepare the Nail Gun
Now that you have the right nails, it’s time to prepare the nail gun. Open the nail gun’s magazine by following the manufacturer’s instructions. Most nail guns have a latch or release button that allows you to easily access the magazine. Once the magazine is open, remove any existing nails or debris from inside.
Step 4: Load the Nails
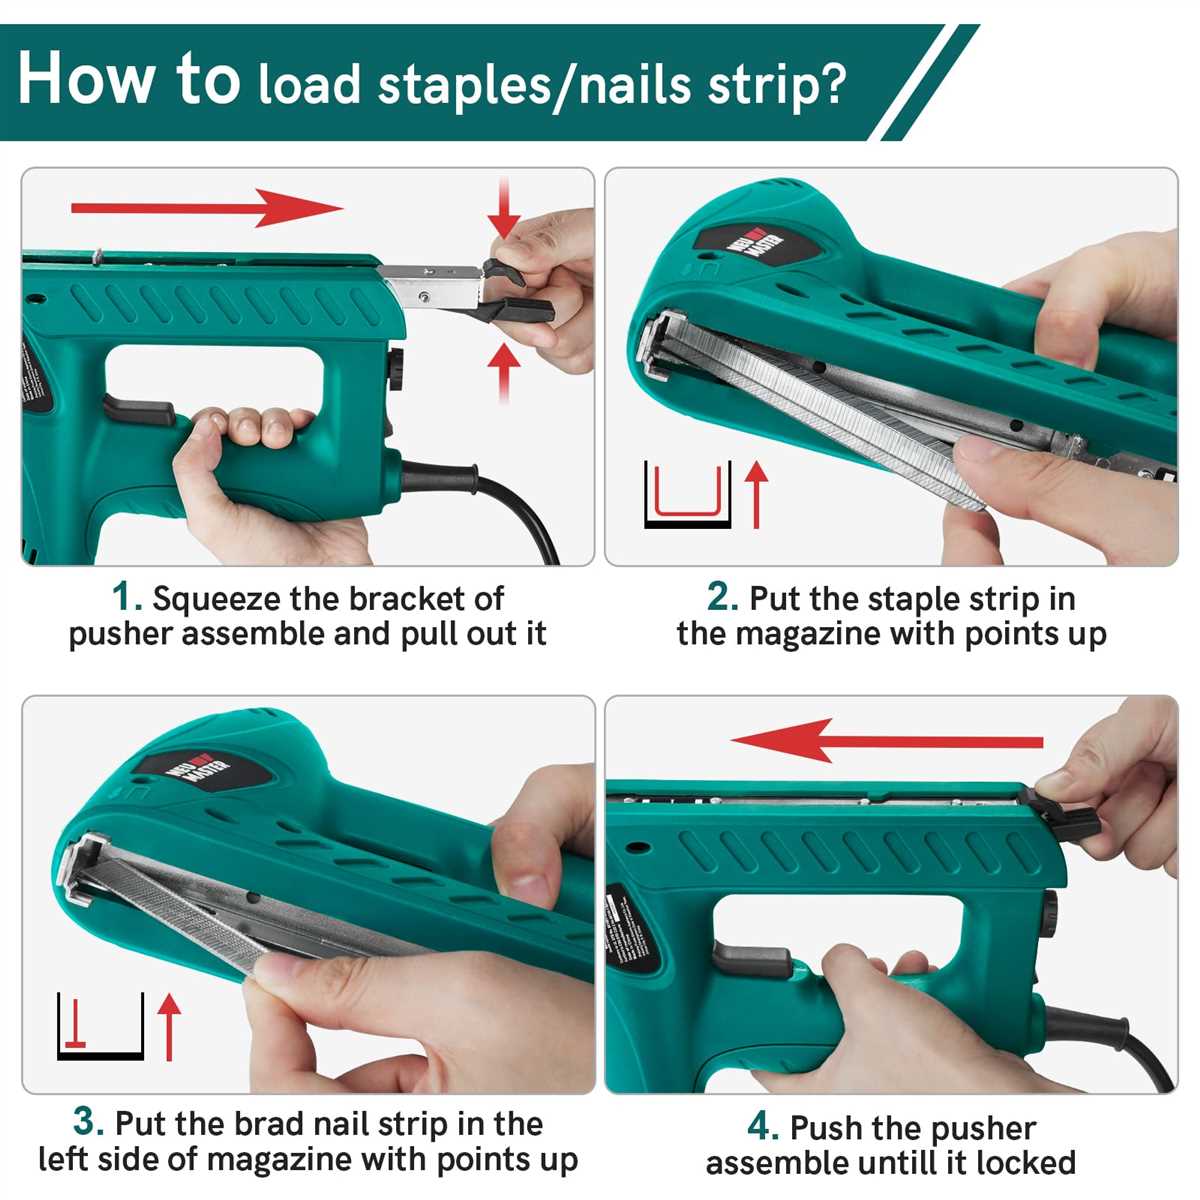
With the nail gun prepared, it’s time to load the nails. Take a strip of nails and align them with the guide rail inside the magazine. The nail heads should be facing up and the pointed ends should be towards the nose of the nail gun. Gently push the nails into the magazine, making sure they are properly aligned and secure.
Step 5: Check the Loading Mechanism
Before closing the magazine, double-check the loading mechanism to ensure it’s functioning correctly. Some nail guns have a push or slide mechanism that automatically advances the nails as you use them. Test the mechanism by pushing it forward or sliding it back and forth to ensure it moves smoothly.
Step 6: Close the Magazine
Once you’ve confirmed that the loading mechanism is working properly, gently close the magazine. Make sure it snaps securely into place. Give the nail gun a gentle shake to ensure the nails are properly seated in the magazine and won’t come loose during use.
Step 7: Test the Nail Gun
Finally, it’s time to test your newly loaded nail gun. Reconnect the nail gun to its power source and aim it at a safe and appropriate target. Press the trigger to release a test nail. If the nail fires smoothly and accurately, congratulations! You’ve successfully loaded your nail gun. If not, double-check the loading process and make any necessary adjustments.
By following these simple steps, you’ll be able to load your nail gun easily and safely. Now you can confidently tackle your DIY projects with precision and efficiency. Remember to always refer to your nail gun’s manual for specific loading instructions and safety guidelines. Happy nailing!
Prepare the Nail Gun
Before loading a nail gun, it is important to prepare it properly to ensure safe and efficient operation. Here are the steps to prepare the nail gun:
1. Read the manufacturer’s instructions

Before using any power tool, it is important to familiarize yourself with the manufacturer’s instructions. These instructions will provide specific guidelines on how to load nails into the nail gun. Make sure to read and understand these instructions before proceeding.
2. Choose the correct type and size of nails
Using the correct type and size of nails is essential for proper operation of the nail gun. Refer to the manufacturer’s instructions or the nail gun’s specifications to determine the appropriate nails to use. Improper nails can cause malfunctions or damage to the nail gun.
3. Gather necessary supplies
Before loading the nail gun, gather all the necessary supplies. This includes the nail gun itself, the correct type and size of nails, and any additional accessories or safety gear that may be required.
4. Inspect the nail gun
Thoroughly inspect the nail gun to ensure it is in proper working condition. Look for any signs of wear or damage, such as frayed cords or loose parts. If any issues are found, it is important to address them before loading the nail gun.
5. Clear the nail gun of any obstructions or debris
Before loading nails into the nail gun, make sure it is free from any obstructions or debris. Use a clean cloth or compressed air to remove any dust, dirt, or debris that may have accumulated in the nail gun’s magazine or working mechanism.
6. Ensure proper safety precautions
Before loading a nail gun, always ensure you are wearing appropriate safety gear, such as safety glasses or goggles and gloves. This will help protect you from any potential injuries or accidents that may occur during the loading process or while using the nail gun.
7. Follow proper loading procedure
Refer to the manufacturer’s instructions for the specific loading procedure of your nail gun model. This may involve opening the magazine, inserting the nails in the correct orientation, and ensuring they are securely held in place. Proper loading is crucial for the nail gun to function correctly and prevent jams or misfires.
- Open the nail gun’s magazine according to the manufacturer’s instructions.
- Insert the nails into the magazine, making sure they are properly oriented.
- Close the magazine, ensuring the nails are securely held in place.
8. Check the nail gun’s operation
Once the nail gun is loaded, perform a quick check of its operation before using it. Test-fire a few nails into a scrap piece of material to ensure they are being driven correctly and without any issues. If any problems are encountered, refer to the manufacturer’s instructions or seek professional assistance.
By following these steps, you can properly prepare the nail gun for loading and ensure safe and efficient operation. Always prioritize safety and read the manufacturer’s instructions before using any power tool.
Choose the Correct Nails
Choosing the correct nails for your nail gun is crucial to ensure proper operation and prevent any damage or accidents. Here are some factors to consider when selecting the nails:
- Length: The length of the nails should be appropriate for the material you are working with. Too short nails may not provide enough hold, while nails that are too long can cause splitting or protrusions.
- Gauge: The gauge of the nails refers to their thickness. Thicker gauge nails are generally used for heavier materials, while thinner gauge nails are suitable for lighter materials.
- Type of nail: There are different types of nails available, such as brad nails, finish nails, and framing nails. Each type of nail has specific applications and is designed to provide optimal performance for different tasks.
When choosing nails, it’s essential to consult your nail gun’s user manual for specific recommendations and requirements. Using the wrong type or size of nails can cause jams or damage to your nail gun.
Tips for Choosing the Right Nails
Here are some additional tips to help you choose the correct nails for your nail gun:
- Consider the project requirements and the material you will be working with.
- Consult with professionals or experienced users for recommendations.
- Take into account the load capacity of your nail gun.
- Avoid using damaged or rusted nails, as they can affect the performance and durability of your nail gun.
- Store nails in a dry and secure area to prevent moisture damage.
By selecting the right nails for your nail gun, you can ensure efficient operation, minimize the risk of accidents, and achieve high-quality results in your woodworking or construction projects.
Open the Nail Gun Magazine

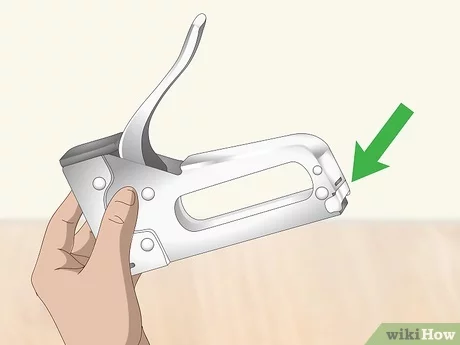
Before you can load the nail gun, you need to open the magazine. The magazine is where the nails are stored and fed into the gun. Follow these steps to open the nail gun magazine:
- Make sure the nail gun is disconnected from any power source and the safety switch is engaged.
- Locate the magazine release button or lever, usually located on the rear or side of the nail gun.
- Press or slide the magazine release button or lever to release the magazine.
- The magazine should now be open and accessible.
It’s important to note that different nail gun models may have slightly different methods for opening the magazine. Always refer to the user manual or manufacturer’s instructions for specific details on your nail gun.
Load the Nails into the Magazine
To begin using your nail gun, you’ll first need to load the nails into the magazine. The magazine is the part of the nail gun that holds the nails and feeds them into the firing mechanism.
Step 1: Prepare the Magazine
Before loading the nails, make sure the nail gun is turned off and unplugged or disconnected from its power source. This will help prevent any accidental firing of nails during the loading process.
Step 2: Open the Magazine
Locate the magazine on your nail gun. It is usually located at the bottom of the gun and will have a latch or release mechanism to open it. Flip the latch or press the release button to open the magazine.
Step 3: Insert the Nails
Take a strip of nails and align it with the magazine. The nail heads should be facing the same direction, usually down. Gently slide the nail strip into the magazine until it is fully seated. The nail heads should fit snugly into the grooves or slots inside the magazine.
Step 4: Secure the Magazine
Once the nails are inserted, close and secure the magazine. Make sure it is locked in place and will not open during use. Double-check that the nails are properly seated and there are no jams or obstructions in the magazine.
Step 5: Test the Nail Feeding
With the magazine loaded and secured, test the nail feeding mechanism by pulling back the firing mechanism or depressing the safety nose. This will simulate the nail gun firing action and ensure that the nails are feeding correctly. If you encounter any issues, such as misfeeds or jams, refer to the nail gun’s user manual for troubleshooting steps.
Now that you have successfully loaded the nails into the magazine, you are ready to use your nail gun for your woodworking or construction projects. Always remember to wear appropriate safety gear, such as safety glasses and gloves, when operating a nail gun to prevent injuries.
Close the Nail Gun Magazine
Once you have inserted the nails into the nail gun, it is important to close the nail gun magazine securely. This will ensure that the nails are held in place and will not come loose during use. Here are the steps to close the nail gun magazine:
- Remove any loose nails. Before closing the magazine, it is important to check for any loose nails that may have fallen out of the strip or coil. Remove these nails and set them aside.
- Align the magazine cover. The nail gun magazine cover is typically hinged and can be opened to load the nails. Before closing it, make sure that the cover is properly aligned with the magazine body.
- Apply pressure to close. Once the magazine cover is properly aligned, apply firm pressure to close it. You may hear a click or feel a resistance when the magazine cover is securely closed.
- Check for proper closure. After closing the magazine, visually inspect it to ensure that it is fully closed and there are no gaps or openings. A fully closed magazine will prevent any nails from accidentally dislodging during use.
- Listen for any loose nails. Shake the nail gun gently and listen for any rattling or loose nails inside the magazine. If you hear any noise, reopen the magazine and check for any loose nails that may have been missed.
By following these steps, you can ensure that the nail gun magazine is securely closed and ready for use. Always remember to follow the manufacturer’s instructions and safety guidelines when operating a nail gun.
Connect the Nail Gun to an Air Compressor
Once you have prepared your nail gun and chosen the appropriate nails, it’s time to connect the nail gun to an air compressor. Follow these steps:
- Locate the air inlet on the nail gun. This is usually located at the bottom or the back of the nail gun.
- Check the air fitting on the nail gun and the air compressor to ensure they match. Most nail guns use a 1/4-inch NPT (National Pipe Thread) air fitting.
- If necessary, use an adapter to connect the nail gun’s air inlet to the air compressor’s air hose.
- Attach the air hose to the nail gun’s air inlet. Make sure it is securely connected to prevent air leaks.
- Adjust the air pressure on the compressor to the recommended level for your nail gun. This information can usually be found in the nail gun’s user manual or on the packaging of the nails you are using.
- Turn on the air compressor and allow it to build up pressure.
- Test the nail gun by pulling the trigger. If air is coming out and the nail gun is functioning properly, you are ready to use it.
Remember to always follow the manufacturer’s instructions and safety guidelines when operating any power tool, including nail guns. Properly connecting the nail gun to an air compressor ensures that it will function correctly and safely.
Test the Nail Gun
Once you have loaded the nail gun, it is important to test it before using it on any project. Testing the nail gun will ensure that it is working properly and is safe to use.
Here are the steps to test the nail gun:
- Make sure the nail gun is disconnected from the power source.
- Inspect the nail gun for any visible damage or signs of wear.
- Check the air compressor gauge to ensure that it is set to the recommended pressure for the nail gun.
- Connect the nail gun to the air compressor.
- Put on the appropriate safety gear, including safety glasses and ear protection.
- Hold the nail gun firmly and aim it towards a safe area.
- Press the trigger to release a nail. The nail should be fired out of the gun with enough force to penetrate the material.
- Repeat this process several times to ensure consistent firing and reliable performance.
If the nail gun is not firing properly or if there are any malfunctions, do not use it and contact a professional for repairs or replacement.
Start Using the Nail Gun

Step 1: Prepare the Nail Gun
Before you start using the nail gun, make sure it is properly prepared.
- Check the power source: Ensure that the nail gun is connected to a power source, such as an electrical outlet or a compressed air supply.
- Load nails: Open the magazine of the nail gun and load the appropriate nails according to the manufacturer’s instructions.
- Adjust the depth: Set the depth adjustment dial or knob to the desired depth for the nails you are using.
Step 2: Position the Nail Gun
Position the nail gun in the correct orientation for the task you are working on.
- Hold the nail gun firmly with both hands, ensuring a stable grip.
- Align the nose of the nail gun with the surface where you want to drive the nail.
Step 3: Fire the Nail Gun
To fire the nail gun and drive a nail into the surface, follow these steps:
- Press the safety contact tip against the surface. This will activate the nail gun.
- Pull the trigger. This will release the nail and drive it into the surface.
Step 4: Repeat the Process
Continue firing the nail gun and driving nails into the desired surfaces until the task is complete.
Step 5: Disconnect the Power Source

Once you have finished using the nail gun, disconnect it from the power source.
- If it is an electric nail gun, unplug it from the electrical outlet.
- If it is a pneumatic nail gun, release the pressure from the compressed air supply and disconnect the hose.
Tips and Warnings
To ensure safe and effective use of the nail gun, keep the following tips and warnings in mind:
- Always wear safety goggles and gloves to protect yourself from flying debris.
- Keep your fingers away from the trigger when not actively firing the nail gun.
- Read and follow the manufacturer’s instructions and recommendations for safe operation.
- Inspect the nail gun regularly for any signs of damage or wear, and repair or replace any faulty parts.
- Never point the nail gun at anyone or anything unintended. Always be aware of your surroundings.
| Common Nail Gun Types | Description |
|---|---|
| Electric Nail Guns | Powered by electricity and ideal for small to medium-sized projects. |
| Pneumatic Nail Guns | Powered by compressed air and suitable for large-scale construction tasks. |
| Gas-Powered Nail Guns | Powered by gas cartridges and commonly used in outdoor applications. |
FAQ
What is a nail gun?
A nail gun, also known as a nailer, is a power tool used to drive nails into various materials, such as wood or concrete. It is operated by compressed air, electricity, or combustion.
Why would I need to load a nail gun?
You need to load a nail gun in order to have nails available for driving. Loading the gun ensures that you can work efficiently without interruptions.
Can I load any type of nails into a nail gun?
No, you cannot load any type of nails into a nail gun. Different nail guns require specific nails that are compatible with their design. It is important to use the correct type and size of nails as recommended by the manufacturer of your nail gun.
How many nails can a nail gun hold?
The number of nails a nail gun can hold depends on its capacity. Nail guns typically have a magazine or cartridge that can hold anywhere from 20 to 100 nails, depending on the model. It is important to check the user manual or specifications of your nail gun to know its specific capacity.
Is it difficult to load a nail gun?
Loading a nail gun is generally a straightforward process and is not difficult. However, it is important to follow the manufacturer’s instructions and take necessary safety precautions to ensure proper loading and operation of the nail gun. With practice and familiarity, it becomes easier to load a nail gun quickly and efficiently.
Can I load a nail gun with one hand?
It is generally recommended to use both hands to load a nail gun for better control and stability. However, some nail guns may have features that allow for one-handed loading. It is important to refer to the user manual of your nail gun to determine the appropriate loading technique.
Video


