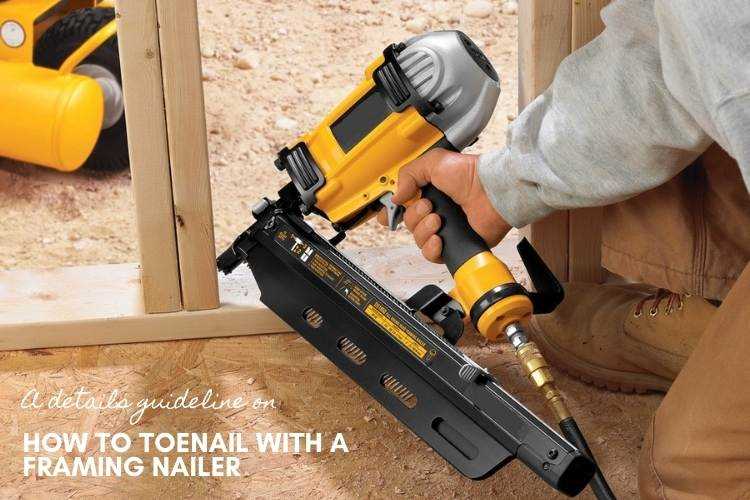
Step-by-Step Guide: How to Toenail Studs with a Nail Gun

When it comes to framing walls or building structures, one of the most commonly used techniques is toenailing. Toenailing refers to the practice of driving a nail at an angle through one piece of wood and into another. This method provides additional strength and stability to the joint, ensuring that the studs or boards remain firmly in place. One of the most efficient tools for toenailing is a nail gun, which allows for quick and precise nail placement. In this step-by-step guide, we will walk you through the process of properly toenailing studs with a nail gun.
Step 1: Set Up Your Work Area
Before you begin toenailing studs with a nail gun, it’s important to set up your work area properly. Make sure you have a clean, well-lit workspace and organize all the necessary tools and materials. Ensure that your nail gun is in good working condition and that you have the appropriate size nails for the job. Additionally, make sure you have a secure surface to nail into, such as a workbench or sawhorse.
Step 2: Position the Studs
Once your work area is ready, you can begin positioning the studs. Start by determining the layout and placement of the studs according to your project’s specifications. Use a tape measure and a level to ensure accurate measurements and alignment. Mark the desired locations for toenailing on both the top and bottom plates.

Step 3: Choose the Correct Angle
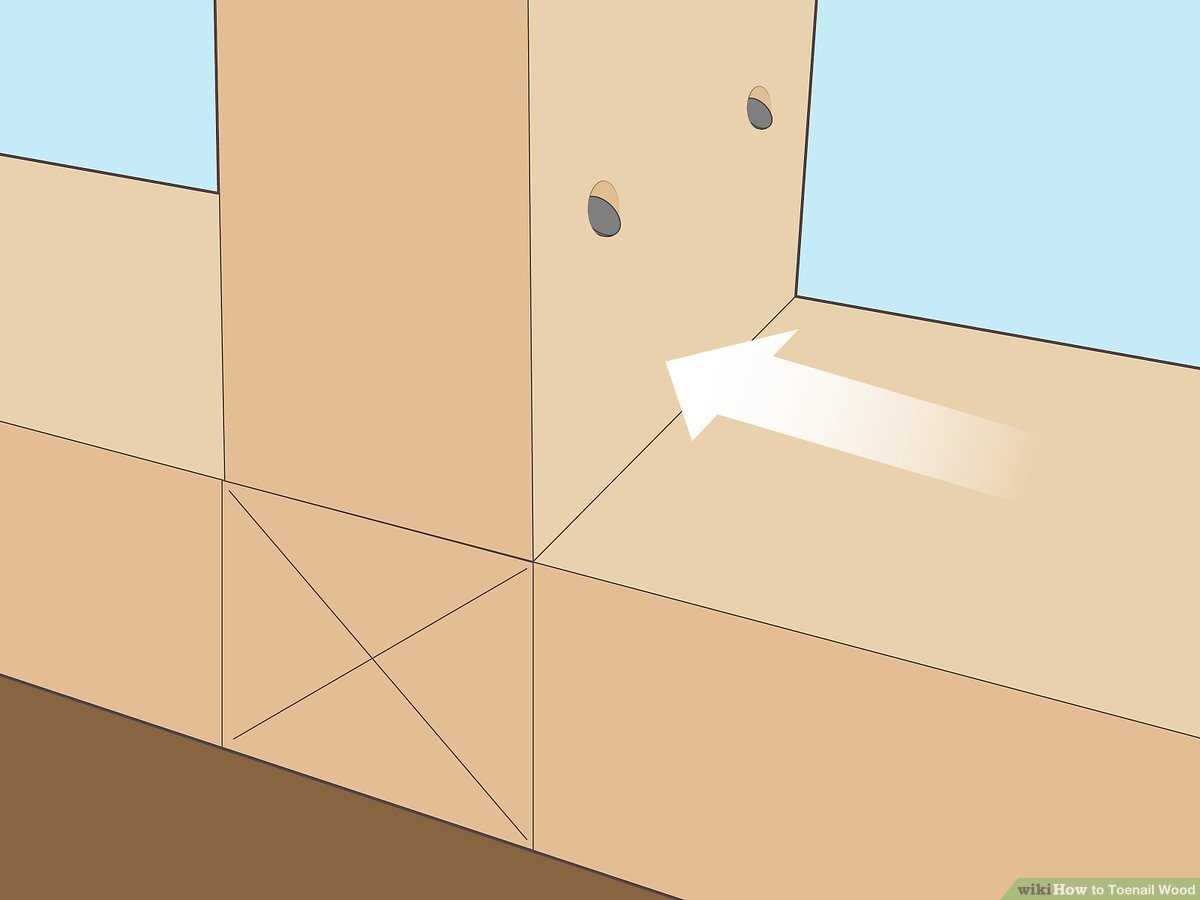
Toenailing requires driving the nail at an angle through one piece of wood and into another. The angle is important because it provides the necessary support and prevents the nail from easily pulling out. The recommended angle for toenailing is typically between 30 and 45 degrees. Use a protractor or a framing square to measure and mark the correct angle on the studs.
Step 4: Secure the Studs
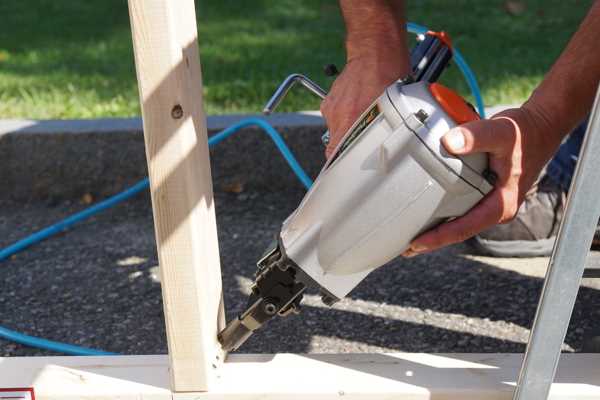
With the angle marked, it’s time to secure the studs. Hold the nail gun firmly and position the angled tip of the nail gun’s muzzle against the marked angle on the stud. Apply gentle pressure on the trigger to fire the nail into the wood. Repeat the process for each toenail, ensuring that the nails are driven deep enough to create a strong and secure connection.
By following these simple steps, you can effectively toenail studs with a nail gun, providing the necessary stability and strength for your construction projects. Remember to always prioritize safety and wear appropriate protective equipment when using power tools. Happy nailing!

Step 1: Gather the necessary materials
Before you begin toenail studs with a nail gun, make sure you have the following materials:
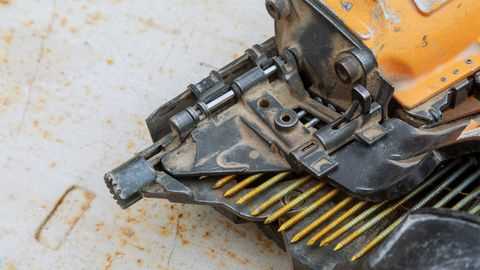
- Nail gun: Choose a nail gun that is suitable for toenailing studs. A framing nail gun with a depth adjustment feature is recommended for this task.
- Nails: Use nails that are specially designed for toenailing studs. These nails should have a length of around 3 inches to provide enough holding power.
- Safety gear: Always prioritize safety when working with power tools. Wear protective goggles to protect your eyes from flying debris and use ear protection to shield your ears from loud noise.
- Work gloves: To protect your hands from accidental injuries, wear work gloves with a good grip to handle the nail gun and other materials.
- Studs: You will need the studs that you want to toenail. Make sure the studs are straight and free from any defects or damage.
- Measuring tape: Use a measuring tape to accurately mark the necessary locations for toenailing the studs. This will ensure that the studs are properly aligned and secured.
- Pencil or marker: Use a pencil or marker to mark the locations where you will toenail the studs. This will help you keep track of the proper placement.
- Compressor and air hose: If you are using a pneumatic nail gun, you will need a compressor and an air hose to power the nail gun. Make sure the compressor is in good working condition and properly connected to the nail gun.
Once you have gathered all these materials, you are ready to move on to the next step in toenailing studs with a nail gun.
Step 2: Prepare the work area
Before you start toenailing studs with a nail gun, it’s important to prepare the work area to ensure safety and efficiency. Follow these steps to properly set up your work area:

- Clear the area: Begin by clearing the work area of any debris, tools, or other obstructions that could interfere with your work. Make sure the area is clean and organized.
- Secure the workpiece: Place the stud or piece of lumber that you are toenailing in a secure position. Use clamps or other appropriate methods to hold it steady and prevent movement during the nailing process.
- Check for electrical wires: Before driving nails into the studs, carefully inspect the work area for any electrical wires or conduits. Use a stud finder or other appropriate tools to locate and avoid these hazards.
- Wear appropriate safety gear: Always wear safety goggles to protect your eyes from flying debris. Additionally, wearing ear protection and a dust mask is recommended to minimize the risk of hearing damage and respiratory issues.
- Set up your nail gun: Make sure your nail gun is properly set up and functioning correctly. Load the correct type and size of nails, adjust the depth setting, and confirm that the safety mechanisms are in place.
- Position yourself correctly: Stand in a stable and balanced position, with your feet shoulder-width apart. Keep a firm grip on the nail gun and have a clear line of sight to the stud you are toenailing.
By following these instructions and properly preparing the work area, you can ensure a safe and efficient process when toenailing studs with a nail gun.
Step 3: Measure and mark the stud positions
Before you start nailing the studs, it’s important to measure and mark their positions on the wall. This will ensure that the studs are evenly spaced and properly aligned.
Here’s how you can measure and mark the stud positions:
- Using a measuring tape, measure the distance between the top and bottom plates of the wall frame. This will give you the total length that needs to be divided by the number of studs.
- Divide the total length by the desired spacing between the studs. This will give you the number of studs required for the wall frame.
- Starting from one end of the wall, use a pencil to make a small mark at the location of the first stud.
- Measure the spacing between the studs and make additional marks at each stud position along the wall.
- Double-check the measurements and marks to ensure accuracy.
By measuring and marking the stud positions beforehand, you can ensure that the studs are correctly placed, which will provide a sturdy and structurally sound wall frame.

Step 4: Set up the nail gun
Before you can start toenailing the studs, you need to properly set up the nail gun to ensure safe and efficient operation. Follow these steps:
- Select the appropriate nail size: Check the project specifications or consult a professional to determine the correct nail size for toenailing studs. Using the wrong size can result in weak connections or damage to the studs.
- Load the nail gun: Open the magazine or nail strip on the nail gun and insert the nails according to the manufacturer’s instructions. Be sure to align the nails properly and close the magazine securely.
- Adjust the nail gun settings: Depending on the nail gun model, you may need to adjust the depth of drive and firing mode. Refer to the user manual to find out how to make these adjustments.
- Connect the air supply: Most nail guns are powered by compressed air. Attach the nail gun to a suitable air compressor using an air hose. Ensure that the air pressure is set to the manufacturer’s recommended specifications.
- Perform a test fire: Before starting the actual toenailing process, perform a test fire on a scrap piece of wood to ensure that the nail gun is functioning properly and the nails are being driven to the desired depth.
Once you have completed these steps, you are ready to begin toenailing the studs using the nail gun. Remember to always follow safety precautions, wear appropriate protective gear, and operate the nail gun according to the manufacturer’s instructions.
Step 5: Hold the nail gun correctly
Properly holding the nail gun is crucial for safety and accuracy when toenailing studs. Follow these steps to hold the nail gun correctly:
- Place your dominant hand on the handle grip of the nail gun. Make sure your hand is positioned comfortably and securely.
- Use your other hand to support the nail gun’s weight and stability.
- Keep your finger off the trigger until you are ready to fire the nail gun.
- Position your body in a way that allows for stability and balance. This will help you maintain control of the nail gun while toenailing the studs.
Remember, always handle the nail gun with care and follow the manufacturer’s instructions for safe operation. If you are unsure about how to hold the nail gun correctly, consult the user manual or seek guidance from a knowledgeable professional.

Step 6: Position the nail gun on the stud
Now that you have prepared the stud and determined the correct angle for toenailing, it’s time to position the nail gun on the stud. Follow these steps:
- Hold the nail gun firmly but comfortably with both hands.
- Make sure the nose of the nail gun is touching the surface of the stud. This will ensure accurate and precise nailing.
- Align the nail gun so that the nail will be driven into the stud at the desired angle and location.
- Make sure your body is positioned in a stable and balanced stance to provide support and control while using the nail gun.
- Double-check the position of the nail gun to ensure it is perpendicular to the stud and aligned properly with the angle you want to achieve.
It is important to position the nail gun correctly to ensure that the nails go in straight and hold the studs securely in place. Take your time to position the nail gun accurately before pulling the trigger.
Step 7: Fire the nail gun
Now that you have positioned the nail gun correctly and aligned the tip with the stud, it’s time to fire the nail gun. Follow these steps:
- Hold the nail gun firmly: Grip the nail gun with both hands, ensuring a secure and stable hold.
- Apply pressure on the trigger: Press the trigger on the nail gun to activate it. Make sure to do this with a controlled motion to prevent accidental firing.
- Aim for the stud: As you fire the nail gun, keep your eyes on the target. Direct the nail gun towards the stud and maintain a straight and steady aim throughout the process.
When firing the nail gun, it’s important to keep safety in mind:
- Wear safety goggles: Protect your eyes by wearing appropriate safety goggles throughout the nailing process to avoid any flying debris.
- Keep your hands clear: Ensure that your fingers and hands are clear of the nail gun’s firing range to prevent any accidental injuries.
- Stay aware of your surroundings: Make sure you are aware of other people or objects in the vicinity that may be at risk before firing the nail gun.
After firing the nail gun, verify that the stud has been securely attached. You can do this by checking for any movement or tapping the stud to ensure it’s firmly in place.
Step 8: Repeat the process for the remaining studs
Once you have successfully toenailed the first stud into place, you will need to repeat the same process for the remaining studs. This step will ensure that all the studs are securely attached to the top and bottom plates, providing a strong frame for your project.
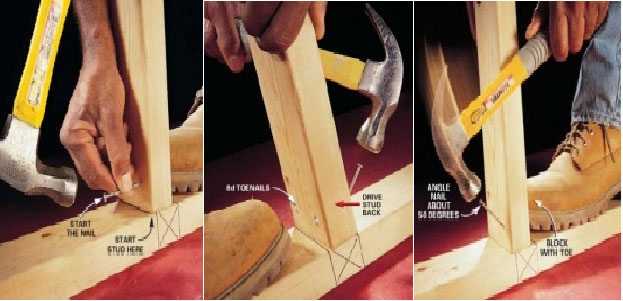
- Position the next stud: Decide on the spacing between the studs, usually 16 inches on center. Place the next stud in position, aligning it with the layout marks on the top and bottom plates.
- Hold the nail gun at the correct angle: Hold the nail gun at a 30-45 degree angle to the stud.
- Align the nail gun: Align the nail gun with the edge of the stud, ensuring that the nail will go through the angled end and into the side of the stud.
- Fire the nail gun: Firmly press the nail gun against the stud and pull the trigger to fire the nail into place. Repeat this process for both sides of the stud.
- Check for proper placement: Once the nail is secured, check the stud to ensure it is flush with the top and bottom plates.
- Continue with the remaining studs: Repeat steps 2-5 for each remaining stud, making sure to maintain the proper spacing and alignment.
By consistently following this process for each stud, you will be able to create a sturdy and reliable frame for your project.
FAQ
What is the purpose of toenailing studs?
The purpose of toenailing studs is to secure them in place at an angle, providing additional strength and stability to a structure.
What kind of nail gun should I use for toenailing studs?
You should use a framing nail gun for toenailing studs. It is specifically designed for this task and can easily drive nails at the correct angle.
Can toenailing studs be done manually without a nail gun?
Yes, toenailing studs can be done manually without a nail gun. You can use a hammer and nails to drive the nails in at an angle. However, using a nail gun can make the process quicker and more efficient.
Video


Meet Harrison Clayton, a distinguished author and home remodeling enthusiast whose expertise in the realm of renovation is second to none. With a passion for transforming houses into inviting homes, Harrison's writing at https://thehuts-eastbourne.co.uk/ brings a breath of fresh inspiration to the world of home improvement. Whether you're looking to revamp a small corner of your abode or embark on a complete home transformation, Harrison's articles provide the essential expertise and creative flair to turn your visions into reality. So, dive into the captivating world of home remodeling with Harrison Clayton and unlock the full potential of your living space with every word he writes.