Step-by-step Guide on How to Remove a Lathe Chuck | Expert Tips and Tricks

Removing a lathe chuck may seem like a daunting task, but with the right knowledge and tools, it can be done easily and efficiently. Whether you are a professional machinist or a DIY enthusiast, this step-by-step guide will walk you through the process and provide you with expert tips and tricks to ensure a successful removal.
Step 1: Prepare the Lathe
Before you begin removing the lathe chuck, it is important to make sure the lathe is turned off and disconnected from any power source. Additionally, you should secure the lathe by clamping it to a stable surface to prevent any movement during the removal process.
Step 2: Gather the Necessary Tools
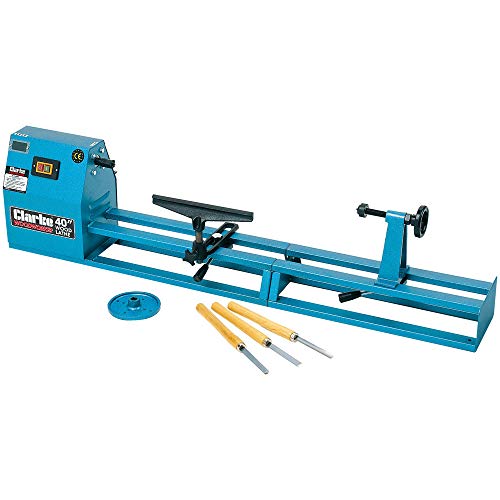
To remove the lathe chuck, you will need a few essential tools. These include an adjustable wrench or chuck key, a hammer, a block of wood, and some penetrating oil. Having these tools readily available will make the removal process much smoother.

Step 3: Loosen the Chuck
Using the adjustable wrench or chuck key, loosen the chuck by turning it counterclockwise. If the chuck is difficult to loosen, you can tap the chuck key gently with a hammer to provide some additional force. If the chuck is stuck, applying some penetrating oil can help loosen any rust or debris.
Step 4: Remove the Chuck
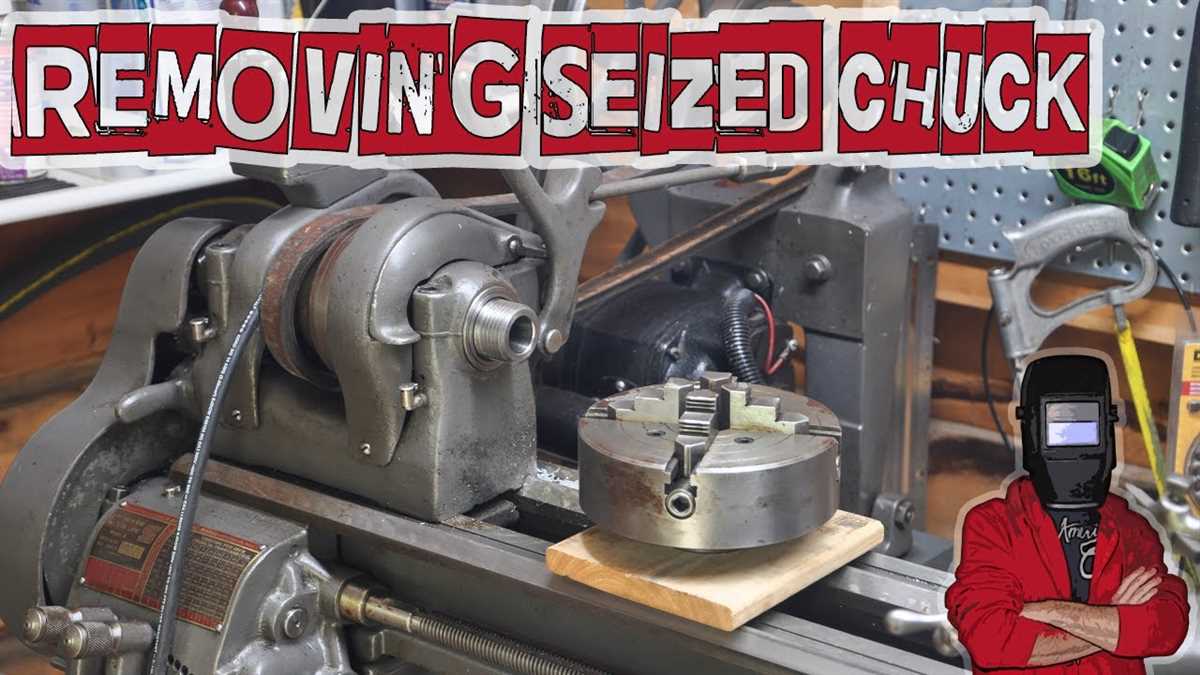
Once the chuck is loosened, you can remove it from the lathe spindle. Place a block of wood against the jaws of the chuck to protect them and use a hammer to tap the wood, dislodging the chuck from the spindle. Be careful not to damage the lathe or the chuck during this process.
Step 5: Clean and Store the Chuck

After removing the chuck, it is important to clean it thoroughly to remove any dirt or debris. You can use a brush and some cleaning solution for this task. Once the chuck is clean, store it in a safe and dry place to prevent any damage or corrosion.
With these expert tips and tricks, you can confidently remove a lathe chuck without any hassle. Remember to always exercise caution and use the proper tools and techniques to ensure your safety and the integrity of your lathe.
Step-by-Step Guide: Remove a Lathe Chuck
Removing a lathe chuck may seem like a daunting task, but with the right tools and steps, it can be a straightforward process. Follow this step-by-step guide to remove a lathe chuck:
Step 1: Safety Precautions
Before beginning any work on the lathe, it is essential to ensure your safety. Wear protective gloves and goggles to protect against any accidents or flying debris.
Step 2: Turning off the Lathe
Make sure to turn off the power to the lathe and unplug it from the power source. This step is crucial to prevent any accidental activation of the lathe while working on it.

Step 3: Removing the Lathe Chuck Key
If the lathe chuck has a key, use it to open the jaws as wide as possible. Then, remove the key and set it aside in a safe place, ensuring it does not interfere with the removal process.
Step 4: Finding the Retaining Screw or Bolt
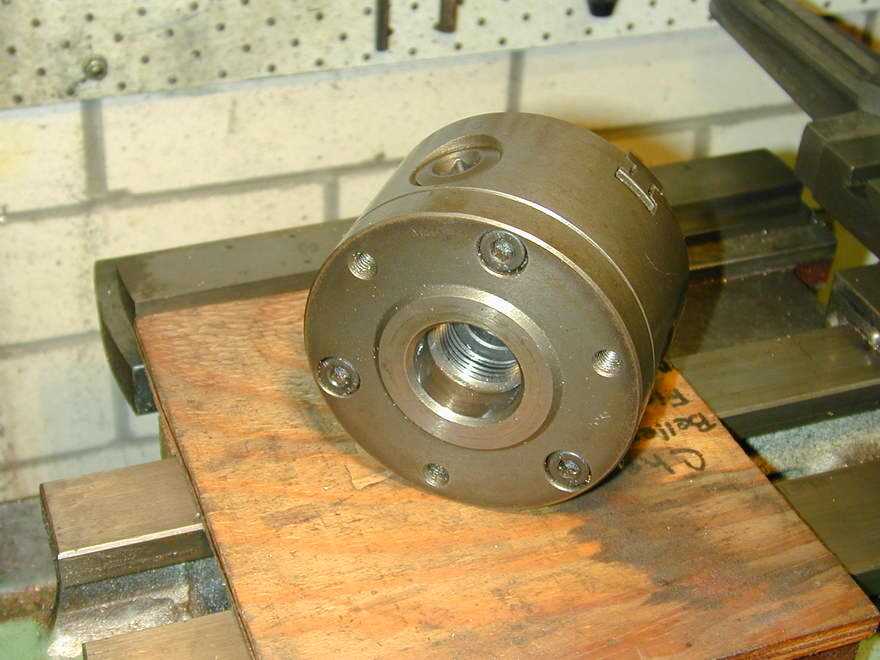
Locate the retaining screw or bolt on the back of the lathe chuck. The retaining screw or bolt holds the chuck onto the lathe spindle.
Step 5: Loosening the Retaining Screw or Bolt
Using an appropriately sized wrench or Allen key, loosen the retaining screw or bolt counter-clockwise. It may be tight, so you may need to apply some force to loosen it.
Step 6: Removing the Retaining Screw or Bolt
Once the retaining screw or bolt has been loosened, completely remove it from the center of the chuck. Set it aside in a safe place where it will not get lost.
Step 7: Removing the Lathe Chuck
After removing the retaining screw or bolt, the chuck should be free to slide off the lathe spindle. Gently pull the chuck away from the spindle, keeping it level and steady to avoid any damage.

Step 8: Inspecting the Lathe Chuck and Spindle
Take a moment to inspect the chuck and the spindle for any signs of damage or wear. If any issues are detected, it is recommended to address them before reinstalling the chuck.
Step 9: Reassembly (if necessary)
If you are not replacing the chuck and need to reassemble it, reverse the steps outlined above. Make sure to tighten the retaining screw or bolt securely to ensure the chuck is firmly attached to the lathe spindle.
Step 10: Testing the Lathe Chuck
After reassembling or replacing the chuck, turn on the lathe and test the chuck’s functionality. Ensure it operates smoothly and securely holds the workpiece before proceeding with any lathe work.
By following these step-by-step instructions, you can confidently remove a lathe chuck and perform maintenance or necessary repairs. Remember to prioritize safety and take your time to ensure the removal process is done correctly.
Safety first: Prepare for chuck removal
Before attempting to remove a lathe chuck, it is crucial to prioritize safety. By following these steps, you can ensure a safe and efficient removal process:

- Gather necessary safety equipment: Before starting, gather the following safety equipment: safety goggles, gloves, earplugs, and a dust mask. These items will protect you from any potential hazards.
- Power off the lathe machine: Ensure that the lathe machine is powered off and disconnected from any power source before beginning the removal process. This step will prevent any accidental start-ups and reduce the risk of electrical shock.
- Secure the lathe chuck: Use a wrench or chuck key to securely tighten the chuck onto the lathe spindle. This step will prevent the chuck from becoming loose or falling off during the removal process.
- Clear the work area: Remove any unnecessary items, tools, or debris from the immediate work area. Having a clean and clutter-free workspace will reduce the risk of accidents or injuries.
- Inform others: If you are working in a shared or public space, inform others in the area about your intention to remove the lathe chuck. This step will prevent any unintentional interference or accidents.
- Read the lathe manual: Refer to the lathe manual for specific instructions and safety precautions regarding chuck removal. Familiarize yourself with any unique features or considerations for your lathe machine.
- Follow proper lifting techniques: If the lathe chuck is heavy or requires lifting, use proper lifting techniques to avoid strains or injuries. Bend your knees, keep your back straight, and lift with your legs, not your back.
By following these safety steps, you can ensure that your chuck removal process is both safe and successful. Take the time to prioritize safety and reduce the risk of accidents or injuries during this procedure.
Gather the necessary tools and equipment
- A lathe chuck removal wrench or key
- Protective gloves and eyewear
- A spanner wrench or adjustable wrench (if needed).
- A sturdy workbench or surface
- A clean cloth or rag
- A lubricant (optional)
You will need a lathe chuck removal wrench or key specifically designed for your lathe model. This tool is essential for safely removing the chuck from the lathe spindle.
Wearing protective gloves and eyewear is crucial for your safety during the chuck removal process. The gloves will protect your hands from sharp edges and prevent accidental injuries, while the eyewear will shield your eyes from any flying debris.
Depending on the type of chuck on your lathe, you may also need a spanner wrench or adjustable wrench to loosen and remove any additional locking mechanisms or retaining rings. This will vary depending on your specific lathe model and chuck design.
Preparing a stable workbench or surface to securely hold your lathe and provide ample space for the chuck removal process is essential. Make sure the surface is sturdy enough to support the weight of the lathe and chuck.
Having a clean cloth or rag on hand will be useful for wiping away any dirt or debris from the chuck and lathe spindle before and after the removal process.
If your lathe chuck has been in use for a long time and seems stuck, applying a lubricant to the chuck threads or spindle can help loosen any rust or debris that may be causing the resistance. This step is optional but can make the removal process easier.
Step-by-step process: Removing the chuck
Removing a lathe chuck may seem like a daunting task, but with the right tools and techniques, you can easily and safely remove it. Follow these step-by-step instructions to successfully remove your lathe chuck:
- Ensure safety: Before starting the removal process, make sure the lathe is turned off and unplugged. Wear safety goggles and gloves to protect yourself from any potential hazards.
- Gather the necessary tools: You will need a chuck key, a hammer, a wooden block or soft jaws, and a wrench or spanner.
- Lock the spindle: Use the spindle lock or engage the spindle brake to prevent it from rotating during the removal process. This will ensure a safer and more efficient removal.
- Insert the chuck key: Insert the chuck key into one of the chuck’s keyholes. Make sure it is securely in place.
- Strike the chuck key: Use a hammer to strike the end of the chuck key quickly and firmly in a counterclockwise direction. This will loosen the chuck from the spindle.
- Remove the chuck key: Remove the chuck key from the chuck and set it aside.
- Place the wooden block or soft jaws: Place a wooden block or soft jaws on the lathe bed below the chuck. This will prevent any damage to the chuck or lathe bed during removal.
- Fit the wrench or spanner: Fit the wrench or spanner onto the chuck body, making sure it is securely in place.
- Tighten the wrench or spanner: Use the wrench or spanner to loosen the chuck by turning it counterclockwise. Apply steady and even pressure to loosen the chuck gradually.
- Remove the chuck: Once the chuck is loose, carefully lift it off the spindle. Be cautious of its weight and size, using proper lifting techniques to prevent injury.
Following these step-by-step instructions will guide you through the process of safely and effectively removing a lathe chuck. Remember to take your time and be cautious throughout the process to avoid any accidents or damage to your lathe.
Expert tips for a smooth chuck removal
Removing a lathe chuck can be a challenging task, but with the right techniques and tools, it can be done smoothly. Here are some expert tips to help you through the process:
- Prepare your workspace: Before starting the removal process, make sure your work area is clean and well-organized. Remove any debris or clutter that may hinder your progress.
- Secure the lathe: It is crucial to secure the lathe in place to prevent it from moving during the chuck removal process. You can use clamps or locking mechanisms to ensure a stable working surface.
- Turn off the power: Always disconnect the power supply to the lathe before attempting to remove the chuck. This step is essential for your safety.
- Gather the necessary tools: You will require several tools to remove the chuck, including an Allen wrench, a chuck removal key, and a hammer. Ensure you have these tools readily available before you start.
- Protect your hands: Wear protective gloves to safeguard your hands from potential injuries during the removal process. The chuck may have sharp edges or be tight, so extra caution is necessary.
- Loosen the chuck: Insert the Allen wrench into the chuck’s screw hole and turn it counterclockwise to loosen the chuck. Be careful not to apply excessive force, as it may damage the chuck or the lathe.
- Use a chuck removal key: Some chucks have a keyway that requires a specific chuck removal key. Insert the key into the keyway and turn it counterclockwise to loosen the chuck. Refer to the lathe’s manual for the correct key and instructions.
- Tap the chuck gently: If the chuck is still stubbornly stuck, you can gently tap it with a hammer. This may help loosen any stuck parts and make it easier to remove. However, be cautious not to hit the lathe or the chuck too forcefully.
- Inspect for any remaining screws: After removing the chuck, inspect the spindle for any remaining screws or debris. Clean the spindle thoroughly before installing a new chuck.
- Store the chuck safely: If you plan on reinstalling the chuck later, store it in a safe and clean location to prevent any damage or misplacement.
Remember, removing a lathe chuck requires patience and caution. If you are unsure about any step or encounter difficulties, it is recommended to consult a professional or refer to the lathe’s manual for guidance.
Common challenges and how to overcome them
1. Stubborn chuck
A common challenge when removing a lathe chuck is dealing with a chuck that is stuck or difficult to remove. This can happen due to rust, dirt, or other debris that has accumulated over time.
To overcome this challenge, you can try the following methods:
- Applying penetrant oil: Spray a penetrant oil like WD-40 or PB Blaster onto the chuck and let it sit for a few hours or overnight. This can help loosen the rust or debris and make it easier to remove the chuck.
- Using a rubber mallet or wooden block: Gently tap the back of the chuck with a rubber mallet or a wooden block to help loosen it. Be careful not to hit it too hard and damage the chuck or lathe.
- Applying heat: Use a heat gun or a propane torch to heat the chuck. The heat can expand the metal and help break the rust or debris bond. Be cautious when using heat and make sure to protect yourself and the surrounding areas from any potential hazards.
2. Lack of access to the chuck retaining bolt
Another common challenge is not being able to access or find the chuck retaining bolt. This can be due to poor visibility or a hidden location.
To overcome this challenge, you can try the following methods:
- Using a mirror: Use a small mirror to get a better view of the chuck and locate the retaining bolt. This can help you navigate any hard-to-reach areas.
- Using a flashlight: Shine a flashlight into the chuck area to improve visibility. This can help you spot the retaining bolt and guide your removal process.
- Consulting the lathe manual: If you’re having trouble locating the retaining bolt, consult the lathe’s manual or look for online resources that provide information specific to your lathe model.
3. Inadequate tools
Having the right tools is crucial for safely removing a lathe chuck. However, it’s common to encounter challenges when you don’t have the necessary tools.
To overcome this challenge, you can try the following methods:
- Borrowing or renting tools: If you don’t have the required tools, consider borrowing or renting them from a friend, local workshop, or hardware store. This can ensure that you have the right tools for the job.
- Improvising with alternative tools: If you’re unable to borrow or rent the tools, you can try improvising with alternative tools. For example, you can use a pipe wrench or strap wrench instead of a chuck key to loosen the chuck.
- Purchasing the tools: If you frequently work with a lathe, consider investing in the necessary tools. This can save you time and frustration in the long run.
4. Lack of knowledge or experience
Removing a lathe chuck can be a complex task, especially for beginners or those with limited experience. Lack of knowledge or experience can lead to additional challenges.
To overcome this challenge, you can try the following methods:
- Researching and learning: Take the time to research and learn about the specific steps involved in removing a lathe chuck. Consult instructional videos, online forums, or seek advice from experienced individuals who have successfully removed a lathe chuck before.
- Seeking professional guidance: If you’re unsure about the process or encounter difficulties, consider seeking professional guidance. A skilled lathe operator or a mechanic can provide you with the necessary expertise and ensure that the chuck is safely removed.
- Practicing on a spare or scrap chuck: If you have access to a spare or scrap chuck, practice the removal process on it. This allows you to gain hands-on experience and build confidence before attempting to remove the chuck on your main lathe.
By being prepared for these common challenges and knowing how to overcome them, you can successfully remove a lathe chuck and continue with your woodworking or metalworking project.
Troubleshooting: What to do if you encounter difficulties
1. Check the Chuck Removal Instructions
Make sure you are following the correct procedure for removing the lathe chuck. Check the user manual or manufacturer’s instructions for the specific steps to follow. It’s important to follow the proper sequence of steps to avoid damage or injury.
2. Apply Lubrication
If the lathe chuck is stuck or difficult to remove, applying lubrication can often help. Use a penetrating oil or other lubricating spray and let it sit for some time to loosen any rust or debris that may be causing the problem. After applying the lubricant, try removing the chuck again.
3. Use Heat
If the chuck is still difficult to remove, you can try using heat to expand the metal and loosen any tight parts. Use a heat gun or propane torch to carefully apply heat to the chuck. Be cautious not to overheat the chuck, as this can damage it. After heating, try removing the chuck while it is still warm.
4. Use a Chuck Removal Tool
If the above methods did not work, you can try using a chuck removal tool. These tools are designed to provide extra leverage and grip for removing stubborn chucks. Follow the instructions that come with the tool to safely and effectively remove the chuck.
5. Seek Professional Assistance
If you are unable to remove the lathe chuck yourself or if you encounter any difficulties that you are not comfortable handling, it is best to seek professional assistance. Contact a professional lathe technician or the manufacturer’s customer support for further guidance and assistance.
6. Preventive Maintenance
To avoid future difficulties with removing the lathe chuck, it is important to perform regular maintenance. Clean the chuck and its components regularly, remove any debris or rust, and lubricate moving parts. This will help prevent any build-up or damage that can make chuck removal more difficult in the future.
Remember to always prioritize safety when working with power tools or heavy machinery. If you are unsure of any steps or if you encounter any difficulties, consult a professional or refer to the manufacturer’s instructions.
Cleaning and maintenance after chuck removal
Once you have successfully removed the lathe chuck, it is important to clean and maintain both the chuck and the lathe to ensure proper functioning and longevity.
Cleaning the chuck
- Start by removing any debris or dirt from the chuck using a soft brush or cloth.
- If there is any built-up grime or grease, you can use a mild detergent or degreaser to clean the chuck. Be sure to follow the manufacturer’s instructions for any cleaning products used.
- Rinse the chuck thoroughly with water to remove any remaining cleaning solution.
- Dry the chuck completely with a clean, dry cloth.
Maintenance tips for the chuck
- Inspect the chuck for any signs of wear or damage. If any parts are worn out or broken, they should be replaced before reinstalling the chuck.
- Apply a small amount of lubricant to the chuck’s moving parts to ensure smooth operation. Refer to the manufacturer’s recommendations for the appropriate type of lubricant to use.
- Check the chuck’s tightening mechanism to ensure it is functioning properly. If it is loose or not working correctly, it may need to be adjusted or repaired.
- Store the chuck in a clean and dry area to protect it from rust and corrosion when not in use.
Cleaning the lathe
- Remove any chips or debris from the lathe bed and other surfaces using a soft brush or vacuum cleaner.
- Wipe down the lathe with a clean, dry cloth to remove any dirt or dust.
- If there are any areas of rust or corrosion, you can use a rust remover or steel wool to gently remove it. Be careful not to scratch or damage the surfaces.
- Apply a light coat of lubricant to the lathe’s moving parts to prevent rust and ensure smooth operation.
By regularly cleaning and maintaining both the chuck and the lathe, you can extend their lifespan and keep them in optimal working condition. Remember to always refer to the manufacturer’s instructions for specific cleaning and maintenance recommendations.
FAQ
Is it difficult to remove a lathe chuck?
Removing a lathe chuck can be a bit tricky, but with the right tools and following the correct steps, it can be done easily.
What tools do I need to remove a lathe chuck?
To remove a lathe chuck, you will need a chuck removal tool, a wrench or spanner, and possibly a hammer.
Can I remove a lathe chuck without any tools?
No, you will definitely need some tools to remove a lathe chuck. Trying to remove it without the right tools can cause damage to the chuck or the lathe.
Do I need to disconnect any power source before removing a lathe chuck?
Yes, it is extremely important to disconnect the power source before attempting to remove a lathe chuck. This will ensure your safety and prevent any accidents.
Are there any precautions I should take before removing a lathe chuck?
Yes, before removing a lathe chuck, you should check the chuck manufacturer’s manual for any specific instructions. Additionally, it is recommended to wear safety goggles and gloves to protect yourself.
What if I don’t have a chuck removal tool?
If you don’t have a chuck removal tool, you can try using a pair of long-handled pliers or a pipe wrench. However, it is important to be cautious and gentle while using these tools to avoid damaging the chuck or the lathe.


Meet Harrison Clayton, a distinguished author and home remodeling enthusiast whose expertise in the realm of renovation is second to none. With a passion for transforming houses into inviting homes, Harrison's writing at https://thehuts-eastbourne.co.uk/ brings a breath of fresh inspiration to the world of home improvement. Whether you're looking to revamp a small corner of your abode or embark on a complete home transformation, Harrison's articles provide the essential expertise and creative flair to turn your visions into reality. So, dive into the captivating world of home remodeling with Harrison Clayton and unlock the full potential of your living space with every word he writes.