Step-by-step guide: How to use Ammco brake lathe – Tips and tricks

Using an Ammco brake lathe can be a daunting task for a beginner, but with the right guidance and some helpful tips and tricks, you’ll be able to master this essential tool for maintaining and repairing vehicle brakes. In this step-by-step guide, we’ll walk you through the process of using an Ammco brake lathe, from set up to finishing touches.
Step 1: Set up the lathe
Before you begin, make sure to properly set up the Ammco brake lathe. This involves mounting it securely to a sturdy workbench or similar surface, and ensuring that all necessary safety precautions are in place, such as wearing protective goggles and gloves. Take the time to familiarize yourself with the control panel and the various settings.
Tip: Always refer to the user manual for specific instructions and safety information.
Step 2: Prepare the brake rotor

Next, prepare the brake rotor for machining. Start by removing the rotor from the vehicle and inspecting it for any signs of damage or excessive wear. Clean the rotor thoroughly with brake cleaner to remove any dirt, oil, or debris. If necessary, use a micrometer to measure the thickness of the rotor to ensure it is within specification.
Tip: Mark the original position of the rotor before removing it, as this will help ensure proper reassembly.
Step 3: Set up the lathe for machining
To set up the lathe for machining, adjust the cutting tool to the proper height and angle for your specific brake rotor. This will depend on the type of rotor and the desired finish. Refer to the lathe’s user manual for guidance on these adjustments. Once the tool is correctly positioned, lock it in place.
Tip: Take your time and make small adjustments until you achieve the desired specifications.

Step 4: Machine the rotor
Now you’re ready to start machining the rotor. Slowly bring the cutting tool into contact with the rotor, making sure to apply consistent pressure. Move the tool in a smooth and even motion across the entire surface of the rotor, removing any imperfections and creating a smooth finish. Remember to periodically check the progress and make any necessary adjustments to the cutting tool.
Tip: Take frequent breaks to allow the rotor and lathe to cool down, as excessive heat can affect the accuracy of the machining process.
Step 5: Finish the rotor
Once the machining is complete, remove the rotor from the lathe and inspect the final finish. Use a brake rotor micrometer to measure the thickness of the rotor at several points to ensure it is within specification. If necessary, use a sanding block or abrasive pad to remove any rough edges or burrs.

Tip: Follow the manufacturer’s recommendations for any additional steps, such as applying a rust inhibitor or coating the rotor with a high-temperature brake lubricant.
By following these step-by-step instructions and using the tips and tricks provided, you’ll be able to effectively use an Ammco brake lathe to machine and finish brake rotors with precision and confidence.
Step-by-step guide on using Ammco brake lathe
1. Safety precautions
Before using the Ammco brake lathe, it is important to ensure your safety and the safety of others. Make sure to wear safety goggles, gloves, and a protective apron. Also, ensure that the lathe is properly grounded and that the area is well-ventilated.
2. Preparing the brake lathe
Start by inspecting the lathe to make sure it is clean and free from any debris. Check that the cutting bits are sharp and positioned correctly. Also, check the condition of the brake rotor or drum to ensure it is clean and free from excessive wear.

3. Mounting the rotor or drum
Mount the rotor or drum onto the lathe using the appropriate adapters and cones. Ensure that it is securely fastened to prevent any movement during operation. Double-check the alignment to make sure it is centered and balanced.
4. Adjusting the cutting depth
Use the depth micrometer to adjust the cutting depth according to the specifications provided by the vehicle manufacturer. This will ensure that the rotor or drum is cut to the correct thickness.
5. Starting the lathe
Turn on the lathe motor and let it reach the desired cutting speed. Make sure that the cutting bits do not make contact with the rotor or drum when starting the lathe.
6. Cutting the rotor or drum
Slowly move the cutting tool towards the rotating rotor or drum. Use even and steady pressure to ensure a smooth and accurate cut. Avoid sudden movements or excessive force, as this can result in an uneven surface.
7. Checking the results
After completing the cut, inspect the rotor or drum for any defects or unevenness. Use a micrometer or caliper to measure the thickness of the rotor or drum at various points to ensure it meets the manufacturer’s specifications.

8. Clean-up
Once you are satisfied with the results, turn off the lathe and carefully remove the rotor or drum. Clean any metal shavings or debris from the lathe, and properly dispose of them. Make sure to clean and lubricate the lathe according to the manufacturer’s instructions.
9. Final checks
Before finishing, double-check your work to ensure everything is in order. Check that all tools and equipment are properly stored and that the work area is clean and organized.
10. Safety reminders
Remember to always follow proper safety precautions when using the Ammco brake lathe. This includes wearing protective gear, working in a well-ventilated area, and properly maintaining the lathe. If you are unsure about any step or encounter any issues, consult the manufacturer’s manual or seek professional assistance.
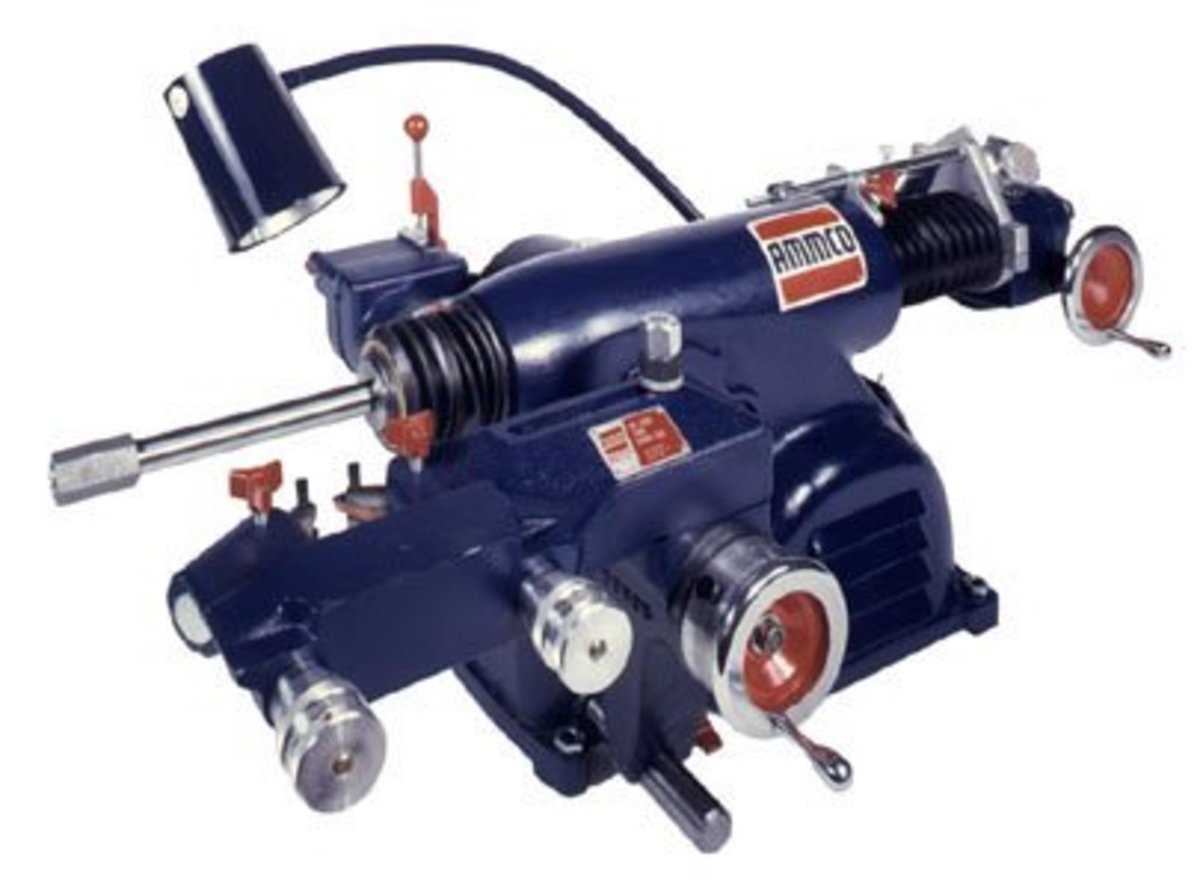
Choosing the right brake lathe
When it comes to choosing the right brake lathe for your needs, there are a few factors that you should consider. These factors include the type of lathe, your budget, and the level of expertise you have in using a brake lathe. Here are some tips to help you make the right choice:
1. Type of lathe
There are two main types of brake lathes: on-car lathes and bench lathes. On-car lathes are designed to be mounted directly on the vehicle, allowing you to resurface the brake rotor without removing it from the vehicle. Bench lathes, on the other hand, are stationary machines that require you to remove the brake rotor before resurfacing it. Consider your specific needs and preferences when deciding between these two types of lathes.
2. Budget
Another important factor to consider when choosing a brake lathe is your budget. Brake lathes can vary widely in price, so it’s important to determine how much you are willing to spend before making a decision. Keep in mind that more expensive models may offer additional features and higher quality, while cheaper models may be more budget-friendly but may lack certain advanced capabilities.
3. Level of expertise
Your level of expertise in using a brake lathe should also play a role in your decision-making process. If you are a beginner or have limited experience with brake lathes, it may be wise to choose a more user-friendly model that is easier to operate. On the other hand, if you are a professional or have extensive experience, you may prefer a more advanced and precision-focused lathe.
4. Reviews and recommendations
Lastly, it’s always a good idea to read reviews and seek recommendations from other users before making a final decision. Consider researching different brands and models, and take note of customer feedback regarding performance, durability, and overall user satisfaction. This can help you narrow down your options and find the best brake lathe for your specific needs.
By considering these factors and following these tips, you can make an informed decision when choosing the right brake lathe for your needs. Remember to prioritize your specific requirements and preferences, and don’t hesitate to seek expert advice if needed. Good luck!
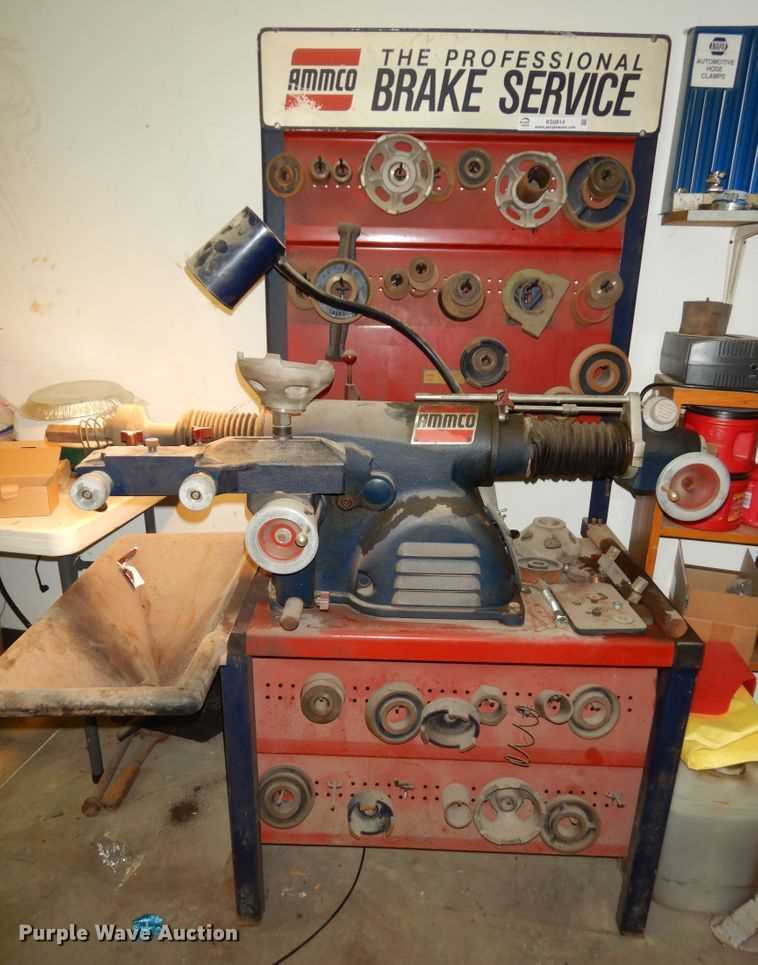
Setting up the Ammco brake lathe
Step 1: Safety Precautions
Before setting up the Ammco brake lathe, it is important to ensure your safety and the safety of others. Follow these safety precautions:
- Wear appropriate personal protective equipment, such as safety glasses, gloves, and ear protection.
- Ensure that the lathe is placed on a stable and level surface.
- Make sure the lathe is properly grounded.
Step 2: Installing the Cutting Bits
Installing the correct cutting bits is crucial for the proper functioning of the Ammco brake lathe. Follow these steps:
- Refer to the lathe’s user manual to determine the correct type and size of cutting bits.
- Make sure the lathe is turned off and unplugged.
- Remove the protective coverings from the lathe’s spindle and arbor.
- Place the cutting bit onto the arbor and make sure it is securely fastened.
Step 3: Adjusting the Lathe Settings
Properly adjusting the lathe settings will ensure accurate and efficient machining. Follow these steps:
- Refer to the lathe’s user manual to determine the recommended settings for your specific brake rotor or drum.
- Adjust the cutting depth and feed rate according to the specifications for the job.
- Check the lathe’s spindle speed and adjust it if necessary.
Step 4: Mounting the Brake Rotor or Drum
Mounting the brake rotor or drum securely is essential for safe and effective machining. Follow these steps:
- Clean the surface of the brake rotor or drum to remove any dirt or debris.
- Mount the brake rotor or drum onto the lathe’s arbour, ensuring it is centered and securely fastened.
Step 5: Starting the Machining Process
Once the Ammco brake lathe is properly set up, you can start the machining process. Follow these steps:
- Double-check all the lathe settings and make sure everything is properly adjusted.
- Turn on the lathe and gradually increase the feed rate to make initial cuts.
- Continue feeding the cutting bit along the surface of the brake rotor or drum until the desired finish is achieved.
- Monitor the machining process and make any necessary adjustments to the lathe settings as needed.
By following these steps, you will be able to effectively set up the Ammco brake lathe and perform brake rotor or drum machining with precision and accuracy.
Preparing the brake rotor
Before using the Ammco brake lathe, it is important to properly prepare the brake rotor. This ensures optimal results and extends the life of the lathe and the rotor. Here are the steps to follow:
Step 1: Inspect the brake rotor
Start by visually inspecting the brake rotor. Look for any signs of damage, such as cracks, deep grooves, or excessive wear. If you notice any significant damage, the brake rotor may need to be replaced before proceeding.
Step 2: Clean the brake rotor
Using a brake parts cleaner or a degreaser, thoroughly clean the brake rotor. This will remove any grease, oil, or dirt that may be on the surface. Cleaning the rotor ensures accurate measurements and prevents any debris from interfering with the lathe’s operation.
Step 3: Measure the brake rotor
Using a micrometer or a dial indicator, measure the thickness of the brake rotor at multiple points. This will help determine if the rotor can be machined or if it needs to be replaced. Refer to the manufacturer’s specifications for the minimum rotor thickness.
Step 4: Secure the brake rotor on the lathe
Before mounting the brake rotor on the lathe, ensure that the lathe is properly set up and adjusted. Follow the manufacturer’s instructions for mounting and securing the rotor. This will prevent any slippage or vibrations during the machining process.
Step 5: Set the lathe parameters
Based on the measurements taken earlier, set the desired parameters on the brake lathe. This includes the cut depth and the feed rate. Refer to the lathe’s user manual for specific instructions on adjusting these parameters.
Step 6: Start the lathe
Once everything is properly set up, start the brake lathe and let it reach the specified speed. Make sure to wear appropriate safety equipment, such as goggles and gloves, during the operation.
Step 7: Machine the brake rotor
Feed the cutting tool into the brake rotor slowly and evenly. Allow the lathe to remove the desired amount of material from the rotor. Take breaks periodically to inspect the rotor and ensure that it is being machined evenly.
Step 8: Measure the rotor thickness
After the machining process is complete, measure the thickness of the brake rotor again. Compare this measurement to the initial one to ensure that the desired amount of material has been removed. If necessary, repeat the lathe operation to achieve the desired result.
Step 9: Remove the brake rotor from the lathe
Once the machining process is complete, carefully remove the brake rotor from the lathe. Clean any excess debris or shavings from the rotor and inspect it once again for any signs of damage or abnormalities.
Following these steps will help ensure a smooth and accurate operation when using the Ammco brake lathe. Remember to always consult the manufacturer’s instructions and wear appropriate safety equipment throughout the process.
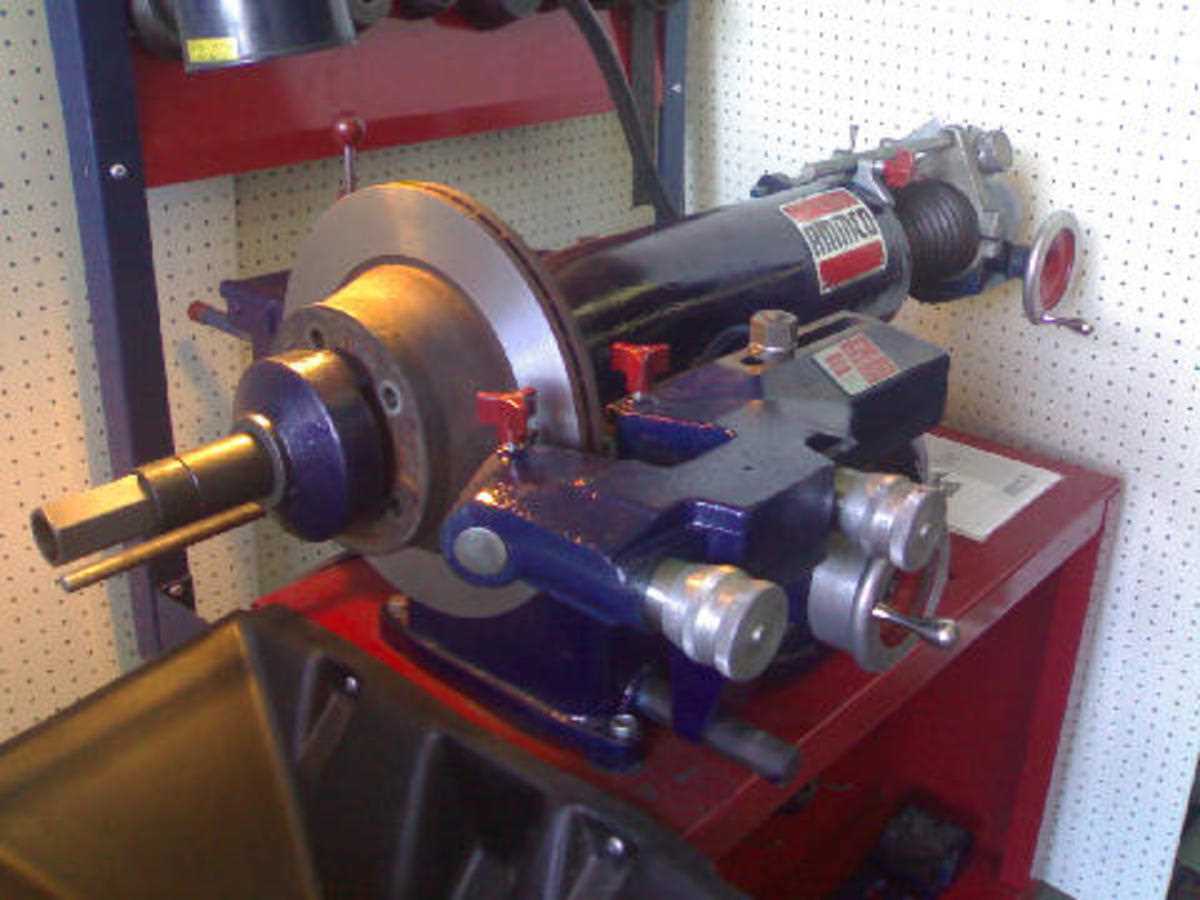
Mounting the brake rotor onto the lathe
Mounting the brake rotor onto the lathe is an important step in the process of machining the rotor. Here are the steps to mount the rotor onto the lathe:
- Choose the appropriate adapter
- Inspect the rotor
- Prepare the lathe
- Place the rotor on the lathe
Choose the appropriate adapter
Before mounting the brake rotor onto the lathe, it is necessary to select the appropriate adapter based on the size and features of the rotor. The adapter should be able to securely hold the rotor in place during the machining process. There are different adapters available for different types of rotors, so make sure to choose the right one.
Inspect the rotor

Prior to mounting the rotor onto the lathe, it is important to inspect the rotor for any damages or defects. Look for any cracks, warping, or excessive wear on the rotor surface. If any issues are found, it may be necessary to replace the rotor before proceeding.
Prepare the lathe
Before mounting the rotor, ensure that the lathe is set up properly. Adjust the tool bit height and position, and make sure the lathe is clean and free from any debris. This will ensure accurate and smooth machining of the rotor.
Place the rotor on the lathe
Carefully place the rotor onto the lathe, ensuring that it is securely held in place by the chosen adapter. Make sure the rotor is properly centered and aligned with the lathe’s cutting tool. When the rotor is positioned correctly, tighten the adapter to securely hold the rotor in place.
Once the rotor is mounted onto the lathe, you can proceed with the machining process according to the manufacturer’s instructions. Remember to follow all safety precautions and guidelines while using the lathe.
Adjusting the cutting depth
Adjusting the cutting depth is an important step in using the Ammco brake lathe. Proper adjustment ensures that the brake rotor or drum is resurfaced to the correct depth, improving braking performance and reducing noise and vibration.
Follow these steps to adjust the cutting depth on the Ammco brake lathe:
- Start by loosening the locking knob located on the top right side of the lathe. This will allow you to adjust the position of the cutting tool.
- Next, turn the adjustment knob counterclockwise to move the cutting tool closer to the brake rotor or drum, or clockwise to move it further away.
- Check the cutting depth by using a depth gauge or by measuring the distance between the cutting tool and the surface of the rotor or drum.
- Make small adjustments as necessary until the desired cutting depth is achieved. It is important to make gradual adjustments to avoid removing too much material or causing damage to the brake rotor or drum.
- Once the cutting depth is properly adjusted, tighten the locking knob to secure the cutting tool in place.
It is recommended to consult the Ammco brake lathe’s user manual for specific instructions regarding cutting depth adjustments, as different models may have slightly different procedures. Regularly checking and adjusting the cutting depth will help maintain the effectiveness and longevity of the brake lathe and ensure accurate resurfacing of brake rotors and drums.
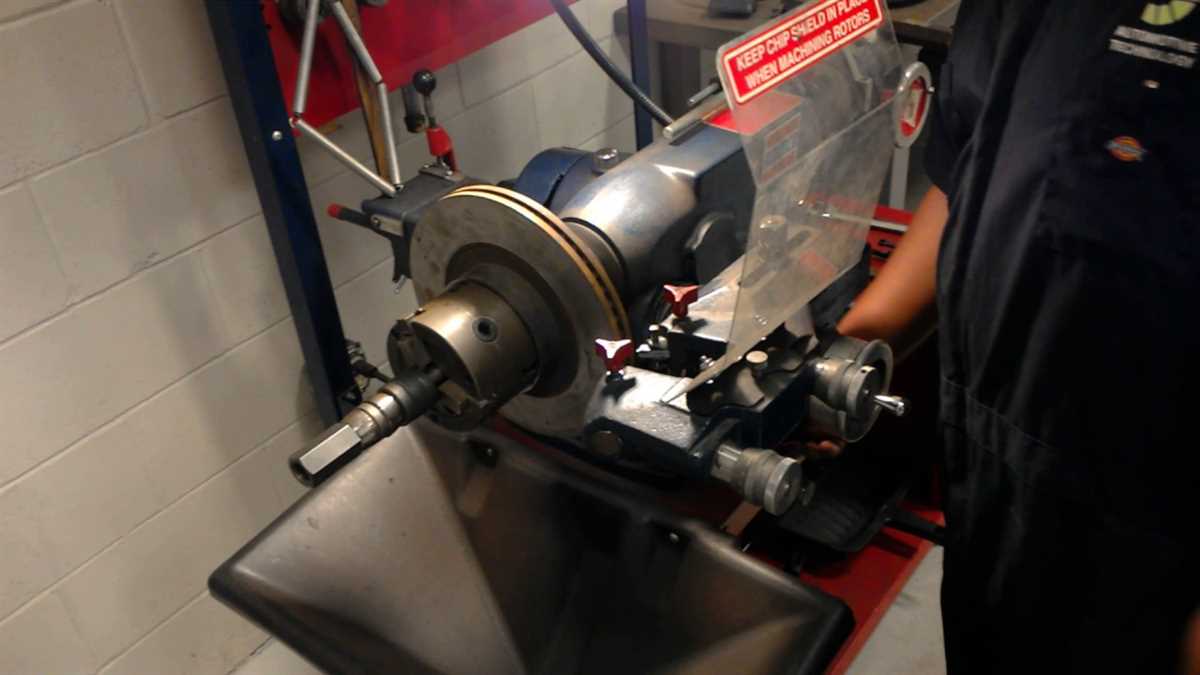
Starting the cutting process
Before you start cutting the brake rotor, make sure to properly set up the Ammco brake lathe and adjust it according to the specifications of the rotor.
Step 1: Safety precautions
- Prior to starting the cutting process, ensure that you are wearing appropriate safety gear such as safety glasses and gloves to protect yourself from any flying debris.
- Make sure that the lathe is securely mounted and stable on a level surface to prevent any accidents or injuries.
Step 2: Rotor setup
- Start by selecting the appropriate cutting bits based on the type of rotor you are working on. Consult the Ammco brake lathe manual or the rotor manufacturer’s specifications for the correct cutting bit.
- Inspect the rotor for any obvious defects or irregularities such as excessive wear, cracks, or warping. If the rotor is severely damaged or worn beyond the minimum specifications, it may need to be replaced.
- Securely clamp the rotor onto the lathe using the lathe’s quick-attach arbor. Make sure the rotor is centered and securely held in place to ensure accurate cutting.
Step 3: Lathe adjustments
Properly adjust the Ammco brake lathe by following these steps:
- Adjust the lathe’s cutting speed according to the rotor’s specifications. The cutting speed can usually be adjusted using the lathe’s speed control knob.
- Set the lathe’s feed rate to achieve the desired cut. The feed rate determines how much material will be removed with each pass. Consult the rotor manufacturer’s specifications or the Ammco lathe manual for the recommended feed rate.
- Adjust the lathe’s depth of cut to remove the necessary amount of material from the rotor. This can be done by adjusting the lathe’s cutting tool or bit to the desired depth.
Step 4: Cutting process
- Start the lathe by turning on the power switch, ensuring that the cutting tool does not come into contact with the rotor until the desired cutting speed is reached.
- Begin the cutting process by gradually lowering the cutting tool onto the rotor’s surface. Use smooth and even movements to ensure an even and accurate cut.
- Monitor the cutting process to ensure that the desired amount of material is being removed and that the cutting tool is not causing any damage or creating excessive heat.
- Continue cutting the rotor until the desired specifications are achieved. Use a measuring tool to periodically check the rotor’s thickness and ensure it is within the recommended limits.
- Once the cutting process is complete, remove the rotor from the lathe, inspect it for any defects or irregularities, and make any necessary adjustments or replacements.
Following these steps will help you properly start the cutting process using the Ammco brake lathe. Remember to always prioritize safety and consult the machine’s manual or a professional technician if you have any doubts or questions.
Removing the brake rotor from the lathe
To remove the brake rotor from the lathe, follow these steps:
- Make sure the lathe is turned off and the power cord is unplugged.
- Inspect the rotor for any signs of damage or wear that might require further attention. If necessary, address any issues before removing the rotor.
- Loosen the chuck jaws by turning the chuck key counterclockwise.
- Carefully slide the rotor off the lathe’s arbor, ensuring that it doesn’t fall or get damaged during the process.
- Place the removed rotor on a clean and flat surface, making sure it doesn’t come into contact with any dirt, debris, or moisture.
- Inspect the lathe’s arbor for any signs of dirt or debris, and clean it if necessary to ensure optimal performance for future use.
- If you need to store the rotor temporarily, consider placing it in a protective cover or bag to prevent any contamination or damage.
It is important to handle the brake rotor with care during the removal process to avoid any accidents or damage. Always adhere to the manufacturer’s instructions and safety guidelines when using the brake lathe.
Cleaning and maintaining the Ammco brake lathe
Why cleaning and maintaining the Ammco brake lathe is important
Cleaning and maintaining your Ammco brake lathe is essential for its proper functioning and longevity. Regular cleaning helps remove dirt, debris, and brake dust that can accumulate on the machine, ensuring accurate readings and precise cuts. Proper maintenance ensures that all parts are in good condition, reducing the risk of breakdowns and costly repairs.
Steps to clean the Ammco brake lathe
- 1. Start by unplugging the machine and ensuring that all moving parts have come to a complete stop.
- 2. Use a soft cloth or brush to remove any loose dirt and debris from the lathe, paying attention to hard-to-reach areas.
- 3. Wipe down the machine’s surfaces with a damp cloth to remove any remaining dirt or grime. Avoid using harsh chemicals or abrasive cleaners that may damage the machine.
- 4. Dry the lathe thoroughly to prevent the accumulation of moisture, which can lead to rust and corrosion.
- 5. Use a vacuum cleaner or compressed air to remove any debris from the lathe’s motor and internal components.
- 6. Inspect the cutting tools and replace any worn or damaged bits.
- 7. Lubricate the moving parts of the lathe, following the manufacturer’s recommendations, to ensure smooth operation.
- 8. Clean and inspect the lathe’s chuck and collet, ensuring they are in good condition and properly aligned.
Maintenance tips for the Ammco brake lathe
- 1. Regularly check the belts and pulleys for any signs of wear or damage. Replace them if necessary.
- 2. Clean the lathe’s filter regularly to prevent clogs and maintain proper airflow.
- 3. Keep the lathe’s work area clean and free from clutter to prevent accidents and ensure efficiency.
- 4. Store the lathe in a dry and secure area to protect it from dust, moisture, and theft.
- 5. Follow the manufacturer’s recommendations for oiling and greasing the machine to prevent excessive wear and tear.
- 6. Inspect the lathe’s electrical connections and wiring for any signs of damage or fraying. Replace defective parts immediately.
- 7. Schedule regular maintenance with a qualified technician to catch any potential issues early and ensure optimal performance.
Conclusion
Regular cleaning and maintenance of your Ammco brake lathe are crucial for its proper functioning and longevity. By following the steps outlined above and implementing the maintenance tips, you can ensure that your brake lathe continues to provide accurate readings and reliable performance for years to come.
FAQ
How do I use an Ammco brake lathe?
Using an Ammco brake lathe is a simple and straightforward process. First, make sure the lathe is properly set up and all the necessary attachments are in place. Then, clean the brake rotor or drum and mount it securely on the lathe. Adjust the cutting depth according to the specifications of the rotor or drum. Finally, start the lathe and slowly bring the cutting tool into contact with the rotor or drum. Move the tool across the surface while making sure to maintain a consistent cutting speed and depth. Once the cutting is complete, remove the rotor or drum and check for any imperfections.
Can I use an Ammco brake lathe on all types of vehicles?
Yes, an Ammco brake lathe can be used on a wide variety of vehicles, including cars, trucks, and motorcycles. It is suitable for both rotors and drums, making it a versatile tool for brake servicing. However, it is important to ensure that the lathe is set up correctly and the cutting tools are appropriate for the specific application. Additionally, some larger or specialized vehicles may require additional attachments or adapters to properly fit on the lathe.
How long does it take to resurface a brake rotor or drum using an Ammco brake lathe?
The time it takes to resurface a brake rotor or drum using an Ammco brake lathe can vary depending on several factors, including the size and condition of the rotor or drum, the cutting depth and speed used, and the experience of the operator. Generally, it can take anywhere from a few minutes to half an hour to complete the resurfacing process for a single rotor or drum.
What is the difference between turning and grinding a brake rotor or drum using an Ammco brake lathe?
Turning and grinding are two different methods of resurfacing a brake rotor or drum using an Ammco brake lathe. Turning involves cutting away a thin layer of the rotor or drum using a sharp cutting tool, while grinding involves using a grinding stone to remove material from the surface. Turning is typically preferred for rotors, as it provides a smoother finish, while grinding is often used for drums, as it can better remove surface imperfections. However, the specific method used will depend on the condition and specifications of the rotor or drum.
Video

How to get to staffa

Meet Harrison Clayton, a distinguished author and home remodeling enthusiast whose expertise in the realm of renovation is second to none. With a passion for transforming houses into inviting homes, Harrison's writing at https://thehuts-eastbourne.co.uk/ brings a breath of fresh inspiration to the world of home improvement. Whether you're looking to revamp a small corner of your abode or embark on a complete home transformation, Harrison's articles provide the essential expertise and creative flair to turn your visions into reality. So, dive into the captivating world of home remodeling with Harrison Clayton and unlock the full potential of your living space with every word he writes.