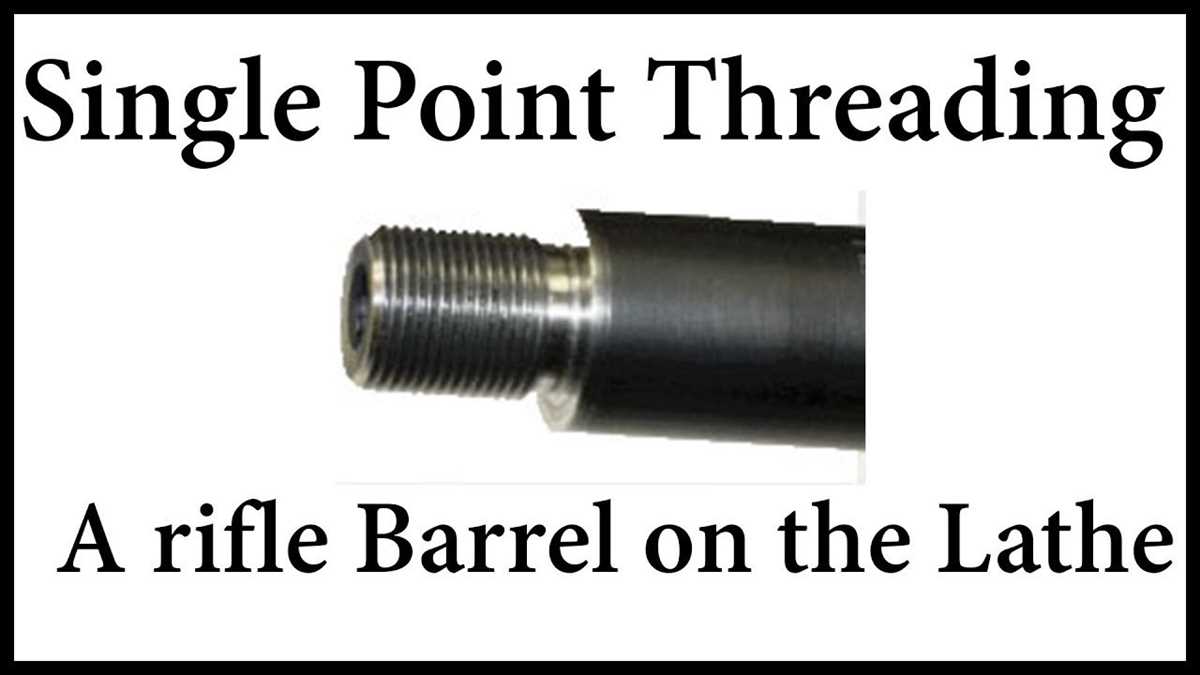
Step-by-Step Guide: How to Rifle a Barrel on a Lathe | Barrel Rifling Techniques

Rifling is a crucial process in the production of firearms. By creating spiral grooves inside the barrel, rifling imparts a spin on the bullet, which improves stability and accuracy. While there are various methods of rifling, one common technique is to use a lathe. In this step-by-step guide, we will explore the process of rifling a barrel on a lathe, highlighting the key techniques and considerations.
Step 1: Preparation
Before rifling a barrel on a lathe, it is important to prepare the barrel and the lathe. First, ensure that the barrel is securely mounted in the lathe’s spindle. You should also clean the barrel thoroughly to remove any debris or contaminants. Additionally, select the appropriate rifling cutter and chamber reamer based on your desired caliber and design.
Step 2: Cutting the Grooves
Once the barrel and lathe are prepared, it is time to start cutting the grooves. Begin by setting the lathe to the desired speed and feeding the rifling cutter into the barrel using the lathe’s feed mechanism. It is crucial to move the cutter at a consistent rate to ensure uniform and precise grooves. Take care to monitor the depth and width of the grooves, adjusting the cutter and feed as necessary.

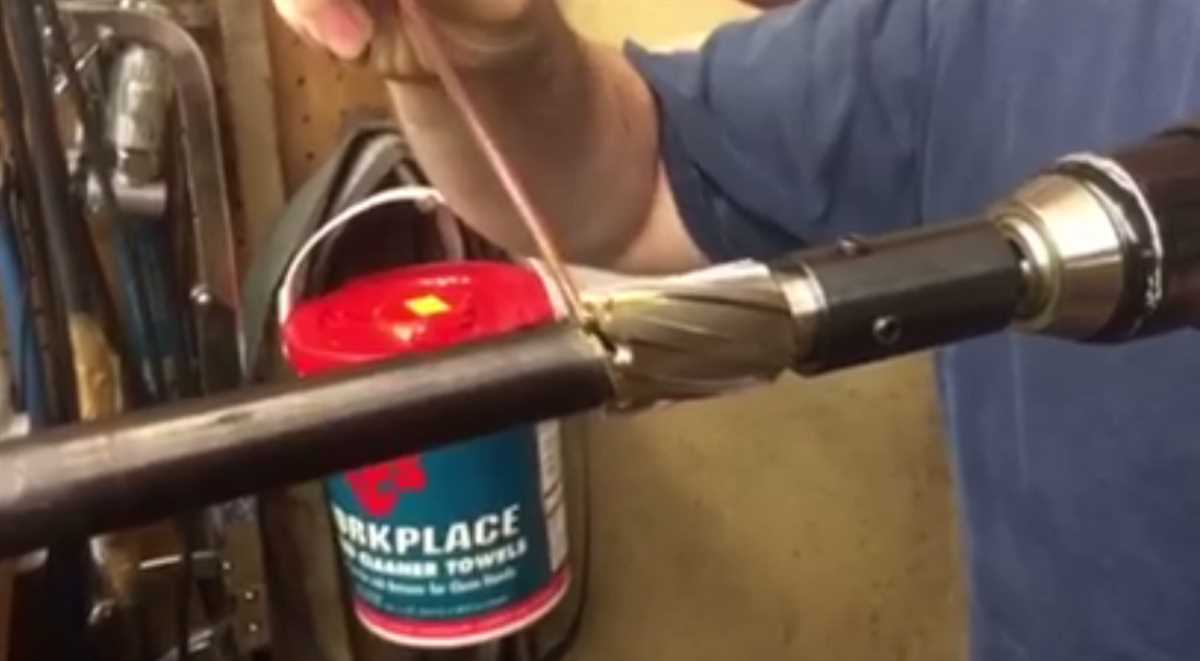
Tip: Using cutting oil or lubricant can help reduce friction and improve the cutting process, resulting in smoother and cleaner grooves.
Step 3: Checking for Accuracy
After completing the rifling process, it is important to check the accuracy of the grooves. This can be done by inspecting the depth, width, and twist of the grooves using precision measuring tools. Additionally, you can test the barrel’s bore diameter and chamber dimensions for consistency. Any deviations or inconsistencies should be identified and corrected before proceeding.
By following these step-by-step techniques, you can effectively rifle a barrel on a lathe, producing precise and high-quality grooves. However, it is important to note that rifling can be a complex and specialized process that requires experience and expertise. Always consult reliable sources and seek guidance from professionals when rifling barrels.
Step-by-Step Guide: How to Rifle a Barrel on a Lathe Barrel Rifling Techniques
Introduction
Rifling a barrel is a crucial step in the manufacturing process of firearms. It involves cutting spiral grooves inside the barrel to impart spin to the bullet, providing stability and accuracy in flight. This step-by-step guide will walk you through the process of rifling a barrel using a lathe and various rifling techniques.
Materials and Tools

To rifle a barrel on a lathe, you will need the following materials and tools:
- Barrel blank
- Lathe machine
- Centering tool
- Rifling cutter
- Bore brush
- Rifling button
- Lubricant
- Calipers
- Measuring instruments
- Safety equipment (goggles, gloves, etc.)
Step 1: Preparing the Barrel Blank
Start by securing the barrel blank firmly in the lathe chuck. Make sure it is centered and aligned properly using a centering tool. This will ensure that the rifling is cut accurately along the centerline of the barrel.
Step 2: Choosing the Rifling Technique
There are several rifling techniques available, including cut-rifling, button-rifling, and broach-rifling. Choose the technique that best suits your needs and the specific requirements of the firearm.
Step 3: Cut Rifling
If you are using the cut-rifling technique, install a rifling cutter into the lathe tool post. Slowly feed the cutter into the barrel while rotating the lathe chuck. Gradually increase the depth of cut, ensuring a smooth and consistent spiral groove pattern.

Step 4: Button Rifling
If you are using the button-rifling technique, lubricate the barrel and the rifling button. Insert the rifling button into the barrel and secure it to the lathe chuck. Rotate the lathe chuck while applying gentle pressure to the rifling button. This will push the button through the barrel, cutting the spiral grooves as it goes.
Step 5: Finishing Touches
After the rifling process is complete, clean the barrel using a bore brush and solvent to remove any debris or residue. Measure the rifling depth and twist rate using calipers and other measuring instruments to ensure the desired specifications have been achieved.
Conclusion
Rifling a barrel on a lathe requires precision and attention to detail. By following this step-by-step guide and utilizing the appropriate rifling technique, you can ensure the production of a high-quality barrel that will improve the accuracy and performance of your firearms.
Required Tools and Materials
To rifle a barrel on a lathe, you will need a variety of tools and materials. Here is a list of the essentials:

- Lathe: A lathe is the primary tool used for rifling a barrel. It is necessary for accurately cutting the spiral grooves into the barrel.
- Barrel blank: A barrel blank is a cylindrical piece of metal that will be used to create the rifled barrel. It should be made from a suitable material, such as steel, with the desired dimensions and caliber.
- Barrel chamber reamer: A chamber reamer is used to shape the chamber of the barrel. It is crucial for creating the correct dimensions and alignment of the chamber.
- Bore gauge: A bore gauge is used to measure the diameter and alignment of the barrel’s bore. It helps ensure the accuracy and consistency of the rifling process.
- Rifle button or cutter: A rifle button or cutter is the tool that is inserted into the barrel to create the spiral grooves. These grooves will impart spin to the bullet, improving its stability and accuracy.
- Lathe cutting tools: Various cutting tools, such as boring bars, cutting inserts, and thread cutting tools, are needed to perform the necessary operations on the barrel blank. These tools are essential for achieving the desired rifling results.
- Measuring tools: Measuring tools, such as calipers, micrometers, and depth gauges, are essential for precise measurements throughout the rifling process. Accurate measurements ensure the desired rifling dimensions and alignment.
- Cutting fluids: Cutting fluids, such as coolant or lubricant, are used during the rifling process to cool the cutting tools, reduce friction, and improve the surface finish of the barrel.
- Safety equipment: Safety glasses, gloves, and a face shield are necessary to protect yourself from any potential hazards during the rifling process. Safety should always be a priority when working with a lathe and other tools.
Having these tools and materials readily available will ensure that you have everything you need to rifle a barrel on a lathe. It is important to carefully select and maintain these tools to achieve accurate and consistent rifling results.
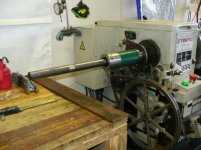
Preparing the Lathe and Barrel
Before you begin rifling a barrel on a lathe, it is important to properly prepare both the lathe and the barrel to ensure accurate and precise rifling. Follow these steps to prepare the lathe and barrel:
1. Mount the lathe
- Ensure that the lathe is securely mounted to a sturdy workbench or stand.
- Check that the lathe is level and stable.
2. Secure the barrel
- Securely fasten the barrel onto the lathe’s chuck.
- Make sure that the barrel is centered and aligned with the lathe’s axis.
3. Clean the barrel
- Thoroughly clean the barrel to remove any dirt, debris, or oil that may affect the rifling process.
- Use a cleaning solvent and a bore brush to clean the entire length of the barrel.
- Dry the barrel completely before proceeding.
4. Measure the barrel
- Measure the length and diameter of the barrel using calipers or a micrometer.
- Record the measurements for future reference.
5. Set the lathe speed and feed rate
- Refer to the manufacturer’s guidelines or a recommended rifling speed and feed rate chart.
- Set the lathe speed and feed rate to the appropriate values for the barrel material and desired rifling configuration.
6. Install the rifling tool
- Choose the appropriate rifling tool for the desired rifling pattern.
- Install the rifling tool onto the lathe’s tool post or tool holder.
- Ensure that the rifling tool is securely tightened.
7. Align the rifling tool
- Align the rifling tool with the centerline of the barrel.
- Make any necessary adjustments to ensure proper alignment.
By properly preparing the lathe and barrel before rifling, you can ensure that the rifling process is accurate, precise, and produces high-quality barrels.

Marking the Rifling Pattern
Before you begin rifling the barrel, you’ll need to mark the rifling pattern onto the surface of the barrel. This pattern will guide your rifling tool as it cuts into the metal, creating the spiral grooves that give the bullet its spin.
Here is a step-by-step guide on how to mark the rifling pattern:
- Clean the barrel: Start by thoroughly cleaning the inside of the barrel to remove any dirt, debris, or oil residue that could interfere with the marking process.
- Secure the barrel: Use a barrel vise or other secure mounting device to hold the barrel in place. It needs to be stable and immobile to ensure accurate markings.
- Create a line reference: Use a combination square or similar tool to create a straight line reference on the barrel. This line will serve as the starting point for marking the rifling pattern.
- Mark the lands: The lands are the raised areas between the grooves in the rifling pattern. Use a small, sharp scribe or marking tool to make small, evenly spaced marks along the straight line reference. These marks will indicate where the lands will be cut.
- Create the twist rate reference: The twist rate refers to how many inches the rifling rotates over a given distance. Use a twist rate calculator or consult the specifications for your specific firearm to determine the desired twist rate. Once you have this information, mark the barrel at the appropriate intervals to indicate the twist rate.
- Create the grooves: Use the marks you made for the lands as a guide to create the grooves. This can be done using a rifling machine or other specialized tools designed for this purpose.
- Inspect and finalize: Once you’ve finished marking the rifling pattern, carefully inspect the barrel to ensure that all markings are accurate and evenly spaced. Make any necessary adjustments before proceeding with the rifling process.
By following these steps, you’ll be able to accurately mark the rifling pattern on your barrel, which is an important step in the rifling process. Remember that precision and attention to detail are key to achieving optimal rifling results.
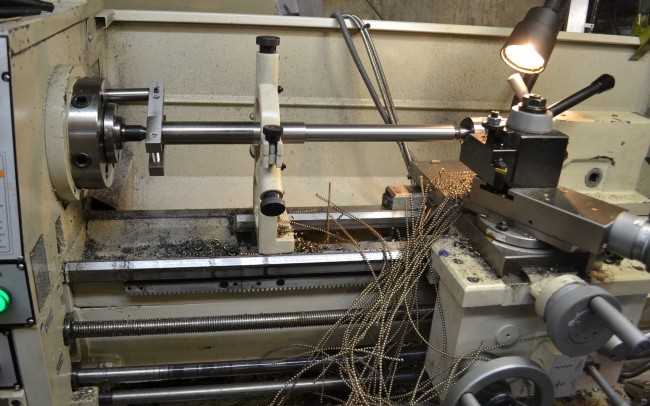
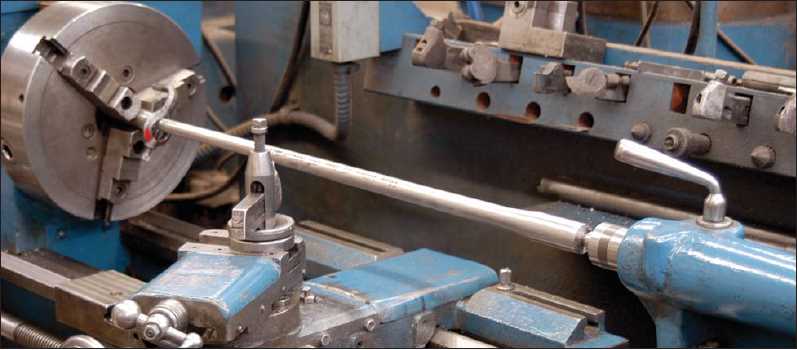
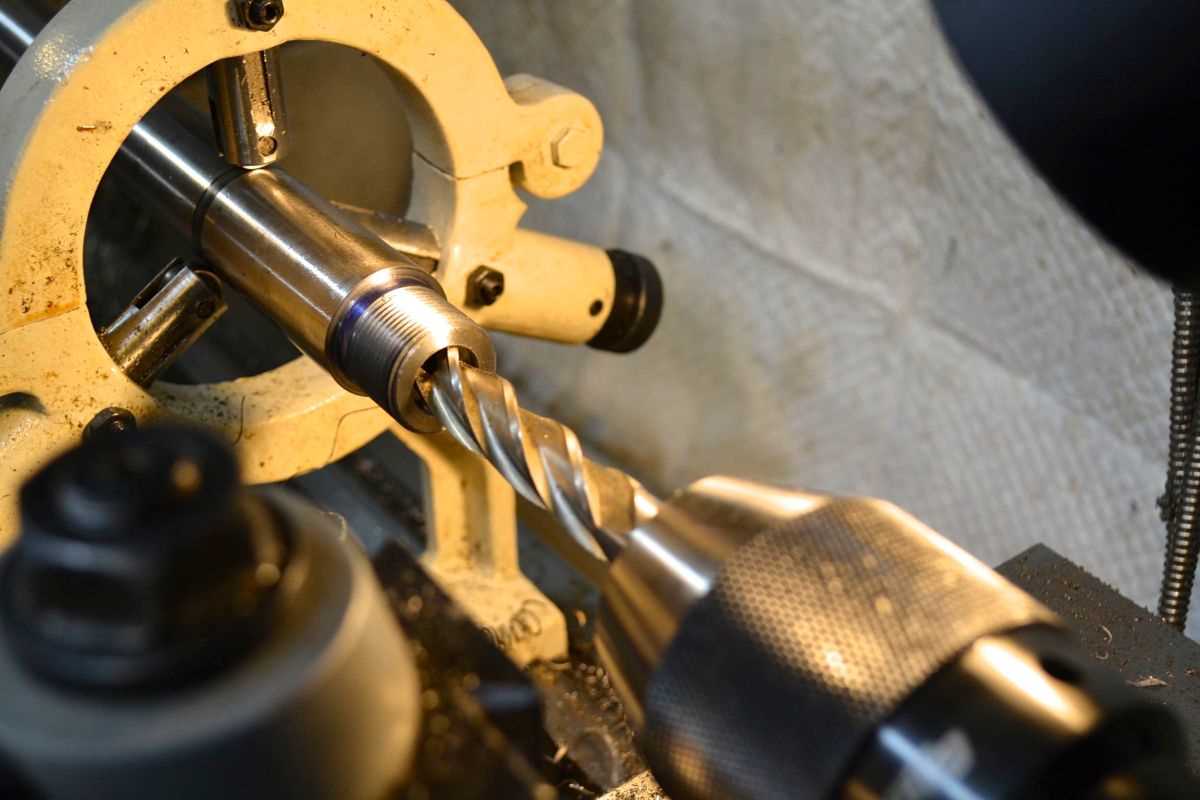
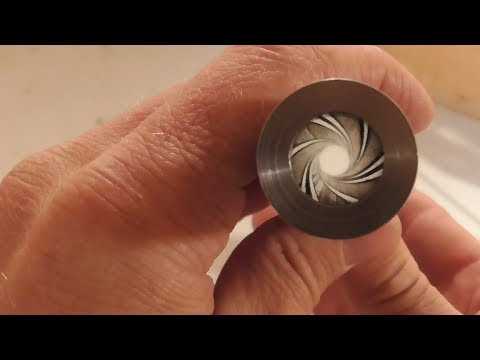
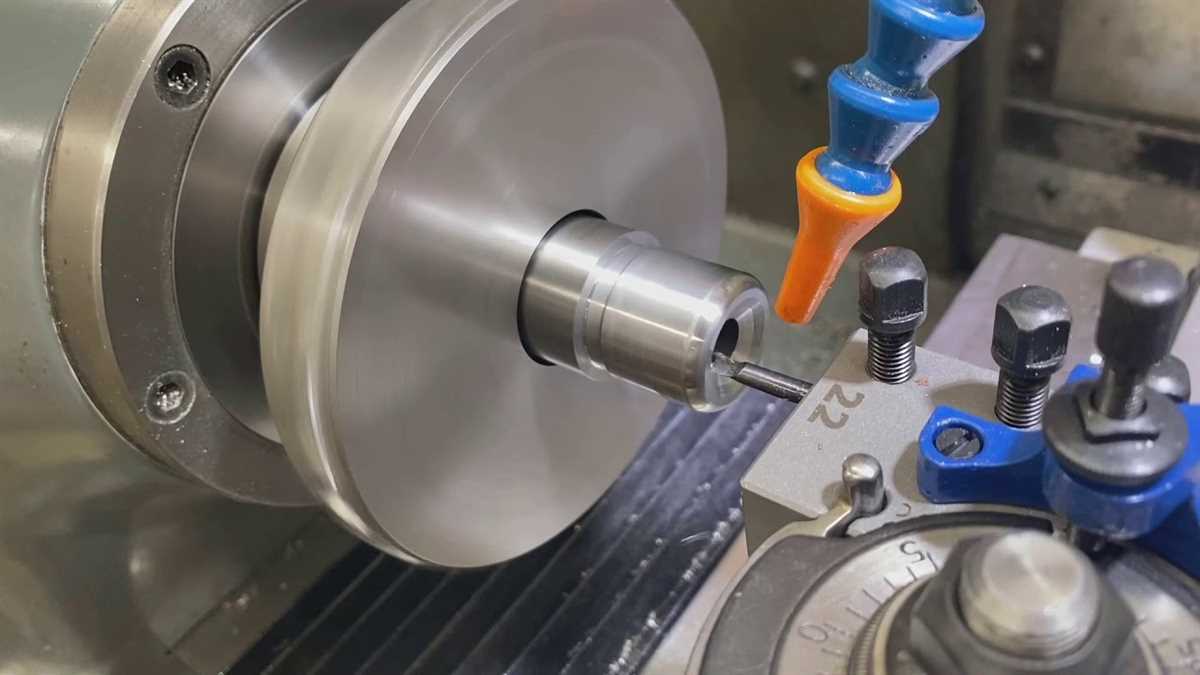
Cutting the Rifling Grooves
Once the barrel has been properly indexed on the lathe, it is time to begin cutting the rifling grooves. Here is a step-by-step guide on how to do it:
- Choose the appropriate cutting tool for rifling. This can be a button cutter or a broach cutter, depending on the type of rifling desired.
- Set the cutting tool in the lathe and secure it properly, making sure it is aligned with the centerline of the barrel.
- Set the desired depth of cut and adjusting the feed rate on the lathe. The depth and feed rate will depend on the type of rifling and the desired groove spacing.
- Start the lathe and slowly begin to feed the cutting tool into the barrel. Make sure to maintain a consistent feed rate and keep the tool perpendicular to the barrel.
- Continue the cutting process until the entire length of the barrel has been rifled. This can be a time-consuming process, so patience and attention to detail are essential.
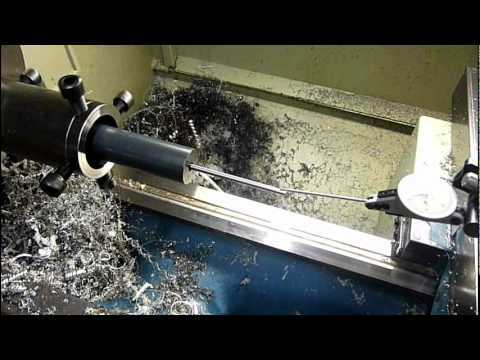
Throughout the cutting process, it is important to regularly check the depth and spacing of the rifling grooves using precision measuring tools. This will ensure that the rifling is uniform and meets the desired specifications.
After the rifling grooves have been cut, the barrel will need to be properly cleaned and inspected to remove any debris and ensure the quality of the rifling. This can be done using solvents, brushes, and inspection tools.
Overall, cutting the rifling grooves is a critical step in the barrel rifling process. It requires careful planning, attention to detail, and the use of precision tools to achieve the desired rifling pattern. Following these steps will help ensure a high-quality rifled barrel.
Deburring and Polishing the Barrel
Once the rifling process is complete, it is important to debur and polish the barrel to ensure optimal performance and accuracy. Deburring removes any rough edges or burrs left from the rifling process, while polishing smooths out the barrel’s surface.
Tools and Materials
Before you begin deburring and polishing the barrel, gather the following tools and materials:
- Sandpaper or abrasive cloth
- Deburring tool
- Polishing compound
- Cotton cloth or polishing wheel
Deburring the Barrel
- Begin by inspecting the barrel for any rough edges or burrs. These can be felt by running your finger along the rifling grooves.
- Use the deburring tool to carefully remove any burrs or rough edges. Be sure to follow the contours of the rifling grooves to avoid altering their shape.
- Continue deburring the entire length of the barrel, checking your progress frequently by running your finger along the rifling grooves.
Polishing the Barrel
- Start by wrapping a piece of fine-grit sandpaper or abrasive cloth around a cleaning rod or dowel.
- Apply a small amount of polishing compound to the sandpaper or abrasive cloth.
- Carefully insert the rod or dowel into the barrel and use a twisting motion to polish the entire length of the barrel.
- Remove the sandpaper or abrasive cloth and repeat the process with progressively finer grits until the desired smoothness is achieved.
- Once the barrel is polished, use a clean cotton cloth or a polishing wheel to remove any residual polishing compound and give the barrel a final shine.
Deburring and polishing the barrel should be done with care and precision to avoid altering the rifling grooves or introducing any new imperfections. Take your time and be thorough to ensure the best possible results.
Testing and Finishing the Rifled Barrel
Once the rifling process is complete, it is important to test the barrel for accuracy and address any imperfections before finishing it.
1. Bore Inspection
The first step in testing the rifled barrel is to perform a bore inspection. Use a bore scope or a bore light to examine the rifling and ensure that it is clean and free from any debris or machining marks. Look for any signs of tooling marks, scratches, or burrs that may affect the accuracy of the barrel.
2. Chambering Test
Next, perform a chambering test to verify that the barrel properly chambers and extracts ammunition. Use a go/no-go gauge or a headspace gauge to check the chamber dimensions and ensure that the cartridge fits correctly without excessive pressure or resistance. This will ensure that the rifle is safe to shoot.
3. Accuracy Testing
Once the barrel has passed the bore inspection and chambering test, it is time to test its accuracy. Mount the barrel onto a rifle receiver and secure it in place. Use a suitable rest or shooting bench to minimize human error.
Shoot a series of test rounds through the barrel and measure the group size on a target at a specific distance. Repeat the test multiple times to get a reliable average group size. This will give you an idea of the barrel’s potential accuracy.
4. Addressing Imperfections
If the barrel does not meet the desired accuracy standards, it may be necessary to address any imperfections. This could involve lapping the bore to remove any tooling marks or polishing the rifling grooves to ensure a smoother surface. With careful attention to detail, it is possible to improve the barrel’s accuracy.
5. Finishing the Barrel
Once the barrel has been tested and any necessary improvements have been made, it can be finished. This typically involves cleaning the barrel thoroughly to remove any debris or residual polishing compounds. Then, apply a suitable finish, such as a durable coating or a traditional bluing treatment, to protect the barrel from rust and other corrosion.
Following these steps will ensure that the rifled barrel is properly tested, any imperfections are addressed, and the finished product meets the desired accuracy standards.
Tips and Safety Precautions
When rifling a barrel on a lathe, it is important to follow certain tips and safety precautions to ensure a successful and safe process. Here are some key points to keep in mind:
1. Wear Personal Protective Equipment (PPE)
- Always wear safety glasses or a face shield to protect your eyes from any flying debris.
- Wear hearing protection to prevent hearing damage from the noise produced by the lathe.
- Consider wearing a dust mask or respirator to protect yourself from any metal shavings or dust.
- Wear protective gloves to minimize the risk of cuts or burns.
2. Secure the Barrel Properly
Make sure that the barrel is securely fastened to the lathe to prevent any movement or wobbling during the rifling process. This will help ensure accurate and consistent rifling.
3. Use the Right Cutting Tools
Choosing the appropriate cutting tools is crucial for achieving the desired rifling pattern and maintaining the barrel’s integrity. Use high-quality cutting tools that are specifically designed for barrel rifling.
4. Follow Cutting Parameters
Refer to the manufacturer’s guidelines or expert advice to determine the correct cutting parameters such as speed, depth of cut, and feed rate. Using the correct cutting parameters will help achieve optimal results and reduce the risk of damage to the barrel.
5. Regularly Inspect the Barrel
Periodically stop the lathe and inspect the rifling progress. Look for any signs of misalignment, dull cutting tools, or other issues. Take corrective measures if necessary to ensure a properly rifled barrel.
6. Clean and Lubricate
- Clean the rifling tools and the lathe regularly to remove any metal shavings or debris that can impair the rifling process.
- Apply lubrication to the barrel and cutting tools to reduce friction and heat generation, which can affect the accuracy and quality of the rifling.
7. Monitor Temperature
Keep an eye on the temperature of the lathe and the barrel during the rifling process. Excessive heat can distort the barrel or affect the hardness of the metal. Take breaks if necessary to prevent overheating.
8. Practice Good Housekeeping
Maintain a clean and organized work area to prevent accidents and facilitate the rifling process. Keep tools, equipment, and materials properly stored when not in use.
By following these tips and safety precautions, you can ensure a safe and successful barrel rifling procedure on a lathe, resulting in a high-quality finished product.
FAQ
What is the purpose of rifling a barrel?
The purpose of rifling a barrel is to impart a spin on the bullet as it travels through the barrel, which helps stabilize the bullet in flight and improve accuracy.
What are some common barrel rifling techniques?
Some common barrel rifling techniques include button rifling, cut rifling, and hammer forging.
Can I rifle a barrel on a lathe?
Yes, it is possible to rifle a barrel on a lathe. However, it requires specialized tooling and a high level of expertise.
What are the steps involved in rifling a barrel on a lathe?
The steps involved in rifling a barrel on a lathe typically include preparing the barrel, setting up the lathe, choosing the rifling method, cutting the rifling, and finishing the barrel.
What are the advantages of cut rifling over button rifling?
One of the advantages of cut rifling over button rifling is that cut rifling allows for greater control over the rifling profile and can result in more precise and consistent rifling.
How long does it usually take to rifle a barrel on a lathe?
The time it takes to rifle a barrel on a lathe can vary depending on various factors such as the length and complexity of the barrel, the rifling method used, and the skill of the operator. It can take anywhere from several hours to several days.
Video


Meet Harrison Clayton, a distinguished author and home remodeling enthusiast whose expertise in the realm of renovation is second to none. With a passion for transforming houses into inviting homes, Harrison's writing at https://thehuts-eastbourne.co.uk/ brings a breath of fresh inspiration to the world of home improvement. Whether you're looking to revamp a small corner of your abode or embark on a complete home transformation, Harrison's articles provide the essential expertise and creative flair to turn your visions into reality. So, dive into the captivating world of home remodeling with Harrison Clayton and unlock the full potential of your living space with every word he writes.