Step-by-Step Guide: How to Make a Bowl on a Lathe

If you are a woodworking enthusiast or a beginner looking to expand your skills, learning how to make a bowl on a lathe can be an exciting and rewarding project. Bowl turning is a centuries-old craft that allows you to create functional and beautiful pieces of art. With the right tools, techniques, and patience, you can create a unique bowl that showcases your creativity and craftsmanship.
Before you start, it’s important to gather all the necessary tools and materials. You will need a lathe, bowl gouges, a faceplate, a chuck, sandpaper, and a finish of your choice. Additionally, you will need a selection of wood suitable for bowl turning, such as maple, walnut, or cherry. Once you have everything ready, you can begin the process of turning a bowl.
The first step is to choose the wood for your bowl. Look for a piece that is free of defects, such as cracks or knots, and has an interesting grain pattern. It’s important to start with a blank that is slightly larger than the final dimensions of your bowl, as you will be turning away material during the shaping process. Once you have selected the wood, secure it to the lathe using a faceplate or a chuck.
Tip: It’s always a good idea to wear protective gear, such as safety glasses and a face shield, when working with a lathe. The spinning wood can present a potential hazard, so it’s important to take precautions to protect yourself.
With the wood securely mounted on the lathe, you can start shaping the bowl. Begin by using a roughing gouge to turn the blank into a cylinder. This will create a smooth and even surface to work with. Once the blank is cylindrical, you can start shaping the outside of the bowl using a bowl gouge. Take your time and make light cuts, gradually shaping the bowl to your desired form. Remember to constantly check the thickness of the walls to ensure they are uniform.
Beginner’s Guide to Making a Bowl on a Lathe
Turning wooden bowls on a lathe can be a satisfying and rewarding woodworking project. Whether you’re a beginner or an experienced woodworker, this guide will walk you through the step-by-step process of making a bowl on a lathe.

Materials You Will Need:
- A lathe
- A wooden blank, preferably made from a hardwood like maple or cherry
- Woodworking tools (chisels, gouges, etc.)
- Sanding pads or sandpaper in various grits
- Finishing supplies (e.g. sanding sealer, lacquer, or oil)
Step 1: Prepare the Blank
Start by selecting a wooden blank that is roughly the size and shape of the bowl you want to create. Make sure the blank is securely mounted on the lathe, using a faceplate or chuck.
Step 2: Rough Turning
Use a roughing gouge to turn the outside of the bowl. Begin by removing excess material and shaping the outer profile. Take light passes and gradually work your way from the bottom to the rim of the bowl.
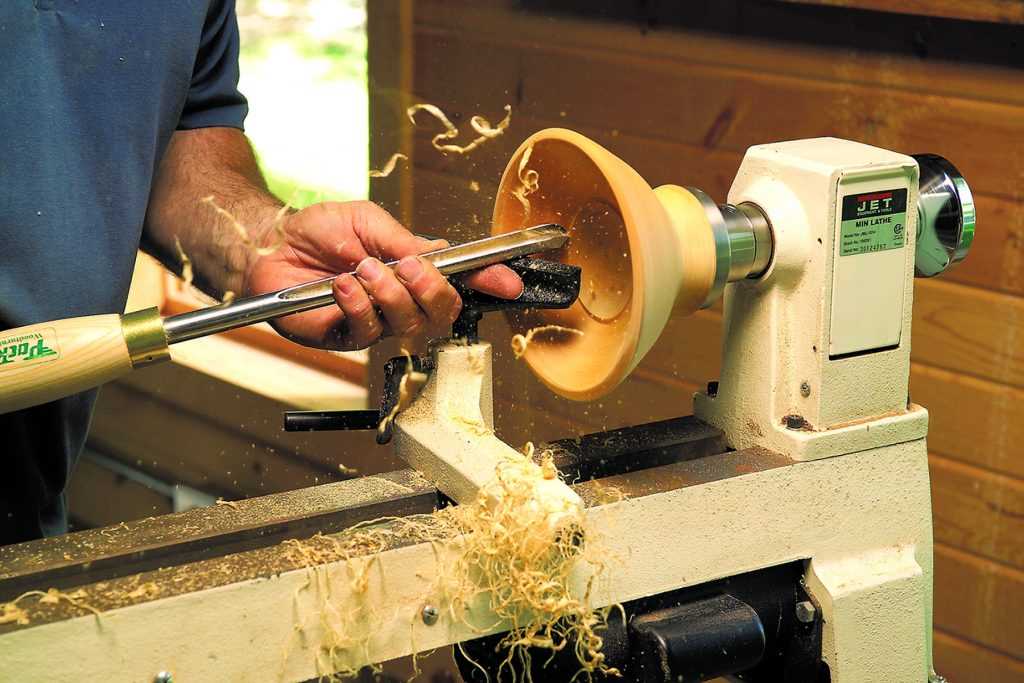
Step 3: Hollowing the Bowl
Switch to a bowl gouge to hollow out the interior of the bowl. Start by removing material from the center and work your way towards the rim. Take care to maintain a consistent wall thickness and an even curve.
Step 4: Sanding
Once the bowl is shaped and hollowed, sand the surface using progressively finer grits of sandpaper. Start with a coarse grit to remove any tool marks, then work your way up to a finer grit for a smoother finish.

Step 5: Finishing
Apply a sanding sealer or finish of your choice to protect and enhance the beauty of the wood. Follow the manufacturer’s instructions for application and drying times. Consider applying multiple coats for added durability.
Step 6: Final Steps
Remove the bowl from the lathe and carefully sand any remaining rough edges or imperfections. Polish the surface with a fine-grit sandpaper or polishing compound. Your bowl is now ready to be used or displayed!
Tips:
- Always wear appropriate safety gear, such as goggles and a respirator, when working with a lathe.
- Keep your tools sharp and properly maintained for optimal performance.
- Practice proper cutting techniques to avoid tear-out and improve the quality of your cuts.
- Experiment with different wood species and shapes to create unique and visually appealing bowls.
Now that you have a basic understanding of the process, it’s time to get started on your own bowl-making journey. Don’t be afraid to make mistakes and learn from them. Enjoy the creative process and have fun turning beautiful bowls on your lathe!
Gathering the Necessary Tools and Materials
Before you can begin making a bowl on a lathe, it’s important to gather all the necessary tools and materials. Here is a list of what you will need:
Tools:
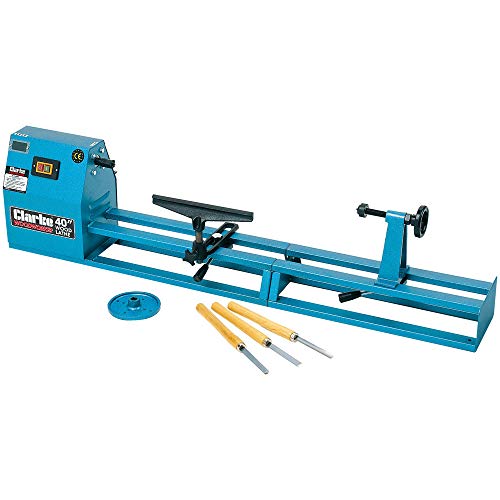
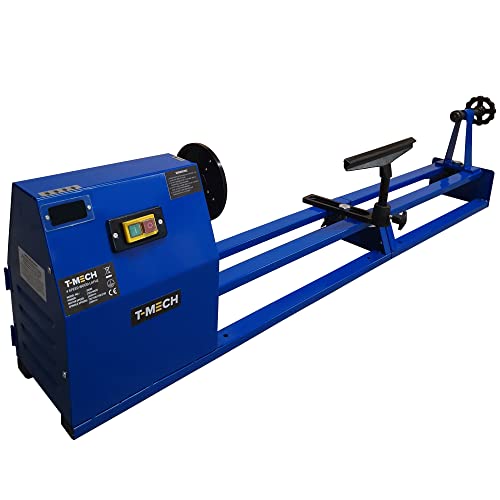
- Lathe: A lathe is the primary tool you will need for this project. Make sure it is in good working condition and properly secured.
- Chisels: You will need a variety of chisels to shape and carve the wood. Be sure to have both gouges and scrapers in different sizes.
- Parting tool: This tool is used for cutting off the finished bowl from the larger piece of wood.
- Calipers: Calipers are used to measure and check the thickness and diameter of the bowl as you work.
- Sanding tools: Sandpaper, sanding pads, or a lathe-mounted sander can be used to smooth and finish the bowl.
- Faceplate or chuck: To securely mount the wood on the lathe, you will need a faceplate or chuck.
Materials:

- Wood: Choose a wood type that is suitable for turning, such as maple, cherry, or walnut. Ensure the wood is dry and free from cracks or defects.
- Wood glue: Used to attach multiple pieces of wood together if you are making a laminated bowl.
- Finish: You can choose to apply a protective finish to the bowl, such as oil or varnish. Select a finish that is food-safe if you plan to use the bowl for eating.
- Protective gear: Safety should always be a top priority. Wear safety goggles, a dust mask, and ear protection when operating the lathe.
Take the time to gather all the tools and materials before starting your woodworking project. Having everything readily available will make the process smoother and more efficient.
Preparing the Wood Blank
Before starting to make a bowl on a lathe, it is important to properly prepare the wood blank. The wood blank is the piece of wood that will be shaped into a bowl using the lathe. Here are the steps to prepare the wood blank:
- Select the wood: Choose a type of wood that is suitable for bowl turning, such as maple, walnut, or cherry. The wood should be dry and free from any defects or cracks.
- Cut the wood blank: Use a bandsaw or a chainsaw to cut a rough blank that is larger than the final size of the bowl. Leave extra material to account for any mistakes or adjustments that may be needed.
- Square the wood blank: Use a jointer or a hand plane to square the ends and sides of the wood blank. This will ensure that the blank is properly aligned and stable while it is being turned on the lathe.
- Mount the wood blank: Secure the wood blank to the lathe using a faceplate or a chuck. Make sure that it is tightly and securely fastened to prevent any accidents or wobbling while turning.
- Mark the center: Use a compass to mark the center of the wood blank on both ends. This will help with aligning and shaping the bowl during the turning process.
- Prepare the tools: Sharpen and set up the necessary turning tools, such as gouges and scrapers. This will ensure that they are ready for use and will produce clean and smooth cuts.
By properly preparing the wood blank, you will have a solid foundation for creating a beautiful bowl on the lathe. Take your time and pay attention to detail at this stage to ensure the best results in the final bowl shape.
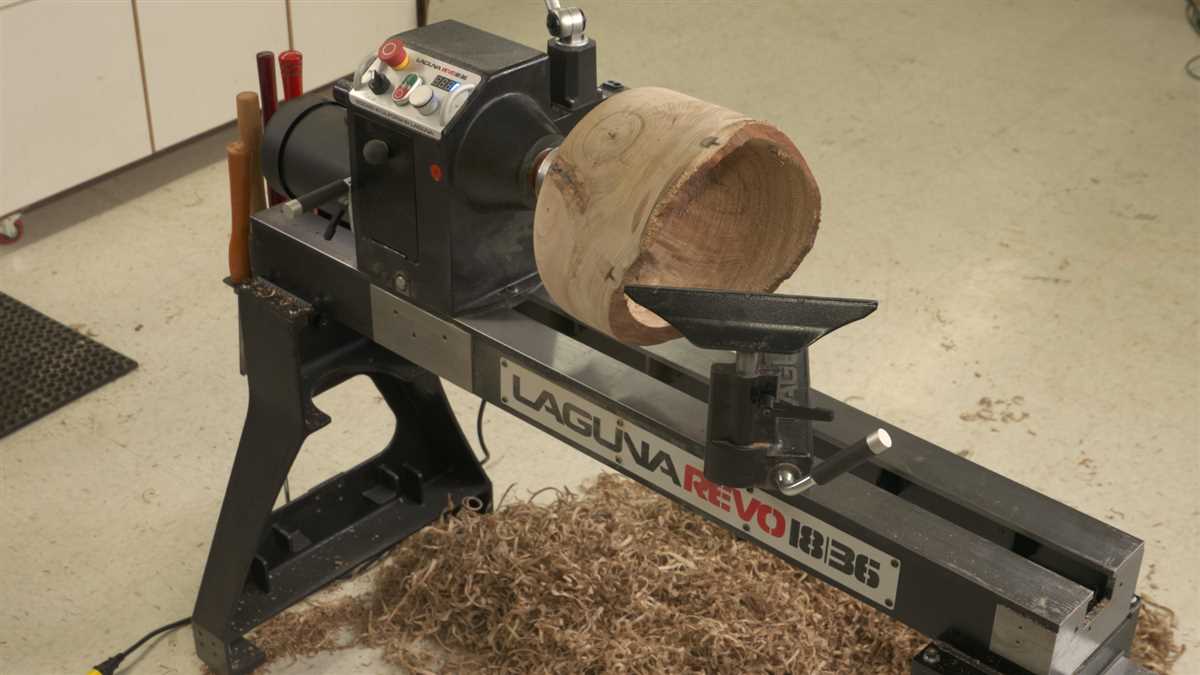
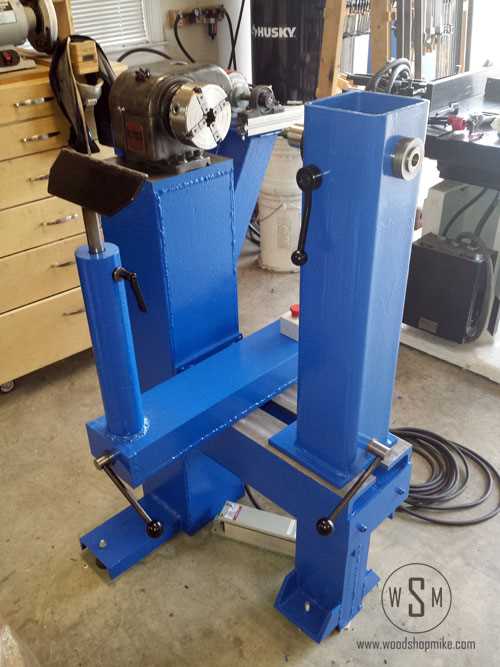
Mounting the Blank on the Lathe
Before starting the process of making a bowl on a lathe, it’s important to properly mount the blank, or the piece of wood, on the lathe. This step is crucial for ensuring stability and safety while turning the bowl.
Preparation

Here are the steps to mount the blank on the lathe:
- Choose a suitable blank: Select a piece of wood that is large enough to accommodate the desired size and shape of the bowl.
- Square the edges: Use a square to check the edges of the blank and make sure they are straight and perpendicular to one another.
- Mark the center: Find the center of the blank and mark it with a pencil or a center finder tool. This will help with aligning the blank on the lathe.
- Prepare the lathe: Make sure the lathe is properly set up and adjusted. Adjust the height of the tool rest to a comfortable position for turning.
Mounting Techniques
There are a few different techniques for mounting the blank on the lathe. Here are a couple of common methods:
- Faceplate mounting: Attach a faceplate to the blank using screws or wood glue. Make sure the faceplate is securely fastened and centered on the marked center of the blank.
- Spindle mounting: Use a drive center or a spur center to hold the blank in place. Insert the center in the marked center of the blank and secure it tightly.
Testing for Stability
Once the blank is mounted on the lathe, it’s important to check for stability before starting the turning process. Here’s how:

- Lock the headstock: Ensure that the headstock is locked and securely holding the blank.
- Test for movement: Try gently pushing and pulling the blank to check if it is secure. If there is any movement, adjust the mounting method or tighten the fasteners.
- Check the alignment: Use a straight edge to check if the blank is aligned properly on the lathe. Adjust if necessary.
Once you are satisfied with the stability and alignment of the blank, you are ready to proceed with turning the bowl on the lathe.
Roughing Out the Bowl Shape
Before you can start turning the bowl on the lathe, you need to rough out the basic shape of the bowl blank. This involves removing excess material and creating a rough outline of the final bowl shape. Here are the steps to follow:
- Secure the bowl blank on the lathe’s faceplate using screws. Make sure it is firmly held in place and centered as accurately as possible.
- Adjust the tool rest so it is approximately at the center of the bowl blank. This will provide support to the turning tool and help you achieve a smooth cut.
- Start by using a roughing gouge to remove the bulk of the excess material. This tool is designed to quickly remove material and shape the blank. Hold the tool at a slight angle and push it along the wood while maintaining a constant cutting motion. Be sure to work from the center outwards to maintain balance and stability.
- Continue using the roughing gouge until you have removed most of the material, leaving only a rough outline of the bowl shape. At this stage, the bowl may still look rough and uneven, but that is normal. The aim is to remove the excess material and create a basic shape.
- Once the bulk of the material is removed, switch to a bowl gouge. This tool has a deeper flute and is specifically designed for shaping the interior of the bowl. Use it to refine the shape and remove any rough spots or imperfections in the wood.
- Take your time and make gentle, controlled cuts. Let the tool do the work and avoid applying too much pressure, as this can lead to a catch or tear-out. Gradually work your way from the center outwards, hollowing out the interior of the bowl.
- As you work, periodically stop the lathe and check the progress. Use calipers or your eye to ensure that the thickness of the bowl walls is consistent. Ideally, aim for a thickness of around 1/8 inch (3 mm) to allow for sanding and finishing later on.
Once you have roughed out the bowl shape, you can proceed to the next step: refining the shape and smoothing the surface. This involves using different tools and techniques to create the final form of the bowl.
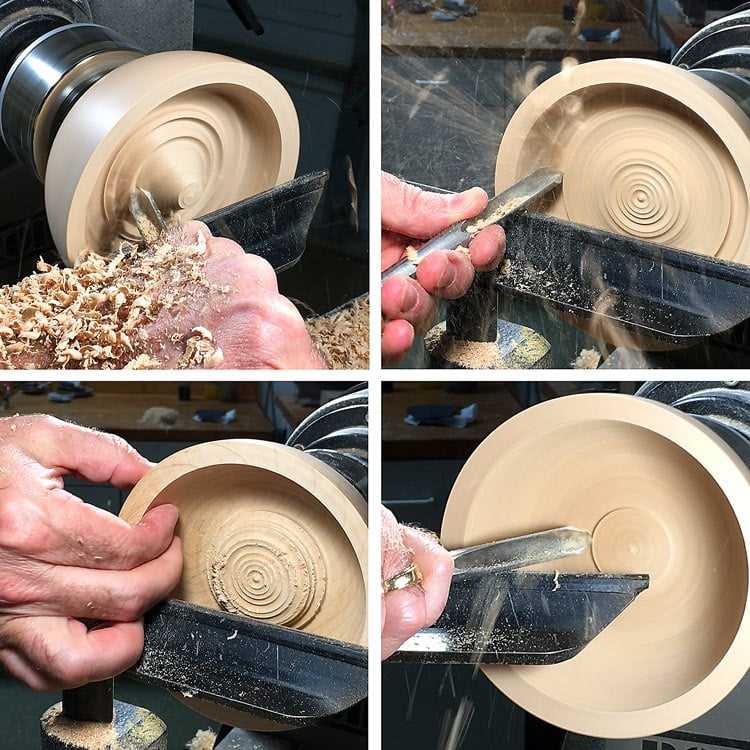
Hollowing the Bowl
- Secure the bowl blank onto the lathe using a faceplate or chuck.
- Use a roughing gouge to remove most of the material from the center of the bowl, leaving a small amount near the rim to guide the hollowing process.
- Switch to a bowl gouge and begin hollowing out the interior of the bowl.
- Start at the center and work towards the rim, making small controlled cuts to remove material.
- Use calipers to measure the depth and thickness of the walls, maintaining an even thickness throughout.
- Periodically stop the lathe to check the progress and make any necessary adjustments.
- Continue hollowing out the bowl until you reach the desired depth and shape.
Remember to take your time and be patient during this process, as hollowing requires precision and control. Use caution to avoid catching the gouge and causing damage to the bowl or lathe.
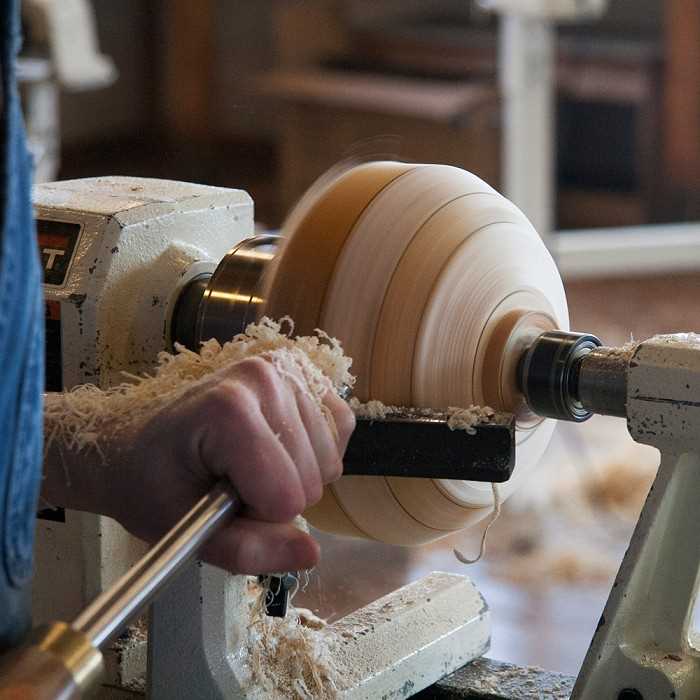
Shaping the Outside of the Bowl
Once you have securely mounted the blank on the lathe, it’s time to start shaping the outside of the bowl. This step is crucial in creating the desired form and design of your bowl.
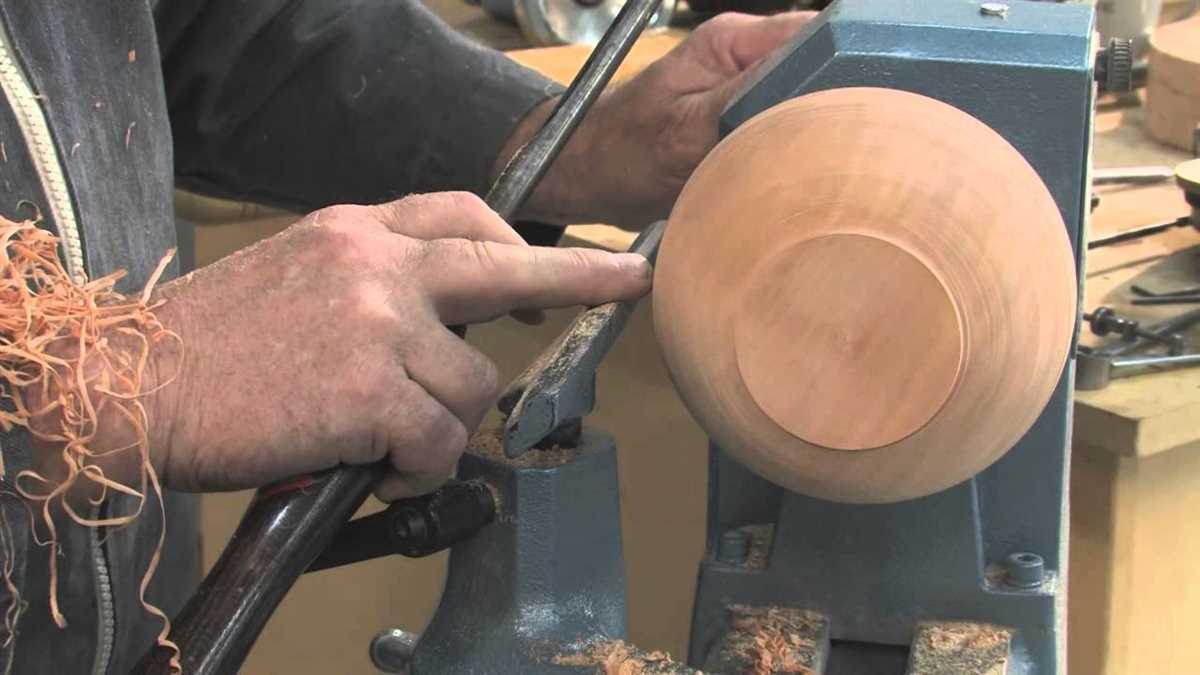
1. Begin with a roughing gouge: Start by using a roughing gouge to remove excess material from the blank. This will give you a rough shape to work with and will make it easier to refine the design later on. Hold the gouge with a firm grip and position it at a slight angle with the bevel rubbing against the wood. Slowly push the gouge into the wood and begin cutting.
2. Use a bowl gouge: As you continue shaping the outside of the bowl, switch to a bowl gouge. This tool has a deeper flute and a more curved edge, making it ideal for cutting the curves of the bowl. Again, hold the gouge firmly and position it at a slight angle with the bevel rubbing against the wood. Use a sweeping, fluid motion to shape the curves and contours of the bowl.
3. Take frequent measurements: Throughout the shaping process, it’s important to take frequent measurements to ensure you’re achieving the desired dimensions and proportions. Use a set of calipers or a measuring tape to measure the diameter, depth, and thickness of the bowl. Compare these measurements to your planned dimensions and make any necessary adjustments.
4. Smooth out the surface: Once you have achieved the rough shape of the bowl, it’s time to focus on smoothing out the surface. Use a bowl scraper or a spindle gouge to remove any tool marks or ridges on the surface. Take light, controlled cuts to avoid tear-out and maintain a smooth finish.
5. Sand the bowl: To achieve a polished, refined finish, sand the bowl using a progression of sandpaper grits. Start with a lower grit, such as 80 or 120, and gradually work your way up to a higher grit, such as 320 or 400. This will help remove any scratches or imperfections and give the bowl a smooth, polished surface.
6. Apply a finish: Finally, apply a finish to the outside of the bowl to protect the wood and enhance its appearance. There are various finishes you can use, such as lacquer, oil, or wax. Follow the manufacturer’s instructions for your chosen finish and apply it evenly to the surface of the bowl. Allow the finish to dry completely before moving on to the next step.
By following these steps, you can effectively shape the outside of the bowl and create a beautifully crafted piece using a lathe.
Sanding and Finishing the Bowl
Once the bowl has been turned and shaped on the lathe, the next step is to sand and finish the surface to achieve a smooth and polished result. Sanding helps to remove any tool marks, small imperfections, and smooth out the surface, while finishing adds a protective layer and enhances the appearance of the wood.
Materials Needed
- Sanding paper in various grits (ranging from coarse to fine)
- Sanding pads or blocks
- Sanding sealer or sanding sealer/varnish combination
- Finish of your choice (such as oil, wax, or lacquer)
- Lint-free cloth or paper towels
Sanding Process
- Begin the sanding process by using a coarse grit sandpaper to remove any rough spots and tool marks. Start with a grit around 80 or 100, and sand in the direction of the grain.
- Gradually progress to finer grits (such as 150, 220, and 320) as you work your way through the sanding process. Remember to always sand in the direction of the grain and apply even pressure.
- Switch to sanding pads or blocks for the later stages of sanding. These can help to evenly distribute pressure and prevent uneven sanding marks.
- After each sanding stage, wipe away any dust or debris with a lint-free cloth or paper towel to ensure a clean surface for the next sanding step.
- Continue sanding with finer grits until you are satisfied with the smoothness of the bowl’s surface. Take your time and pay attention to any remaining imperfections.
Finishing Process
- Before applying any finish, it is important to seal the wood properly. This can be done by applying a sanding sealer or a sanding sealer/varnish combination. Follow the instructions on the product for application and drying times.
- Once the sealer has dried, you can apply your desired finish. Popular options include oils, waxes, and lacquers. Apply the finish evenly and allow it to dry according to the manufacturer’s instructions.
- If desired, you can repeat the finishing process with multiple coats to achieve a more durable and polished result. Be sure to lightly sand between coats to remove any imperfections or rough spots.
- After the final coat has dried, gently buff the surface with a soft cloth or buffing pad to enhance the shine and remove any remaining imperfections.
Following these steps will help you achieve a beautifully sanded and finished bowl on a lathe. Remember to take your time and work in a well-ventilated area for safety. Enjoy the process and the satisfaction of creating a functional and aesthetically pleasing piece of wooden art!
Final Steps and Tips for Success
1. Sanding and Finishing
After shaping the bowl on the lathe, it’s time to sand and finish the piece. Use sandpaper of various grits, starting with a rough grit to remove any tool marks and then progressing to finer grits for a smooth finish. Sand both the inside and outside of the bowl, making sure to sand evenly and consistently.
Once the sanding is complete, you can apply a finish to the bowl. Common finishes for wooden bowls include food-safe oils, such as walnut or mineral oil, or a clear lacquer or varnish. Apply the finish according to the manufacturer’s instructions, making sure to cover all areas of the bowl.
2. Buffing and Polishing
For an extra smooth and lustrous finish, you can buff and polish the bowl. Use a set of lathe-mounted buffing wheels or a hand-held buffing wheel attachment to apply a buffing compound or wax to the surface of the bowl. Move the buffing wheel back and forth across the bowl while applying light pressure to achieve a glossy shine.
3. Cleaning and Maintenance
Once your bowl is complete, it’s important to clean and maintain it properly. For wooden bowls, avoid submerging them in water and instead clean them with a damp cloth or sponge. Dry the bowl thoroughly after cleaning to prevent moisture damage.
Regular maintenance may include reapplying a fresh coat of oil or finish every few months, especially if the bowl is used for food. Keep the bowl away from extreme heat or direct sunlight to prevent warping or cracking.
4. Displaying and Using Your Bowl
Now that your bowl is finished and well-maintained, it’s time to display and use it. Wooden bowls make beautiful centerpieces or decorative pieces on shelves or mantels. You can also use them for serving salads, fruits, or snacks.
Make sure to handle the bowl with care to avoid dropping or knocking it against hard surfaces, as this can lead to chips or cracks. Enjoy the beauty and functionality of your handmade lathe-turned bowl!
FAQ
What materials do I need to make a bowl on a lathe?
To make a bowl on a lathe, you will need a lathe machine, a bowl blank – which can be made of wood or other materials, lathe tools, sandpaper, and finish for the bowl.
How do I choose the right size bowl blank for my lathe?
When choosing the bowl blank for your lathe, make sure it is not larger than the capacity of your lathe. The diameter and length of the blank should fit comfortably on the lathe’s spindle.
What type of lathe tools do I need to make a bowl?
To make a bowl on a lathe, you will need a spindle roughing gouge, bowl gouge, parting tool, and a skew chisel. These tools will help you shape, hollow, and finish the bowl.
Can I make a bowl on a mini lathe?
Yes, you can make a bowl on a mini lathe. However, the size of the bowl will be limited by the capacity of the lathe. You might have to work with smaller bowl blanks and adjust your techniques accordingly.
What safety precautions should I take when making a bowl on a lathe?
When using a lathe to make a bowl, it is important to wear safety goggles to protect your eyes from flying debris. Make sure your lathe is properly secured to the workbench. Avoid loose clothing and jewelry that can get caught in the lathe. Always keep your hands at a safe distance from the spinning bowl blank.
Video


Meet Harrison Clayton, a distinguished author and home remodeling enthusiast whose expertise in the realm of renovation is second to none. With a passion for transforming houses into inviting homes, Harrison's writing at https://thehuts-eastbourne.co.uk/ brings a breath of fresh inspiration to the world of home improvement. Whether you're looking to revamp a small corner of your abode or embark on a complete home transformation, Harrison's articles provide the essential expertise and creative flair to turn your visions into reality. So, dive into the captivating world of home remodeling with Harrison Clayton and unlock the full potential of your living space with every word he writes.