Discover the Possibilities: What Can You Make with a Mini Lathe?

Are you a craft enthusiast looking to take your skills to the next level? Or perhaps you’re just curious about the world of woodworking and want to explore new possibilities. Either way, a mini lathe might be just what you need.
A mini lathe is a powerful tool that allows you to shape and create objects out of wood, metal, and other materials. With this versatile tool, you can turn a simple piece of wood into a beautiful bowl, a stunning vase, or even intricate pens and pencils.
But the possibilities don’t end there. A mini lathe opens up a whole world of creativity, allowing you to experiment with different shapes, sizes, and designs. Whether you want to create one-of-a-kind furniture pieces or exquisite jewelry, a mini lathe gives you the freedom to bring your ideas to life.
Not only does a mini lathe enable you to create unique and personalized pieces, but it also provides a great way to relax and unwind. There’s something incredibly satisfying about working with your hands and watching as a block of material transforms into a work of art right before your eyes.
So, whether you’re an experienced woodworker or a beginner looking to dip your toes into a new hobby, a mini lathe can open up a world of possibilities. Get ready to discover the joy of creating something with your own hands and the endless opportunities that a mini lathe provides.
Explore the World of Woodturning
Woodturning is a mesmerizing and rewarding art form that allows you to transform blocks of wood into beautiful and functional objects. With a mini lathe, you have the power to explore this world and unleash your creativity.

Whether you are a seasoned woodworker or a beginner, woodturning offers endless possibilities. From crafting intricate bowls and vases to turning pens and other small items, there is no limit to what you can create. The mini lathe provides a compact and versatile tool to help you achieve your woodturning dreams.
Why Choose a Mini Lathe?
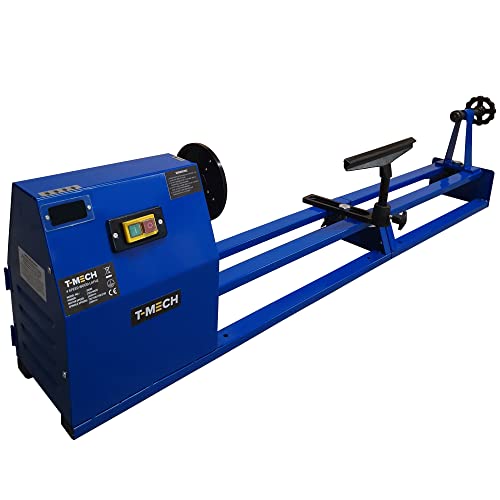
A mini lathe is the perfect choice for those who want to dive into woodturning but have limited space or budget. It offers a smaller footprint without sacrificing power or capabilities. With a mini lathe, you can easily fit it in your workshop or even set it up on a sturdy table in your garage.
Mini lathes often come with adjustable speed controls, allowing you to vary the speed of your turning projects. This feature is invaluable when working with different types of wood or when you need precise control over your cuts and finishes.
Projects to Get You Started
Once you have your mini lathe, the possibilities are endless. Here are a few projects to inspire you:
- Pens: Turning pens is a popular project for woodturners of all skill levels. You can experiment with different types of wood, colors, and finishes to create unique and personalized pens.
- Handles: Upgrade your kitchen utensils by turning custom handles for your knives, spatulas, or cooking spoons. This allows you to add a personal touch to your everyday tools.
- Bowls: Explore the art of bowl turning and create stunning wooden bowls of various sizes and shapes. From decorative pieces to functional vessels, the possibilities are endless.
- Vases: Add a touch of elegance to your home by turning your own wooden vases. Experiment with different wood species and designs to create unique and eye-catching centerpieces.
Tips for Success
Woodturning requires practice, patience, and attention to detail. Here are some tips to help you along the way:

- Start with simple projects: Begin by turning small and straightforward objects to get a feel for the lathe and the wood. As you gain confidence, you can tackle more complex projects.
- Wear proper safety gear: Always wear safety goggles and a face shield to protect yourself from flying wood chips or splinters. Use a dust mask to prevent inhalation of wood dust.
- Sharpen your tools: Keep your cutting tools sharp to ensure clean and precise cuts. Dull tools can cause tear-out and compromises the quality of your work.
- Experiment with different wood species: Each type of wood has unique properties and characteristics. Experiment with different species to discover which ones you enjoy working with the most.
- Enjoy the process: Woodturning is not just about the final product; it’s also about the experience. Embrace the meditative and therapeutic nature of turning wood and enjoy the journey.
With a mini lathe, you can unlock the world of woodturning and create beautiful and functional objects that showcase your craftsmanship. Let your imagination run wild and start your woodturning adventure today!
Create Beautiful Pens and Pencils
The Mini Lathe is a versatile tool that can be used to create a variety of projects, and one of the most popular things to make with it is beautiful pens and pencils. Whether you’re a seasoned woodworker or just starting out, creating your own writing utensils can be a rewarding and creative endeavor.
Materials Needed
- Pen or pencil kit
- Wood blanks
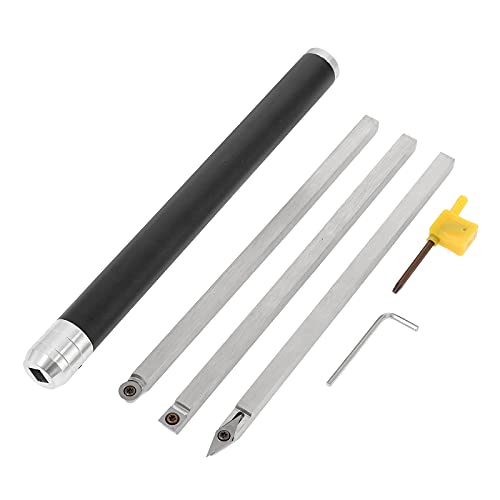
- Lathe tools
- Sandpaper
- Finishing supplies (wax, oil, or polish)
Process
- Choose a wood blank that you like and cut it to the appropriate size for your pen or pencil kit.
- Mount the wood blank onto the lathe using a chuck or other mounting method.
- Use lathe tools to shape the wood blank into the desired design. This can include creating decorative patterns or adding unique features.
- Once the basic shape is achieved, use sandpaper to smooth out any rough edges and create a smooth finish.
- Apply a finish to the wood to protect and enhance its natural beauty. This can be done using wax, oil, or a polish specifically designed for wood. Follow the instructions on the product for best results.
- Assemble the pen or pencil kit according to the manufacturer’s instructions.
- Enjoy your beautiful new writing utensil!
Tips and Tricks
- Experiment with different types of wood to create unique and interesting designs.
- Take your time and pay attention to detail when shaping the wood blank.
- Be careful when sanding to avoid removing too much material and compromising the integrity of the pen or pencil.
- Consider adding decorative elements such as inlays or engravings for added visual interest.
- Practice proper safety precautions when using power tools, including wearing protective eyewear and securing your workpiece.
Creating beautiful pens and pencils with a Mini Lathe allows you to showcase your woodworking skills and create functional pieces of art. Whether you’re making them for yourself or as gifts for others, the possibilities are endless.
Craft Unique Jewelry Pieces
With a mini lathe, you have the opportunity to create one-of-a-kind jewelry pieces that reflect your personal style. Whether you’re a beginner or an experienced crafter, the mini lathe offers endless possibilities for creating beautiful and intricate designs.
Materials
To get started, you’ll need a few basic materials:

- A mini lathe
- Various types of wood, metal, or acrylic
- Assorted cutting tools
- Sanding paper or tools
- Finishing materials (e.g. varnish, paint, or polish)
Process
Creating jewelry with a mini lathe involves a step-by-step process:
- Design: Start by sketching out your desired jewelry piece. Consider the type of material you want to use and the overall design aesthetic.
- Material Selection: Choose the type of material that is suitable for your design and desired end result. Wood, metal, and acrylic are popular choices for jewelry making.
- Mount the Material: Secure the chosen material onto the mini lathe using the appropriate chuck or mandrel.
- Shaping and Cutting: Use the cutting tools to shape the material, creating the desired design. Take your time and make small, precise cuts to avoid any mistakes.
- Sanding and Finishing: Once the shaping is complete, use sanding paper or tools to smooth out any rough edges. Apply any finishing materials, such as varnish or paint, to enhance the appearance of the jewelry piece.
- Assembly: If your design involves multiple components, assemble them together using appropriate techniques (e.g. gluing or attaching with jump rings).
Ideas for Jewelry Pieces
The mini lathe allows you to create a wide range of jewelry pieces. Here are a few ideas to get you started:
- Wooden rings
- Acrylic earrings
- Metal pendants
- Wooden bangles
- Acrylic necklaces
- Metal brooches
Conclusion
The mini lathe opens up a world of possibilities for crafting unique jewelry pieces. With the right materials and tools, you can turn your creative ideas into stunning wearable art.
Design Custom Chess Pieces
If you love the game of chess and want to add a personal touch to your chess set, why not design your own custom chess pieces? With a mini lathe, you can create unique and intricate pieces that showcase your creativity and craftsmanship. Here are a few ideas to get you started:
1. Classic Staunton Set
The Staunton design is the most recognized and widely used style of chess pieces. You can use the mini lathe to turn your own Staunton-style chess pieces from a variety of materials, such as wood or acrylic. This allows you to choose the size, shape, and details of each piece, making them truly one-of-a-kind.

2. Fantasy Theme
Why not bring a touch of fantasy to your chess set? Design unique pieces inspired by mythical creatures such as dragons, unicorns, or goblins. You can let your imagination run wild and create a set that is not only functional but also visually stunning.
3. Nature-Inspired
Take inspiration from nature and create chess pieces in the shape of animals, plants, or natural elements. You can turn pieces that resemble trees, flowers, or even animals like lions or eagles. This theme allows you to incorporate organic shapes and textures into your design.
4. Modern and Abstract
If you prefer a more contemporary look, consider designing abstract and minimalist chess pieces. Experiment with geometric shapes, smooth curves, and unusual profiles. This style can add a touch of modern elegance to your chess set.
5. Personalized Pieces
Why not design chess pieces that reflect your own personality or interests? You can turn pieces that represent your favorite sports, hobbies, or even your profession. These pieces will not only be functional but also meaningful and sentimental.
6. Collaborative Set

Consider collaborating with a friend or family member to design a chess set together. Each person can turn their own set of pieces, creating a unique combination of styles. This collaborative approach can result in a diverse and interesting chess set.
Remember, the possibilities are endless when it comes to designing custom chess pieces. The mini lathe allows you to bring your creative ideas to life and create a chess set that is truly unique to you.
Turn Small Bowls and Vases
One of the many possibilities you can explore with a mini lathe is the art of turning small bowls and vases. With the right tools and techniques, you can create beautiful and functional pieces that add a unique touch to your home or make great gifts for friends and family.
Tools and Materials:
- Mini lathe
- Bowl and spindle gouges
- Wood blanks
- Faceplate or chuck
- Calipers
- Sanding tools
- Finish of your choice
1. Prepare the Wood Blanks
Start by selecting a suitable wood for your bowls and vases. Hardwoods like maple, oak, and walnut are popular choices for their durability and beautiful grain patterns. Cut your wood blanks to the desired size and shape using a saw or a band saw.
2. Mount the Wood on the Lathe
Attach a faceplate or a chuck to the lathe’s headstock, depending on the size and shape of your wood blank. Mount the blank securely onto the faceplate or chuck, making sure it is centered and balanced. This will ensure smooth and even turning.
3. Turning the Bowl or Vase
Start by turning the outside shape of the bowl or vase. Use a bowl gouge to make roughing cuts and remove excess material. Take your time and make light cuts to avoid tear-out or rough surfaces. Gradually shape the outside until you achieve the desired form.
Once the outside is complete, focus on hollowing out the bowl or vase. Use a spindle gouge or a bowl gouge with a fingernail grind for better control. Keep measuring the thickness of the walls with calipers to ensure consistency.
4. Sanding and Finishing
After the desired shape is achieved, sand the surface of the bowl or vase using sandpaper of varying grits. Start with a coarse grit to remove any tool marks, and gradually progress to finer grits for a smooth finish. Remove any dust or debris between sandings.
Once sanded, apply a finish of your choice to enhance the natural beauty of the wood and protect it from moisture and wear. Common finishes for turned bowls and vases include food-safe oils or wax-based products.
5. Final Touches
Before removing the bowl or vase from the lathe, take the time to inspect the piece for any imperfections or areas that need refinement. Make any necessary adjustments or touch-ups, and then carefully part the piece from the lathe using a thin parting tool.
Your small bowl or vase is now ready to be admired and used. Display it as a centerpiece on your dining table, use it for holding small items, or gift it to a loved one to enjoy.
Remember: Safety should always be a priority when working with a mini lathe. Follow the manufacturer’s instructions, wear appropriate protective gear, and work in a well-ventilated area.
Make Personalized Bottle Stoppers
If you have a mini lathe, you have the perfect tool for crafting personalized bottle stoppers. Whether you want to make a unique gift or add a personal touch to your own kitchen, bottle stoppers are a fun and practical project.
Materials and Tools Needed:
- A mini lathe
- A lathe chuck
- Wood blanks
- Woodturning tools
- Sandpaper and finishing supplies
- Chop saw or miter saw (optional)
Step 1: Prepare the Wood Blanks
Start by selecting the wood blanks you want to use for your bottle stoppers. You can use a variety of hardwoods, such as maple, cherry, or walnut. If necessary, use a chop saw or miter saw to cut the blanks to the desired length.
Step 2: Mount the Wood Blanks on the Lathe
Mount one of the wood blanks onto the lathe chuck. Make sure it is securely tightened before you start turning.
Step 3: Shape the Bottle Stopper
Use your woodturning tools to shape the wood blank into the desired design for your bottle stopper. You can create traditional shapes or get creative and experiment with unique designs. Remember to take your time and work slowly to avoid any accidents.
Step 4: Sand and Finish the Bottle Stopper
Once you are happy with the shape of your bottle stopper, use sandpaper to smooth out any rough edges. Start with a coarse grit and gradually work your way up to a finer grit for a polished finish. Finally, apply your preferred finishing supplies, such as oil, wax, or lacquer, to protect the wood and give it a professional look.
Step 5: Attach the Bottle Stopper
To complete your personalized bottle stopper, you will need to attach the stopper itself. Depending on the type of bottle stopper you have, you may need to screw it onto the wooden base or use adhesive. Follow the manufacturer’s instructions for attaching the stopper securely.
Step 6: Enjoy Your Handcrafted Bottle Stoppers
Once your bottle stopper is complete, it’s time to enjoy your handcrafted creation. Use it to seal wine, oil, vinegar, or any other type of bottle you want. You can also give your personalized bottle stoppers as gifts to friends and family, who will surely appreciate the time and effort you put into making them.
With a mini lathe and some basic woodturning skills, you can create beautiful and functional personalized bottle stoppers. So, go ahead and unleash your creativity!
Sculptures and Figurines
Sculptures and figurines are a popular choice for projects made with a mini lathe. The precision and control offered by a mini lathe make it an ideal tool for creating intricate and detailed sculptures.
Materials
There are various materials that can be used to create sculptures and figurines with a mini lathe. Some popular choices include wood, metal, and acrylic. Each material has its own unique properties and offers different possibilities for creativity and design.
Design and Techniques
When creating sculptures and figurines, it is important to have a clear design in mind. Sketching out the design and planning the steps before starting can help ensure a successful outcome.
One technique that is commonly used is called turning, which involves shaping the material by rotating it against a cutting tool. This technique allows for precise and detailed work, making it perfect for creating sculptures and figurines.
Examples
With a mini lathe, you can create a wide range of sculptures and figurines. Here are a few examples:
- Bird Figurines: Craft beautiful wooden bird figurines by carefully shaping the wood to resemble different bird species. The details can be enhanced by using wood carving tools after turning.
- Abstract Sculptures: Use metal or acrylic to create abstract sculptures with unique shapes and designs. Experiment with different materials and techniques to achieve the desired look.
- Human Busts: Challenge your skills by sculpting human busts out of wood or metal. Pay attention to the facial features and proportions to create a realistic representation.
Tips
Here are some tips to keep in mind when working on sculptures and figurines with a mini lathe:
- Start with a smaller project to practice your skills before moving on to larger and more complex designs.
- Use appropriate safety precautions, such as wearing protective eyewear and gloves, when working with the mini lathe.
- Take your time and work slowly to ensure precision and accuracy in your designs.
- Experiment with different tools and materials to discover new techniques and possibilities.
With a mini lathe, the possibilities for creating sculptures and figurines are endless. Let your imagination and creativity soar as you explore the world of sculpting with this versatile tool.
Turn Handles for Tools and Utensils
One of the great things you can do with a mini lathe is to turn handles for various tools and utensils. Whether you need a new handle for your favorite screwdriver or want to add a personal touch to your kitchen utensils, a mini lathe can help you create custom handles that are both functional and aesthetically pleasing. Here are a few ideas to get you started:
1. Screwdriver Handles
With a mini lathe, you can turn wooden handles for your screwdrivers. This not only gives you a comfortable grip but also adds a touch of elegance to your tools. You can experiment with different types of wood and finishes to create unique designs that reflect your personal style.
2. Kitchen Utensil Handles
Upgrade your kitchen utensils by turning wooden handles for them. From spatulas and spoons to ladles and whisks, you can transform everyday utensils into beautiful and functional pieces. Wooden handles are not only comfortable to hold but also add a warm and natural touch to your kitchen.
3. Gardening Tool Handles
Give your gardening tools a makeover by turning new handles for them. Whether it’s a handle for your favorite trowel or a replacement for a worn-out handle on your hoe, a mini lathe can help you create handles that are both durable and comfortable to use. You can choose hardwoods that are resistant to moisture and decay to ensure your handles last for a long time.
4. Brush Handles
If you enjoy painting or any other artistic hobbies that require brushes, you can use a mini lathe to turn handles for your brushes. Not only will this give you a better grip on the brush, but it will also add a personal touch to your art supplies. Use different types of wood to create handles that match your artistic style.
5. Tool Handles for Specialized Craftsmanship
If you have specific tools for unique craftsmanship like carving knives, hand planes, or chisels, you can turn custom handles for them using a mini lathe. A well-designed handle can greatly improve your precision and control while working with these tools.
Remember, when turning handles for tools and utensils, it’s essential to use hardwoods that are durable and can withstand constant use. Different woods can provide different aesthetics and levels of durability, so choose accordingly. Additionally, make sure to use proper safety precautions and techniques when operating the mini lathe.
With a mini lathe, the possibilities for turning handles for tools and utensils are endless. Get creative and enjoy the process of turning functional objects into unique pieces of art!
FAQ
What is a mini lathe?
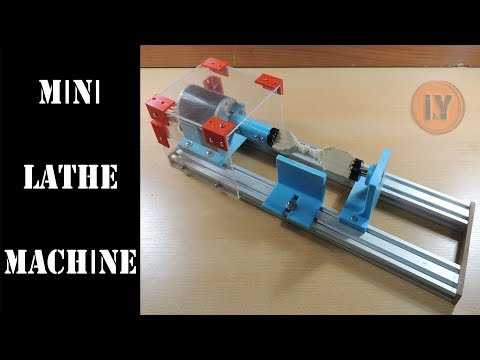
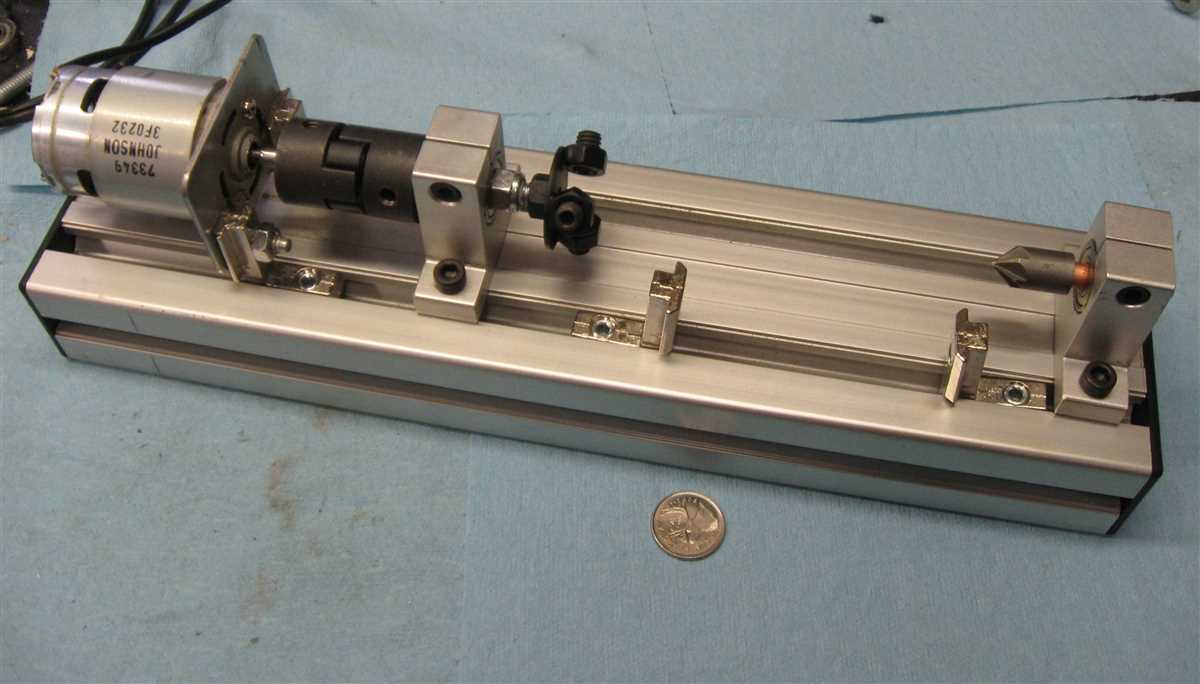
A mini lathe is a small machine used for woodworking or metalworking. It is a scaled-down version of a regular lathe and is usually used for small projects and hobbies.
What can I make with a mini lathe?
With a mini lathe, you can make various items such as bowls, pens, candle holders, bottle stoppers, and even small furniture pieces. The possibilities are endless and depend on your creativity and skill level.
Is a mini lathe suitable for beginners?
Yes, a mini lathe is a great option for beginners. Its smaller size and simpler features make it easier to learn and operate compared to a larger lathe. It allows beginners to practice and develop their turning skills before moving on to more advanced projects.
What are the advantages of using a mini lathe?
One of the advantages of using a mini lathe is its compact size, which makes it portable and easy to store. It is also more affordable compared to larger lathes, making it accessible to a wider range of people. Additionally, a mini lathe allows for precise and detailed work, as well as the ability to turn small or delicate materials.
What are some safety precautions to keep in mind when using a mini lathe?
When using a mini lathe, it is important to wear appropriate safety gear, such as safety glasses and a dust mask, to protect your eyes and lungs from flying debris. It is also essential to read and follow the manufacturer’s instructions and guidelines for safe operation. Additionally, make sure to keep your workspace clean and organized to minimize the risk of accidents.
Video


Harrison Clayton
Meet Harrison Clayton, a distinguished author and home remodeling enthusiast whose expertise in the realm of renovation is second to none. With a passion for transforming houses into inviting homes, Harrison's writing at https://thehuts-eastbourne.co.uk/ brings a breath of fresh inspiration to the world of home improvement. Whether you're looking to revamp a small corner of your abode or embark on a complete home transformation, Harrison's articles provide the essential expertise and creative flair to turn your visions into reality. So, dive into the captivating world of home remodeling with Harrison Clayton and unlock the full potential of your living space with every word he writes.