How to Change Socket Wrench Head: A Step-by-Step Guide
Socket wrenches are essential tools for any handyman or DIY enthusiast. They allow you to tighten or loosen bolts and nuts with ease. However, sometimes you may need to change the socket wrench head to fit a different size or type of fastener.
In this step-by-step guide, we will walk you through the process of changing the socket wrench head. Whether you’re a novice or an experienced handyman, this guide will help you make the necessary adjustments to your socket wrench.
Step 1: Select the Correct Socket Wrench Head
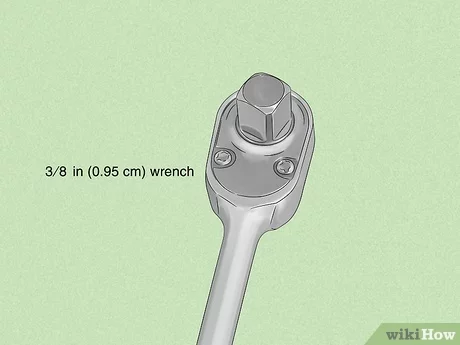
Before you begin, you need to determine the size and type of fastener you will be working with. This will help you choose the appropriate socket wrench head. Socket wrench heads come in various sizes and shapes, including standard, metric, deep, and universal. Make sure to select the correct head for your specific needs.
“Ensure the socket wrench head is compatible with the socket wrench handle.”

Step 2: Remove the Current Socket Wrench Head
To change the socket wrench head, start by locating the release button or lever near the head of the wrench. Hold down the button or flip the lever to unlock the current head. Once released, gently pull the head off the handle. Be careful not to apply too much force as this may damage the wrench or cause injury.
Step 3: Attach the New Socket Wrench Head
Once the old head is removed, take the new socket wrench head and align it with the handle. Make sure it fits securely and is properly seated. Press the head onto the handle until you hear a click or feel it lock into place. Give it a slight tug to confirm that it is securely attached.
By following these simple steps, you can easily change the socket wrench head to accommodate different fasteners. Remember to always choose the correct head size and type for the job at hand to ensure safe and effective use of your socket wrench.
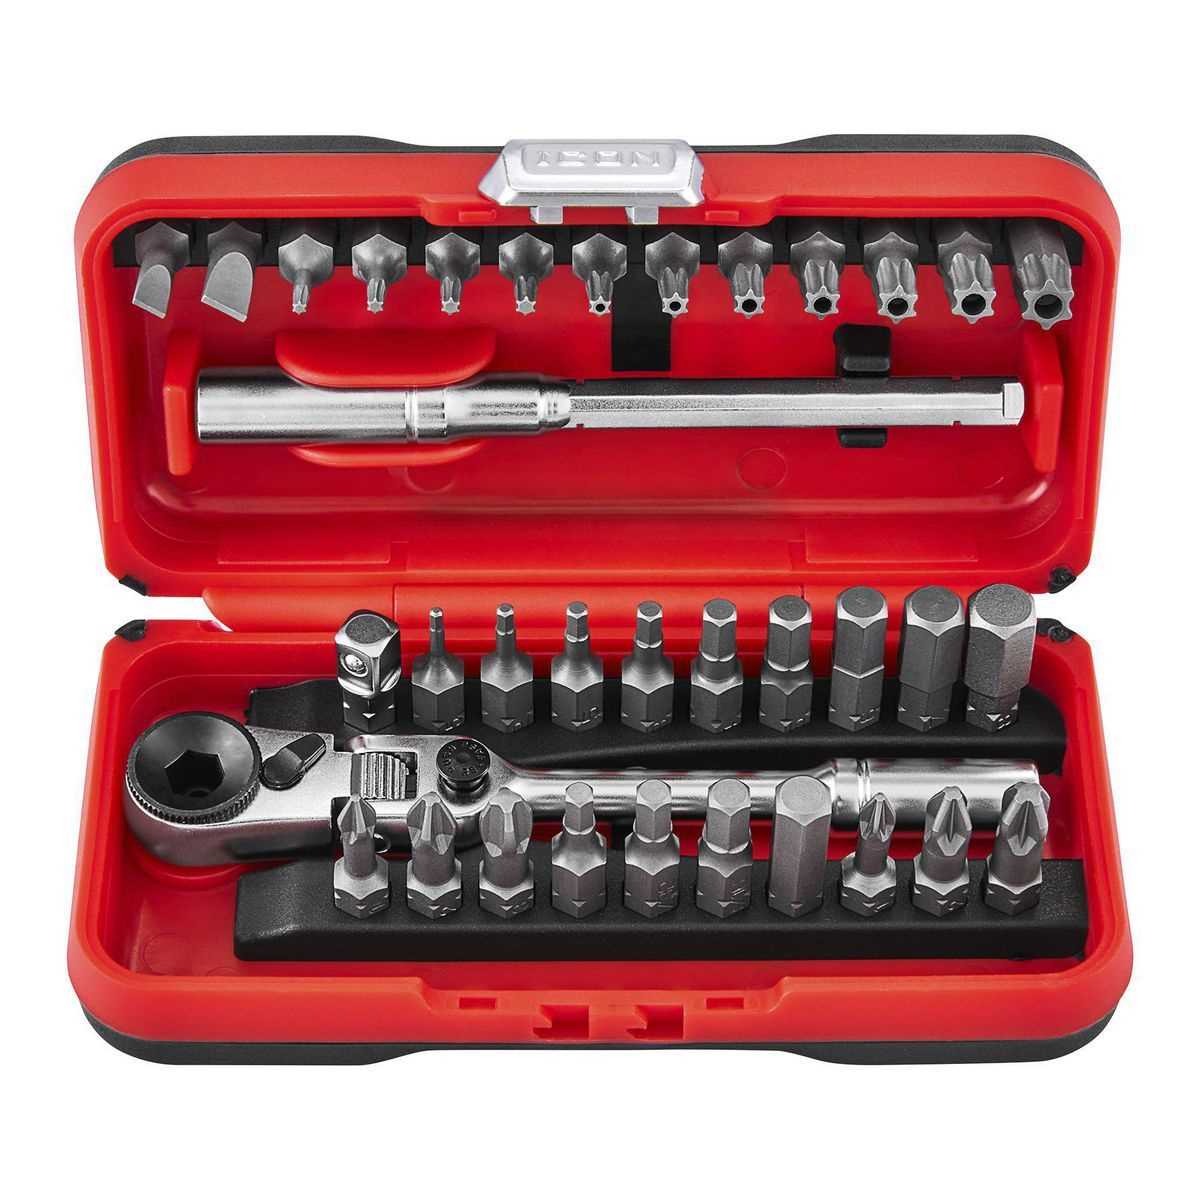
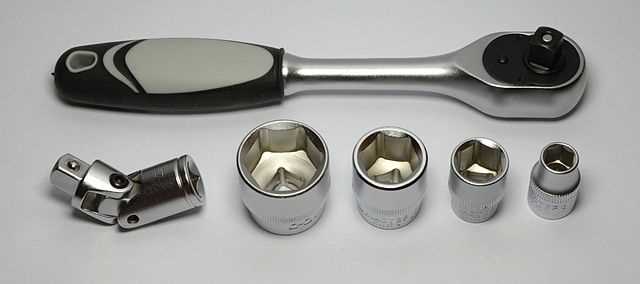
Gather the Necessary Tools
Before you start changing the socket wrench head, it’s important to gather all the necessary tools. Having the right tools on hand will help ensure a smooth and efficient process. Here are the tools you will need:
- Socket wrench
- New socket wrench head
- Socket set
- Adjustable wrench
- Pliers
- Screwdrivers (both Phillips and flathead)
- Hammer
- Socket wrench extension
- Gloves
Make sure all the tools are clean and in good condition before you begin. This will help prevent any unnecessary accidents or damage during the process.
Safety Precautions
1. Wear Personal Protective Equipment (PPE)
Before you start changing the socket wrench head, make sure you have proper personal protective equipment to keep yourself safe. This may include safety glasses, gloves, and closed-toe shoes. By wearing PPE, you can protect your eyes, hands, and feet from any potential hazards.
2. Ensure the Power is Off

Always make sure that the power is off before attempting to change the socket wrench head. This will help prevent any accidental starts or electrical shocks. To ensure the power is off, unplug the device or turn off the power at the circuit breaker.
3. Disconnect from the Power Source
In addition to ensuring the power is off, disconnecting the device from the power source is another safety measure. This can be done by unplugging the device or removing the battery, if applicable. By disconnecting from the power source, you eliminate the risk of the device accidentally turning on while you are changing the socket wrench head.
4. Allow the Device to Cool Down
If the device was recently in use, allow it to cool down before attempting to change the socket wrench head. This will help prevent burns or injuries from hot surfaces. Check the manufacturer’s instructions for specific cooling down times.
5. Follow the Manufacturer’s Instructions
Always refer to the manufacturer’s instructions for changing the socket wrench head. Different devices may have specific steps or precautions to follow. By following the instructions provided, you can ensure you are using the device safely and correctly.
6. Maintain a Clean and Organized Workspace
Before starting any task, it is important to have a clean and organized workspace. Remove any clutter or obstacles that may pose a tripping hazard. Keeping your workspace clean and organized will help prevent accidents and make the process of changing the socket wrench head safer and more efficient.

7. Work in a Well-Lit Area
Ensure you have adequate lighting in your work area. This will help you see what you are doing and avoid any potential mishaps. If necessary, use additional lighting such as a task light or flashlight to improve visibility.
8. Use the Correct Tools
Make sure you have the correct tools for the job. Using the wrong tools can lead to injuries and damage to the device. Refer to the manufacturer’s instructions or consult a professional if you are unsure about which tools to use.
9. Work at a Comfortable Height
When changing the socket wrench head, work at a comfortable height that allows you to maintain good posture and control over the device. Avoid bending or stretching in awkward positions, as this can increase the risk of accidents or injuries.
10. Keep Others Away
While changing the socket wrench head, it is important to keep others, especially children and pets, away from your work area. This will prevent any distractions and reduce the risk of accidents or injuries to yourself and others.

Remember, safety should always be your top priority when working with any power tools or equipment. Take the necessary precautions to protect yourself and others, and consult a professional if you are unsure about any step of the process.
Identify the Type of Socket Wrench
Before you begin changing the socket wrench head, it’s important to identify the type of socket wrench you have. There are several common types of socket wrenches, including:
- Standard Socket Wrench: This is the most common type of socket wrench and consists of a handle and a detachable socket head that can be replaced.
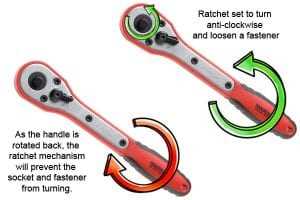
- Ratchet Socket Wrench: This type of socket wrench has a ratcheting mechanism that allows for continuous rotation in one direction, making it easier to use in tight spaces.
- Impact Socket Wrench: Designed for heavy-duty use, an impact socket wrench is usually used in conjunction with an impact driver or impact wrench to handle high torque applications.
To identify the type of socket wrench you have, look for any markings or labels on the wrench itself. The type of socket wrench may also be indicated on the packaging or in the product manual if you still have them. If you’re still unsure, consult a professional or do some online research to help identify the type of socket wrench you have.
Once you have identified the type of socket wrench you have, you can proceed with changing the socket wrench head.

Remove the Current Socket Wrench Head
Before you can change the socket wrench head, you’ll need to remove the current one. Follow these steps to do so:
- Ensure the socket wrench is not connected to any power source or has any power running through it. Safety should always be a priority when working with tools.
- Inspect the socket wrench head to locate the release mechanism. This may be a button, lever, or switch.
- Activate the release mechanism to detach the current socket wrench head. The specific method may vary depending on the brand and model of your socket wrench.
- Once the release mechanism is engaged, firmly pull the current socket wrench head away from the handle. It should come off easily.
- Set aside the removed socket wrench head in a safe place.
Now that you have successfully removed the current socket wrench head, you are ready to proceed with installing a new one or performing any necessary maintenance or repairs.
Select and Prepare the New Socket Wrench Head
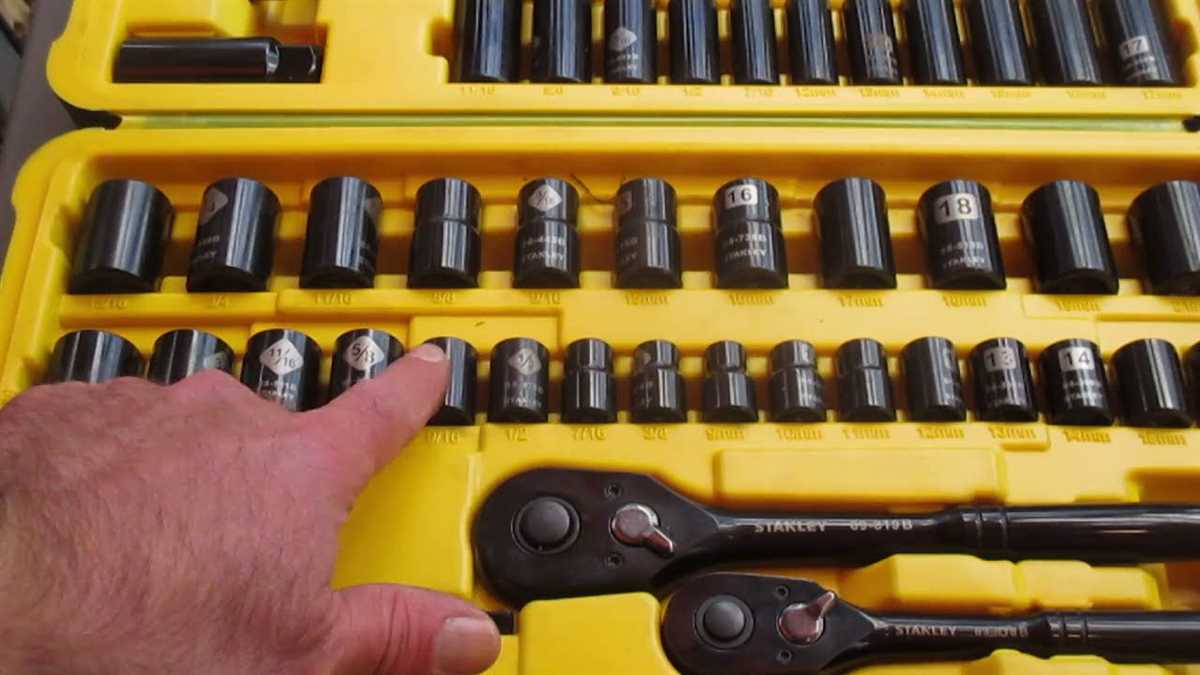
When changing the socket wrench head, it is important to select the correct size and type of head for the desired task. Here is a step-by-step guide to help you select and prepare the new socket wrench head:
- Determine the size: Measure the bolt or nut that you will be working with using a measuring tape or calipers. This will help you determine the correct size of the socket wrench head.
- Select the appropriate socket wrench: Based on the size of the bolt or nut, choose a socket wrench head that matches the measurements. Socket wrench heads come in various sizes, so make sure to select the correct one.
- Inspect the socket wrench head: Before using the new socket wrench head, check for any signs of damage or wear. Look for cracks, stripped threads, or any other defects that may affect its performance. If you notice any issues, consider getting a replacement.
- Clean the socket wrench head: If the new socket wrench head is dirty or greasy, clean it using a degreaser or mild soap and water. This will help ensure smooth operation and prevent any debris from interfering with its functionality.
- Apply lubricant: To further enhance the performance of the socket wrench head, apply a small amount of lubricant to the moving parts. This will help reduce friction and make it easier to operate.
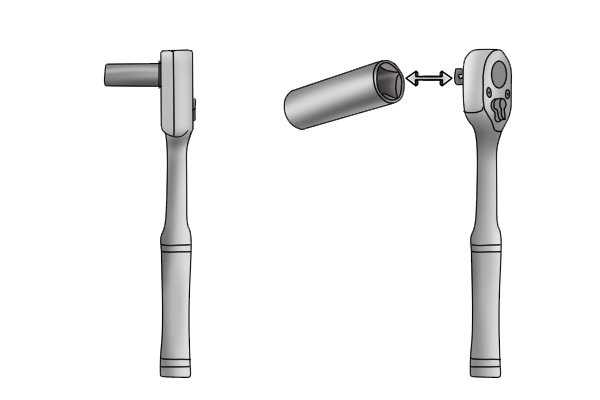
Attach the New Socket Wrench Head
Once you have removed the old socket wrench head, it is time to attach the new one. Follow these steps:
- Make sure the new socket wrench head is clean and free from any debris or dirt.
- Select the correct socket wrench head size for the job you are about to undertake.
- Insert the square drive end of the socket wrench into the socket wrench head, ensuring that it fits securely.
- Tighten the socket wrench head onto the square drive by turning it clockwise.
- Ensure that the socket wrench head is securely attached and will not come loose during use.
It is important to note that different socket wrench systems may have different attachment mechanisms. Some socket wrench heads may require a retaining pin or locking mechanism to secure them in place. Refer to the manufacturer’s instructions or product manual for specific guidance on attaching the new socket wrench head.
Test the Socket Wrench
Before using the socket wrench, it is important to test it to ensure that it is functioning properly. Follow these steps to perform a basic test on the socket wrench:
- Inspect the wrench: Check the overall condition of the wrench. Make sure there are no visible damages or signs of wear and tear that could affect its performance.
- Check the socket head: Ensure that the socket head is securely attached to the wrench handle. Give it a gentle tug to make sure it is tightly fitted.
- Select the appropriate socket: Choose the correct socket size for the task at hand. Refer to the measurement markings on the socket head to determine the size.
- Fit the socket onto a fastener: Insert the socket onto a fastener, such as a bolt or nut, that matches the size of the socket. Ensure that the socket is seated fully and securely.
- Apply force: Once the socket is properly fitted onto the fastener, apply force in the appropriate direction to loosen or tighten the fastener. Use steady and controlled movements.
- Observe the wrench: Pay attention to any unusual sounds or movements while using the wrench. If you notice any abnormalities, stop using the wrench and inspect it further to determine the cause.
By testing the socket wrench before use, you can ensure that it is safe and in good working condition, minimizing the risk of accidents or damage to the tool. Regularly inspect and maintain your socket wrench to keep it functioning optimally.
Properly Store the Unused Socket Wrench Heads
When you have multiple socket wrench heads for different sizes and types of bolts, it’s important to properly store the unused heads to keep them organized and in good condition. Here are a few steps to follow:
- Clean and inspect: Before storing the socket wrench heads, make sure to clean them thoroughly with a rag or brush to remove any dirt or debris. Inspect each head for any signs of damage or wear.
- Organize: Find a suitable storage solution for your socket wrench heads. You can use a tool case or a tool chest with compartments or drawers to keep them organized. Alternatively, you can use a pegboard or a wall-mounted socket holder.
- Label: If you have socket wrench heads of different sizes or types, consider labeling them to make it easier to find the right head when needed. You can use adhesive labels or a marker to write the size or type on each head.
- Protect: To prevent the socket wrench heads from getting damaged or scratched, consider using protective sleeves or covers. These can be purchased separately or you can make your own using foam or rubber materials.
- Store: Once you have cleaned, organized, labeled, and protected the socket wrench heads, store them in their designated storage solution. Make sure to place them in a way that prevents them from rolling or sliding around, which can cause damage.
By following these steps, you can ensure that your unused socket wrench heads are properly stored and ready for use whenever you need them. Remember to periodically check and clean the heads to maintain their condition over time.
FAQ
What is a socket wrench head?
A socket wrench head is the detachable end of a socket wrench that holds the socket. It is used to turn nuts and bolts by fitting into the socket and applying torque to fasten or loosen them.
Why would I need to change the socket wrench head?
You may need to change the socket wrench head to accommodate different socket sizes or to switch between different types of socket wrench heads, such as a hex head or a Torx head, depending on the type of fastener you are working with.
Can I use any socket wrench head with any type of socket wrench?
No, socket wrench heads are not universal and are usually designed to fit a specific type or brand of socket wrench. It is important to ensure that the socket wrench head you are using is compatible with your socket wrench handle to prevent any issues or accidents.
Video


Harrison Clayton
Meet Harrison Clayton, a distinguished author and home remodeling enthusiast whose expertise in the realm of renovation is second to none. With a passion for transforming houses into inviting homes, Harrison's writing at https://thehuts-eastbourne.co.uk/ brings a breath of fresh inspiration to the world of home improvement. Whether you're looking to revamp a small corner of your abode or embark on a complete home transformation, Harrison's articles provide the essential expertise and creative flair to turn your visions into reality. So, dive into the captivating world of home remodeling with Harrison Clayton and unlock the full potential of your living space with every word he writes.