How to pre drill: A Step-by-Step Guide to Preparing for Perfectly Placed Holes

Pre-drilling is an essential step in many projects that involve drilling holes. Whether you are installing shelves, hanging pictures, or building furniture, pre-drilling ensures that your holes are perfectly placed and prevents wood or other materials from splitting or cracking. By taking the time to properly prepare for drilling, you can achieve professional-looking results and increase the longevity of your project.
Step 1: Choose the Right Drill Bit
Before you start pre-drilling, it’s important to select the correct drill bit for your project. The type of material you’re drilling into will determine the type of drill bit you need. For wood, a standard twist bit works well, while masonry requires a masonry bit. If you’re working with metal, a metal drill bit is essential. Using the correct drill bit will ensure clean and precise holes.
Pro Tip: To determine the correct drill bit size, you can measure the diameter of the screw or anchor you plan to use and select a bit that matches the size.
Step 2: Mark the Hole Location
Next, mark the location where you want to drill your hole. Use a pencil or a marker to make a small dot or cross on the surface. Make sure to use a level or a measuring tape to ensure accurate positioning. If you’re drilling multiple holes, use a straightedge or a template to create evenly spaced marks.
Step 3: Secure the Material
Before you start drilling, it’s important to securely hold the material in place. Use clamps or vice grips to prevent the material from moving or slipping during the drilling process. This will help you maintain control and prevent accidents or mistakes. If you’re drilling into a delicate or thin material, you can place a piece of scrap wood underneath to prevent tearout.
Step 4: Set the Drill Speed
Adjust the speed of your drill according to the material you’re working with. For wood and soft materials, a low speed is recommended to prevent splintering. For harder materials like metal or masonry, a higher speed can be used. Adjusting the drill speed will help you achieve clean and precise holes.
Remember to always wear safety goggles and gloves when drilling to protect yourself from flying debris or shards.
Following these steps will help you pre-drill with confidence and precision. By taking the time to properly prepare and select the right tools, you can ensure that your holes are perfectly placed and your projects are built to last.
Why Pre Drilling is Important for Perfectly Placed Holes
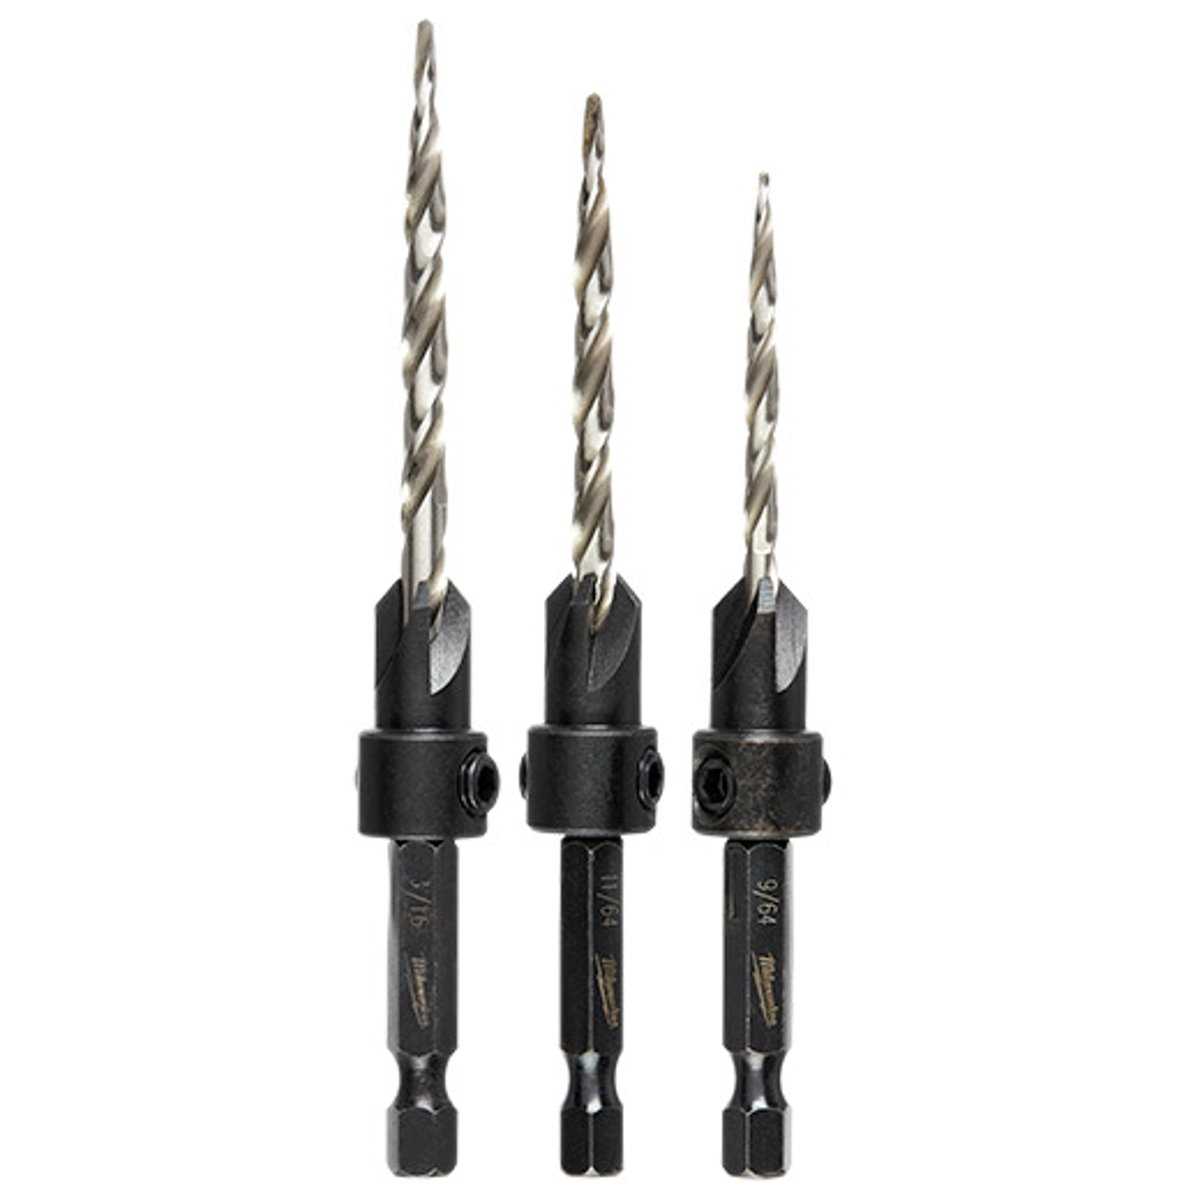
Pre drilling is an essential step in any woodworking or construction project that involves driving screws, nails, or other fasteners into wood or other materials. While it may seem like an extra step that can be skipped, pre drilling actually has several important benefits that can lead to perfectly placed holes and ultimately better results.
1. Prevents Splitting and Cracking
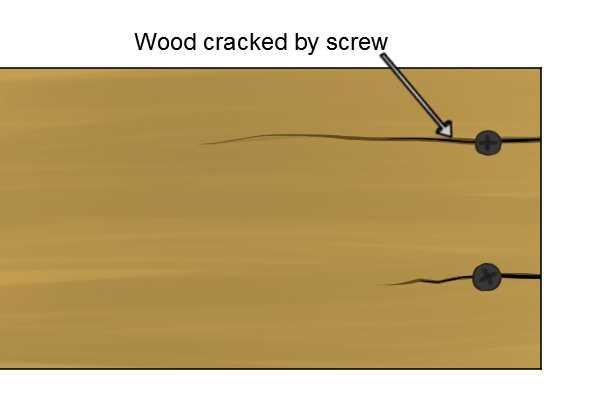
One of the main reasons why pre drilling is important is that it helps prevent splitting and cracking of the material being fastened. When a screw or nail is directly driven into wood, there is a risk of the wood splitting or cracking under the pressure. This can weaken the structure and compromise the integrity of the project. By pre drilling a hole that is slightly smaller in diameter than the fastener, the risk of splitting or cracking is greatly reduced.
2. Ensures Proper Alignment
Pre drilling also helps ensure that the fastener is properly aligned with the desired location. It provides a guide for the screw or nail to follow, preventing it from veering off course or going in at an angle. This is particularly important when working on projects that require precise placement, such as installing cabinets or aligning boards.
3. Makes Driving Easier
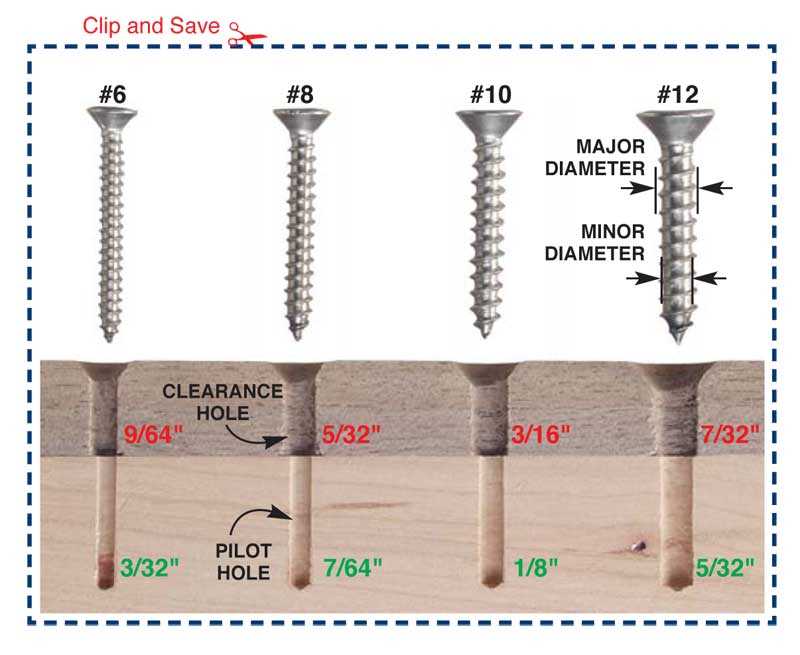
Another benefit of pre drilling is that it makes driving the fastener easier. By creating a pilot hole, you are essentially removing some of the material ahead of time, allowing the screw or nail to easily penetrate the surface. This helps prevent the fastener from getting stuck or becoming difficult to drive in, making the overall process smoother and more efficient.
4. Improves the Overall Finish
Pre drilling also contributes to a better overall finish of the project. When a fastener is directly driven into wood, it can sometimes leave behind an unsightly mark or indentation on the surface. However, by pre drilling and countersinking the hole, you can ensure that the fastener sits flush with the surface, leaving a clean and professional-looking finish.
| Benefits | Description |
|---|---|
| Prevents Splitting and Cracking | Reduces the risk of material splitting or cracking under pressure. |
| Ensures Proper Alignment | Helps guide the fastener to the desired location for precise placement. |
| Makes Driving Easier | Facilitates easy penetration of the fastener into the surface. |
| Improves the Overall Finish | Leaves a clean and professional-looking finish without unsightly marks or indentations. |
In conclusion, pre drilling is an important step in any woodworking or construction project. It helps prevent splitting and cracking, ensures proper alignment, makes driving easier, and improves the overall finish of the project. By taking the time to pre drill, you can ensure that your holes are perfectly placed, leading to better results and a more professional-looking outcome.
Understanding the Basics of Pre Drilling
Pre drilling is an essential step in many projects that involve drilling holes in various materials such as wood, metal, or plastic. It involves creating a small pilot hole before driving in a larger screw or drilling a larger hole. This process helps to prevent the material from splitting or cracking, ensures a clean and precise hole, and makes the job easier overall.
Why is Pre Drilling Important?
- Prevents splitting or cracking: By pre drilling a pilot hole, you reduce the risk of the material splitting or cracking due to the force exerted by the screw or drill bit.
- Ensures precise hole placement: Pre drilling allows you to mark the exact spot where you want the hole to be, ensuring accurate placement and alignment.
- Makes driving screws or drilling holes easier: A pilot hole provides a guide for the screw or drill bit, making it easier to drive the screw in or drill a larger hole without resistance.
When to Pre Drill?
You should consider pre drilling in the following situations:
- When working with hardwood or dense materials: Hardwoods and dense materials are more prone to splitting, so pre drilling is crucial to prevent damage.
- When using larger screws or drill bits: Larger screws or drill bits require more force to drive or drill, making pre drilling necessary to prevent splitting or cracking.
- When working near the edge of the material: Pre drilling near the edge helps to prevent the material from splitting or splintering.
Steps to Pre Drill
Follow these steps to pre drill effectively:
- Mark the desired hole location using a pencil or marker.
- Select the appropriate drill bit size for the pilot hole based on the screw or drill bit you will be using.
- Secure the material firmly to prevent any movement during drilling.
- Place the drill bit on the marked spot and apply steady downward pressure.
- Start drilling at a slow speed to create the pilot hole.
- Ensure the drill bit is perpendicular to the material to maintain the straightness of the hole.
- Remove the drill bit from the pilot hole and proceed with driving the screw or drilling the larger hole.
Conclusion
Understanding the basics of pre drilling is essential for achieving clean and precise holes without damaging the material. By following the proper steps and knowing when to pre drill, you can ensure the success of your projects and avoid common issues such as splitting or misalignment.
Choosing the Right Drill Bit for the Job
When it comes to pre-drilling, choosing the right drill bit is essential for achieving perfectly placed holes. The drill bit you select will depend on the material you are working with and the type of hole you need to create. Here are some factors to consider when choosing a drill bit:
1. Material
The type of material you are drilling into will determine the type of drill bit you should use. For wood, a standard twist bit will usually suffice. However, for harder materials like metal or masonry, you will need a specialized bit. Make sure to select a drill bit that is specifically designed for the material you are working with.
2. Hole Size
The size of the hole you need to create will also determine the type of drill bit you should use. For small holes, a standard twist bit with a diameter slightly larger than the screw you will be using is usually sufficient. However, for larger holes, you may need to use a spade bit or a hole saw. These bits are designed to create larger diameter holes with ease.
3. Drill Type
The type of drill you are using will also influence your choice of drill bit. For handheld drills, standard twist bits are the most common and versatile option. However, for drill press machines, you have a wider range of options. You can use specialty bits like forstner bits or brad point bits, which are specifically designed for precision drilling. These types of bits are often used for woodworking projects.
4. Shank Type
The shank of the drill bit refers to the part that fits into the chuck of the drill. It is important to choose a drill bit with the correct shank type for your drill. Most drills use a 3/8-inch chuck, so a drill bit with a 3/8-inch shank will fit perfectly. However, some specialty drills may require different sizes of shanks, so be sure to check the specifications of your drill before purchasing drill bits.
5. Quality
Lastly, it is important to consider the quality of the drill bit. Higher quality drill bits tend to last longer and perform better than cheaper options. Look for drill bits made from high-speed steel (HSS) or carbide for maximum durability. While they may be more expensive, they are worth the investment in the long run.
By considering these factors and choosing the right drill bit for the job, you can ensure that your pre-drilling process is smooth and successful. Remember to always wear protective eyewear and follow proper safety precautions when using power tools.
Marking and Measuring for Accurate Hole Placement
Before you start drilling, it’s important to map out where your holes should be placed. This will ensure that your project turns out as intended and avoids any mistakes.
Gather the Necessary Tools
Before you begin marking and measuring, make sure you have the following tools on hand:
- A tape measure
- A carpenter’s pencil or marker
- A level
Identify the Placement Points
Start by identifying the specific points where you want the holes. Mark these points with a small dot using your carpenter’s pencil or marker.
Measure and Mark the Distances
Next, use your tape measure to measure the distances between your placement points. Make sure to account for any spacing or alignment requirements specific to your project.
Once you have determined the distances, use your carpenter’s pencil or marker to mark them on your surface. This will give you a visual reference for where to drill.
Check for Level
Use a level to ensure that your marks are aligned correctly. This is especially important when working on a vertical surface or when drilling multiple holes in a row.
If your marks are not level, adjust accordingly and re-measure the distances to ensure accuracy.
Double-Check and Confirm
Before you start drilling, double-check all of your measurements and marks to ensure accuracy. This will help prevent any mistakes and ensure that your holes are perfectly placed.
Pro Tip: Use a Template
If you’re working on a project that requires multiple holes with precise spacing, consider creating a template. This can be made from a piece of cardboard or a thin piece of wood. Simply mark the hole placements on the template, and then use it as a guide for marking and drilling.
By following these steps and taking the time to mark and measure accurately, you can ensure that your holes are perfectly placed and your project turns out just the way you envisioned.
Setting up the Workpiece for Pre Drilling
Before you start pre drilling, it’s important to properly set up your workpiece to ensure accurate and precise holes. Follow these steps to prepare your workpiece for pre drilling:
1. Measure and mark the hole locations
Using a measuring tape or ruler, determine the exact locations where you want to drill the holes. Use a pencil or marking tool to make small, precise marks on the workpiece at these locations.
2. Select the appropriate drill bit
Based on the material of your workpiece and the size of the holes you need, choose the correct drill bit. Refer to the drill bit size guide for recommendations on the appropriate bit diameter.
3. Secure the workpiece in place
Use clamps or a vice to hold the workpiece securely in place. This will prevent it from moving or shifting during the pre drilling process, ensuring accurate hole placement.
4. Prepare the drilling area
Clear the area around the workpiece of any debris or obstructions. This will provide a clean and safe drilling environment. Place a piece of scrap wood underneath the workpiece to prevent any damage to the surface beneath.
5. Use a center punch
Before drilling, use a center punch to create a small indentation at each marked hole location. This will help guide the drill bit and prevent it from slipping off the mark, ensuring precise hole placement.
6. Set the drill depth
Adjust the drill depth to the desired depth for your holes. This can be done by setting the depth control collar on your drill or by using a piece of tape as a depth marker on the drill bit.
7. Double-check the setup
Before you start drilling, double-check the accuracy of the hole locations and the stability of the workpiece. Make any necessary adjustments to ensure everything is in the right position before proceeding.
8. Put on safety gear
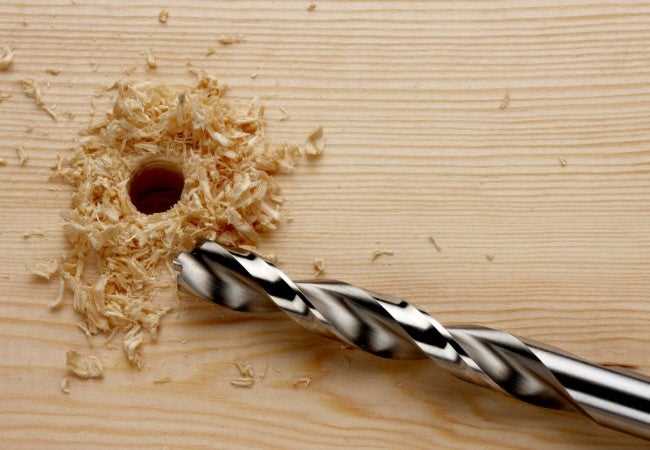
Always wear appropriate safety gear, such as safety glasses and ear protection, when pre drilling. This will protect your eyes from flying debris and your ears from the noise of the drill.
With the workpiece properly set up, you are now ready to begin the pre drilling process. Follow the next steps in the guide to learn how to drill the holes accurately and efficiently.
Step-by-Step Guide to Pre Drilling
1. Gather the necessary tools
Before you start pre drilling, make sure you have all the necessary tools at hand. These may include:
- Drill
- Drill bits
- Marker or pencil
- Tape measure or ruler
- Level
2. Determine the location of the holes
Use a tape measure or ruler to determine the exact location where you want to drill the holes. Mark the spot with a marker or pencil.
3. Choose the right drill bit size
Select the appropriate drill bit size for the material you are drilling into. Refer to the manufacturer’s guidelines for the correct drill bit size.
4. Secure the workpiece
If you’re drilling into a thin or delicate material, it’s important to secure the workpiece to prevent it from moving or splintering. You can use clamps or a vise to hold it in place.
5. Set the depth stop on the drill
If you want to control the depth of the hole, set the depth stop on the drill. This will prevent you from drilling too deep.
6. Put on safety gear
Before you start drilling, make sure to put on safety gear, such as safety glasses and gloves, to protect yourself from any potential injuries.
7. Start pre drilling
Hold the drill perpendicular to the surface and slowly start drilling. Apply steady pressure and let the drill bit do the work. Avoid pushing too hard, as it may cause the drill bit to wander or break.
8. Clean the holes
Once you have drilled the holes, use a brush or compressed air to remove any debris or dust from the holes. This will ensure a clean and precise fit for any screws or fasteners.
9. Test the holes
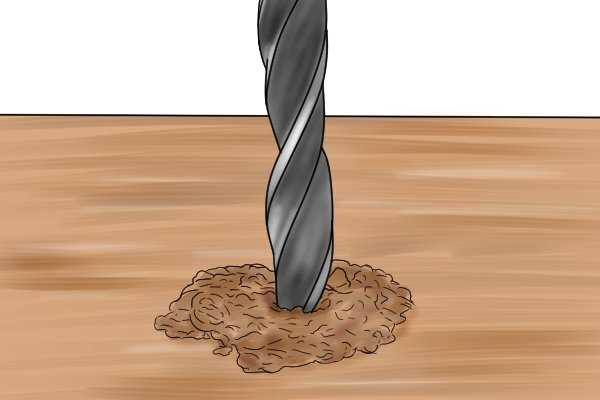
Before proceeding with the final installation, it’s important to test the fit of your screws or fasteners in the drilled holes. Make sure they go in smoothly and securely.
10. Proceed with the installation
If the holes are properly pre drilled, you can now proceed with the installation of your desired item. Follow the manufacturer’s instructions for the specific installation process.
By following these step-by-step instructions for pre drilling, you can ensure that your holes are perfectly placed and ready for seamless installation.
Tips and Tricks for Successful Pre Drilling
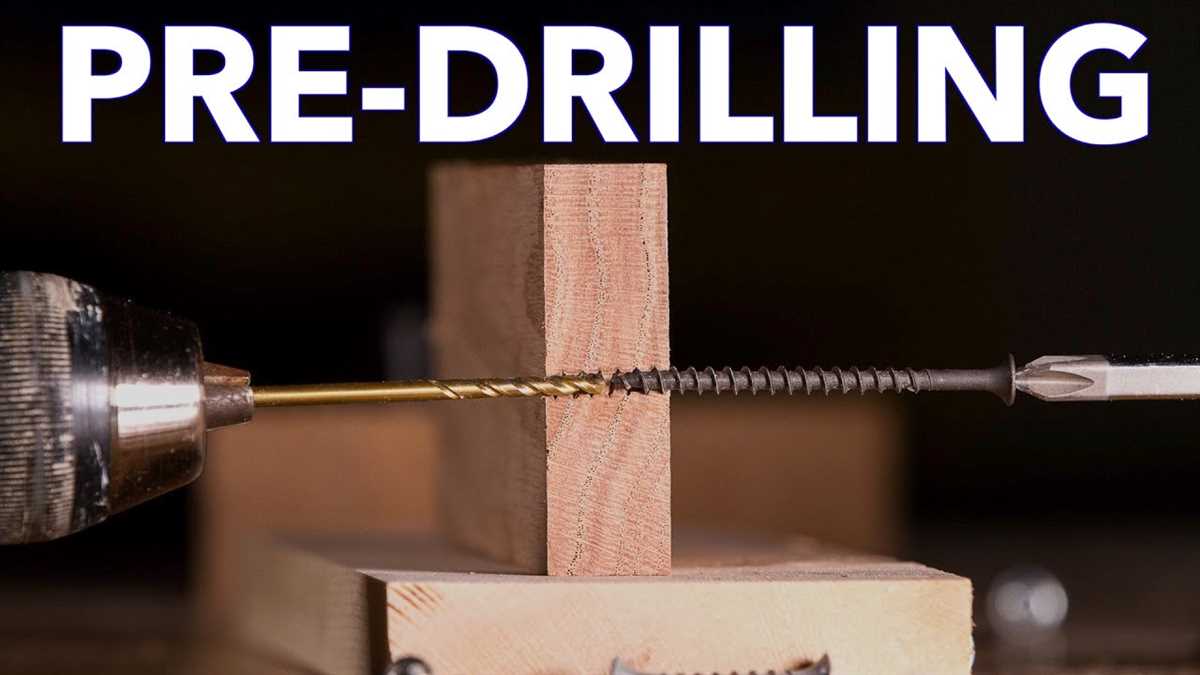
Pre drilling is an important step in ensuring that your holes are perfectly placed. Here are some tips and tricks to help you achieve successful pre drilling:
- Choose the right drill bit: Selecting the correct drill bit size and type for your project is crucial. Consider the material you’re drilling into and choose a bit that is appropriate for it.
- Mark the spot: Before starting to drill, make sure to mark the exact spot where you want the hole. This will help you to stay on track and prevent any mistakes in placement.
- Use a pilot hole: For larger holes or harder materials, it’s a good idea to start with a pilot hole. This smaller hole will guide the larger drill bit and prevent it from wandering off course.
- Use a drill guide: If you need to drill multiple holes that need to be perfectly aligned, consider using a drill guide. This tool will ensure that each hole is drilled at the exact desired angle and position.
- Apply steady pressure: When drilling, it’s important to maintain a steady and consistent pressure on the drill. This will help to prevent the bit from slipping and ensure a clean and accurate hole.
- Keep the drill perpendicular: Make sure to hold the drill level and perpendicular to the surface you’re drilling into. Tilting the drill can result in angled or uneven holes.
- Remove debris: As you drill, periodically stop and remove any debris that has accumulated in the hole. This will prevent the drill bit from getting clogged and ensure a smooth drilling process.
- Practice on scrap material: If you’re new to pre drilling or working with a new type of material, it’s a good idea to practice on a scrap piece first. This will allow you to fine-tune your technique before working on the actual project.
By following these tips and tricks, you can ensure successful pre drilling and achieve perfectly placed holes for your projects.
Common Mistakes to Avoid
- Not measuring correctly: One of the most common mistakes is not measuring the hole locations accurately. This can result in misaligned or unevenly spaced holes, leading to a poor end result. Always take the time to double-check your measurements before drilling.
- Using the wrong drill bit: Another common mistake is using the wrong drill bit for the material you are drilling into. Different materials require different types of drill bits, and using the wrong one can result in a hole that is too small, too large, or jagged. Make sure to select the appropriate drill bit for the material you are working with.
- Not using a pilot hole: Skipping the step of creating a pilot hole is a mistake that can lead to splitting or cracking of the material. A pilot hole helps to guide the drill bit and prevents the material from getting damaged. Always start with a pilot hole for better results.
- Not securing the workpiece: Failing to secure the workpiece can cause it to move or slide while drilling. This can result in inaccurate hole placement or even injury. Always make sure to properly secure the workpiece before drilling.
- Drilling too quickly: Drilling too quickly can cause the drill bit to overheat, resulting in dull or damaged cutting edges. Additionally, drilling too quickly can cause the bit to wander off course, leading to misaligned holes. Take your time and drill at a steady pace for better control and results.
- Not cleaning the drill bit: Failing to clean the drill bit between holes can cause sawdust or debris to build up, resulting in less efficient drilling. Cleaning the drill bit by wiping it with a cloth or blowing away the debris will help maintain its cutting effectiveness.
- Not wearing protective gear: Safety should always be a top priority when drilling. Not wearing protective gear, such as safety glasses and gloves, can lead to eye injuries or hand injuries from flying debris. Always wear the appropriate protective gear when using power tools.
FAQ:
What is pre drilling and why is it important?
Pre drilling is the process of making a small pilot hole before inserting a screw or nail into a material. It is important because it helps prevent the wood from splitting and ensures that the screw or nail goes in straight and flush with the surface.
How do I know what size drill bit to use for pre drilling?
To determine the size of the drill bit for pre drilling, you should choose a bit that is slightly smaller in diameter than the screw or nail you will be using. This will allow the screw or nail to have a firm grip while also minimizing the risk of the wood splitting.
Can I pre drill into any type of material?
No, pre drilling is primarily used for woodworking projects. While it is possible to pre drill into other materials such as metal or plastic, the process and the drill bit used will vary depending on the material. It is best to consult a specific guide for pre drilling into different materials.
Video:


