How to Safely Drill Tempered Glass: Step-by-Step Guide

Drilling into tempered glass can be a tricky task if you don’t have the right tools or know how to approach it. Tempered glass is a type of safety glass that is specially treated to make it stronger and more resistant to breakage. While this makes it ideal for many applications, it also makes drilling into it more challenging than drilling into regular glass.
However, with the right techniques and precautions, you can safely drill through tempered glass without causing any damage or compromising its structure. This step-by-step guide will walk you through the process and ensure that you can successfully accomplish your drilling project.
First and foremost, it’s crucial to use the right drill and drill bits for working with tempered glass. Regular drill bits will most likely shatter the glass due to the high pressure and temperature involved in drilling. Instead, you should opt for a diamond-tipped drill bit specifically designed for glass and tile. These drill bits have a hardened surface that can cut through tempered glass without cracking or breaking it.
Another essential step is to apply lubrication while drilling. This helps reduce the friction and heat generated during the drilling process, preventing the glass from cracking. You can use water as a lubricant or invest in a specific glass-cutting oil to ensure a smooth and safe drilling experience.
Additionally, it’s important to take proper safety precautions when drilling tempered glass. Wear safety goggles to protect your eyes from any potential shards or debris. Use clamps or a vise to hold the glass securely in place, preventing it from slipping or shattering. It’s also advisable to place a piece of scrap wood underneath the glass to provide additional support and prevent any potential cracking.

By following these step-by-step instructions and taking the necessary precautions, you can successfully and safely drill through tempered glass. Remember to take your time, apply consistent pressure, and be patient throughout the drilling process. With the right tools and techniques, you can accomplish your drilling project without any mishaps or damage to the glass.
Understanding Tempered Glass
Tempered glass is a type of glass that has been treated with heat or chemicals to increase its strength and durability. It is commonly used in applications where safety is a primary concern, such as in car windows, shower doors, and glass panels.
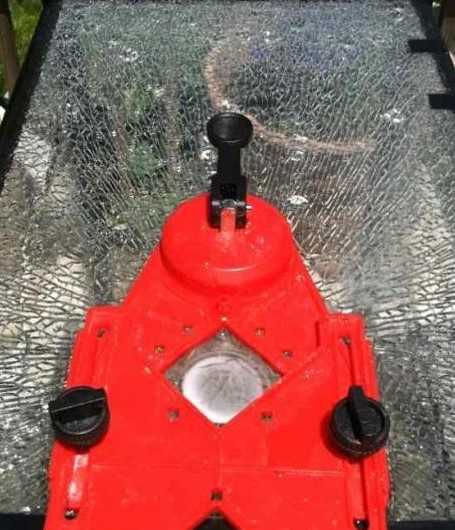
Tempered glass is made by heating regular glass to a very high temperature and then rapidly cooling it. This process creates internal stresses within the glass, which give it its increased strength. When tempered glass breaks, it shatters into small, rounded pieces, rather than sharp, jagged shards, reducing the risk of injury.
Benefits of Tempered Glass
- Strength: Tempered glass is up to four times stronger than regular glass, making it more resistant to impact and bending forces.
- Safety: The shattering pattern of tempered glass reduces the risk of serious injury in case of breakage.
- Heat resistance: Tempered glass can withstand higher temperatures than regular glass, making it suitable for applications where heat is a concern.
- Scratch resistance: The tempering process also makes the glass more resistant to scratches and other damage.
- Uniformity: Tempered glass has a more uniform thickness and surface, giving it a sleek and professional appearance.
Uses of Tempered Glass
Due to its strength and safety features, tempered glass is used in a wide range of applications, including:

- Automobiles: Tempered glass is commonly used in car windows and windshields, providing protection to passengers in case of accidents.
- Architectural: It is used in the construction of glass doors, windows, and glass panels for buildings, ensuring safety and durability.
- Technology: Many electronic devices, such as smartphones and tablets, use tempered glass as their display screens for added durability.
- Furniture: Tempered glass is often used in the construction of tables, shelves, and cabinets, providing a sleek and modern look.
- Appliances: Kitchen appliances, such as oven doors and refrigerator shelves, often use tempered glass for its heat resistance and durability.
- Bathrooms: Shower doors, bathroom partitions, and mirrors all commonly use tempered glass for its safety and strength.
Care and Maintenance of Tempered Glass
To ensure the longevity of tempered glass, it is important to follow these care and maintenance tips:
- Regular cleaning: Clean the glass regularly using a mild glass cleaner and a soft cloth to remove dust, fingerprints, and other debris.
- Avoid abrasive materials: Avoid using abrasive materials, such as steel wool or harsh chemicals, as they can scratch or damage the glass surface.
- Handle with care: Although tempered glass is stronger than regular glass, it is still important to handle it with care to avoid unnecessary stress or impact.
- Inspect for damage: Regularly inspect the glass for any signs of damage, such as chips or cracks. If any damage is found, it should be repaired or replaced as soon as possible.
By understanding the properties and uses of tempered glass, you can safely and effectively work with this durable material.
Importance of Drilling Tempered Glass Safely
Drilling tempered glass can be a delicate process that requires careful attention and proper techniques. Failing to drill tempered glass safely can result in the glass shattering or cracking, potentially causing injury.
Here are some reasons why drilling tempered glass safely is important:

- Preventing injuries: Tempered glass is designed to shatter into small, granular pieces when broken, which reduces the risk of serious injuries. However, if the glass is drilled incorrectly or with excessive force, it can still break unpredictably and cause harm.
- Maintaining structural integrity: Tempered glass is often used in applications where its strength and durability are crucial, such as in shower doors, windows, or glass partitions. Drilling the glass improperly can weaken its structure and compromise its ability to withstand external forces and pressure.
- Preserving aesthetics: Tempered glass is commonly used for its visual appeal, as it offers a sleek and modern look. When drilling tempered glass, it is important to do it safely to avoid any unsightly cracks or damage that can detract from the overall appearance.
- Protecting investment: Tempered glass can be expensive, especially when used in large installations or custom projects. By drilling it safely, you can protect your investment and avoid the cost of replacing damaged glass.
When drilling tempered glass, it is crucial to follow the proper steps and use the right tools and techniques. This includes using a diamond or carbide-tipped drill bit, lubricating the drilling area with water or glass-cutting oil, and applying gentle and steady pressure. Additionally, wearing safety goggles, gloves, and a dust mask is recommended to protect yourself from any flying glass particles or debris.
By drilling tempered glass safely, you can ensure its longevity, maintain its aesthetics, and prevent potential hazards. It is always best to consult a professional or experienced glass cutter if you are unsure about drilling tempered glass yourself.
Step 1: Gathering the Necessary Tools
Before you begin drilling tempered glass, it is important to gather all the necessary tools. Having the right tools on hand will help ensure a safe and successful drilling process. Here is a list of the tools you will need:
- Glass Drill Bit: This type of drill bit is specifically designed for drilling through glass. It has a carbide or diamond tip that helps to prevent the glass from cracking or shattering.
- Masking Tape: This tape will be used to create a protective barrier on the glass. It helps prevent the drill bit from slipping and also guards against any damage to the glass surface.
- Clamps: Clamps are used to securely hold the glass in place during the drilling process. This ensures that the glass remains stable and reduces the risk of accidents.
- Safety Glasses: Safety glasses are essential to protect your eyes from any flying debris or glass particles that may be generated during drilling.
- Water: Water is crucial in the drilling process to keep the drill bit cool and prevent the glass from overheating. It also helps to lubricate the cutting area, reducing the chance of cracking or breaking the glass.
- Spray Bottle: A spray bottle filled with water can be used to evenly distribute the water onto the glass surface while drilling.
- Drill: You will need a power drill with variable speed settings to control the drilling process and ensure it is done at the correct speed.
- Workbench or Sawhorse: You will need a stable surface to place the glass on while drilling. A workbench or sawhorse can provide the necessary stability.
Gathering these tools before you start drilling tempered glass will help make the process smoother and safer. Once you have all the necessary tools, you can move on to the next steps in the drilling process.

Step 2: Preparing the Glass
Before you begin drilling into tempered glass, it is important to properly prepare the glass to ensure the drilling process goes smoothly. Here are the steps you will need to take:
- Choose the proper location: Find a clean, well-lit area with enough space to work on the glass without any obstructions.
- Ensure safety: Put on a pair of safety glasses and work gloves to protect your eyes and hands throughout the process.
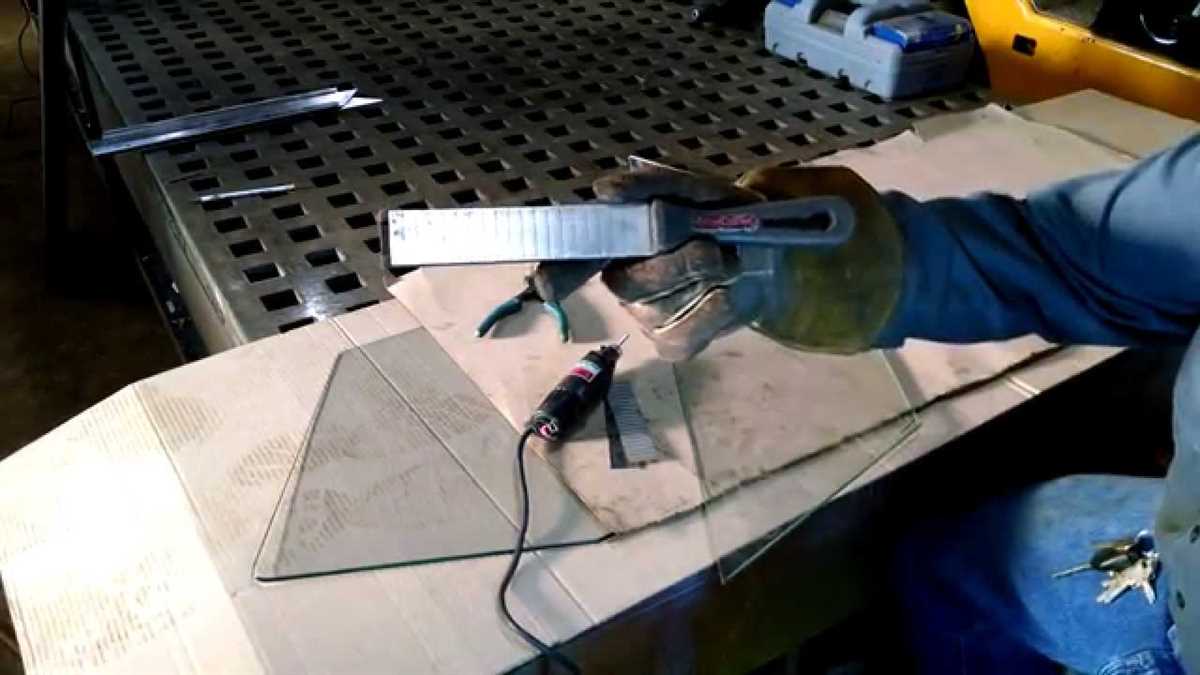
- Secure the glass: Place the tempered glass on a stable surface, such as a work table. Make sure it is positioned securely and will not move or wobble during drilling.
- Mark the drilling spot: Use a permanent marker or glass marking pencil to clearly mark the spot where you want to drill the hole. Double-check the measurements and ensure the mark is centered and accurate.
- Create a drilling template: If desired, you can create a drilling template using a piece of paper or cardboard. Simply trace the shape of the hole onto the template and cut it out. This can help guide the drill bit and prevent it from slipping.
By following these steps and properly preparing the glass, you will be ready to move on to the next stage of drilling.
Step 3: Marking the Drilling Point
Before you start drilling into tempered glass, it’s important to mark the exact point where you want to make the hole. This will help you ensure precision and accuracy during the drilling process.
Here are the steps to mark the drilling point on tempered glass:
- Clean the surface of the glass thoroughly using a glass cleaner and a lint-free cloth. This will ensure there are no dirt or oils that could interfere with the marking process.
- Measure and mark the desired location on the glass using a fine-tipped permanent marker or a glass marker. Place a small dot or cross where you want the hole to be drilled.
- Double-check the accuracy of the marking by using a measuring tape or ruler. Make sure the placement is exactly where you need it to be.
- If you are drilling multiple holes, repeat the marking process for each hole, taking precise measurements.
Remember, the accuracy of the marking will directly impact the drilling process and the final result, so take your time and ensure the markings are precise.

Step 4: Choosing the Right Drill Bit
When drilling tempered glass, it is crucial to select the right drill bit. Using the wrong drill bit can lead to cracking or shattering of the glass.
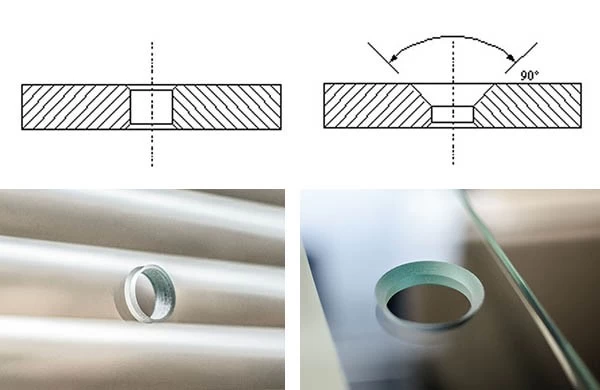
There are specific drill bits designed for use on glass and other hard materials. These drill bits are made with a diamond or carbide tip, which helps to create clean and precise holes without damaging the glass.
When choosing a drill bit for tempered glass, consider the following factors:
- Size: Select a drill bit that is appropriate for the size of hole you need to create. The size of the drill bit will depend on the application and the hardware you plan to use.
- Material: Look for drill bits made specifically for glass or tile. These drill bits are designed to handle the hardness of tempered glass and will minimize the risk of cracks or chips.
- Coating: Some drill bits come with a coating, such as titanium or diamond, which can enhance the durability and performance of the bit. Consider opting for a coated drill bit for better results.
It is also essential to ensure that the drill bit is sharp before starting the drilling process. Dull drill bits can cause the glass to crack or chip more easily.
Remember, using the right drill bit is crucial for successfully drilling tempered glass without causing damage. Take your time to find the appropriate drill bit for your project to ensure the best results.
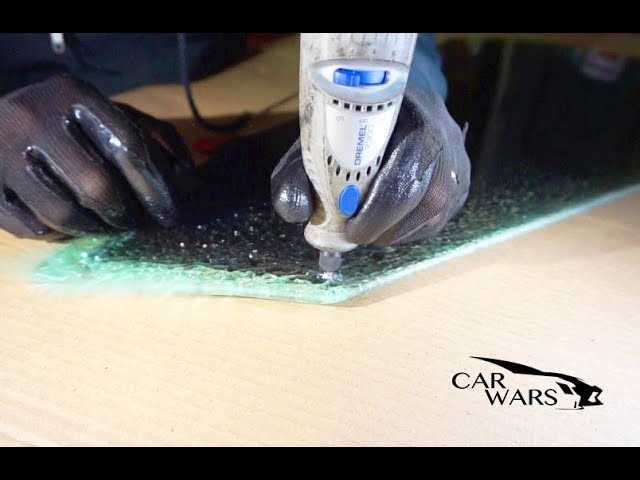
Step 5: Drilling the Glass
After preparing the glass and marking the spot where you want to drill, it’s time to start drilling. Follow the steps below to drill tempered glass safely:
1. Secure the glass
Place the tempered glass on a stable surface, such as a workbench or table. Make sure the glass is secure and doesn’t move during the drilling process. You can use clamps or suction cups to hold the glass in place.
2. Use the right drill bit
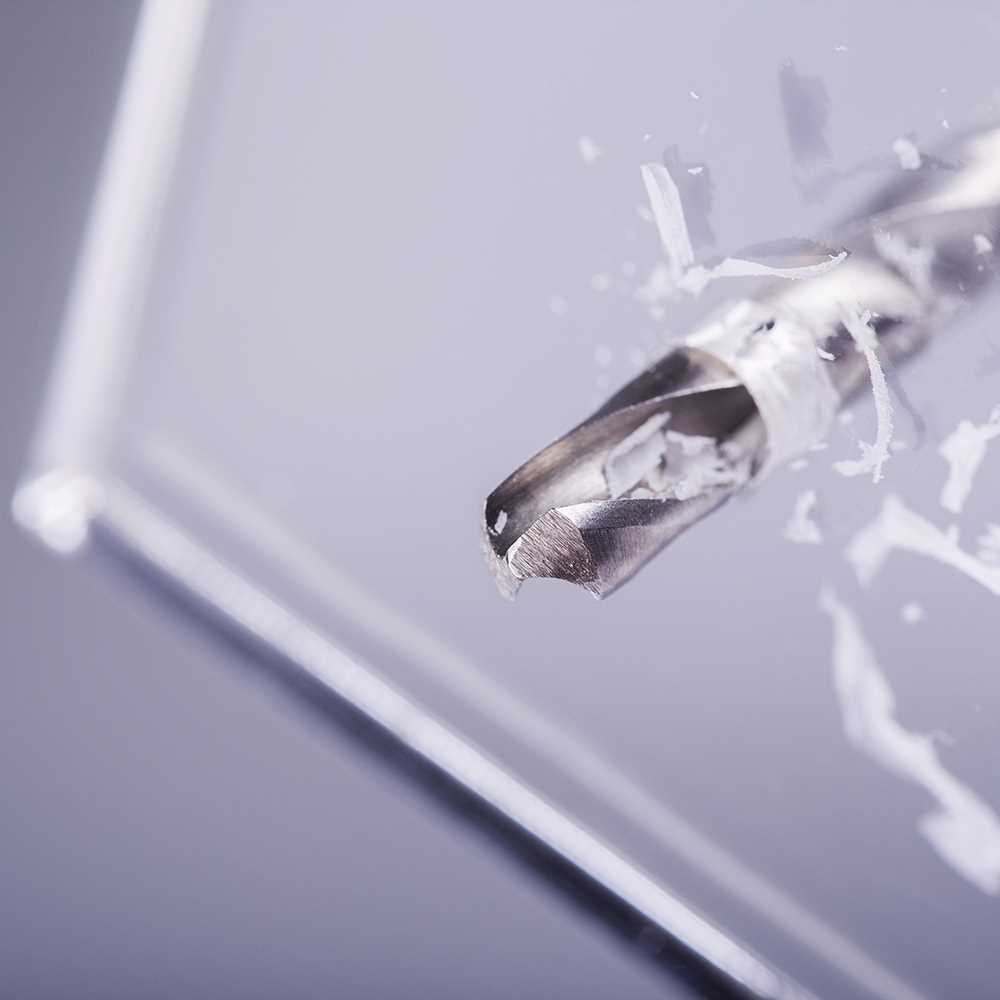
Choose a diamond-tipped drill bit specifically designed for drilling glass or tile. These drill bits have a pointed tip and a diamond coating that helps them cut through the tough surface of tempered glass.
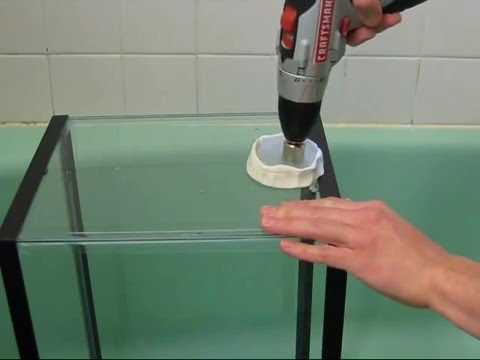
3. Apply lubrication
Drilling tempered glass generates a lot of heat, which can cause the glass to crack or shatter. To prevent this, apply a generous amount of lubricant, such as a mixture of water and dish soap, to the area you will be drilling. This will help keep the glass cool and reduce the risk of damage.
4. Start drilling
Begin drilling at a slow speed and apply light pressure to the glass. Keep the drill perpendicular to the surface of the glass and be patient. Tempered glass is hard and may take some time to drill through. Avoid pushing too hard or putting too much pressure on the drill, as this can increase the risk of cracking or shattering the glass.
5. Maintain a constant speed
As you drill, maintain a constant speed and avoid stopping and starting. This can increase the chances of the glass cracking. If you need to adjust the pressure or position of the drill, do so slowly and carefully to minimize the risk of damage.
6. Go slow and steady
Take your time and drill slowly and steadily. Rushing or applying too much pressure can cause the glass to break. Let the drill bit do the work and focus on maintaining a stable and controlled drilling motion.
7. Keep the glass cool
Continuously apply lubricant to the drilling area to keep the glass cool. This will help prevent overheating and reduce the risk of cracking or shattering. If you notice the glass becoming too hot, stop drilling and allow it to cool down before continuing.
8. Drill through completely
Continue drilling until you have penetrated completely through the glass. Once you have reached the other side, slowly release pressure on the drill and gently pull it out of the hole.
Remember to always wear safety goggles and gloves when drilling tempered glass to protect yourself from possible shards or debris. Once you have successfully drilled the glass, you can proceed to the next step in your project.
Step 6: Cooling the Glass
After you have finished drilling the hole in the tempered glass, it is important to allow the glass to cool down before handling it. This step is crucial to ensure the safety and integrity of the tempered glass.
Here are the steps to cool the glass properly:
- Stop the drilling process and remove the drill bit from the glass.
- Place the glass in a cool and well-ventilated area, away from direct sunlight or any source of heat.
- Allow the glass to naturally cool down for at least 30 minutes to one hour. Avoid touching the glass during this cooling period.
- Do not place the hot glass on a cold surface, as this can cause the glass to crack or shatter.
- Once the glass has cooled down completely, you can safely handle it and proceed with your project.
Remember, tempered glass is created through a special heating and cooling process, which makes it stronger and more resistant to breaks and cracks. However, it is still prone to thermal stress if not cooled properly. Taking the time to cool the glass after drilling will help prevent any potential damage or accidents.
Step 7: Finishing Touches

Once you have successfully drilled the tempered glass, there are a few finishing touches you can make to ensure a clean and professional look.
1. Deburring
After drilling, you may notice that there are sharp edges or burrs around the hole. To remove these, use a deburring tool or a piece of fine-grit sandpaper. Gently smooth out the edges until they are no longer sharp. This will help prevent any potential injuries and give the glass a polished appearance.
2. Cleaning
Before installing or using the tempered glass, it is essential to clean it thoroughly. Use a mild glass cleaner or soapy water solution to remove any dirt, dust, or debris left behind from the drilling process. Make sure to dry the glass completely to avoid any water spots or streaks.
3. Inspection
Before proceeding with the installation, take the time to inspect the drilled hole and the glass itself. Look for any cracks, chips, or other damage that may have occurred during the drilling process. If you notice any issues, it is best to replace the glass to ensure its stability and safety.
4. Securing
If you are using the drilled glass for a specific purpose, such as mounting it on a wall or using it as a shelf, make sure to secure it properly. Use suitable brackets, clamps, or other mounting hardware designed for glass to ensure a secure and stable installation.
5. Maintenance
Once the tempered glass is installed, regular maintenance is essential to keep it in good condition. Clean the glass regularly using a non-abrasive glass cleaner and a soft cloth. Avoid using harsh chemicals or abrasive materials that can scratch or damage the glass surface.
By following these finishing touches, you can ensure that your drilled tempered glass remains safe, aesthetically pleasing, and resistant to any potential future issues.
FAQ:
What is tempered glass?
Tempered glass is a type of safety glass that has been specially treated to be stronger and more resistant to shattering than regular glass. It is commonly used in car windows, shower doors, and table tops.
Can you drill holes in tempered glass?
Yes, it is possible to drill holes in tempered glass, but it requires special techniques and tools to prevent the glass from shattering. It is important to follow a step-by-step guide and take necessary precautions to ensure safety.
What tools do I need to drill tempered glass?
To drill tempered glass, you will need a diamond-tipped drill bit, a drill with variable speeds, masking tape, a spray bottle with water, and safety goggles. These tools are necessary to ensure that the glass does not crack or shatter during the drilling process.
What are the steps for drilling tempered glass?
The steps for drilling tempered glass are as follows: 1. Mark the spot where the hole needs to be drilled with masking tape. 2. Attach the diamond-tipped drill bit to the drill. 3. Apply water to the area to keep the glass cool and lubricated. 4. Start drilling at a slow speed and gradually increase the speed. 5. Use light pressure and let the drill bit do the work. 6. Continue drilling through the glass until the hole is complete. 7. Remove the masking tape and clean any residue.
Video:


Meet Harrison Clayton, a distinguished author and home remodeling enthusiast whose expertise in the realm of renovation is second to none. With a passion for transforming houses into inviting homes, Harrison's writing at https://thehuts-eastbourne.co.uk/ brings a breath of fresh inspiration to the world of home improvement. Whether you're looking to revamp a small corner of your abode or embark on a complete home transformation, Harrison's articles provide the essential expertise and creative flair to turn your visions into reality. So, dive into the captivating world of home remodeling with Harrison Clayton and unlock the full potential of your living space with every word he writes.


