Step-by-Step Guide: How to Drill a Hole in a Shell

If you’re a fan of beachcombing and collecting seashells, you’ve probably come across some beautiful shells that you’d like to turn into jewelry or home decor. One way to do this is by drilling a hole in the shell. While it may seem like a daunting task, drilling a hole in a shell is actually quite simple with the right tools and techniques. In this step-by-step guide, we’ll walk you through the process of drilling a hole in a shell, so you can create stunning pieces from your seashell collection.
Step 1: Gather Your Materials
Before you begin, make sure you have all the necessary materials. You’ll need a drill with a small diamond bit, a piece of scrap wood or foam board, a clamp or vise, and some water. The diamond bit is essential for drilling through the hard surface of the shell, and using water as a lubricant will help keep the shell cool and prevent it from cracking.
Step 2: Secure the Shell
Next, secure the shell to the scrap wood or foam board using a clamp or vise. This will prevent the shell from moving around while you’re drilling and ensure that you have a stable surface to work on. Place the shell on its side with the area where you want to drill the hole facing up.

Step 3: Start Drilling
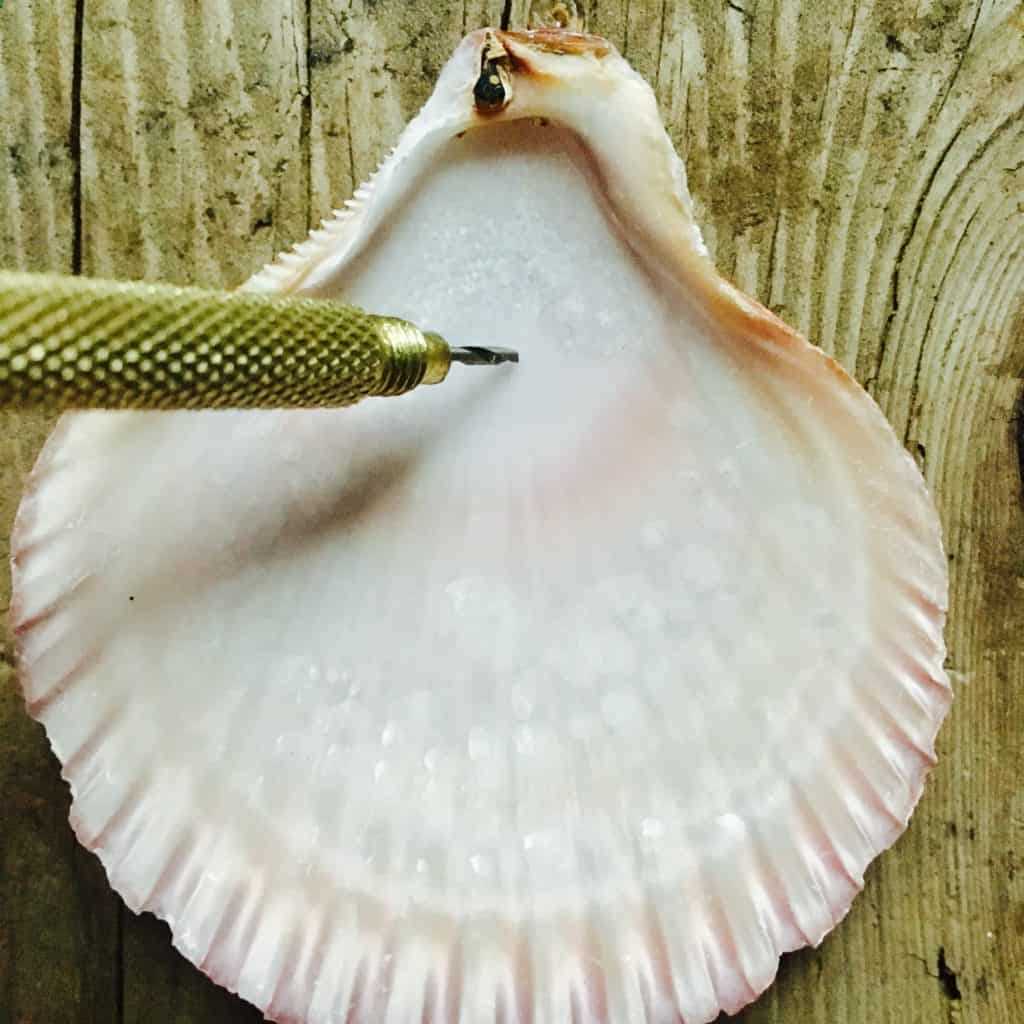
Now that your shell is secured, it’s time to start drilling. Place the tip of the diamond bit on the spot where you want to create the hole, and hold the drill perpendicular to the shell. Begin drilling slowly, applying light pressure and letting the bit do the work. Keep the shell and bit wet with water as you drill to prevent overheating.
Step 4: Clean and Finish
Once the hole is drilled, remove the shell from the clamp or vise and rinse it with water to remove any debris. Use sandpaper or a file to smooth the edges of the hole and create a finished look. You can also use a dental pick or toothpick to remove any lingering shell fragments from the hole.
Note: It’s important to wear safety goggles and work in a well-ventilated area when drilling shells, as tiny fragments may fly off during the process.
Now that you know how to drill a hole in a shell, you can unleash your creativity and turn your seashell collection into beautiful jewelry, wind chimes, or other decorative pieces. Just remember to take your time, use the right tools, and always work safely.

Choose the Right Tools
Before you begin drilling a hole in a shell, it’s important to have the right tools on hand. Here are some tools you will need:
- Drill – A power drill with variable speed settings will work best for drilling through shells. Make sure you have the appropriate drill bits for the type of shell you are working with.
- Clamp – This will help secure the shell in place while you drill, preventing it from slipping or rolling.
- Protective gear – Safety goggles and gloves are essential when working with a drill, as they will protect your eyes and hands from any flying debris.
- Marker or tape – This will help you mark the spot where you want to drill the hole, ensuring accuracy.
- Damp cloth – Keep a damp cloth nearby to wipe away any dust or debris that may accumulate on the shell’s surface during drilling.
Having these tools ready and easily accessible will make the drilling process smoother and safer. Remember to always handle the drill and other tools with care, and take necessary precautions to protect yourself and your surroundings.
Prepare the Shell
Before you start drilling a hole in the shell, it’s important to properly prepare the shell to ensure a clean and successful drilling process.
1. Clean the Shell
Begin by cleaning the shell thoroughly to remove any dirt, debris, or residue that may be present. Use a soft brush or toothbrush to gently scrub the surface of the shell, paying attention to any crevices or hard-to-reach areas. Rinse the shell with clean water and pat it dry with a towel.

2. Mark the Drill Point
Next, decide where you want to drill the hole in the shell. Use a pencil or marker to make a small dot or mark on the surface of the shell at the desired location. This will serve as a guide for your drill bit.
3. Use a Suitable Drill Bit
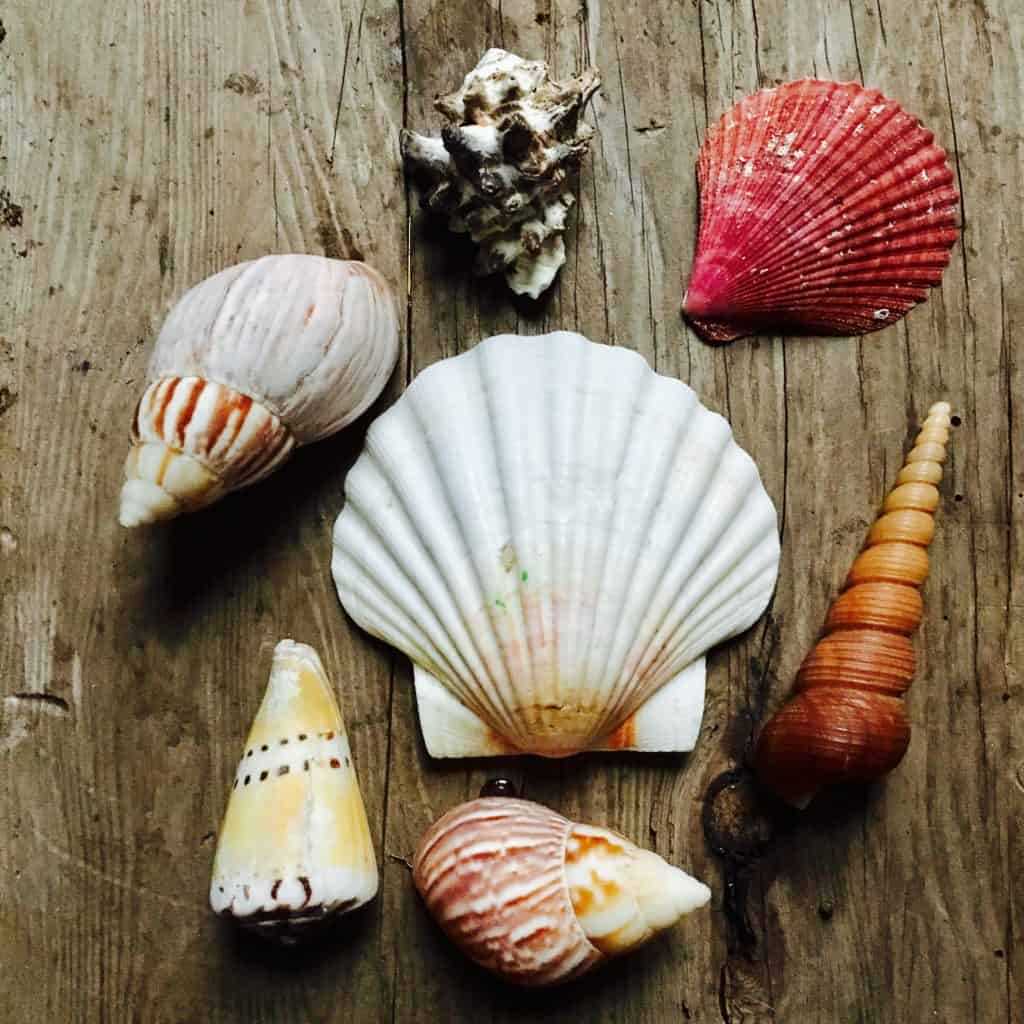
Select a drill bit that is appropriate for the type of shell you are working with. For softer shells, such as those from mollusks, a regular twist bit should suffice. However, for harder shells such as those from turtle or tortoise, it is recommended to use a diamond or carbide-tipped drill bit.
4. Secure the Shell
Place the shell on a stable surface or use a clamp to hold it securely in place. This will prevent the shell from moving or slipping during the drilling process, reducing the risk of accidents.
5. Use Proper Safety Equipment
When drilling a hole in a shell, it is important to protect yourself by wearing safety goggles and gloves. The goggles will shield your eyes from any potential flying debris, while the gloves will provide a layer of protection for your hands.
6. Begin Drilling
Once you are fully prepared, position the drill bit at the marked drill point on the shell. Apply gentle pressure and begin drilling at a slow speed. Keep the drill bit perpendicular to the shell’s surface to ensure a straight and clean hole.

Note: It is important to take breaks while drilling and allow the drill bit and shell to cool down. Drilling for extended periods without breaks can cause the shell to become too hot, which may result in cracks or damage.
Congratulations! You have successfully prepared the shell for drilling a hole.
Mark the Drilling Spot
Before you begin drilling into a shell, it’s important to mark the spot where you want to make the hole. Take into consideration the size and shape of the shell as well as your intended use for it.
Here are a few steps to help you mark the drilling spot:
- Inspect the shell: Examine the shell closely to identify the best area for drilling. Look for a spot that is smooth, without any cracks or damage.
- Choose the size of the hole: Decide on the size of the hole you want to drill. Smaller holes are generally easier to drill and may be more suitable for delicate shells.
- Mark the spot: Use a pencil or a marker to mark the exact spot where you want to drill. Make a small dot or draw a small circle around the area.
- Consider the orientation: Think about the orientation of the shell and how the hole will affect its appearance. You may want to mark the drilling spot on the side or bottom of the shell to minimize any visual impact.
- Protect the shell: Place the shell on a soft surface, such as a towel or a piece of foam, to prevent it from getting scratched or damaged during the drilling process.
By taking the time to carefully mark the drilling spot, you can ensure that your hole is placed exactly where you want it and that the shell remains intact throughout the process.

Secure the Shell
Before you begin drilling, it’s important to secure the shell to prevent it from rolling or moving around. This will ensure that you have better control and accuracy while drilling.
Here are a few methods you can use to secure the shell:
- Tape: Use a strong tape, such as duct tape, to attach the shell to a flat surface. This will prevent it from moving while you drill.
- Clamp: If you have a clamp handy, you can use it to secure the shell. Simply place the shell in the clamp and tighten it to hold the shell in place.
- Workbench: If you have a workbench or table, you can place the shell on it and use clamps to secure it. This will provide a stable surface for drilling.
Choose the method that works best for you and ensure that the shell is securely held in place before proceeding with drilling.
Start Drilling
Once you have gathered all the necessary materials and prepared your work area, you can now start the drilling process.
Step 1: Mark the spot
Use a pencil or marker to mark the spot where you want to drill the hole on the shell. This will help guide your drilling and ensure accuracy.
Step 2: Choose the right drill bit
Select a drill bit that is suitable for drilling through shells. A smaller drill bit is recommended for beginner-level projects or delicate shells, while a larger drill bit can be used for more durable shells.
Step 3: Get your safety gear
Put on safety glasses and gloves to protect yourself from any debris or shell fragments that may fly off during drilling.
Step 4: Secure the shell
Place the shell on a stable surface or use a clamp to hold it in place. This will prevent the shell from slipping or moving while you drill.
Step 5: Start drilling
Hold the drill at a perpendicular angle to the shell. Apply steady pressure and begin drilling slowly. Let the drill bit do the work and avoid using excessive force, as this may crack or damage the shell.
Note: It’s important to be patient and not rush the drilling process, especially when working with more fragile shells.
Step 6: Add water
If you notice that the shell is getting hot or the drill is not going through smoothly, you can add water as a cooling agent. Dip the drill bit into a cup of water occasionally to prevent overheating and keep the shell and drill bit lubricated.
Step 7: Clean up
Once the hole has been drilled, carefully remove any shell fragments or dust. You can use compressed air or a small brush to gently clean the hole and shell.
Tip: Remember to empty the cup of water used for cooling and dispose of any shell fragments responsibly.
| Shell Type | Recommended Drill Bit Size |
|---|---|
| Soft/fragile shells (e.g. seashells) | 1/16 – 1/8 inch bit |
| Medium-hardness shells (e.g. clam shells) | 1/8 – 3/16 inch bit |
| Hard shells (e.g. turtle shells) | 3/16 – 1/4 inch bit |
Step 8: Experiment and practice
Remember that drilling through shells can be a trial-and-error process, especially if you are working with different shell types or sizes. Don’t be discouraged if your first attempts are not perfect. Take the time to experiment and practice to improve your drilling skills.
Control the Drilling Speed
When drilling a hole in a shell, it is important to control the speed of the drill to prevent damage to the shell and ensure a clean hole. Here are some tips for controlling the drilling speed:
- Choose the right drill bit: Use a drill bit that is appropriate for drilling through the type of shell you are working with. For thinner shells, a high-speed steel bit would work well, while a carbide-tipped bit may be more suitable for harder shells. Using the right drill bit will make it easier to control the drilling speed.
- Start drilling at a slow speed: Begin drilling at a slow speed to allow for greater control and prevent the drill bit from slipping or wandering on the shell’s surface. Slowly apply pressure to the drill as you increase the speed gradually.
- Maintain a steady speed: Once you have achieved the desired drilling speed, try to maintain it throughout the drilling process. Avoid sudden changes in speed, as this can cause the drill bit to slip or create uneven holes in the shell.
- Use consistent pressure: Apply a steady and consistent pressure to the drill, without forcing it. Too much pressure can crack or break the shell, while too little pressure may result in a slow and inefficient drilling process.
- Cool the drill bit: Drilling through a shell can generate heat, which can damage the shell or dull the drill bit. To prevent this, periodically cool the drill bit by dipping it in water or using a lubricant. This will help to maintain the drilling speed and prolong the life of the drill bit.
By following these tips, you can effectively control the drilling speed when working with shells, resulting in clean and precise holes without causing any damage to the shell. Remember to practice caution and patience while drilling to achieve the best results.
Use Water as Lubricant
Using water as a lubricant can help prevent the drill bit from overheating and reduce the risk of cracking or damaging the shell. Here’s how you can use water as a lubricant when drilling a hole in a shell:
- Fill a small container or basin with water.
- Place the shell in the water, ensuring that it is fully submerged.
- Hold the shell firmly in place with one hand, keeping it steady and preventing it from moving while you drill.
- Dip the drill bit into the water, coating it with a small amount of water.
- Position the drill bit on the shell where you want to drill the hole.
- Apply light pressure and begin drilling slowly, allowing the water to flow onto the drill bit as you work.
- Continue drilling, periodically dipping the drill bit into the water to keep it lubricated and cool.
- Take breaks if needed, allowing the shell and drill bit to cool down if they become too hot.
- Once you have drilled through the shell, remove the shell from the water and wipe away any excess water.
Remember to always exercise caution and wear protective eyewear when drilling into shells. Using water as a lubricant can make the drilling process easier and help preserve the integrity of the shell.
Finishing Touches
1. Rinse the Shell
Once you have finished drilling the hole in the shell, it is important to rinse it thoroughly. This will help remove any leftover debris or dust from the drilling process. Fill a bowl or sink with warm water and gently rinse the shell under running water. You can use a small brush or toothbrush to remove any stubborn dirt or particles.
2. Drying the Shell
After rinsing the shell, it is important to let it dry completely before using it for any craft or decoration purposes. Place the shell in a well-ventilated area and allow it to air dry naturally. Avoid using heat or direct sunlight, as this can damage the shell or cause it to warp.
3. Sanding and Polishing
If desired, you can sand and polish the drilled hole to make it smoother and more refined. Use fine-grit sandpaper to gently sand the edges of the hole, removing any rough or jagged edges. After sanding, you can use a soft cloth or a polishing compound to give the shell a nice shine. This step is optional and can be skipped if you prefer a more natural look.
4. Sealing the Hole
If you intend to use the shell for a craft project or as a piece of jewelry, you may consider sealing the drilled hole. This will help prevent any dirt or moisture from entering the shell through the hole. You can use a clear nail polish or a sealant specifically designed for shells. Apply a thin layer of the sealant over the edges of the hole and let it dry completely before handling the shell.
5. Display or Use
Once you have finished all the necessary steps, your drilled shell is ready to be displayed or used. You can use it as a pendant for a necklace, a keychain, or even as a decoration in your home. Get creative and showcase your drilled shell in any way that appeals to you.
- Rinse the shell thoroughly
- Let the shell air dry completely
- Sand and polish the drilled hole (optional)
- Seal the hole to prevent dirt and moisture (optional)
- Display or use the drilled shell
FAQ:
What materials do I need to drill a hole in a shell?
You will need a drill with a small drill bit, a shell, a clamp or vise, and some water or oil for lubrication.
Can I use any type of drill bit?
It is recommended to use a small diamond or carbide drill bit specifically designed for drilling through hard materials like shells.
Do I need to apply pressure while drilling?
Yes, you will need to apply light to moderate pressure while drilling. Too much pressure can crack or break the shell, so it’s important to be careful and go slow.
Should I use water or oil as a lubricant?
Both water and oil can be used as a lubricant while drilling. Water is the most common choice because it is easily accessible and does not leave an oily residue. However, oil can provide better lubrication and help keep the drill bit cool during drilling.
Video:


Meet Harrison Clayton, a distinguished author and home remodeling enthusiast whose expertise in the realm of renovation is second to none. With a passion for transforming houses into inviting homes, Harrison's writing at https://thehuts-eastbourne.co.uk/ brings a breath of fresh inspiration to the world of home improvement. Whether you're looking to revamp a small corner of your abode or embark on a complete home transformation, Harrison's articles provide the essential expertise and creative flair to turn your visions into reality. So, dive into the captivating world of home remodeling with Harrison Clayton and unlock the full potential of your living space with every word he writes.


