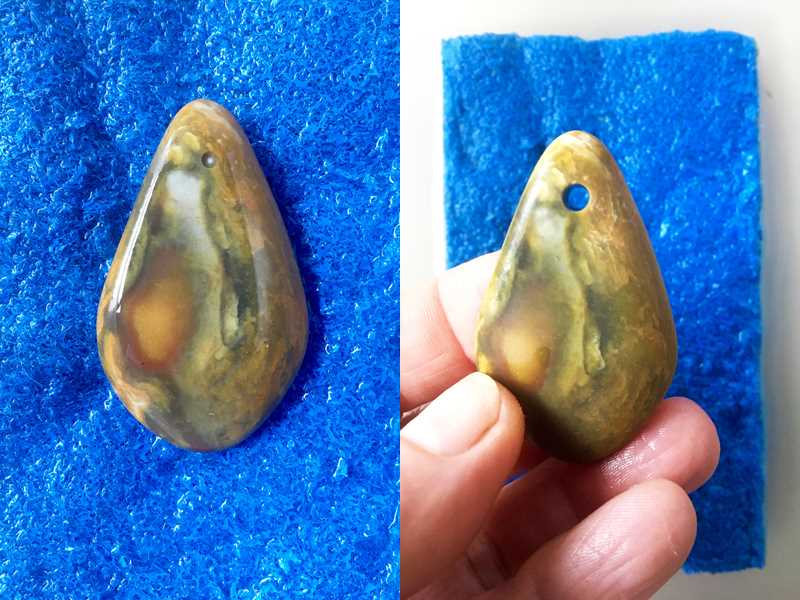
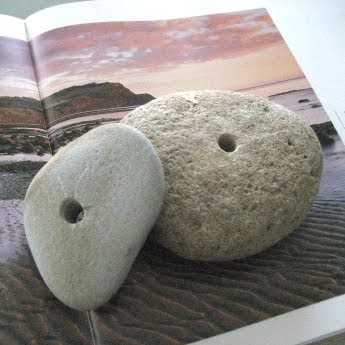
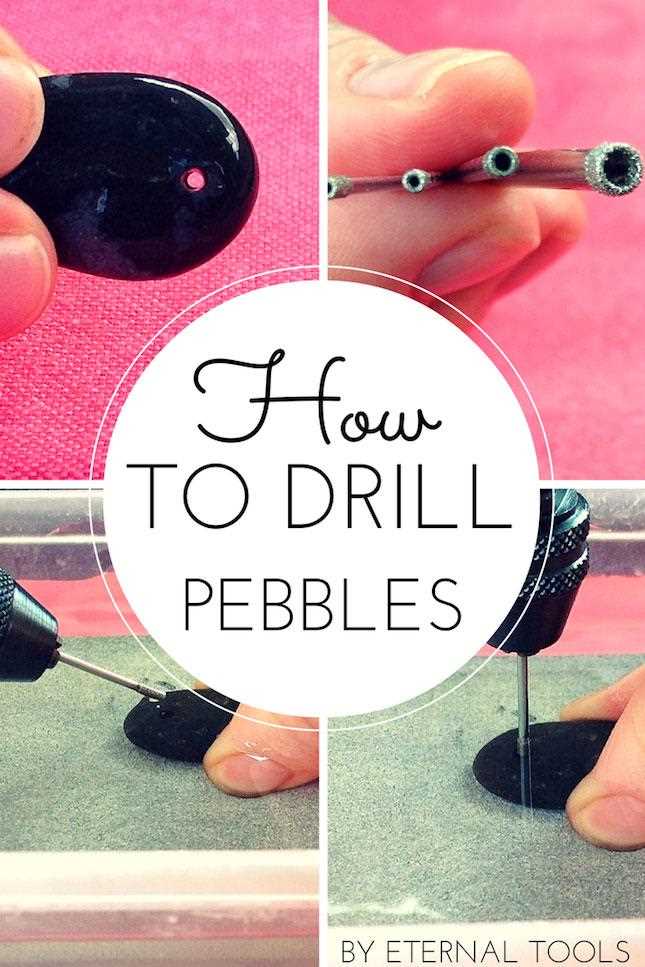
Step-by-Step Guide: How to Drill a Hole into a Rock

Rock drilling can be a challenging task, but with the right tools and techniques, you can successfully drill a hole into a rock. Whether you need to create a hole for a decorative rock sculpture or for a practical purpose like a drainage system, this step-by-step guide will walk you through the process.
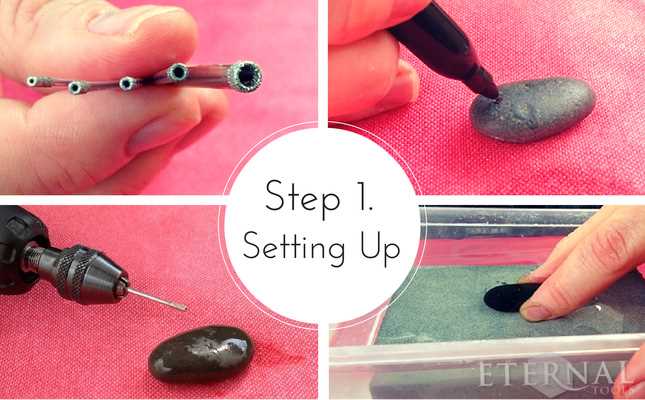
Step 1: Choose the Right Tools
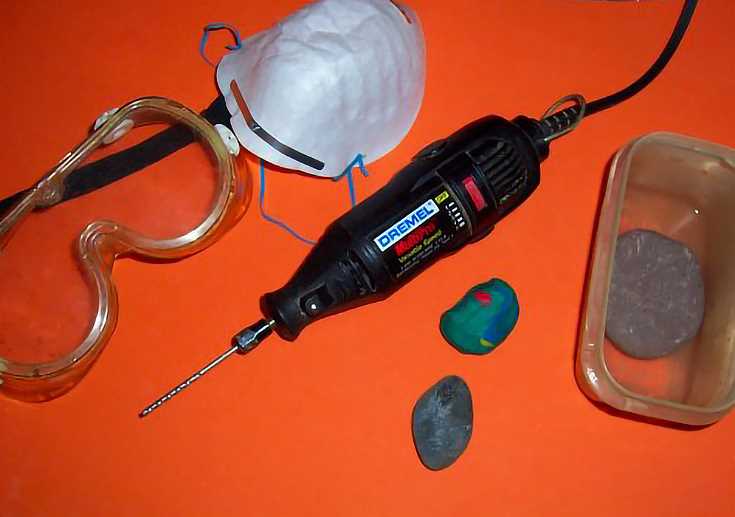
Before you start drilling, it’s important to select the right tools for the job. You will need a diamond-tipped drill bit, as this is the only type of drill bit that can effectively cut into rocks. Additionally, make sure you have safety goggles, gloves, and a dust mask to protect yourself from flying debris.
Step 2: Prepare the Rock
Before you start drilling, you’ll need to prepare the rock by marking the area where you want to drill the hole. Use a pencil or a marker to create a small dot on the surface of the rock. This will serve as a guide for your drill bit.

Step 3: Secure the Rock
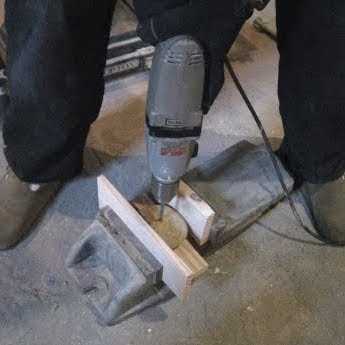
Next, you’ll need to secure the rock to prevent it from moving while you’re drilling. Place the rock on a stable surface like a workbench or a piece of plywood. If the rock is small and can easily be held with one hand, you can use a clamp to hold it in place. This will ensure stability and prevent accidents.
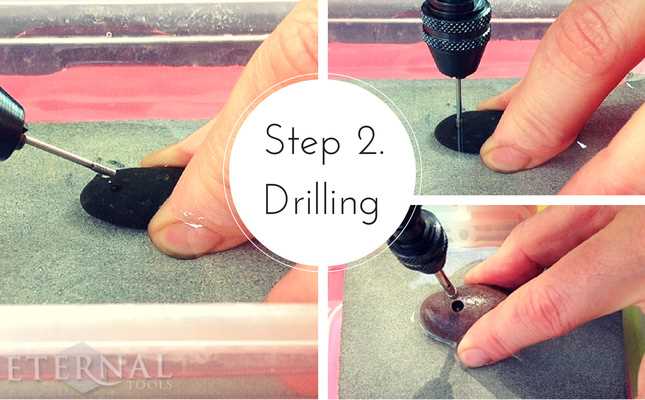
Step 4: Start Drilling
Now it’s time to start drilling. Slowly and steadily apply pressure to the drill, making sure to keep it perpendicular to the surface of the rock. Use a low to medium speed setting on your drill to prevent overheating. Keep the drill bit lubricated with water or a specialized cutting oil to reduce friction and increase the lifespan of the drill bit.
Step 5: Monitor the Progress

As you drill, periodically stop to remove debris and check the progress of the hole. Use a brush or a cloth to clear away any dust or rock fragments that may accumulate around the hole. You may also need to reapply lubricant to keep the drill bit cool and prevent it from getting stuck.
TIP: Patience is key during this process. Drilling into a rock can take time and require several breaks to let the drill bit cool down.
Step 6: Finish the Hole
Once you’ve drilled deep enough for your intended purpose, carefully remove the rock from the work surface and inspect the hole. Use a small chisel or sandpaper to smooth the edges of the hole if necessary. Congratulations, you’ve successfully drilled a hole into a rock!
Remember to always prioritize safety while drilling, and use caution to prevent accidents or injuries. With practice and the right tools, you can become proficient at drilling into rocks and use this skill for a variety of projects.
Choosing the Right Drill Bit
When it comes to drilling a hole into a rock, choosing the right drill bit is crucial. The type of drill bit you use will depend on the type of rock you’re working with and the size of the hole you need to create. Here are some factors to consider when selecting a drill bit:

- Material: Different drill bits are designed for different materials. For drilling into rocks, you’ll need a bit that is specifically designed for masonry or concrete.
- Diameter: The diameter of the hole you need will dictate the size of the drill bit you should use. Drill bits are available in various sizes, so choose one that matches the size of the hole you want to create.
- Length: The length of the drill bit is also important, especially if you’re drilling a deep hole. Make sure the bit is long enough to reach the desired depth without causing any issues.
- Type: There are different types of drill bits that can be used for drilling into rocks. Some common options include masonry bits, carbide bits, and diamond-tipped bits. Each type has its advantages and limitations, so choose one that is suitable for your specific needs.
- Quality: Investing in a high-quality drill bit is essential for a successful drilling operation. Cheaper drill bits may wear out quickly or perform poorly, leading to frustration and inefficiency. Choose a drill bit from a reputable brand that is known for its durability and performance.
Before starting your drilling project, it’s essential to ensure that you have the right drill bit for the job. Taking the time to choose the right drill bit will make the drilling process easier and ensure that you achieve the desired results.
Gathering the Necessary Materials
Before you can start drilling a hole into a rock, you will need to gather the necessary materials. Here is a list of supplies you will need:
- A rock of your choice
- Safety goggles
- Protective gloves
- A sturdy work surface
- An electric or cordless drill
- A drill bit specifically designed for drilling into rocks
- A spray bottle filled with water
- Masking tape or duct tape
- A vacuum or brush for cleaning up debris
It is important to make sure you have all of these materials before you begin the drilling process. Not having the right tools could lead to ineffective drilling or even potential injury.
Preparing the Rock Surface
Before you start drilling into a rock, it is important to prepare the surface to ensure a clean and precise hole. Follow these steps to properly prepare the rock:
- Clean the rock: Use a brush or cloth to remove any dirt, dust, or debris from the surface of the rock. This will help you see the natural lines and textures of the rock, making it easier to choose a suitable drilling spot.
- Inspect the rock: Look closely at the rock’s surface to assess its hardness and any potential cracks. If the rock is too hard or has extensive cracks, it may not be suitable for drilling. It is best to choose a rock that is not too soft or brittle.
- Mark the drilling spot: Once you have chosen a suitable spot, use a marker or chalk to mark the exact location where you want to drill the hole. This will help guide your drilling and ensure accuracy.
- Secure the rock: Place the rock on a stable surface or use clamps to hold it securely in place. This will prevent the rock from moving or shifting during the drilling process.
- Wear safety gear: Before you start drilling, make sure to wear safety goggles and gloves to protect your eyes and hands from any flying debris. Rock drilling can generate a lot of dust and debris, so it is important to take precautions.
By properly preparing the surface of the rock, you will have a solid foundation for drilling a hole. Taking the time to clean, inspect, and secure the rock will help ensure that you achieve the desired results and avoid any accidents or damage.

Marking the Hole Location
Before you start drilling into the rock, it’s important to mark the exact location where you want the hole to be. This will help ensure accuracy and precision in your drilling.
Here are the steps to mark the hole location:
- Start by visualizing where you want the hole to be on the rock. Consider factors such as the size and shape of the rock, as well as any design or pattern you are going for.
- Place a piece of masking tape or painter’s tape on the rock, covering the area where you want the hole to be. Make sure the tape is securely adhered to the rock.
- Next, use a pencil or a marker to mark the center of the hole on the tape. This will serve as a guide for drilling.
- If you need multiple holes, repeat the previous steps for each hole, making sure to place the tape and mark the center accurately.
Pro tips:
- Make sure the tape is firmly pressed against the rock to prevent any shifting or movement during the drilling process.
- For more precise markings, you can use a center punch to create a small indentation on the rock’s surface at the center point.
- Take your time to ensure accurate placement of the tape and center markings. This will save you time and effort during the drilling process.
Once you have successfully marked the hole location, you can move on to the next step, which is preparing the drilling area.

Securing the Rock
Before you begin drilling, it’s important to securely fasten the rock down to prevent it from moving or rolling while you work.
Here are a few methods you can use to secure the rock:
- Clamp it down: If you have a sturdy workbench or table, you can use a clamp to hold the rock in place. Make sure the clamp is tight and secure, so the rock doesn’t slip.
- Use a vice grip: A vice grip is another option for securing the rock. Simply adjust the jaws of the vice grip to fit the size of the rock and tighten it until the rock is held firmly in place.
- Create a base: If you don’t have access to clamps or a vice grip, you can create a base for the rock using a piece of scrap wood or a thick foam pad. Place the rock on the base and press down firmly to keep it stable.
Whichever method you choose, make sure the rock is positioned in a way that allows easy access to the area you plan to drill.
| Method | Pros | Cons |
|---|---|---|
| Clamp |
|
|
| Vice Grip |
|
|
| Create a Base |
|
|
Choose the securing method that works best for your situation and ensures the rock remains stable as you drill the hole.
Drilling the Hole
Once you have selected your rock and gathered the necessary materials, you are ready to start drilling the hole.
Step 1: Safety Precautions
Before you begin drilling, it is important to take some safety precautions:
- Wear safety goggles to protect your eyes from rock fragments.
- Wear work gloves to protect your hands from sharp edges.
- Work in a well-ventilated area or use a dust mask to avoid inhaling dust particles.
Step 2: Marking the Spot
Use a marker or a piece of tape to mark the spot where you want to drill the hole. This will help you stay on target and ensure that the hole is drilled in the right spot.
Step 3: Choosing the Right Drill Bit
Choose a drill bit that is appropriate for drilling into rocks. A masonry drill bit or a diamond-tipped drill bit are commonly used for this purpose.
Note: The size and type of drill bit you need will depend on the size and hardness of the rock you are drilling into.
Step 4: Setting Up the Drill
Secure the rock in a sturdy vice or use clamps to hold it in place. Make sure the rock is stable and will not move around while you are drilling.
Step 5: Lubricating the Drill Bit
Apply a lubricant, such as water or cutting oil, to the drill bit. This will help to dissipate heat and prevent the drill bit from getting too hot.
Step 6: Starting the Drill
Hold the drill firmly and start drilling at a slow speed. Apply steady pressure and let the drill bit do the work. Do not force the drill or push too hard, as this can cause the drill bit to break.
Step 7: Drilling the Hole

Continue drilling, maintaining a slow and steady pace. Pause periodically to clear away any debris or dust that may accumulate in the hole. This will help you see your progress and prevent the drill bit from becoming clogged.
Step 8: Checking the Depth
Periodically stop drilling and check the depth of the hole. You can do this by using a depth gauge or simply by measuring the length of the drill bit that is exposed.
Step 9: Finishing Up
Once you have drilled the desired depth, stop the drill and carefully remove the rock from the vice or clamps. Clean up any debris or dust that may have accumulated.
Note: It is important to handle the rock with care, as it may be hot from drilling and the edges may be sharp.
Congratulations! You have successfully drilled a hole into a rock.
Cleaning and Finishing the Hole
After successfully drilling a hole into the rock, it is important to clean and finish the hole to ensure it is ready for use or further decoration.
Cleaning the Hole
First, use a brush or compressed air to remove any debris or dust from the hole. This will ensure that the hole is clean and free from any loose particles that could interfere with its functionality or aesthetics.
Note: Be sure to wear eye protection and a dust mask when cleaning the hole to avoid any potential injuries or inhalation of harmful particles.
Finishing the Hole
Depending on the desired outcome, you may want to finish the hole in various ways:
- Smoothing the edges: Use a metal file or sandpaper to smooth out any rough edges around the hole. This will create a more polished look and prevent any potential injuries from sharp edges.
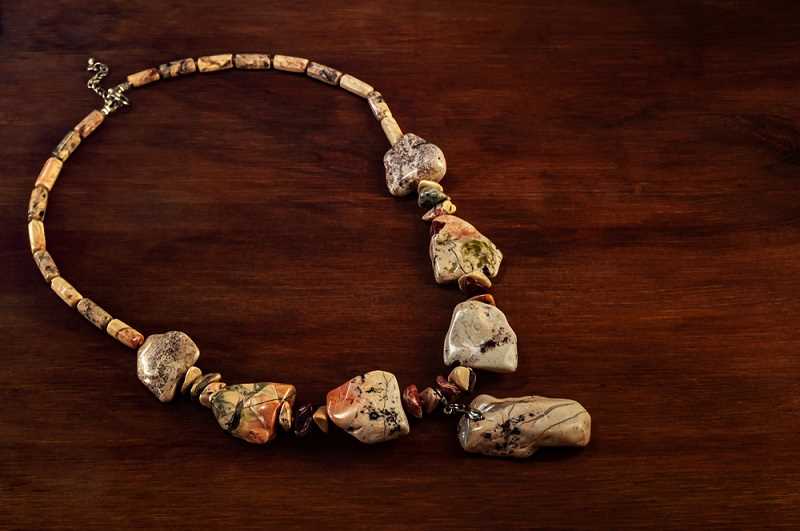
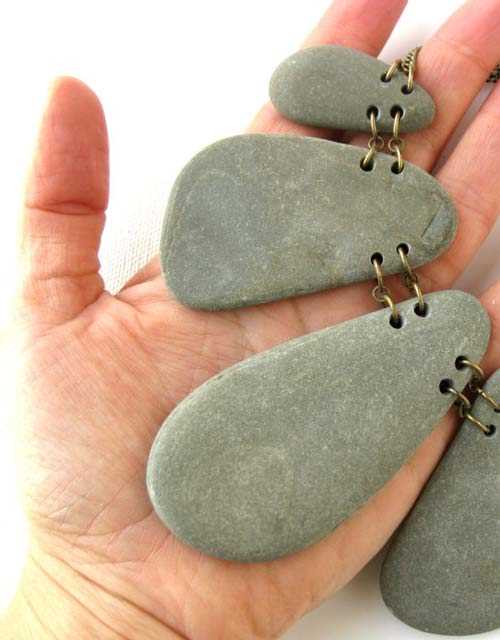
- Paint or sealant: If you plan to use the hole for decorative purposes or to prevent water or moisture from seeping in, consider painting or applying a sealant to the hole. This will protect the rock from potential damage and enhance its appearance.
- Add decorative elements: If desired, you can further enhance the hole by adding decorative elements such as gemstones, beads, or mortar. This will add a unique touch and make the hole visually appealing.
In conclusion, cleaning and finishing the hole after drilling into a rock is essential for both functionality and aesthetics. By following these steps, you can ensure that your drilled hole is clean, safe, and ready for use or decoration.
Extra Tips and Precautions
1. Choose the Right Drill Bit
When drilling a hole into a rock, it is important to select the appropriate drill bit. The type of rock you are drilling into will determine the best drill bit to use. For softer rocks, such as sandstone or limestone, a regular masonry drill bit will suffice. However, for harder rocks like granite or quartz, a carbide-tipped or diamond drill bit is recommended.
2. Wear Safety Gear
Drilling into rocks can generate flying debris and dust, so it is crucial to wear appropriate safety gear. Make sure to wear safety goggles to protect your eyes from any potential hazards. Additionally, consider wearing a dust mask to prevent inhaling any harmful particles.
3. Secure the Rock
Before you start drilling, it is important to secure the rock to prevent any movement. This can be done by using clamps or a vice grip. Ensuring that the rock is stable will make the drilling process easier and safer.
4. Start with a Pilot Hole
For better accuracy and control, start by creating a small pilot hole in the rock. Use a lower speed setting on your drill, apply gentle pressure, and gradually increase the size of the hole. This will help prevent the drill bit from slipping and ensure a clean and precise hole.
5. Use Water as Lubricant
When drilling into hard rocks, it can generate a significant amount of heat. To prevent overheating and prolong the life of your drill bit, use water as a lubricant. Apply water to the drilling area periodically or set up a small water drip system to keep the drill bit cool.
6. Take Breaks
Drilling into rocks can be a strenuous task, especially if you are working on a large project. To prevent fatigue and ensure safety, take regular breaks. This will give you time to rest and prevent any accidental injuries caused by exhaustion.
7. Work Slowly and Patiently
Drilling into rocks can be a time-consuming process, especially when working with harder materials. It is important to work slowly and patiently to avoid applying too much pressure or damaging the drill bit. Take your time and let the drill bit do the work.
8. Clean the Hole
Once you have drilled the hole, make sure to clean it thoroughly. Remove any debris or dust from the hole using a brush or compressed air. This will ensure that the hole is clean and ready for any subsequent tasks, such as inserting anchors or attaching fixtures.
9. Always Follow Safety Guidelines
Remember to always follow safety guidelines when drilling into rocks. Be cautious of sharp edges and wear appropriate safety gear. If you are unsure about any aspect of the drilling process, seek guidance from a professional or someone with experience in rock drilling.
10. Practice and Patience
Drilling into rocks can be challenging, especially if you are new to it. Practice on smaller or less valuable rocks before attempting to drill into more precious or larger rocks. With practice and patience, you will improve your technique and achieve more successful drilling results.
FAQ:
What tools do I need to drill a hole into a rock?
You will need a power drill, a diamond-tipped drill bit designed for drilling into rocks, water, a clamp or vise to hold the rock in place, and safety goggles.
How do I choose the right drill bit for drilling into a rock?
You should choose a diamond-tipped drill bit specifically designed for drilling into rocks. Make sure to check the size and compatibility with your power drill before purchasing.
Do I need to use water while drilling into a rock?
Yes, using water while drilling into a rock helps to cool down the drill bit and prevent it from overheating. It also helps to lubricate the drilling process and prolong the life of the drill bit.
Can I drill a hole into any type of rock?
You can drill a hole into most types of rocks, but some may be harder and more difficult to drill than others. Softer rocks like limestone or sandstone will be easier to drill into compared to harder rocks like granite or basalt.
What safety precautions should I take while drilling into a rock?
It is important to wear safety goggles to protect your eyes from flying rock fragments. You should also secure the rock with a clamp or vise to prevent it from moving while drilling. Make sure to use a steady and controlled drilling motion to avoid accidents or injuries.
Are there any alternative methods to drilling a hole into a rock?
Yes, if drilling is not an option or if you prefer a different method, you can consider using a rotary tool with a grinding or sanding attachment to slowly grind or sand away the desired hole in the rock. This method may be more time-consuming and require more patience, but it can be effective.
Video:


Meet Harrison Clayton, a distinguished author and home remodeling enthusiast whose expertise in the realm of renovation is second to none. With a passion for transforming houses into inviting homes, Harrison's writing at https://thehuts-eastbourne.co.uk/ brings a breath of fresh inspiration to the world of home improvement. Whether you're looking to revamp a small corner of your abode or embark on a complete home transformation, Harrison's articles provide the essential expertise and creative flair to turn your visions into reality. So, dive into the captivating world of home remodeling with Harrison Clayton and unlock the full potential of your living space with every word he writes.


