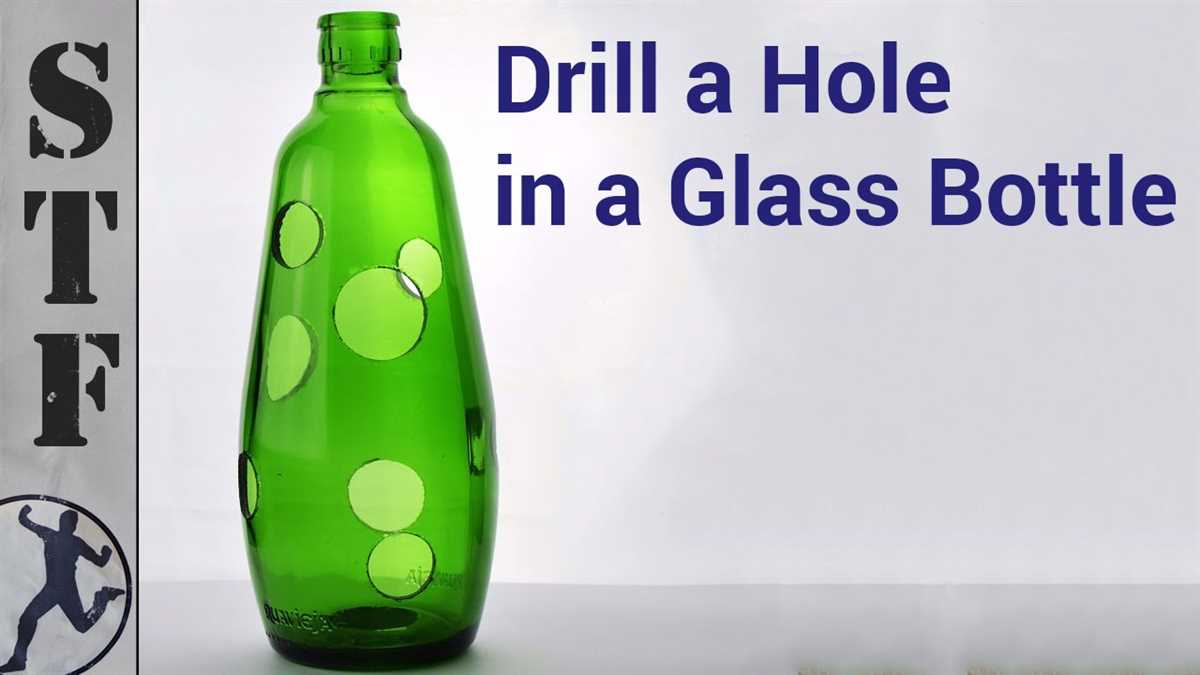
Step-by-Step Guide: How to Drill through a Glass Bottle

Drilling through a glass bottle can be a useful skill to have, whether you want to create a unique vase or turn it into a DIY lamp. While it may seem like a daunting task, with the right tools and technique, drilling through glass is actually quite manageable. In this step-by-step guide, we will walk you through the process of safely drilling through a glass bottle, so you can confidently tackle your next glass crafting project.
Step 1: Gather the necessary tools and materials.
Before you begin, make sure you have all the tools and materials you need for the project. Here’s what you’ll need:
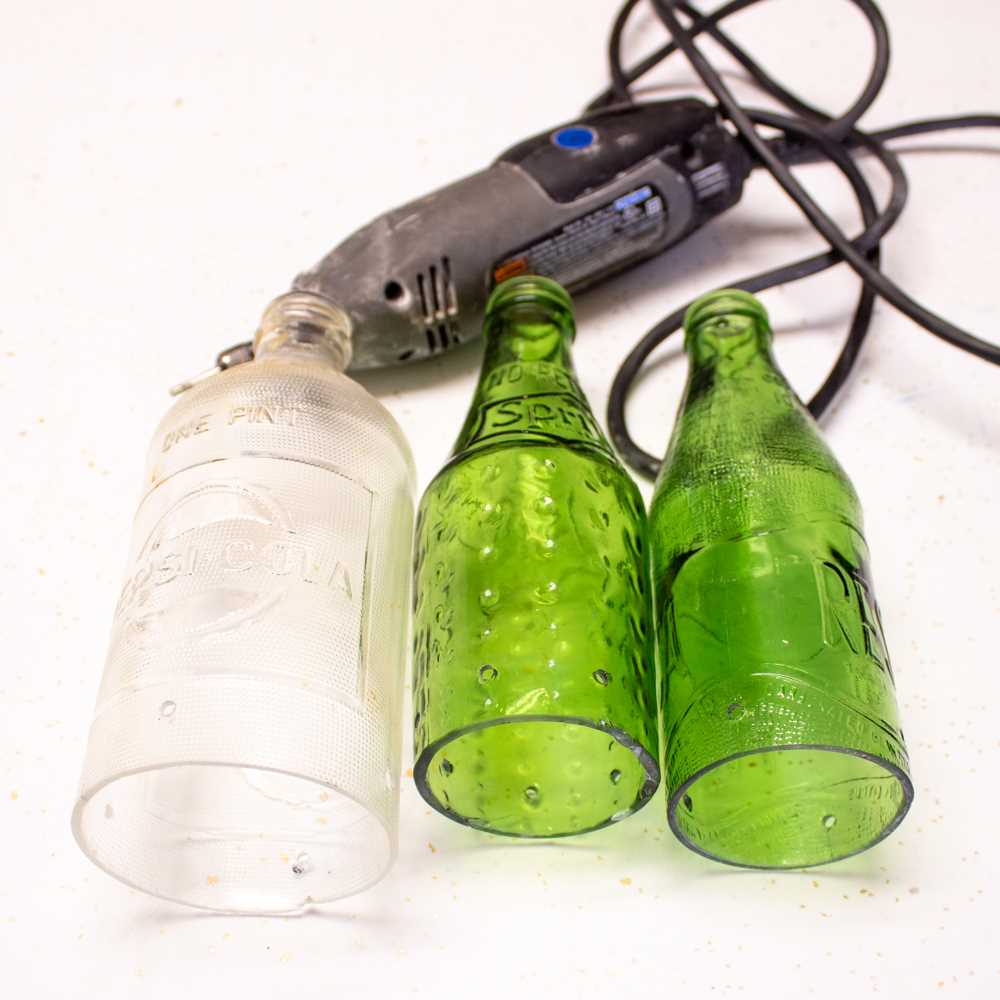
- A glass bottle
- A drill with a diamond or carbide tip
- Masking tape
- A cloth or towel
- Water
- Safety goggles
Step 2: Prepare the bottle.
Before you start drilling, it’s important to prepare the glass bottle. Begin by cleaning the bottle thoroughly and removing any labels or stickers. Then, using masking tape, mark the spot where you want to drill. This will help guide your drill and prevent it from slipping.

Step 3: Lubricate the drill bit.
Next, you’ll want to lubricate the drill bit. This will help keep it cool and prevent the glass from cracking or shattering. Dip the tip of the drill bit in water or use a spray bottle to moisten it. Make sure to keep the drill bit lubricated throughout the drilling process.
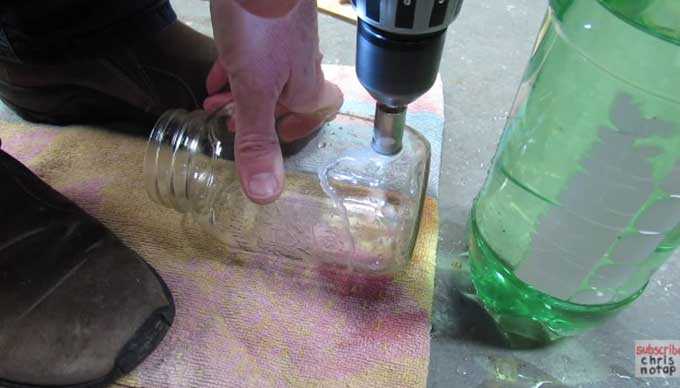
Step 4: Begin drilling.
Now it’s time to start drilling. Place the tip of the drill bit on the marked spot and apply gentle downward pressure. Start drilling at a slow speed to create a pilot hole. Once the pilot hole is created, you can increase the speed and continue drilling through the glass bottle.
Choose the Right Glass Bottle
Before drilling through a glass bottle, it is important to choose the right type of bottle. Not all bottles are suitable for drilling, so it’s important to consider the following factors:

- Thickness: Opt for a bottle with thick walls. Thin bottles are more prone to cracking or breaking during the drilling process.
- Material: Choose bottles made of borosilicate glass or tempered glass, as they are more durable and resistant to heat. Avoid bottles made of soda-lime glass, as they are more brittle.
- Shape: Bottles with a flat bottom are easier to drill through than those with curved or uneven bottoms. It is also important to consider the shape of the neck, as it may affect the stability of the bottle during drilling.
- Size: Consider the size of the bottle and ensure that it fits securely in your drill press or jig. Large and heavy bottles may require extra support or specialized equipment.
Take your time to assess the bottle and ensure that it meets these criteria before proceeding with the drilling process. Choosing the right glass bottle will significantly increase your chances of success and minimize the risk of accidents.
Gather the Necessary Tools
1. Glass Bottle
A glass bottle is the main material you will be working with in this project. Choose a bottle that has a smooth surface and is not too thick. It’s important to take extra caution when drilling into glass, so it’s recommended to start with a smaller, simpler bottle for your first attempt.
2. Diamond Drill Bit
A diamond drill bit is specifically designed to cut through glass without cracking or shattering it. It’s essential to use a diamond drill bit for this project to ensure clean and precise holes. Make sure to choose a drill bit size that matches the diameter of the hole you want to create.

3. Electric Drill
An electric drill is necessary to create the holes in the glass bottle. Make sure you have a drill that is compatible with your diamond drill bit and has variable speed settings. This will allow you to control the drilling speed and prevent the glass from overheating.
4. Masking Tape
Masking tape will help protect the glass surface and prevent the drill bit from slipping. Apply strips of masking tape over the area where you plan to drill to create a guide and reduce the risk of cracking the glass.
5. Safety Goggles
Safety goggles are crucial to protect your eyes from any flying glass shards or debris. Always wear safety goggles when working with glass to prevent any accidents or injuries.
6. Water Source
Water acts as a coolant while drilling into glass, preventing it from overheating and cracking. Use either a bowl of water or a spray bottle to keep the drill bit and glass bottle moist throughout the drilling process.

7. Duct Tape or Putty
Duct tape or putty can be used as a cushioning material to create a stable and secure base for the glass bottle. This will prevent it from slipping or rolling while you drill and ensure accurate hole placement.
8. Workbench or Clamps
A sturdy workbench or clamps are essential for securing the glass bottle in place while drilling. This will provide stability and reduce the risk of accidents or uneven drilling.
9. Lubricant or Cutting Oil (optional)
Lubricant or cutting oil can be used to further reduce heat and friction while drilling into the glass. This can help prolong the life of your drill bit and enhance the drilling process. However, it is not necessary for every project.
10. Sandpaper (optional)
After drilling the hole, you may want to smooth the edges using sandpaper. This will prevent any rough or sharp edges that may be present after drilling. Choose a fine-grit sandpaper and gently sand the edges until they are smooth to the touch.
Prepare the Glass Bottle
The first step in drilling through a glass bottle is to properly prepare the bottle to minimize the chance of cracking or breaking. Follow these steps:

- Choose the right bottle: Select a glass bottle that is suitable for drilling. It should have a smooth surface and be free of any cracks or imperfections. Avoid bottles with narrow necks or uneven surfaces, as they may be more difficult to work with.
- Wear safety goggles and gloves: Before you begin, it’s important to protect yourself by wearing safety goggles and gloves. This will minimize the risk of injury in case the bottle breaks during the drilling process.
- Mark the drilling spot: Determine where you want to drill the hole on the glass bottle. Use a permanent marker or masking tape to mark the exact spot. Take measurements if necessary to ensure precision.
- Secure the bottle: Place the glass bottle in a stable position to prevent it from rolling or moving during drilling. You can choose to use a vise, clamp, or a rubber surface to hold the bottle in place. Make sure it is secure and won’t slip.
- Use a lubricant: Apply a small amount of lubricant to the area where you will be drilling. This will help to reduce heat and friction during the drilling process and prevent the glass from cracking.
By following these steps, you will effectively prepare the glass bottle for drilling and minimize the risk of cracking or breaking. Once you have completed these preparations, you can move on to the next step of drilling through the glass bottle.
Mark the Drilling Point
Before you start drilling into the glass bottle, it’s important to mark the drilling point to ensure accuracy and precision. Here are the steps to mark the drilling point:
- Clean the glass bottle: Use soap and water or a glass cleaner to thoroughly clean the surface of the bottle where you plan to drill. This will remove any dirt, dust, or oils that could interfere with the drilling process.
- Choose the drilling spot: Decide where you want to drill the hole on the bottle. Depending on your project, you may want to drill near the bottom or in the middle of the bottle. Avoid the bottle’s curved areas or seams, as these are more prone to cracking.
- Measure and mark the spot: Take a measuring tape or ruler and measure the desired distance from the bottom or top of the bottle. Use a marker or a piece of adhesive tape to mark the exact spot where you want to drill the hole. Ensure the mark is clearly visible and won’t rub off easily.
- Double-check the mark: Step back and examine the marked spot on the bottle to make sure it is in the correct position and aligns with your project’s requirements. This extra step will help avoid any drilling mishaps or inaccuracies.
Once you have marked the drilling point, you are ready to proceed with the next steps of drilling through the glass bottle.
Secure the Glass Bottle
Before you start drilling, it’s important to secure the glass bottle to prevent it from slipping or rolling while you work. Here are some methods you can use to secure the bottle:
1. Non-slip surface
Place a non-slip surface, such as a rubber mat or a towel, on your work area. This will help hold the glass bottle in place and prevent it from sliding or turning.

2. Vice or clamp
If you have access to a vice or a clamp, you can use it to firmly hold the glass bottle in place. Make sure to position the clamp or vice so that it doesn’t put pressure on the glass bottle itself, as this can cause it to crack or break.
3. Bottle holder
If you don’t have a vice or a clamp, you can use a specialized bottle holder or bottle jaws. These tools are specifically designed to hold glass bottles securely, allowing you to work on them without worrying about them moving or rolling.
4. Sandbag
If you’re drilling the glass bottle on a flat surface, you can place a sandbag on either side of the bottle to anchor it in place. The sandbag provides stability and prevents the bottle from moving while you drill.
Remember to always take precautions and wear safety goggles and gloves while working with glass bottles to protect yourself from possible injury.
Start Drilling
Once you have gathered all the necessary materials and have prepared the glass bottle for drilling, you can begin the drilling process. Here are the steps to start drilling:

Step 1: Wear Protective Gear
Before you start drilling, make sure to put on your safety goggles and gloves. This will protect your eyes from any flying glass shards and your hands from heat and sharp edges.
Step 2: Choose the Right Drill Bit
Using a diamond-tipped drill bit is recommended for drilling through glass bottles. This type of drill bit is specifically designed to cut through glass without shattering it.
Step 3: Apply Lubrication
Apply a small amount of lubrication, such as water or oil, to the area where you will be drilling. This will help keep the drill bit cool and prevent the glass from cracking or breaking.
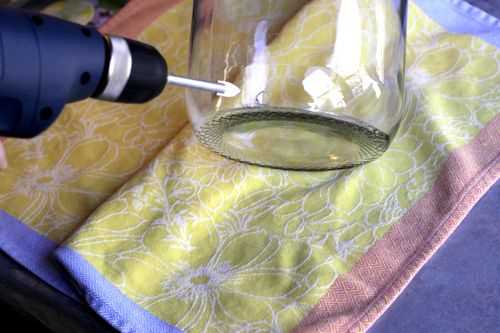
Step 4: Position the Drill
Hold the drill perpendicular to the glass bottle. Make sure to maintain a steady grip on the drill and apply even pressure as you start drilling.
Step 5: Start Drilling
Slowly start the drill at a low speed to create a small indentation in the glass. This will prevent the drill bit from slipping. Once you feel the drill bit has gripped the glass, you can increase the speed and begin drilling more forcefully.
Step 6: Work in Stages
It is important to work in stages when drilling through glass. Apply moderate pressure and drill for a few seconds, then stop to let the glass and drill bit cool down. Repeat this process until you have drilled all the way through the glass bottle.
Step 7: Clean up the Glass Dust
Once you have finished drilling, use a damp cloth or sponge to wipe away any glass dust or debris from the drilled hole. This will ensure a clean finish and prevent any potential injuries.
Following these steps will help you safely and effectively drill through a glass bottle. Remember to take your time and exercise caution throughout the process.
Monitor the Drilling Process
When drilling through a glass bottle, it’s important to monitor the process to ensure safety and accuracy. Here are some steps to follow:
Step 1: Wear Protective Gear
Before you start drilling, make sure to wear appropriate protective gear such as safety glasses and gloves. This will help protect your eyes and hands from any flying glass shards or debris.
Step 2: Position the Bottle
Place the glass bottle securely on a sturdy surface, such as a workbench or table. Make sure the bottle is stable and won’t topple over during the drilling process. You can also use clamps to secure the bottle in place.
Step 3: Start Drilling
Using a drill with a diamond bit, slowly begin drilling into the bottle. Apply gentle, consistent pressure to avoid cracking or shattering the glass. It’s recommended to use a low to medium speed setting on your drill to prevent overheating and potential damage to the glass.
Step 4: Cool the Bit
Periodically pause the drilling process to cool the diamond bit. This can be done by dipping the bit into a container filled with water or using a lubricant specifically designed for glass drilling. Cooling the bit will help prevent it from becoming too hot and potentially damaging the glass.
Step 5: Wipe Away Debris
As you drill, glass debris and water or lubricant may accumulate on the surface of the bottle. Wipe away this debris using a damp cloth or sponge. This will help you maintain a clear view of the drilling area and prevent the accumulation of excess debris.
Step 6: Check for Progress
Periodically check your progress by removing the bottle from the drill and inspecting the hole. This will allow you to assess the depth and quality of the hole, as well as make any necessary adjustments in your drilling technique if needed.
By following these steps and monitoring the drilling process, you can successfully drill through a glass bottle while ensuring safety and accuracy.
Clean and Finish the Drilled Glass Bottle
After successfully drilling a hole in your glass bottle, it is important to clean and finish it properly to ensure its safe and attractive usage. Follow these steps to clean and finish your drilled glass bottle:
1. Remove any glass shavings
Using a soft brush or cloth, gently remove any glass shavings or debris from both the inside and outside of the drilled hole. Be careful not to scratch or damage the bottle while doing so.
2. Rinse with warm soapy water
Fill a sink or basin with warm water and add a small amount of mild dish soap. Place the bottle in the soapy water and gently swirl it around for a few minutes to clean the entire surface. Rinse the bottle thoroughly with clean water to remove any soap residue.
3. Dry the bottle
Use a clean, lint-free cloth to dry the bottle completely. Ensure that both the inside and outside of the bottle are dry before proceeding to the next step.
4. Sand the edges
Take a fine-grit sandpaper and gently sand the edges of the drilled hole. This will help smooth out any sharp edges or rough spots, making it safer to handle the bottle. Be sure to sand in a circular motion, applying light pressure.
5. Apply a finishing touch
If desired, you can apply a finishing touch to the drilled hole to make it more polished and visually appealing. You can use a glass drill bit to widen the hole slightly and create a beveled edge. Alternatively, you can use a decorative glass gem or a rubber grommet to cover the rough edges and add a decorative element.
6. Clean and maintain regularly
To keep your drilled glass bottle looking its best, clean it regularly using mild soap and water. Avoid using harsh chemicals or abrasive materials that can damage the glass. Additionally, handle the bottle with care to prevent any accidental breakage or damage.
By following these steps, you can clean and finish your drilled glass bottle to make it safe, attractive, and ready for use in various crafts or home decor projects.
FAQ:
What tools do I need to drill through a glass bottle?
To drill through a glass bottle, you will need a glass drill bit, a power drill, a lubricant (such as water or oil), masking tape, and safety goggles.
Can I use any type of drill bit to drill through glass?
No, you cannot use just any type of drill bit to drill through glass. You need to use a specific glass drill bit that has a carbide or diamond tip.
How do I choose the right size drill bit for my glass bottle?
The right size drill bit for your glass bottle will depend on the size of the hole you want to create. Measure the diameter of the object you want to insert into the hole, and choose a drill bit that is slightly larger than that.
Do I need to use a lubricant when drilling through a glass bottle?
Yes, it is important to use a lubricant when drilling through a glass bottle. This will help to keep the drill bit cool and prevent the glass from cracking or shattering.
What is the correct drilling technique for drilling through a glass bottle?
The correct drilling technique for drilling through a glass bottle is to start at a low speed and gradually increase the speed as you go. Apply steady but gentle pressure, and keep the drill bit lubricated with water or oil. Drill at a slight angle to create a smooth hole.
How do I prevent the glass bottle from cracking while drilling?
To prevent the glass bottle from cracking while drilling, you can apply masking tape or duct tape over the area where you plan to drill. This will help to stabilize the glass and reduce the risk of cracking.
Is it possible to drill through a glass bottle without breaking it?
While it is possible to drill through a glass bottle without breaking it, there is always a risk of the glass cracking or shattering. It is important to use the correct technique, the right drill bit, and to take safety precautions such as wearing goggles.
Video:


Meet Harrison Clayton, a distinguished author and home remodeling enthusiast whose expertise in the realm of renovation is second to none. With a passion for transforming houses into inviting homes, Harrison's writing at https://thehuts-eastbourne.co.uk/ brings a breath of fresh inspiration to the world of home improvement. Whether you're looking to revamp a small corner of your abode or embark on a complete home transformation, Harrison's articles provide the essential expertise and creative flair to turn your visions into reality. So, dive into the captivating world of home remodeling with Harrison Clayton and unlock the full potential of your living space with every word he writes.


