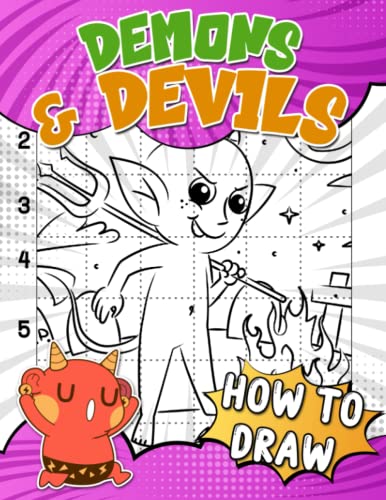
How to draw a devil
If you want to learn how to draw a devil, you’ve come to the right place. Drawing a devil can be a fun and creative way to explore your artistic side. Whether you’re a beginner or an experienced artist, this step-by-step guide will help you create a devil that is both intimidating and captivating.
Before we get started, it’s important to understand that drawing a devil requires an understanding of basic shapes and proportions. By breaking down the figure into simple shapes, you’ll be able to create a solid foundation for your devil drawing.
To begin, start by sketching the head of the devil using an oval shape. Next, add two intersecting lines to guide the positioning of the facial features. The vertical line should run down the center of the face, while the horizontal line will help you position the eyes and nose. Keep in mind that devils are often depicted with sharp, angular features, so try to incorporate these details into your sketch.
Once you’re satisfied with the placement of the facial features, you can begin to add more details to the head. Start by drawing the eyes, which are typically narrow and slanted. Next, add the eyebrows to give the devil a more menacing expression. Don’t forget to include a pair of sharp, curved horns on top of the head. These horns are a signature feature of a devil that will give your drawing an unmistakable look.
Step-by-Step Guide on Drawing a Devil
Are you ready to learn how to draw a devil? Follow these simple steps to create your own spooky masterpiece!

Materials You Will Need:
- Pencil
- Eraser
- Drawing paper
Step 1: Basic Shape
Start by drawing a circle in the center of your paper. This will be the devil’s head. Then, draw a curved line across the bottom of the circle to create the jawline.
Step 2: Facial Features
Add the devil’s facial features. Draw two small, oval-shaped eyes above the jawline. Then, draw a curved line for the devil’s smile, making sure to add sharp, pointed teeth.
Step 3: Horns
Next, draw two curved horns on top of the devil’s head. These horns should start from the sides of the head and curve upwards.
Step 4: Body
Now, draw the devil’s body. Start by drawing two lines extending downwards from the head to create the neck. Then, draw a curved line for the devil’s back. Add two arms on either side of the body, and two small legs at the bottom.
Step 5: Details
Once you have the basic outline, add more details and definition to your devil drawing. You can add muscles to the body, texture to the skin, and more details to the facial features.

Step 6: Final Touches
Finally, go over your drawing with a pen or marker, and erase any unnecessary lines. Add shading or color to bring your devil to life!
Congratulations! You have successfully drawn a devil. Keep practicing and experimenting with different styles to improve your drawing skills. Have fun!
Materials Needed:
To draw a devil, you will need:
- A pencil: A basic tool for sketching and outlining the devil’s features.
- Eraser: To easily correct any mistakes or make adjustments to your drawing.
- Paper: Choose a blank sheet of paper that suits your preferences or use a drawing pad.
- Ink pens: Optional, but can be used for outlining and adding details once you are satisfied with your pencil sketch.
- Colored pencils or markers: These are ideal for adding color and bringing your devil drawing to life. Feel free to choose colors that suit your devil’s style and personality.
- Inspiration: Look for reference images or sketches to help you create your devil masterpiece.
Note: These materials are simply suggestions, and you can use any art supplies you feel comfortable with. The most important thing is to unleash your creative energy and have fun while drawing!
Drawing Steps:
Follow these step-by-step instructions to draw a devil:
| Step 1: | Start by drawing a circle for the devil’s head. |
| Step 2: | Add two small horns on top of the circle. |
| Step 3: | Draw two curved lines below the circle for the devil’s body. |
| Step 4: | Sketch two arms on either side of the body using curved lines. |
| Step 5: | Add a tail at the back of the body using a long, curved line. |
| Step 6: | Draw two legs at the bottom of the body using curved lines. |
| Step 7: | Give the devil a mischievous smile by adding a curved line for the mouth. |
| Step 8: | Add two small dots for the devil’s eyes. |
| Step 9: | Use jagged lines to draw flames around the devil’s head and body. |
| Step 10: | Finish by adding details like muscles and additional horns to make the devil look more menacing. |


Harrison Clayton
Meet Harrison Clayton, a distinguished author and home remodeling enthusiast whose expertise in the realm of renovation is second to none. With a passion for transforming houses into inviting homes, Harrison's writing at https://thehuts-eastbourne.co.uk/ brings a breath of fresh inspiration to the world of home improvement. Whether you're looking to revamp a small corner of your abode or embark on a complete home transformation, Harrison's articles provide the essential expertise and creative flair to turn your visions into reality. So, dive into the captivating world of home remodeling with Harrison Clayton and unlock the full potential of your living space with every word he writes.


