How to fit loft ladders

If you have a loft space in your home that you would like to make more accessible, fitting a loft ladder can be a great solution. Loft ladders are designed to fold away neatly when not in use and provide a safe and easy way to access your loft. Whether you need to use your loft for storage or as an additional living space, fitting a loft ladder can make it much more convenient to reach.
Before you start, it is important to choose the right type of loft ladder for your specific needs. There are many different options available, such as sliding loft ladders, folding loft ladders, and telescopic loft ladders. Consider factors like the frequency of use, available space, and your budget when making your decision.
Once you have chosen a suitable loft ladder, the next step is to measure the height and width of your loft opening. This will ensure that you can select a ladder that is the right size and can be installed properly. Make sure to take accurate measurements and consider any potential obstructions in the loft space that may affect the ladder installation.
Choosing the Right Loft Ladder for Your Space
When it comes to selecting a loft ladder for your space, it is important to consider various factors to ensure you make the right choice. Here are some key considerations to keep in mind:
- Space limitations: Measure the available space in your loft area to determine the maximum dimensions your ladder can be. This will help you choose a ladder that fits perfectly.
- Weight capacity: Consider the weight capacity of the ladder to ensure it can safely support the weight of yourself, tools, or any other items you may need to carry when climbing up and down.
- Installation: Take into account how easy or difficult it will be to install the ladder. Some ladders require professional installation, while others come with easy-to-follow instructions that allow for DIY installation.
- Accessibility: Think about who will be using the ladder most frequently. If it will be used by children or older adults, you may want to select a ladder with handrails or non-slip treads for added safety.
- Material: Decide between different materials such as aluminum, wood, or steel. Each material has its own benefits and drawbacks in terms of durability and weight.
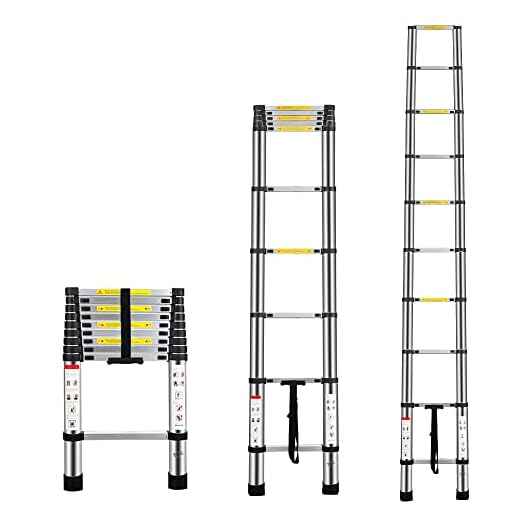
- Type of ladder: Consider different types of loft ladders, such as folding, sliding, or telescopic ladders. Each type has its own advantages, so choose the one that best suits your needs and space constraints.
By taking these factors into consideration, you can choose the right loft ladder that matches your requirements and ensures safe and convenient access to your loft space.

Measuring and Preparing the Area for Installation
Before installing a loft ladder, it is important to carefully measure and prepare the area to ensure a proper fit and safe installation. Follow the steps below to properly prepare the area:
- Clear the surrounding area: Remove any items or debris that may obstruct the installation area, ensuring there is sufficient space to work comfortably.
- Measure the distance: Measure the vertical distance from the floor to the ceiling in the desired location for the ladder. This will determine the length of the ladder required. Additionally, measure the horizontal distance available to ensure there is enough room for the ladder to fully extend and fit properly.
- Check for obstructions: Take note of any obstacles such as electrical wiring, plumbing pipes, or structural beams that may interfere with the ladder installation. Ensure there is enough clearance around the area for safe operation.
- Choose the right ladder: Based on the measurements and space available, select a loft ladder that fits within the measurements and meets your specific needs. Consider factors such as weight capacity and ease of use.
- Prepare the access point: If necessary, create an access point to the loft by cutting an opening in the ceiling. Use caution and follow appropriate safety guidelines when dealing with power tools or cutting through surfaces.
- Inspect the ceiling structure: Before installing the ladder, inspect the strength and structure of the ceiling. Ensure it can support the weight of the ladder and any individuals using it.
- Gather necessary tools: Prepare the tools needed for installation, such as a ladder, measuring tape, drill, screws, and a level. Having everything on hand will help streamline the installation process.
By measuring and preparing the area before installation, you can ensure a proper fit and seamless installation of your loft ladder.
Preparing Yourself and Your Tools for the Task
Before installing a loft ladder, it is important to make sure you have all the necessary tools and equipment. This will ensure that you are prepared and able to complete the task efficiently. Here are some tools you will need:
Tools Required
1. Measuring tape
2. Drill

3. Screwdriver
4. Saw
5. Hammer
6. Safety goggles
7. Work gloves

8. Step ladder
Safety First
It is also essential to prioritize safety and take the necessary precautions before starting the task. Follow these guidelines to ensure your safety:
- Wear appropriate clothing and footwear.
- Take precautions to protect yourself from dust and debris by wearing safety goggles and a mask.
- Clear the area around the loft entrance to ensure a safe and clutter-free workspace.
- Make sure the step ladder is sturdy and on a stable surface before climbing it.
By preparing yourself and gathering the necessary tools, you can approach the task with confidence and complete your loft ladder installation successfully.
Installing the Loft Ladder with Step-by-Step Instructions
Installing a loft ladder is a great way to gain easy access to your loft space and make it more usable. With the following step-by-step instructions, you’ll learn how to install a loft ladder safely and efficiently.
Step 1: Measure and Prepare
The first step is to measure the height between the floor and the loft opening. This will help you choose a loft ladder that fits your space. Next, clear the area around the loft opening and remove any obstructions that may get in the way.

Step 2: Position the Ladder
Place the loft ladder in the best position that allows easy access to the loft space. Make sure it is aligned parallel to the floor and centered with the loft opening.
Pro Tip: It’s a good idea to mark the positions of the fixing brackets on the wall to ensure accuracy during installation.
Step 3: Secure the Ladder
Using screws and a drill, secure the fixing brackets to the wall. Make sure the ladder is stable and securely attached to the wall. Double-check for any wobbling or instability before proceeding.
Step 4: Test and Adjust
Test the ladder before fully committing to the installation. Extend and retract it a few times to ensure smooth movement. Adjust the ladder if necessary to ensure it’s level and securely attached.
Pro Tip: Apply a lubricant to the moving parts of the ladder to prevent squeaking or difficulty in extending.
Step 5: Verify Safety Measures
Check that the ladder has suitable safety features, such as non-slip steps and a sturdy handrail. Ensure they are properly installed and functioning correctly to guarantee safe use.
Note: Consider installing a loft hatch cover to improve insulation and energy efficiency in your home.
By following these step-by-step instructions, you’ll have your loft ladder installed and ready for use in no time.
Ensuring Safety and Stability in Your Loft
When fitting loft ladders in your home, it is crucial to prioritize safety and stability to prevent accidents or injuries. Here are some essential tips to ensure that your loft ladder installation is secure:
- Choose a suitable ladder: Select a loft ladder that is appropriate for the height and length of your loft access point. Consider factors like weight capacity, materials used, and ease of use to ensure maximum safety.
- Measure accurately: Take precise measurements of the space where you plan to install the ladder. This will ensure a proper fit and also help identify any structural limitations that may need to be addressed or modified.
- Secure the ladder: Use fixings and brackets that are specifically designed for loft ladders to securely attach them in place. Follow the manufacturer’s instructions carefully and consider seeking professional assistance if needed.
- Check the floor: Verify the condition and strength of the floor area in your loft to support the ladder. Reinforce weak spots or seek expert advice if necessary.
- Maintain clear access: Ensure that the area surrounding the ladder is free from clutter and obstruction. This will allow for safe and easy access to the loft without the risk of tripping or falling.
- Install handrails: Adding handrails to your loft ladder can provide extra stability and support. They can make the ascension and descent safer, especially for individuals with reduced mobility or balance.
- Regular maintenance: Periodically inspect and maintain your loft ladder to make sure it remains secure and in good working condition. Lubricate moving parts, tighten any loose screws or bolts, and replace any worn-out or damaged components.
By following these precautions, you can promote a secure environment and minimize the risk of accidents associated with loft ladder usage. Remember to seek professional advice or services if you are uncertain about any aspect of the installation process to ensure the utmost safety.

Maintaining and Cleaning Your Loft Ladder
Maintaining and cleaning your loft ladder is an important aspect of keeping it safe and functional. Regular maintenance can help prevent accidents and extend the lifespan of your ladder.
Here are some steps to follow when maintaining and cleaning your loft ladder:
- Inspect the ladder for any visible damage or signs of wear and tear. Check for loose or broken parts, such as hinges, bolts, or screws.
- Tighten any loose screws or bolts, and replace any damaged or missing parts. A sturdy ladder is crucial for safety.
- Clean the ladder regularly to remove dust, dirt, and debris. Use a soft cloth or sponge and mild soap, and avoid using abrasive materials or harsh chemicals that may damage the ladder’s finish.
- Pay extra attention to the hinges and moving parts. Lubricate them with a silicone spray or a similar lubricant to ensure smooth operation.
- Check the ladder’s stability and ensure it is properly aligned with the loft opening. If necessary, adjust the ladder’s positioning or contact a professional for assistance.
- Do not overload the ladder with heavy items, as this can cause strain or damage. Follow the weight limit specified by the ladder’s manufacturer.
- Regularly test the ladder’s opening and closing mechanisms to make sure they are functioning correctly and smoothly.
- If you notice any issues or concerns during the maintenance process, consult the ladder’s manual or contact the manufacturer for guidance. It is always better to be safe than sorry.
By following these steps and taking proper care of your loft ladder, you can ensure its longevity and use it safely for years to come.


Meet Harrison Clayton, a distinguished author and home remodeling enthusiast whose expertise in the realm of renovation is second to none. With a passion for transforming houses into inviting homes, Harrison's writing at https://thehuts-eastbourne.co.uk/ brings a breath of fresh inspiration to the world of home improvement. Whether you're looking to revamp a small corner of your abode or embark on a complete home transformation, Harrison's articles provide the essential expertise and creative flair to turn your visions into reality. So, dive into the captivating world of home remodeling with Harrison Clayton and unlock the full potential of your living space with every word he writes.


