How to joint wood without a jointer
Woodworkers often rely on jointers to create flat and smooth edges on boards. However, not everyone has access to a jointer or wants to invest in one. Fortunately, there are alternative methods that can help you achieve similar results without a jointer.
1. Hand Planing: Hand planing is one of the oldest and most traditional methods of jointing wood. It involves using a hand plane to shave thin layers of wood off the board until it is flat and smooth. This method requires some skill and patience, but with practice, you can achieve precise results.
2. Router Jig: Another option is to use a router jig. A router jig is a simple tool that guides the router over the edge of the board, allowing you to create a flat and smooth joint. This method is relatively easy to use and can produce excellent results, especially when combined with careful hand planing.
3. Table Saw: If you have a table saw, you can also use it to joint wood. By adjusting the fence and making multiple passes, you can gradually remove material until the edge is straight and smooth. Be sure to use a featherboard or push stick to ensure safe and accurate results.
4. Biscuit Joiner: A biscuit joiner can be another useful tool for jointing wood without a jointer. By cutting matching slots in the edges of the boards and inserting biscuits, you can create a strong and stable joint. This method is ideal for edge-to-edge joints or joining boards at an angle.

5. Hand Sanding: Finally, hand sanding can be used to joint wood, although it may be more time-consuming. By investing in a sanding block and starting with coarse-grit sandpaper, you can gradually work your way to finer grits, achieving a smooth and flat edge.
While having a jointer can make the process of jointing wood easier and more efficient, these alternative methods can still produce satisfactory results. Remember to take your time, use proper safety precautions, and practice to improve your skills. With some patience and determination, you can achieve well-jointed wood without a jointer.
Ways to Joint Wood Without a Jointer
1. Hand Planer: A hand planer is a versatile tool that can be used to joint wood without a jointer. Simply use the planer to flatten the surface of the wood by shaving off thin layers until the desired smoothness is achieved.
2. Router with Jig: Another option is to use a router with a homemade jig. The jig can be made by attaching a straight edge to a piece of plywood. Place the plywood on top of the wood and use the router to follow the straight edge, creating a flat jointed surface.
3. Table Saw: If you have a table saw, you can use it to joint wood by making a rip cut along the edge of the board. This will create a straight and flat surface on one side of the wood. Flip the wood and make another rip cut to remove any remaining irregularities.

4. Hand Jointer Plane: A hand jointer plane is a specialized woodworking tool that can be used to joint wood. It has a long and wide blade that can be adjusted to remove thin layers of wood, creating a flat surface. This method requires more skill and practice than using other tools.
5. Dowel Joints: If you are joining two pieces of wood, you can use dowel joints to create a seamless joint. Drill matching holes in both pieces of wood and insert dowels to hold them together. This method not only joins the wood but also helps align and flatten the surfaces.
6. Biscuit Joints: Similar to dowel joints, biscuit joints involve creating matching slots in the wood pieces and using biscuits as a joining agent. The biscuits help align the wood pieces and create a strong joint. They can also help flatten uneven surfaces.
7. Hand Tools: Finally, traditional hand tools such as chisels and hand saws can also be used to joint wood. While this method requires more time and effort, it can achieve precise results. Use a chisel to remove any unevenness and a hand saw to straighten the edges before joining the wood.
While a jointer is a convenient tool for jointing wood, there are several alternative methods that can be used. Depending on your skills and available tools, you can choose the method that best suits your needs and achieve professional-looking results.

The Importance of a Jointer for Woodworking
A jointer is an essential tool for any woodworking project. It is used to create flat and smooth surfaces on boards or panels, ensuring precise and seamless joints. Whether you are a professional woodworker or a hobbyist, a jointer can greatly improve the quality of your work and save you time and effort.
What is a jointer?
A jointer is a woodworking machine that is designed to flatten and straighten the faces and edges of wood boards. It consists of a flat table, a rotating cutter head, and a fence. The cutter head has multiple sharp blades that remove material from the wood as it passes over the table. The fence guides the board and ensures a straight edge.
Benefits of using a jointer
Using a jointer in your woodworking projects offers several benefits:
- Flat and smooth surfaces: A jointer helps to create flat and smooth surfaces on boards, eliminating any imperfections or deformations. This ensures that the wood pieces fit together seamlessly and creates a professional finish.
- Straight edges: The fence of a jointer helps to create straight and square edges on boards. This is crucial for creating tight and accurate joints, whether it’s for joining two boards together or creating panels.
- Improved accuracy: Using a jointer can help improve the accuracy and precision of your woodworking projects. By having flat and straight surfaces to work with, you can more easily measure and mark your pieces, resulting in better fitting joints.
- Time-saving: Jointing boards by hand can be a time-consuming and labor-intensive process. A jointer speeds up this process by quickly and efficiently removing material from the wood, saving you time and effort.
Alternative methods
If you don’t have access to a jointer, there are alternative methods for achieving similar results:
- Hand planes: Hand planes can be used to flatten and straighten wood surfaces, although it requires more manual effort and skill. They are a good option if you only have a small project or a limited budget.
- Routers: Routers can be used with a straight bit and a straight edge guide to achieve straight and even edges on wood. However, they may not be as effective in flattening large surfaces.
- Jointer jigs: You can also create or purchase jointer jigs that can be used with a table saw or a router to achieve jointer-like results. These jigs provide a guide and support for the wood, ensuring straight and flat edges.
While these alternative methods can be effective, they may not give you the same level of precision and efficiency as a dedicated jointer.
In conclusion, a jointer is a valuable tool for any woodworker, providing flat, smooth, and straight surfaces for seamless joints. It saves time and effort and improves the accuracy of your woodworking projects. If you don’t have access to a jointer, there are alternative methods available, but they may not offer the same level of results. Investing in a jointer will greatly enhance your woodworking capabilities and help you achieve professional-quality results.
Using a Hand Plane for Jointing
If you don’t have access to a jointer, you can still achieve flat, smooth edges on your woodworking projects by using a hand plane. While it does require a bit more practice and skill, hand plane jointing can be a cost-effective way to get the job done.
Here are the steps to jointing wood using a hand plane:
- Prepare the wood: Start by selecting the boards you want to joint. Make sure they are straight and flat on at least one face.
- Mark the edges: Use a pencil or marking knife to mark the areas that need to be jointed. This will help you focus on the specific areas that need work.
- Set up the hand plane: Adjust the plane blade and the frog to ensure they are parallel. Set the blade to take a thin shaving to avoid removing too much material at once.
- Secure the wood: Clamp the board firmly to a workbench or use a bench vise to hold it securely. This will prevent slipping and minimize the chance of injuries.
- Start planing: Position the hand plane at the beginning of the wood and apply even pressure as you push it forward. Concentrate on the marked areas and remove thin shavings until the surface is flat and smooth.
- Check for flatness: Regularly check the jointed edge by placing a straightedge or a square along the length of the board. Adjust your planing technique as needed to achieve a perfectly straight edge.
- Repeat the process: Once you have jointed one edge, remove the clamps and flip the board. Repeat the same steps to joint the opposite edge.
- Finish the jointed boards: After both edges are jointed, use sandpaper or a hand file to remove any remaining imperfections and create a clean, smooth surface.
- Continue with your woodworking project: With jointed boards, you can now proceed with assembling your woodworking project, confident that the edges will fit together seamlessly.
Remember, hand plane jointing requires practice and patience. Take your time and focus on maintaining a consistent technique for the best results. With practice, you will be able to achieve flat and smooth edges on your woodworking projects without the need for a jointer.
Straightedge and Circular Saw Method
If you don’t have a jointer, you can still achieve straight edges on your wood pieces by using a straightedge and a circular saw. Here’s how:
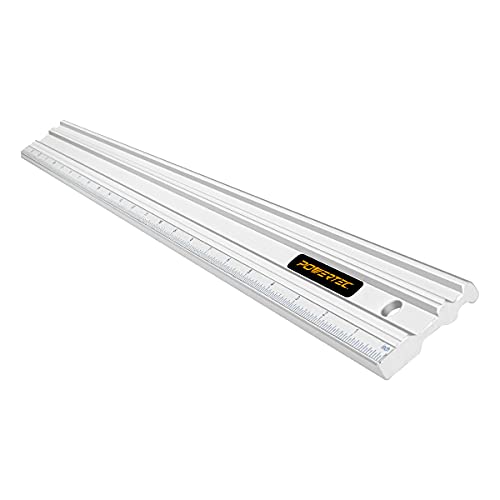
Step 1: Start by selecting a straightedge that is longer than the pieces of wood you need to joint. Ideally, the straightedge should be made of a sturdy material, such as aluminum, that will provide a reliable guide for your circular saw.
Step 2: Position the straightedge along the edge of the wood piece that needs to be jointed. Use clamps to secure the straightedge in place, ensuring it remains straight and steady throughout the cutting process.
Step 3: Next, adjust the depth and angle of your circular saw to match the thickness of the wood and the desired joint angle. It’s crucial to set the saw correctly to achieve precise and accurate cuts.
Step 4: With the straightedge securely clamped and the circular saw properly adjusted, begin making your cuts. Start at one end of the wood and slowly guide the saw along the straightedge, following the desired joint line. Apply consistent pressure and keep a steady hand to ensure a clean, straight cut.
Step 5: Repeat the process on the opposite edge of the wood piece to create a parallel, straight joint. Make sure to align the straightedge properly and double-check the saw settings before making your second cut.
Step 6: Once the cuts are complete, carefully inspect the jointed edges to ensure they are straight and properly aligned. Use sandpaper or a hand plane to remove any small imperfections or roughness, if necessary.
Note: While the straightedge and circular saw method can be effective for achieving straight edges on wood, it may not provide the same level of precision and accuracy as a jointer. It’s important to carefully measure and mark the desired joint lines before making your cuts, and to take your time to ensure straight and even cuts.
Router and Straight Bit Technique
Another method for jointing wood without a jointer is to use a router and a straight bit. This technique involves using a straight edge guide or a jointing jig to guide the router along the edge of the wood, creating a straight and flat surface.
Here is a step-by-step guide on how to use the router and straight bit technique:
- Start by gathering the necessary tools and materials, including a router, a straight bit, a straight edge guide or a jointing jig, clamps, and safety equipment such as safety glasses and ear protection.
- Secure the wood to be jointed on a work surface using clamps. Make sure it is stable and does not move during the routing process.
- Attach the straight bit to the router, making sure it is securely locked in place. Adjust the router’s depth of cut to remove only a small amount of wood with each pass.
- Position the straight edge guide or jointing jig along the edge of the wood, ensuring it is straight and parallel to the desired jointing edge.
- Place the router on the edge of the wood, against the straight edge guide or jointing jig, with the bit positioned to cut into the wood. Hold the router firmly and turn it on.
- Slowly and steadily move the router along the edge of the wood, following the straight edge guide or jointing jig. Apply light downward pressure to ensure the router cuts smoothly and evenly.
- Repeat the previous step multiple times, making multiple passes along the edge of the wood to ensure a consistent and flat jointing surface.
- Once the jointing process is complete, remove any excess wood chips or debris from the jointed edge using a brush or compressed air.
- Inspect the jointed edge to ensure it is straight, flat, and free of any imperfections. Sand the jointed edge if necessary to achieve a smooth finish.
Using a router and straight bit can be an effective way to joint wood without the use of a jointer. It requires some skill and practice, but with proper technique and attention to detail, you can achieve straight and flat jointed edges for your woodworking projects.
Using a Table Saw and a Shooting Board
If you don’t have access to a jointer, you can still achieve a flat and smooth edge on your wood using a table saw and a shooting board. A shooting board is a simple tool that helps you make precise cuts on a table saw.
To create a shooting board, you will need a piece of plywood, a straight board, and clamps. Start by cutting a piece of plywood to the desired size of your shooting board. Make sure it is wide enough to accommodate your wood pieces. Attach a straight board along one side of the plywood, using clamps or screws to hold it in place. This straight board will act as a guide for your wood pieces.
Once your shooting board is ready, place it against the fence of your table saw. The fence will act as a support for your shooting board and provide stability while making cuts. Make sure the shooting board is securely in place before proceeding.
Next, take your wood piece and mark the desired width of the joint on one side. Use a pencil or a marking gauge to make an accurate mark. Align the edge of the wood with the straight board on the shooting board and press it firmly against the fence.
Turn on the table saw and slowly push the wood through, keeping it pressed against the fence and the shooting board. The table saw blade will cut away the excess wood, leaving you with a straight and flat edge. Be sure to use a push stick or a push block to keep your hands safe during the process.
Continue making passes through the table saw until you have achieved the desired smoothness and flatness on the edge of your wood. Check the edge with a straight edge or a square to ensure it is perfectly straight and square.
Remember to make multiple passes, taking off a small amount of wood with each pass, rather than trying to remove too much material in one go. This will help you achieve a clean and accurate joint.
This method can be used for both long edges and end grain, allowing you to joint wood without a jointer. With practice and attention to detail, you can achieve professional-looking results using a table saw and a shooting board.
Using a Biscuit Joiner for Edge Jointing
If you don’t have a jointer but still want to achieve a strong and seamless edge joint, a biscuit joiner is a great alternative. A biscuit joiner is a power tool that allows you to cut matching slots in two pieces of wood, which can then be joined together using small biscuits made of compressed wood. Here’s how you can use a biscuit joiner for edge jointing:
1. Mark the Joint
Start by marking the area where you want to create the edge joint. Use a pencil and a ruler to make a straight and accurate line across the edges that need to be joined.
2. Set Up the Biscuit Joiner
Next, set up the biscuit joiner. Attach the appropriate size blade to match the size of the biscuits you will be using. Adjust the height of the blade to match the thickness of the wood.
3. Cut the Slots
With the biscuit joiner properly set up, align the tool with the marked line on the wood. Press the biscuit joiner firmly against the wood and activate the blade to cut the matching slots. Make sure to cut the slots at the same depth on both pieces of wood.
4. Insert Biscuits
Once the slots are cut, apply glue to the sides and bottom of the slots. Then, insert the biscuits into one side of the joint, making sure they are evenly spaced. Align the matching slots on the other piece of wood with the biscuits and press the two pieces together firmly.
Note: It is important to work quickly after applying the glue as it can dry fast.
5. Clamp the Joint
To ensure a strong joint, use clamps to hold the pieces together while the glue dries. Position the clamps perpendicular to the joint and apply enough pressure to ensure a tight bond. Leave the clamps in place until the glue is completely dry.
Using a biscuit joiner for edge jointing provides a simple and effective method for creating strong and durable wood joints. With the right tools and techniques, you can achieve seamless and professional-looking results without the need for a jointer.
FAQ
What is a jointer and why should I use it?
A jointer is a woodworking machine used to create a flat, smooth surface on the edge of a piece of wood. It is typically used to prepare wood for joining or creating clean, straight edges. Using a jointer ensures that your wood pieces fit together properly and creates a strong, seamless joint.
Can I joint wood without a jointer?
Yes, it is possible to joint wood without a jointer using alternative methods. While a jointer provides the most precise and efficient results, you can achieve similar results using other tools such as a table saw, router, or hand plane. These methods may require more time and effort, but they can still produce quality jointed wood.


Harrison Clayton
Meet Harrison Clayton, a distinguished author and home remodeling enthusiast whose expertise in the realm of renovation is second to none. With a passion for transforming houses into inviting homes, Harrison's writing at https://thehuts-eastbourne.co.uk/ brings a breath of fresh inspiration to the world of home improvement. Whether you're looking to revamp a small corner of your abode or embark on a complete home transformation, Harrison's articles provide the essential expertise and creative flair to turn your visions into reality. So, dive into the captivating world of home remodeling with Harrison Clayton and unlock the full potential of your living space with every word he writes.


