How to make electric glue gun at home with cardboard
Creating your own electric glue gun at home can be a fun and rewarding project. With just a few simple materials and a little bit of creativity, you can make a functional glue gun using cardboard. This DIY project is not only a great way to save money, but it also allows you to customize your glue gun to suit your specific needs.
Materials you will need:
- Cardboard
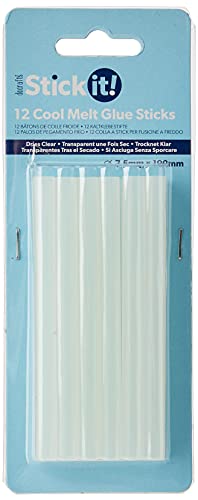
- Hot glue gun and glue sticks
- Copper wire
- Battery
- Thermoplastic adhesive
- Scissors
- Electrical tape
- Sandpaper
Before you start, make sure you have a safe and well-ventilated workspace. It’s also important to exercise caution when working with hot glue guns and to have adult supervision if necessary.
Step 1: Creating the body of the glue gun
Begin by cutting out a rectangular shape from the cardboard to serve as the body of your glue gun. This should be large enough to fit comfortably in your hand. Use sandpaper to smooth out any rough edges. Cut out a smaller rectangular piece to act as the trigger for your glue gun.
DIY Electric Glue Gun: Step-by-Step Guide
Are you tired of buying expensive glue guns for your crafting projects? Why not make your own electric glue gun at home using cardboard and a few simple materials? In this step-by-step guide, we will show you how to create your own DIY electric glue gun that is not only cost-effective but also easy to make.
Materials Needed:
- Cardboard
- Pencil
- Ruler
- Hot glue gun sticks
- Aluminum foil
- Electrical wires
- Small light bulb
- Battery holder
- On/off switch
- Battery
Step 1: Creating the Body
Start by drawing the shape of the glue gun body on the cardboard using a pencil and ruler. The body should consist of two flat pieces connected by a long, narrow strip in the middle. Cut out the cardboard pieces and the strip using scissors or a craft knife.
Step 2: Forming the Nozzle
To create the nozzle of the glue gun, roll a small piece of aluminum foil into a cone shape. Make sure the opening of the cone is narrow enough for the glue to come out smoothly.
Step 3: Assembling the Gun
Attach one end of the nozzle to the narrow strip in the middle of the cardboard body using hot glue. Make sure it is securely attached. Then, attach the battery holder and on/off switch to one of the cardboard pieces using hot glue as well.
Step 4: Wiring
Connect one end of the electrical wire to the positive terminal of the battery holder and the other end to one side of the small light bulb. Then, connect the other side of the light bulb to the positive terminal of the on/off switch. Finally, connect the negative terminal of the battery holder to the negative terminal of the on/off switch.
Step 5: Final Assembly
Attach the second cardboard piece to the body of the glue gun using hot glue. Make sure to leave enough space for the wires to pass through. Securely attach the battery to the battery holder.
Your DIY electric glue gun is now ready to use! Simply switch it on and wait for it to heat up. Once the glue is melted and ready, press the trigger to release the glue through the nozzle. Remember to exercise caution and use protective gloves while handling the hot glue.
By following this step-by-step guide, you can easily create your own electric glue gun using materials readily available at home. Enjoy your crafting projects without breaking the bank!
Materials Needed for Making Electric Glue Gun
- Cardboard
- Hot glue gun
- Wire
- Knife or scissors
- Electrical tape
- Heat resistant adhesive
- Heat resistant wire
- Power source (batteries or power adapter)
To make an electric glue gun at home with cardboard, you will need the following materials:
- Cardboard – This will serve as the base and handle of the glue gun.
- A hot glue gun – This will be disassembled to extract the heating element and trigger mechanism.
- Wire – You will need wire to connect the heating element and handle to the power source.
- A knife or scissors – These will be used to cut the cardboard and modify the hot glue gun.
- Electrical tape – This will be used to secure and insulate the wires.
- Heat resistant adhesive – This will be used to attach the heating element to the glue gun handle.
- Heat resistant wire – This wire can withstand high temperatures and will be used to connect the heating element to the power source.
- A power source – You can use batteries or a power adapter to supply the necessary electrical current to heat the glue.
Step 1: Building the Body of the Glue Gun
To make an electric glue gun at home, you will first need to gather the necessary materials. For the body of the glue gun, you will need cardboard, a ruler, scissors, a pencil, and a glue stick.
1. Measure and Cut the Cardboard
Start by measuring and cutting the cardboard into three pieces. One piece will be the main body of the glue gun, measuring approximately 20 centimeters in length and 7 centimeters in width. The other two pieces will be the handle, each measuring approximately 7 centimeters in length and 3 centimeters in width.
2. Create the Trigger Mechanism
Next, take one of the handle pieces and cut a small rectangle from the middle of one side. This will serve as the trigger mechanism for the glue gun. Make sure the width of the rectangle is slightly smaller than the width of the glue stick.
3. Attach the Handle to the Body
Using your pencil, make two marks on the larger piece of cardboard where you want the handle to be attached. Align one of the handle pieces with the marks and use glue or adhesive tape to secure it in place. Repeat this step for the other handle piece.
4. Insert the Glue Stick
Now it’s time to insert the glue stick into the body of the glue gun. Take the main body piece and cut a small hole near one end, slightly larger than the diameter of the glue stick. Insert the glue stick into the hole, making sure it is securely in place.
5. Test the Trigger Mechanism
Before moving on to the next steps, test the trigger mechanism by pulling the cut-out rectangle in the handle. The glue stick should move forward when the trigger is pulled and retract when it is released. Ensure that the mechanism is working smoothly and adjust if necessary.
Now that you have built the body of your homemade electric glue gun, you can move on to the next steps to complete your project.
Step 2: Wiring the Electrical Components
Once you have gathered all the materials needed to make an electric glue gun with cardboard, it’s time to start wiring the electrical components. Follow the steps below:
| 1. | Take the cardboard base and mark the position for the glue stick holder and the power switch. Use a ruler to ensure accurate measurements. |
| 2. | Using a cutter or scissors, carefully cut out the holes for the glue stick holder and the power switch. |
| 3. | Insert the glue stick holder into its designated hole. Make sure it fits securely and doesn’t wobble. |
| 4. | Next, take the power switch and insert it into its hole. Again, ensure a snug fit. |
| 5. | On the underside of the cardboard base, use a hot glue gun or strong adhesive to secure the glue stick holder and power switch in place. |
| 6. | Take the wires and connect the positive terminal of the power switch to the positive terminal of the heating element. Similarly, connect the negative terminal of the power switch to the negative terminal of the heating element. |
| 7. | Once the connections are made, secure them using electrical tape to prevent any accidental disconnections. |
| 8. | Finally, connect the other ends of the wires to a power source, such as a battery or a power adapter. |
Now that the electrical components are wired, you can move on to the next step of assembling the cardboard casing.
FAQ
Where can I find a heating element for the electric glue gun?
You can find a heating element for the electric glue gun at most online stores that sell electronics components. You can also try checking your local electronics store or hobby shop. Alternatively, you can salvage a heating element from an old appliance or electronics device.

Meet Harrison Clayton, a distinguished author and home remodeling enthusiast whose expertise in the realm of renovation is second to none. With a passion for transforming houses into inviting homes, Harrison's writing at https://thehuts-eastbourne.co.uk/ brings a breath of fresh inspiration to the world of home improvement. Whether you're looking to revamp a small corner of your abode or embark on a complete home transformation, Harrison's articles provide the essential expertise and creative flair to turn your visions into reality. So, dive into the captivating world of home remodeling with Harrison Clayton and unlock the full potential of your living space with every word he writes.