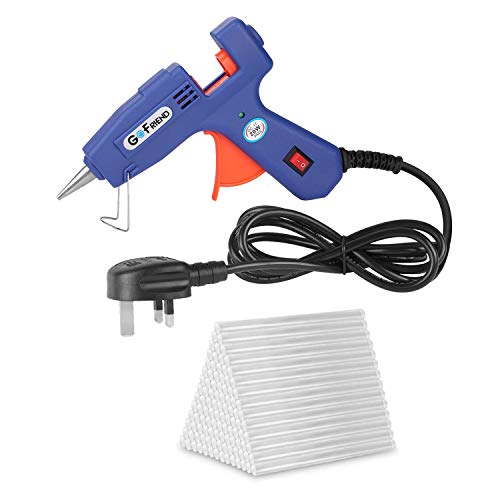
How to change hot glue gun stick

Hot glue guns are incredibly useful tools for a variety of crafts and projects. Whether you’re working on a DIY project or repairing something around the house, a glue gun can come in handy. However, one common issue that arises is the need to change the glue stick when it runs out. If you’re unfamiliar with how to do this, don’t worry! It’s a simple process that anyone can learn.
First, you’ll need to gather your supplies. Make sure you have a replacement glue stick that matches the size of your glue gun. It’s also a good idea to have a pair of pliers or tweezers on hand to help remove any remaining pieces of the old stick.
Next, you’ll want to unplug the glue gun and allow it to cool down for a few minutes. Safety is important when working with hot glue, so take your time and exercise caution. Once the gun has cooled, you can begin the process of removing the old glue stick.
Using your pliers or tweezers, gently pull on the old glue stick until it comes loose from the gun. Be careful not to force it, as this could cause damage to the gun or the stick. Once the old stick is removed, discard it and prepare to insert the new one.
Take your replacement glue stick and insert it into the back of the glue gun. Push it in until it is secure and make sure it lines up with the heating element. Once the stick is in place, you can plug in the glue gun and allow it to heat up. Within a few minutes, the new glue stick should be ready to use.

And that’s it! You’ve successfully changed the glue stick in your hot glue gun. Now you can get back to your project and continue crafting with confidence.
Why You Should Learn to Change Hot Glue Gun Stick
Hot glue guns are versatile tools that are widely used for various craft projects, DIY repairs, and other applications. Understanding how to change the glue stick in a hot glue gun is an essential skill that can save you time and frustration. Here are a few reasons why you should learn to change the hot glue gun stick:
1. Efficiency and Convenience
Knowing how to change the hot glue gun stick allows you to work efficiently and with ease. When you run out of glue, you can quickly replace it with a new stick and continue your project without any unnecessary delays. This ensures that you can complete your task smoothly and save valuable time.
2. Cost-Effective
Being able to change the hot glue gun stick means you can make the most out of the glue sticks you have on hand. Instead of throwing away a partially used glue stick, you can remove it and use a new one. This saves money in the long run by reducing waste and ensuring that you get the most out of each glue stick.
Pro Tip: To maximize the usage of your glue sticks, consider using shorter glue sticks if your project doesn’t require a full-length one.

3. Versatility
By learning to change the hot glue gun stick, you can expand your creative possibilities. Different projects may require different types of glue sticks, such as low or high-temperature sticks, colored sticks, or specialty sticks. By knowing how to change them, you can select the appropriate glue stick that best suits your project’s needs.
It’s important to note that depending on the hot glue gun you have, there may be slight variations in the process of changing the glue stick. Always refer to the manufacturer’s instructions for your specific hot glue gun model.
Overall, learning to change the hot glue gun stick is a valuable skill that enhances your efficiency, saves money, and expands your creative possibilities. Whether you’re a DIY enthusiast or a professional, this skill will come in handy during various projects and tasks. So take the time to master this simple yet essential technique and enjoy the benefits it brings!
Benefits of Learning to Change a Hot Glue Gun Stick
Learning how to change a hot glue gun stick can bring various benefits to both beginners and experienced crafters. Here are a few advantages of mastering this simple skill:
1. Convenience and Efficiency
Knowing how to change a hot glue gun stick allows you to work more conveniently and efficiently. When you run out of glue, instead of waiting for someone else to replace the stick or struggling with other adhesive options, you can quickly swap it out yourself. This helps you save time and ensures that your projects progress smoothly without any interruptions.

2. Cost Savings
Changing hot glue gun sticks on your own can save you money in the long run. Rather than buying a new glue gun every time the stick runs out, you can simply purchase additional sticks, which are usually more affordable. This not only reduces waste but also enables you to invest more in high-quality glue sticks that can last longer and provide better adhesion.
3. Versatility
Being able to change hot glue gun sticks opens up a world of possibilities in your crafting endeavors. Different projects may require different types or colors of glue, and by being able to switch out the sticks, you can easily adapt to these needs. This versatility allows you to explore a wider range of creative options and experiment with various techniques, resulting in more unique and personalized crafts.
4. Independence
Mastering the skill of changing hot glue gun sticks grants you independence in your crafting process. You don’t need to rely on others to assist you when a stick needs to be replaced, giving you more freedom and control over your projects. Whether you are working on a personal hobby or completing a professional assignment, having the ability to manage your own supplies ensures that you can work at your own pace and meet deadlines without any setbacks.
In conclusion, learning how to change a hot glue gun stick offers numerous benefits, including convenience, cost savings, versatility, and independence. By gaining this skill, you can enhance your crafting experience and take your projects to the next level.
Step-by-Step Guide to Changing a Hot Glue Gun Stick
Changing the glue stick in a hot glue gun is a simple process that requires a few basic steps. Follow this step-by-step guide to ensure a smooth transition:

- Ensure that the glue gun is turned off and unplugged from the power source. This will prevent any accidents or injuries during the changing process.
- Allow the glue gun to cool down for a few minutes. Hot glue can cause burns, so it’s important to work with caution.
- Locate the glue stick chamber on the glue gun. This is usually at the rear end of the gun.
- Using a pair of pliers, gently grasp the end of the glue stick that is currently in the gun. Carefully pull it out, taking note of any excess glue that may be left behind.
- Take a new glue stick and insert it into the empty glue stick chamber. Make sure the end of the stick is securely placed into the chamber.
- Plug the glue gun back into the power source and allow it to heat up for a few minutes. The glue stick will melt and be ready for use once the gun has reached the desired temperature.
- Test the glue gun by squeezing the trigger. If the glue comes out smoothly, the new glue stick has been successfully inserted.
With these simple steps, you can easily change a hot glue gun stick and continue your crafting or DIY projects without any interruptions. Just remember to always exercise caution when working with hot glue to avoid any accidents or injuries.
Tips and Tricks for Successful Hot Glue Gun Stick Replacement
When working with a hot glue gun, it’s inevitable that you’ll need to replace the glue sticks at some point. Whether you’re a beginner or an experienced crafter, here are some tips and tricks to help ensure a successful hot glue gun stick replacement:
1. Choose the Right Glue Stick: Before starting the replacement process, make sure you have the correct glue sticks for your hot glue gun. There are various sizes and types available, such as clear, colored, and high-temperature sticks. Always check the compatibility and temperature range of the glue sticks with your glue gun.
2. Heat Up the Glue Gun: Plug in your hot glue gun and allow it to heat up for the recommended time specified by the manufacturer. This will ensure that the glue gun is at the optimal temperature for easy stick replacement.
3. Remove the Old Glue Stick: Once the glue gun is heated up, gently push the old glue stick backward using the built-in mechanism or manually remove it with pliers. Be cautious of the hot nozzle during this process.

4. Insert the New Glue Stick: Take your new glue stick and insert it into the glue gun, making sure it fits securely and is aligned properly with the nozzle. Push it slightly to ensure it is fully engaged with the gun’s mechanism.
5. Give it Time to Melt: After inserting the new glue stick, give it a few moments to melt fully. This will ensure a steady flow of glue when you’re ready to use the hot glue gun.
6. Test before Use: Before starting your project, test the glue gun on a scrap piece of material to ensure the glue is flowing properly and the replacement stick is working correctly. This will help you avoid any issues during your actual project.
7. Be Mindful of Safety: Always remember to exercise caution and handle the glue gun with care. The nozzle can remain hot even after the glue gun is turned off or unplugged. Keep a heat-resistant mat or surface nearby to prevent any accidental burns.
Following these tips and tricks will help you replace hot glue gun sticks successfully and avoid any unnecessary complications. Remember to always work in a well-ventilated area and keep glue sticks out of reach of children.

Common Mistakes to Avoid When Changing a Hot Glue Gun Stick
Changing a hot glue gun stick may seem like a simple task, but there are some common mistakes that people make. By avoiding these mistakes, you can ensure a smooth and hassle-free process. Here are some common mistakes to watch out for when changing a hot glue gun stick:
1. Forgetting to unplug the glue gun
One of the most important steps in changing a hot glue gun stick is to unplug the glue gun. Forgetting to do so can lead to accidental burns or other injuries. Always make sure to disconnect the glue gun from the power source before attempting to change the stick.
2. Not allowing the glue gun to cool down
Hot glue guns can get extremely hot while in use. It is crucial to allow the glue gun to cool down before attempting to change the stick. Trying to change a stick while the glue gun is still hot can result in burns or melted glue making a mess.
Once you have unplugged the glue gun, set it aside and wait for it to cool down completely. This usually takes around 10-15 minutes, but it may vary depending on the model and brand of the glue gun.
3. Failing to remove the old glue stick properly
When changing a glue stick, it is important to remove the old stick properly. Failing to do so can lead to difficulties in inserting the new stick or even damage the glue gun mechanism.

To remove the old glue stick, gently pull it out from the back of the glue gun. It should come out easily without applying excessive force. If the stick is stuck or resistant to removal, try heating up the glue gun for a short period to soften the glue before attempting to remove it again.
4. Using the wrong size or type of glue stick
Using the wrong size or type of glue stick can cause issues and prevent the glue gun from functioning correctly. It is essential to check the specifications and requirements of your glue gun before purchasing new sticks.
Always use glue sticks that are compatible with your glue gun model. Additionally, make sure to choose the correct size and type of glue stick for your project. Using the wrong stick can result in poor adhesion or clogs in the glue gun.
By avoiding these common mistakes, you can ensure a successful and trouble-free process when changing a hot glue gun stick. Remember to unplug the glue gun, allow it to cool down, remove the old stick properly, and use the correct size and type of glue stick for your glue gun. Following these guidelines will help you maintain the functionality and efficiency of your hot glue gun.
FAQ
How do I change a hot glue gun stick?
To change a hot glue gun stick, you need to wait for the glue gun to heat up first. Once it reaches the desired temperature, you can simply pull out the old glue stick by grasping it near the base and gently pulling it backward. Then, insert a new glue stick into the chamber, making sure it is aligned properly. Allow the new stick to heat up for a few minutes before using the glue gun again.
What is the procedure for changing a hot glue gun stick?
The procedure for changing a hot glue gun stick is as follows: first, plug in the glue gun and allow it to heat up. Once the gun is hot, grab the old glue stick near the base and pull it backwards to remove it. Next, take a new glue stick and insert it into the chamber, ensuring that it is correctly aligned. Wait for a few minutes for the new stick to heat up before using the glue gun again.
Can you explain how to replace a hot glue gun stick?
Sure! To replace a hot glue gun stick, start by plugging in the glue gun and waiting for it to heat up. Once it is heated, grab the old glue stick near the base and gently pull it out. Then, take a new glue stick and insert it into the chamber, making sure it is properly aligned. Give the new stick a few minutes to heat up before resuming your gluing tasks.


Meet Harrison Clayton, a distinguished author and home remodeling enthusiast whose expertise in the realm of renovation is second to none. With a passion for transforming houses into inviting homes, Harrison's writing at https://thehuts-eastbourne.co.uk/ brings a breath of fresh inspiration to the world of home improvement. Whether you're looking to revamp a small corner of your abode or embark on a complete home transformation, Harrison's articles provide the essential expertise and creative flair to turn your visions into reality. So, dive into the captivating world of home remodeling with Harrison Clayton and unlock the full potential of your living space with every word he writes.