How To Use A Soldering Iron On A Circuit Board
The process of soldering is an essential skill for anyone interested in electronics or DIY projects. It involves joining electronic components to a circuit board, creating a secure and conductive connection. One of the key tools used in this process is a soldering iron.
A soldering iron is a heated tool that melts solder, a metal alloy, enabling it to flow into the joints and bond the components together. It is crucial to use a soldering iron correctly to avoid damaging the circuit board and ensure a successful soldering connection.
Before using a soldering iron, it is important to prepare the circuit board and the components. Make sure the board is clean and free from any dirt or debris that could interfere with the soldering process. Additionally, double-check that all the components are correctly placed and aligned.
When working with a soldering iron, it is essential to take safety precautions. Wear safety goggles to protect your eyes from any potential splashes of molten solder. Ensure you have a well-ventilated workspace to avoid inhaling any fumes that may be released during the soldering process.
Choosing the Right Soldering Iron
When it comes to using a soldering iron on a circuit board, choosing the right one is crucial. The soldering iron you select should meet the specific needs of your project and provide you with the precision and control necessary to achieve quality solder joints.

Factors to Consider
Here are some important factors to consider when choosing a soldering iron:
- Power: The power rating of the soldering iron is an important consideration. Higher power irons heat up faster and can maintain a stable temperature, which is essential for soldering delicate circuit boards.
- Temperature Control: Look for a soldering iron that offers temperature control. This allows you to adjust the temperature according to the solder and components you’re working with. Temperature control is crucial to prevent overheating and damage to the circuit board.
- Tip Compatibility: Different soldering irons use different types of tips. Ensure that the iron you choose has a variety of tip options available and that they are readily accessible. This will allow you to select the tip that works best for your specific soldering needs.
- Comfort and Ergonomics: Soldering can be a precise and time-consuming process, so it’s important to choose an iron that is comfortable to hold and work with. Look for an iron that has an ergonomic handle design and a lightweight construction.
- Durability and Reliability: Consider the overall build quality of the soldering iron. It should be made of durable materials and built to last. Also, check customer reviews and ratings to ensure that the iron is reliable and performs well over time.
Types of Soldering Irons
There are different types of soldering irons available, each with its own strengths and applications:
- Pencil Iron: This is the most common type of soldering iron and is suitable for general soldering tasks. It has a slim, pencil-like design that offers good precision and control.
- Soldering Station: Soldering stations are more advanced and feature additional temperature control and stability. They usually come with a separate power unit and a detachable iron, allowing for easier handling and increased precision.
- Hot Air Soldering Iron: This type of soldering iron uses heated air to melt the solder and is often used for surface mount components. It allows for precise temperature control and is ideal for soldering components with high lead density.
- Butane Soldering Iron: Butane soldering irons are portable and do not require an external power source. They are suitable for outdoor or on-the-go soldering tasks. However, they may not provide the same level of temperature control and precision as electric soldering irons.
By considering these factors and understanding the different types of soldering irons available, you can make an informed decision and choose the right soldering iron for your circuit board projects. Remember to practice proper safety precautions and always follow the manufacturer’s instructions when using a soldering iron.
Factors to Consider When Selecting a Soldering Iron
Choosing the right soldering iron is crucial when it comes to working with circuit boards. There are several factors to consider before making a purchase:
- Temperature Control: Look for a soldering iron that has adjustable temperature settings. Different components on a circuit board require varying temperatures, so having control over the heat is essential.
- Power: Consider the power rating of the soldering iron. Higher wattage irons can heat up faster and maintain a constant temperature, making them suitable for large or complex circuit boards.
- Type of Tip: The tip of the soldering iron plays a significant role in its performance. Choose a soldering iron that offers different tip sizes and shapes to accommodate various soldering tasks.
- Comfort and Ergonomics: Since soldering can be a time-consuming task, it’s important to choose a soldering iron that is comfortable to hold. Look for irons with ergonomic handles and a lightweight design.
- Quality and Durability: Invest in a soldering iron that is made from high-quality materials and is built to last. A durable soldering iron will ensure reliable performance and longevity.
- Safety Features: Check for safety features such as an auto-shutoff function, heat-resistant handles, and a sturdy holder to prevent accidents and protect the circuit board.
When selecting a soldering iron, keep in mind the specific requirements of your soldering projects and your skill level. It’s always recommended to choose a reputable brand that offers good customer support and warranty options. By considering these factors, you can select the right soldering iron that will help you achieve professional and reliable soldering results on circuit boards.

Preparing the Circuit Board
Before you can start soldering on a circuit board, it’s important to prepare the board properly. This involves a few key steps to ensure that you have a clean and suitable surface for soldering.
Clean the Circuit Board
The first step in preparing the circuit board is to clean it thoroughly. Use a small brush to remove any dust or debris from the board. You can also use compressed air or a can of compressed air to blow away any loose particles. Make sure to clean both sides of the board.
If there is any residual flux or solder on the board from previous soldering, you can use a solder wick or a desoldering pump to remove it. This will ensure that you have a clean surface to work with.
Inspect the Circuit Board
Next, carefully inspect the circuit board for any signs of damage or defects. Look for any broken traces, lifted pads, or damaged components. If you spot any issues, you may need to repair or replace the affected parts before continuing with the soldering process.
Pro Tip: Use a magnifying glass or a microscope to get a closer look at the board and identify any potential problems.

If the circuit board has any through-hole components, it’s a good idea to make sure that the holes are clear and free of any debris. You can use a needle or a small drill bit to clear out any obstructions.
Once you have cleaned and inspected the circuit board, it’s time to move on to the next step: tinning the pads.
Cleaning the Circuit Board
Before soldering on a circuit board, it’s important to clean the board to ensure proper adhesion and prevent any contamination that could affect the performance of the components. Here are a few steps to follow when cleaning a circuit board:
- Inspect the board: Start by visually inspecting the circuit board for any visible dirt, debris, or residue that may be present. Use a magnifying glass if needed to get a closer look.
- Use compressed air: Once you’ve identified any loose particles on the board, gently blow them away using compressed air. This will help remove any loose dirt or dust that may have accumulated on the surface.
- Apply flux cleaner: Next, apply a small amount of flux cleaner to a clean, lint-free cloth. Gently wipe the board in a circular motion, focusing on areas where soldering will take place. Flux cleaner helps remove any oxidation or flux residue that may be present.
- Rinse with isopropyl alcohol: After using flux cleaner, rinse the board with isopropyl alcohol to further remove any remaining residue. Isopropyl alcohol is a powerful solvent that evaporates quickly and leaves no residue behind.
- Inspect again: Once you’ve cleaned the board, inspect it again to make sure there’s no visible residue or contaminants. If you spot any, repeat the cleaning process until the board is completely clean.
By following these cleaning steps, you’ll ensure that your circuit board is clean and ready for soldering. This will help ensure reliable connections and the proper functioning of the components.
Applying Solder to the Circuit Board
Once you have properly prepared your circuit board and soldering iron, it’s time to apply solder to the board. This process is crucial for making secure connections between components and ensuring the functionality of your circuit. Follow these steps to apply solder effectively:

-
Heat up the soldering iron
Prior to applying solder, it is important to ensure that the soldering iron is heated up to the appropriate temperature. This typically takes a few minutes.
-
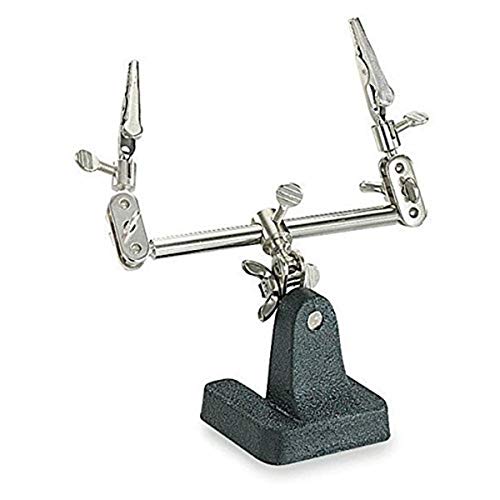
Secure the circuit board
To prevent any accidental movements or damage to the board, make sure it is secured in place using a clamp or helping hands tool. This will provide stability and precision during the soldering process.
-
Tin the soldering iron tip
Before applying solder to the circuit board, it is advisable to “tin” the tip of the soldering iron. This involves coating the tip with a small amount of solder. Tinning helps with heat transfer and improves the overall efficiency of the soldering process.
-
Position the tip and apply solder
With the soldering iron tip tinned, position it carefully on the pad or component lead that you wish to solder. Ensure that the tip touches both the pad and the lead. Hold the solder wire against the heated joint and allow it to melt. Once the solder melts, it will flow freely onto the joint, creating a strong and reliable connection.
-
Remove the solder and soldering iron
After applying solder, remove the solder wire from the joint. Be careful not to disturb the joint while doing so. Once the joint is properly formed, remove the soldering iron from the board.
Remember to take breaks and let the soldering iron cool down to avoid overheating. Additionally, always work in a well-ventilated area to prevent inhaling any noxious fumes produced during the soldering process.
Techniques for Applying Solder
When soldering a circuit board, there are a few key techniques to keep in mind to ensure a successful solder joint. Follow these guidelines to effectively apply solder:
- Clean the tip of your soldering iron by wiping it on a wet sponge or brass coil. This will remove any oxidation or debris from the tip, allowing for better heat transfer.
- Apply a small amount of solder to the tip of the iron to help with heat transfer. This is known as tinning and will create a thin layer of solder on the tip.
- Position the soldering iron tip so that it makes contact with both the component lead and the pad on the circuit board.
- Heat the joint for a few seconds to allow the solder to flow and create a strong bond. The solder should melt and cover the entire joint area.
- Apply solder to the joint, but be careful not to use too much. The ideal amount of solder should create a smooth, shiny fillet around the joint.
- Keep the soldering iron in contact with the joint for a few seconds after applying the solder to allow it to cool and solidify.
- Inspect the joint after soldering to ensure it is properly formed. Look for any cracks, dull spots, or excessive solder that may indicate a faulty joint.
Remember to practice good soldering technique and take your time when working with a soldering iron. With a steady hand and proper technique, you can confidently apply solder to your circuit board and create reliable connections.
Troubleshooting Common Soldering Issues
While soldering is a fundamental skill in electronics, there are situations where problems may arise, leading to faulty connections or damage to the circuit board. Understanding and being able to troubleshoot these common soldering issues will help you achieve successful results and prevent potential mishaps. Here are some common soldering problems and their solutions:
1. Cold Joints
A cold joint occurs when the solder doesn’t properly flow and connect the components due to insufficient heat or improper technique. These joints can be weak and prone to breaking. To fix a cold joint, reheat the joint with the soldering iron until the solder melts and flows smoothly around the connection.

2. Solder Bridges
A solder bridge happens when solder unintentionally connects two adjacent electrical paths that should be isolated. This can cause short circuits or interfere with the proper functioning of the circuit. To fix a solder bridge, use desoldering braid or a desoldering pump to remove the excess solder, ensuring there is no longer a connection between the two paths.
3. Solder Splatter
Solder splatter occurs when blobs of solder are scattered across the circuit board, potentially causing unintended connections or shorts. To prevent solder splatter, make sure to only apply the right amount of solder and keep the soldering iron tip clean. If solder splatter does happen, use desoldering braid or a desoldering pump to remove the excess solder.
4. Component Damage
Sometimes, excessive heat can damage or destroy sensitive components on the circuit board. To prevent component damage, it’s essential to use the correct temperature and technique for soldering. Additionally, using heat sinks or heat transfer materials can help protect nearby components from excessive heat during soldering.
5. Insufficient Solder
If there isn’t enough solder applied to a connection, the joint may be weak or fail to establish a proper bond. To fix this, add a small amount of solder to the joint while ensuring the proper flow and adhesion to both the component and the board.
In conclusion, being aware of these common soldering issues and knowing how to troubleshoot them will greatly improve your soldering skills. Practice, patience, and attention to detail are essential for successful soldering, so don’t be discouraged if you encounter difficulties along the way. With practice, you’ll become proficient in using a soldering iron and effectively working with circuit boards.

Questions and answers
What is a soldering iron and what is it used for?
A soldering iron is a tool used for melting solder in order to join two metal pieces together. It is commonly used in electronics for soldering components onto circuit boards.
How do I use a soldering iron on a circuit board?
To use a soldering iron on a circuit board, you first need to clean the iron tip and apply solder to it. Then, heat the soldering iron and touch it to the metal pad where the component is to be soldered. Once the solder melts, you can place the component onto the pad and remove the soldering iron to let the solder solidify.
What are some tips for using a soldering iron on a circuit board?
When using a soldering iron on a circuit board, it is important to use the correct temperature setting to avoid damaging the board or the components. It is also important to use the right amount of solder to ensure a proper connection. Additionally, you should hold the soldering iron at a slight angle to prevent excess solder from dripping onto the board. Finally, always make sure to work in a well-ventilated area and to wear safety glasses to protect your eyes.

How long does turf take to root

Harrison Clayton
Meet Harrison Clayton, a distinguished author and home remodeling enthusiast whose expertise in the realm of renovation is second to none. With a passion for transforming houses into inviting homes, Harrison's writing at https://thehuts-eastbourne.co.uk/ brings a breath of fresh inspiration to the world of home improvement. Whether you're looking to revamp a small corner of your abode or embark on a complete home transformation, Harrison's articles provide the essential expertise and creative flair to turn your visions into reality. So, dive into the captivating world of home remodeling with Harrison Clayton and unlock the full potential of your living space with every word he writes.


