How To Sharpen Garden Shears With A Wet Stone

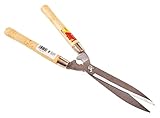
Garden shears are essential tools for any gardener. They help you trim and shape your plants, keeping your garden looking neat and beautiful. However, over time, the blades of the shears can become dull and less effective. Luckily, sharpening them is a simple task that can be done with a wet stone.
Sharpening your garden shears with a wet stone is a great way to maintain their sharpness and extend their lifespan. The wet stone provides a smooth and even sharpening surface, allowing you to remove any nicks or burrs from the blade. Additionally, the water helps to keep the stone clean and prevents heat build-up, which can damage the blade.
To begin sharpening your garden shears, start by securing the shears in a vise or holding them firmly with your non-dominant hand. Take the wet stone and wet it thoroughly with water. Then, hold the shears at a comfortable angle and gently run the blade along the wet stone, moving it in a curved motion from the base to the tip. Make sure to maintain a consistent angle and apply even pressure.
After a few strokes, check the blade for sharpness by running your thumb along the edge. If it feels dull, continue sharpening, making sure to keep the stone wet. Once you are satisfied with the sharpness of the blade, repeat the same process on the other side of the shears. Finally, wipe the blade clean and oil it to prevent rusting.
Remember, it’s important to regularly sharpen your garden shears to ensure optimal performance. By using a wet stone, you can easily maintain the sharpness of the blades and keep your shears in top condition. So grab your wet stone and give your garden shears the sharpening they deserve!

Why Sharpening Garden Shears is Important
Regularly sharpening your garden shears is essential for maintaining their performance and prolonging their lifespan.
Garden shears are commonly used to trim and shape plants, bushes, and trees in the garden. Over time, the blades of the shears can become dull and lose their cutting edge.
Here are a few reasons why sharpening garden shears is important:
1. Efficient Cutting: Sharp garden shears make cutting through branches and stems much easier and faster. Dull shears, on the other hand, require more force and effort, making your gardening tasks more tiring and time-consuming.
2. Clean Cuts: Dull shears can crush and damage plants instead of creating clean cuts. This can leave plants more susceptible to diseases and pests. By sharpening your shears, you can ensure clean and precise cuts, promoting the health and growth of your plants.

3. Safety: Dull garden shears are not only less effective, but they can also be dangerous to use. When the blades are dull, you may need to use excessive force, increasing the risk of slips or accidents. Sharpened shears ensure a smoother and safer cutting experience.
4. Longevity: Taking care of your garden tools, including sharpening the shears regularly, can extend their lifespan. By maintaining sharp blades, you prevent excessive wear and tear, ensuring that your shears last for many gardening seasons.
5. Cost-effective: Instead of spending money on new garden shears, sharpening the blades is a cost-effective solution. Regular maintenance and sharpening can help you save money in the long run.
Overall, sharpening your garden shears is a simple but crucial task that can greatly improve your gardening experience. It allows for efficient cutting, clean cuts, enhanced safety, prolonged tool lifespan, and cost savings. Make it a regular practice to keep your garden shears in top shape.
Choosing the Right Tools for Sharpening
When it comes to sharpening your garden shears with a wet stone, selecting the right tools is crucial. Here are a few essential tools you will need:
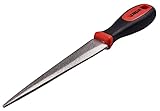
Wet Stone
A wet stone is the primary tool you will require for sharpening your garden shears. Wet stones are specifically designed to remove material from the blade while maintaining a cool temperature through the use of water. They come in various grit sizes, so it’s important to choose one that suits your specific needs.
Lubricating Oil or Water
Using a lubricant, such as lubricating oil or water, is essential to ensure a smooth and effective sharpening process. The lubricant helps to prevent the wet stone from clogging and keeps the surface moist, allowing for better control and a more precise sharpening.
Sharpening Guide
A sharpening guide is a handy tool that helps you maintain the correct angle while sharpening the garden shears. It acts as a guide for positioning the blade at the optimal angle, resulting in a more consistent and sharp edge.
Overall, having the right tools is vital for achieving a professional sharpening result. Invest in high-quality tools that are specifically designed for sharpening garden shears, and you’ll be able to enjoy sharp and efficient shears for all your gardening needs.
Step-by-Step Guide
Follow these step-by-step instructions to sharpen your garden shears using a wet stone:
Step 1: Start by preparing the work area. Find a clean and well-lit space where you can comfortably work on sharpening your garden shears.
Step 2: Inspect the shears for any damage or signs of wear. Look for nicks or chips on the blade, as these will need to be fixed before sharpening.
Step 3: Clean the shears thoroughly. Use a clean cloth or brush to remove any dirt, sap, or debris from the blades. Make sure to dry them completely before proceeding.
Step 4: Fill a container with water and soak the wet stone. Make sure the stone is fully submerged in water for at least 10 minutes to ensure it is properly saturated.
Step 5: Hold the shears firmly and place the blade against the wet stone at the desired sharpening angle, typically around 20 degrees. Use both hands to maintain control and apply consistent pressure.

Step 6: Move the shears in a sweeping motion across the wet stone. Start from the base of the blade and move towards the tip, ensuring the entire cutting edge is sharpened evenly.
Step 7: Repeat the sweeping motion on the other side of the blade to achieve an even sharpening. Take your time and maintain a steady pace to avoid applying too much pressure.
Step 8: Check the sharpness of the shears by carefully running your finger along the blade. Be cautious to avoid any accidental cuts. If the blade feels dull, repeat the sharpening process until desired sharpness is achieved.
Step 9: Once you are satisfied with the sharpness, rinse the shears under running water to remove any residue from the wet stone. Dry them thoroughly before storing or using the shears again.
Step 10: Store your garden shears in a safe place to avoid any accidental damage or dulling of the blades. Consider using a protective cover or storing them in a dry, clean container.

Following these steps will help you maintain sharp and efficient garden shears that will make your gardening tasks much easier.
Step 1: Cleaning the Shears
Before you begin sharpening your garden shears, it is important to make sure they are clean and free of any dirt or debris. Cleaning the shears will not only help you achieve better results when sharpening, but it will also help prevent the spreading of any potential plant diseases.
Start by using a brush or a cloth to remove any loose dirt or debris from the blades. Pay close attention to the area near the pivot point, as this is where a lot of dirt tends to accumulate.
Next, fill a bucket or a sink with warm soapy water and immerse the shears in it. Let them soak for a few minutes to soften any stubborn dirt or residue. You can also add a small amount of vinegar to the water to help remove any rust that may be present on the blades.
After soaking, use a scrub brush or a toothbrush to gently scrub the blades and remove any remaining dirt or residue. Be careful not to apply too much pressure, as this could damage the blades.

Once you have finished scrubbing, rinse the shears thoroughly under running water to remove any soap or vinegar residue. Make sure to dry them completely before moving on to the next step.
Step 2: Preparing the Wet Stone
Before you start sharpening your garden shears, it’s important to prepare the wet stone. Follow these steps to ensure that your wet stone is ready for use:
1. Soak the Wet Stone
Fill a container or sink with water and submerge the wet stone in it. Allow the wet stone to soak for approximately 10-15 minutes. This will ensure that the stone is fully saturated and ready for sharpening.
2. Place the Wet Stone securely
Find a stable surface where you can securely place the wet stone. It should be comfortable to work at and have enough space for you to move the shears back and forth across the stone without any obstruction.
3. Create a non-slip surface
To prevent the wet stone from slipping while you are sharpening your garden shears, place a damp towel or rubber mat underneath it. This will provide stability and ensure that the stone stays in place during the sharpening process.
By properly preparing the wet stone before sharpening your garden shears, you can ensure that the process goes smoothly and effectively. Once the wet stone is ready, you can move on to the next step of sharpening your shears.
Step 3: Sharpening the Blades
Now that you have prepared the shears and wet stone, it’s time to start sharpening the blades. Follow these steps to ensure a sharp and effective cutting edge:
1. Position the shears
Hold the shears firmly in one hand, ensuring that the blades are facing away from you and the cutting edge is exposed. This will allow you to easily access and sharpen the blades.
2. Slide the wet stone along the blade
Using steady pressure, position the wet stone against the cutting edge of one blade. Carefully slide the wet stone along the entire length of the blade, starting from the base and moving towards the tip. Be sure to maintain a consistent angle and apply even pressure throughout the process. Repeat this step for the second blade.
3. Check for burrs
After sharpening both blades, carefully inspect them for any remaining burrs or dull spots. If you notice any imperfections, continue to lightly glide the wet stone over those areas until they disappear.
4. Test the sharpness
To determine if the blades are adequately sharpened, carefully close the shears and perform a cutting test on a piece of scrap paper or plant material. If the shears effortlessly cut through the material with a clean and precise motion, then they are sharp and ready to use. If not, repeat the sharpening process until the desired sharpness is achieved.
Remember to exercise caution while sharpening the blades and always wear protective gloves to prevent any accidents. Once you have completed sharpening the shears, make sure to clean them thoroughly with water and a cloth before storing them or using them for any gardening tasks.
Questions and answers
What is the best way to sharpen garden shears?
The best way to sharpen garden shears is by using a wet stone. This method ensures that the blade is sharpened evenly and effectively.
How do I know if my garden shears need sharpening?
You can tell if your garden shears need sharpening if they are not cutting through branches as easily as before. Dull blades can also crush or damage branches instead of making clean cuts.
Can I use any type of wet stone to sharpen my garden shears?
It is recommended to use a coarse wet stone for sharpening garden shears. This type of stone will remove the dull edges more efficiently and provide a sharper cutting surface.
Are there any other methods to sharpen garden shears?
While using a wet stone is the most effective method, there are other ways to sharpen garden shears. These include using a hand file or a grinding wheel. However, these methods require more skill and may not produce the same level of sharpness.


Harrison Clayton
Meet Harrison Clayton, a distinguished author and home remodeling enthusiast whose expertise in the realm of renovation is second to none. With a passion for transforming houses into inviting homes, Harrison's writing at https://thehuts-eastbourne.co.uk/ brings a breath of fresh inspiration to the world of home improvement. Whether you're looking to revamp a small corner of your abode or embark on a complete home transformation, Harrison's articles provide the essential expertise and creative flair to turn your visions into reality. So, dive into the captivating world of home remodeling with Harrison Clayton and unlock the full potential of your living space with every word he writes.

