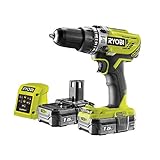
How To Turn On Ryobi Table Saw

If you’re new to woodworking or just starting out with your Ryobi table saw, you may be wondering how to turn it on. Luckily, it’s a simple process that just requires a few steps. In this guide, we’ll walk you through the process of turning on your Ryobi table saw, ensuring that you’re ready to start tackling all of your woodworking projects.
Before we dive into the steps, it’s important to note that safety should always be your top priority when using any power tool. Make sure you have the necessary safety gear on, such as goggles and ear protection, and ensure that you’re working in a well-ventilated area.
Now, let’s get started. The first step to turning on your Ryobi table saw is to locate the power switch. This switch is typically located on the front of the saw, near the blade. It’s usually a large, red switch that can be easily flipped on and off. Once you’ve found the switch, make sure it’s in the off position before proceeding.
Next, plug in your table saw. Find the power cord, which is usually located on the back or side of the saw, and plug it into an electrical outlet. Ensure that the outlet is properly grounded and can handle the power requirements of the saw.
Once you’ve plugged in your table saw and ensured that the power switch is in the off position, you’re ready to turn it on. Flip the power switch to the on position, and you should hear the saw come to life. You may also see indicator lights or hear a beep to indicate that the saw is powered on and ready for use.

At this point, it’s important to double-check that everything is in working order before you start using your Ryobi table saw. Ensure that the blade is properly aligned, the fence is secure, and all safety features are functioning correctly.
Now that you know how to turn on your Ryobi table saw, you’re ready to start your woodworking projects with confidence. Just remember to always prioritize safety and take the necessary precautions whenever you’re working with power tools.
Safety Precautions for Using Ryobi Table Saw
When using a Ryobi table saw, it is important to prioritize safety to prevent accidents and injuries. Follow these safety precautions to ensure a safe and successful operation:
1. Read the Manual
Before using the table saw, carefully read and understand the instruction manual provided by Ryobi. This will provide essential information on the proper operation, setup, and safety features of the tool.
2. Wear Personal Protective Equipment (PPE)
Always wear appropriate personal protective equipment, such as safety glasses, a face shield, and hearing protection. Additionally, consider wearing a dust mask to protect against wood dust and debris.
3. Maintain a Clean Work Area
Keep your work area clean and organized. Remove any clutter, debris, or other obstacles that may hinder your movements or cause accidents. This will help ensure a clear and safe working space.
4. Secure the Workpiece
Prior to cutting, make sure the workpiece is properly secured. Use clamps or other appropriate methods to hold the material firmly in place. This will help prevent the material from moving or shifting during the cutting process.
5. Check the Blade and Fence Alignment
Before starting the saw, inspect the blade and fence alignment. Ensure that the blade is parallel to the fence and that the fence is properly aligned. This will help prevent kickback and ensure accurate cuts.
6. Use Push Sticks or Grippers
Whenever possible, use push sticks or grippers to guide the material through the blade. This will help keep your hands a safe distance from the blade and reduce the risk of accidental contact.
7. Keep Hands and Fingers Clear
Never place your hands or fingers near the blade while the saw is in operation. Always maintain a safe distance and use caution when handling the material.

8. Disconnect Power Before Blade Changes
When changing blades or performing maintenance on the table saw, always disconnect the power source. This will help prevent accidental starts and protect against potential injuries.
9. Work at a Comfortable Pace
Do not rush or force the material through the blade. Work at a comfortable pace, allowing the saw blade to cut without excessive strain. This will help maintain control and reduce the risk of accidents.
10. Do Not Reach Over the Blade
Avoid reaching over the blade or trying to remove scraps while the blade is still spinning. Wait for the blade to come to a complete stop before cleaning the table or removing any debris.
By following these safety precautions, you can significantly reduce the risk of accidents and injuries while using your Ryobi table saw. Remember to always prioritize safety and use good judgment when operating any power tool.
Understanding the Components of Ryobi Table Saw
A Ryobi table saw is a versatile tool that can be used for a variety of woodworking projects. Before you can start using the table saw, it’s important to familiarize yourself with its various components. This will ensure that you can operate the saw safely and efficiently.

1. Blade: The blade is the most crucial part of a table saw. It is responsible for cutting through the material. Make sure that the blade is sharp and in good condition before using the table saw.
2. Fence: The fence is used to guide the material being cut. It can be adjusted to ensure accurate and straight cuts. Always double-check that the fence is parallel to the blade before making any cuts.
3. Miter Gauge: The miter gauge is used to make angled cuts. It can be adjusted to various angles to create bevels or miters. Ensure that the miter gauge is securely locked in place before making any cuts.
4. Power Switch: The power switch is used to turn the table saw on and off. It is typically located on the front of the saw for easy access. Always make sure to turn off the power switch and unplug the saw when not in use or when making any adjustments.
5. Riving Knife: The riving knife is a safety feature that helps prevent kickback. It is positioned behind the blade and helps keep the material from pinching or binding during a cut. Always make sure that the riving knife is properly aligned with the blade.

6. Blade Guard: The blade guard is another safety feature that helps protect your hands from accidental contact with the blade. It should be properly installed and adjusted to provide adequate protection while still allowing for visibility of the cut.
7. Tabletop: The tabletop is the flat surface where the material is placed for cutting. Keep the tabletop clean and free of debris to ensure smooth and accurate cuts.
8. Rip Fence: The rip fence is used to make parallel cuts along the length of the material. It can be adjusted to the desired width and locked in place. Always ensure that the rip fence is securely locked before making any cuts.
By understanding these components of a Ryobi table saw, you will be better equipped to use the saw effectively and safely. Remember to always follow the manufacturer’s instructions and use appropriate safety precautions while operating the table saw.
Powering On the Ryobi Table Saw
Before powering on your Ryobi table saw, it’s important to ensure that you have taken all necessary safety precautions. This includes wearing appropriate safety gear, such as safety goggles and ear protection, and ensuring that the workspace is clean and clear from any potential hazards.

Once you have prepared the workspace and are ready to power on the Ryobi table saw, follow these steps:
- Locate the power switch on the table saw. It is typically located on the front panel of the saw.
- Ensure that the power cord is securely plugged into a grounded electrical outlet.
- Flip the power switch to the “On” position. You may need to refer to the saw’s manual to determine the exact position of the power switch.
- Once the power switch is turned on, you should see a light or indicator on the saw that confirms the power is active.
It’s important to note that before making any adjustments or using the saw, you should always take a moment to familiarize yourself with the saw’s features and functionality. This includes understanding how to adjust the blade height and angle, as well as how to properly position and secure the workpiece.
Remember, safety should always be the top priority when using any power tool, including the Ryobi table saw. Always follow the manufacturer’s instructions and exercise caution to avoid accidents or injuries.
Adjusting the Blade Height and Angle
To ensure accurate and clean cuts, it is important to adjust the blade height and angle on your Ryobi table saw. Here are the steps to accomplish this:
Adjusting the Blade Height:
Step 1: Start by disconnecting the table saw from its power source.

Step 2: Locate the blade height adjustment knob or crank, typically located on the front or side of the saw’s housing.
Step 3: Turn the knob or crank counterclockwise to raise the blade or clockwise to lower it. Make small adjustments at a time to ensure precision.
Step 4: Use a tape measure or a blade height gauge to check the height of the blade. The proper blade height will depend on the type of cut you want to make.
Adjusting the Blade Angle:
Step 1: Again, start by disconnecting the table saw from its power source.
Step 2: Locate the blade angle adjustment knob or lever, usually found on the front or rear of the saw’s housing.
Step 3: To set the blade angle, unlock the knob or lever and tilt the blade to the desired angle. A degree indicator near the knob or lever can help you set the angle accurately.
Step 4: Once you’ve set the angle, lock the knob or lever securely to prevent any unintentional movement during operation.
Note: Always refer to your table saw’s user manual for specific instructions on adjusting the blade height and angle, as the location and mechanisms may vary depending on the model.
By correctly adjusting the blade height and angle on your Ryobi table saw, you can achieve precise and clean cuts for your woodworking projects. Remember to always prioritize safety by wearing appropriate protective equipment and using caution while operating the saw.
Using the Fence and Miter Gauge
When operating a Ryobi table saw, it’s essential to understand how to properly use the fence and miter gauge. These accessories play a crucial role in achieving accurate and precise cuts.
The Fence
The fence is a guide that helps you make parallel cuts by keeping the workpiece straight and in line with the blade. Follow these steps to use the fence effectively:
- Align the fence with the desired measurement on the scale.
- Make sure the fence is parallel to the blade by using a square to check.
- Secure the fence in place using the locking mechanism.
- Position the workpiece against the fence, ensuring it is firmly pressed against it.
- Feed the workpiece through the blade, keeping it against the fence throughout the cut.
The Miter Gauge
The miter gauge allows you to make angled cuts or crosscuts by controlling the angle at which the workpiece is fed into the blade. Here’s how to use the miter gauge:
- Loosen the lock knob to adjust the miter gauge to the desired angle.
- Align the workpiece with the miter gauge, ensuring it is snug against the gauge and the fence.
- Tighten the lock knob to secure the miter gauge in place.
- Push the workpiece smoothly and steadily through the blade, maintaining control and accuracy.
- Always keep your hands and fingers away from the blade and behind the miter gauge for safety.
By properly utilizing the fence and miter gauge, you can enhance your table saw experience and achieve precise cuts for various woodworking projects. Remember to practice caution and follow safety guidelines to prevent any accidents or injuries.
Maintenance and Cleaning of Ryobi Table Saw
Maintaining and cleaning your Ryobi table saw regularly is essential to ensure its optimal performance and extend its lifespan. Here are some steps you can follow:
1. Unplug the saw
Before performing any maintenance or cleaning tasks, always unplug the table saw from the power source to prevent any accidental starts.
2. Clean the table surface
Regularly clean the table surface using a soft cloth or brush to remove any sawdust, debris, or other materials that may accumulate. Avoid using abrasive cleaners as they can damage the table surface.
3. Inspect the blade
Check the condition of the saw blade for any signs of wear, damage, or dullness. If necessary, replace the blade with a new one. Make sure the blade is properly tightened and aligned before using the saw.
4. Lubricate moving parts
Apply a few drops of lubricating oil to the moving parts of the table saw, such as the arbor, gears, and bearings. This will help reduce friction and ensure smooth operation. Wipe away any excess oil to prevent it from attracting dust and debris.
5. Check the fence and miter gauge
Inspect the fence and miter gauge for any misalignment, damage, or wear. Adjust or replace them as necessary to ensure accurate cuts and safety.
6. Clean the dust collection system
Clean or replace the dust collection system of the table saw to ensure efficient dust and debris removal. This will help maintain a clean and safe working environment.
7. Store the saw properly
When not in use, store the table saw in a clean and dry area. Cover it with a dust cover or tarp to protect it from dust, moisture, and other environmental factors that can cause damage.
By following these maintenance and cleaning steps, you can keep your Ryobi table saw in excellent condition and enjoy accurate and reliable cuts for years to come.
Questions and answers
How do I turn on my Ryobi table saw?
To turn on your Ryobi table saw, you first need to locate the power switch. The power switch is typically located on the front or side of the saw. Once you have located the switch, simply press it to turn on the saw. Make sure you have the proper safety precautions in place before using the saw.
What safety precautions should I take before turning on my Ryobi table saw?
Before turning on your Ryobi table saw, it is important to take several safety precautions. First, make sure you are wearing appropriate safety gear, such as safety glasses and ear protection. Second, ensure that the saw is properly set up and adjusted, and that the blade is sharp and in good condition. Third, check that the work area is clear of any debris or obstructions. Finally, familiarize yourself with the saw’s safety features and follow all instructions and guidelines provided by the manufacturer.
Can I turn on my Ryobi table saw without using the power switch?
No, it is not recommended to turn on your Ryobi table saw without using the power switch. The power switch is designed to provide a safe and controlled method of starting and stopping the saw. Bypassing the power switch can be dangerous and may void the warranty on your saw. Always use the power switch to turn on and off your table saw.


Harrison Clayton
Meet Harrison Clayton, a distinguished author and home remodeling enthusiast whose expertise in the realm of renovation is second to none. With a passion for transforming houses into inviting homes, Harrison's writing at https://thehuts-eastbourne.co.uk/ brings a breath of fresh inspiration to the world of home improvement. Whether you're looking to revamp a small corner of your abode or embark on a complete home transformation, Harrison's articles provide the essential expertise and creative flair to turn your visions into reality. So, dive into the captivating world of home remodeling with Harrison Clayton and unlock the full potential of your living space with every word he writes.


