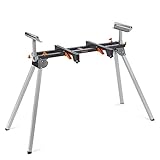
How To Level Table Saw Wings

Table saws are an essential tool for any woodworking enthusiast, allowing you to make precise cuts with ease. However, over time, the wings of your table saw may become unlevel, causing your cuts to be inaccurate. This can be frustrating and can lead to wasted materials and time.
Leveling the wings of your table saw is a relatively simple process that can greatly improve the accuracy of your cuts. It involves adjusting the height of each wing so that they are perfectly parallel to the table surface. By taking the time to level your table saw wings, you can ensure that your cuts are clean, straight, and precise.
To begin the process of leveling your table saw wings, you will need a few basic tools. These include a reliable level, an adjustable wrench, and shims. Start by placing the level on the table surface to check its levelness. If the table is not level, adjust the feet of the table until it is. Once the table is level, move on to leveling the wings.
Begin by loosening the bolts that hold the wings to the table. Use the adjustable wrench to turn the bolts counterclockwise, loosening them just enough so that you can slide the wings up and down. Place the level on top of one wing and adjust the height of the wing until it is parallel to the table surface. Tighten the bolts once the wing is level, being careful not to overtighten them.
Repeat this process for each wing of the table saw, checking the levelness of each one as you go. If any adjustments need to be made, use shims to level the wings. Shims are small pieces of material that can be placed between the wing and the table to adjust the height. Once all of the wings are level, double-check the levelness of the table surface to ensure that everything is aligned properly.

By taking the time to level the wings of your table saw, you can greatly improve the accuracy of your cuts. This simple process can make a world of difference in the quality of your woodworking projects, allowing you to achieve professional-level results. So don’t let unlevel wings hold you back. Take the time to level your table saw wings and take your woodworking to the next level.
Why Leveling Table Saw Wings is Important for Accurate Cuts
Leveling the table saw wings is an essential step in ensuring accurate and precise cuts. The wings, also known as extension tables, are the side areas of the saw table that provide extra support for longer workpieces.
When the table saw wings are not level, it can lead to a variety of problems that affect the quality of your cuts:
1. Inaccurate Measurements:
Uneven wings can cause your workpiece to sit unevenly on the table, affecting the accuracy of your measurements and leading to cuts that are not straight or square.
2. Poor Stability:
Uneven wings can also cause instability, making it difficult to achieve a consistent and steady feed rate. This can result in wobbly cuts and an increased risk of kickback.

3. Difficulty in Feeding Material:
If the wings are not level, it can be difficult to smoothly feed the material through the blade. This can cause binding, kickback, or even damage to the material itself.
By taking the time to level the table saw wings, you can avoid these issues and ensure that your cuts are accurate, straight, and safe. Here are a few steps to help you level your table saw wings:
Step 1: Start by removing any accessories or attachments from the table saw, including the fence and miter gauge.
Step 2: Use a straight edge or level to check the wings for any high or low spots. Adjust the leveling screws or bolts accordingly until the wings are perfectly level with the main table.
Step 3: Double-check the alignment by measuring the distance between the saw blade and the wings at both the front and back of the table. Make any necessary adjustments to ensure consistency.

Remember, the accuracy of your cuts depends on the precision of your equipment. By leveling the table saw wings, you are taking an important step towards achieving professional-level results in your woodworking projects.
Tools You’ll Need to Level Table Saw Wings
This section will outline the various tools you will need in order to successfully level the wings on your table saw. Having the right tools available before you begin can help ensure a smooth and efficient leveling process.
1. Leveling gauge: A leveling gauge is a tool specifically designed for checking the levelness of surfaces. It consists of a circular level mounted on a metal or plastic base. Make sure to choose a leveling gauge that is accurate and reliable.
2. Adjustable wrench: An adjustable wrench will be needed to loosen and tighten bolts, screws, and other fasteners on the table saw. This tool is essential for making adjustments to the wing alignment.
3. Screwdriver set: A set of screwdrivers with various sizes and types will be necessary for removing and installing screws on the table saw wings. It is recommended to have both flathead and Phillips screwdrivers on hand.

4. Shims: Shims are thin, wedge-shaped pieces of material that can be used to fill gaps between surfaces, adjusting their alignment. You may need shims to level the wings of your table saw. Plastic or metal shims are commonly used for this purpose.
5. Level: While a leveling gauge is useful for checking the levelness of surfaces, a larger level can also be handy during the leveling process. A longer level will allow you to assess the overall alignment of the wings and make necessary adjustments.
6. Rubber mallet: A rubber mallet is a useful tool for gently tapping and adjusting the position of the wings on the table saw. It can help to nudge the wings into alignment without damaging the surface or causing any unnecessary force.
Note: It is important to follow the manufacturer’s instructions and safety guidelines when using these tools. Always wear appropriate safety gear, such as safety glasses and gloves, when working with power tools or making adjustments to machinery.
Step-by-Step Guide to Leveling Table Saw Wings
Introduction
Leveling the wings of your table saw is an essential step to ensure accurate and precise cuts. Over time, the wings may become uneven due to various factors such as movement or vibration. In this step-by-step guide, we will walk you through the process of leveling the table saw wings to maintain the integrity of your saw.

Materials You Will Need
- Level
- Wrench
- Shims
Step 1: Prepare Your Work Area
Before starting the leveling process, ensure that your work area is clean and clutter-free. This will provide you with ample space to maneuver and access the table saw wings.
Step 2: Check the Current Level
Using a level, check the current level of the table saw wings. Place the level horizontally and vertically on each wing to identify any deviations from the level position. Take note of the areas that require adjustment.
Step 3: Loosen the Wing Bolts
Using a wrench, loosen the wing bolts that secure the wings to the table saw. Do not remove the bolts entirely; just loosen them enough to allow for adjustments.
Step 4: Add Shims
Place shims under the wings in the areas that require adjustment. Start with small shims and gradually increase the thickness until the wings are level. Use the level to check the status after each adjustment.
Step 5: Retighten the Wing Bolts
Once the wings are level, use the wrench to tighten the wing bolts securely. Ensure that the wings do not move or shift during this process.
Step 6: Verify the Level
Double-check the level of the table saw wings using the level. Place it horizontally and vertically on each wing to confirm that they are now level. Make any additional adjustments if necessary.
Step 7: Test the Leveling
After completing the leveling process, perform a test cut to verify the accuracy and precision of the table saw. Make adjustments if needed until you are satisfied with the results.
Conclusion
By following this step-by-step guide, you can successfully level your table saw wings, ensuring accurate and consistent cuts. Regularly checking and maintaining the level of your table saw wings will contribute to the overall performance of your saw and improve the quality of your woodworking projects.
| Table of Contents | |
|---|---|
| Introduction | Step 1: Prepare Your Work Area |
| Step 2: Check the Current Level | Step 3: Loosen the Wing Bolts |
| Step 4: Add Shims | Step 5: Retighten the Wing Bolts |
| Step 6: Verify the Level | Step 7: Test the Leveling |
| Conclusion | |
Tips and Tricks for Maintaining Level Table Saw Wings
Having level table saw wings is crucial for an accurate and smooth cutting experience. Here are some tips and tricks to help you maintain level table saw wings:
1. Regular Inspection
Regularly inspect your table saw wings to ensure they are still level. Look for any signs of sagging or unevenness. If you notice any issues, it’s important to address them as soon as possible to prevent further problems.

2. Adjusting Bolts
Most table saw wings have bolts that can be adjusted to level them. Use a wrench or socket set to tighten or loosen these bolts as needed. Start by checking the corners of each wing and gradually work your way towards the center until all areas are level.
3. Shims
If you’re unable to achieve a level surface using the adjusting bolts alone, you can use shims. Cut small pieces of wood or metal shim stock into thin strips and place them under the wings at the appropriate locations. This will help to balance out any unevenness and achieve a level surface.
4. Reinforcement
If you’re experiencing significant sagging or instability with your table saw wings, you may need to reinforce them. Adding additional supports underneath the wings can help to distribute the weight more evenly and prevent sagging. Consult your table saw’s manual or seek professional advice for specific reinforcement methods.
5. Regular Maintenance
Keep your table saw clean and free of debris to prevent any obstructions that may affect the levelness of your wings. Lubricate moving parts regularly to ensure smooth adjustment of the bolts and overall operation of the table saw.
By following these tips and tricks, you can maintain level table saw wings for precise and accurate cuts. Remember to always prioritize safety and consult a professional if you’re unsure about any adjustments or repairs.
Questions and answers
Why do you need to level table saw wings?
Leveling table saw wings is important to ensure accurate and safe cuts. If the wings are not level, the workpiece can be unstable and lead to inaccurate cuts. Additionally, if the wings are not properly aligned, it can affect the overall performance and functionality of the table saw.
What tools do I need to level table saw wings?
To level table saw wings, you will need a straight edge or a level tool, a set of wrenches or sockets to adjust the mounting bolts, and possibly shims or washers if needed. It is also a good idea to have a measuring tape or ruler to check the levelness of the wings.


Harrison Clayton
Meet Harrison Clayton, a distinguished author and home remodeling enthusiast whose expertise in the realm of renovation is second to none. With a passion for transforming houses into inviting homes, Harrison's writing at https://thehuts-eastbourne.co.uk/ brings a breath of fresh inspiration to the world of home improvement. Whether you're looking to revamp a small corner of your abode or embark on a complete home transformation, Harrison's articles provide the essential expertise and creative flair to turn your visions into reality. So, dive into the captivating world of home remodeling with Harrison Clayton and unlock the full potential of your living space with every word he writes.


