How To Attach A Scroll Saw To Workbench

If you’re a woodworking enthusiast or just someone who enjoys DIY projects, a scroll saw is an essential tool that can help you create intricate designs and shapes in wood. But to get the most out of your scroll saw, it’s important to have a stable and secure workbench to attach it to. In this article, we’ll guide you through the process of attaching a scroll saw to your workbench, ensuring that it’s sturdy and ready for all your cutting needs.
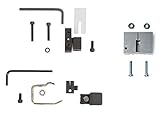
Before you begin, make sure you have all the necessary tools and materials. You’ll need a scroll saw (of course), a workbench, a measuring tape, screws, a drill, and a set of wrenches. It’s also a good idea to have a level handy to ensure that your workbench is even and stable.
The first step is to determine the ideal location for your scroll saw on the workbench. Find a spot that allows for easy access and comfortable operation. You’ll also want to make sure that there’s enough space around the scroll saw for your materials and any other tools or accessories you plan to use.
Next, measure and mark the positions where you’ll be attaching the scroll saw to the workbench. It’s recommended to use at least four screws to secure the scroll saw, with two screws on each side. Make sure these marks are aligned and level to ensure a straight and secure attachment.
What is a Scroll Saw?
A scroll saw is a power tool that is used to make intricate cuts in wood, metal, plastic, and other materials. It is similar to a jigsaw, but with a thinner blade that allows for more precise cuts. The blade of a scroll saw moves up and down in a rapid reciprocating motion, allowing the user to create detailed patterns and shapes.

Scroll saws are commonly used by woodworkers, hobbyists, and craftspeople for a variety of projects, such as making puzzles, cutting out intricate designs for ornaments and decorations, crafting wooden toys, and creating detailed fretwork or marquetry.
One of the key features of a scroll saw is its ability to make internal cuts, meaning that it can cut out shapes from the middle of a piece of material without the need for a starting or ending point. This makes it particularly useful for creating intricate designs and patterns.
Scroll saws come in various sizes and power levels, ranging from small, handheld models to larger, stationary machines that are mounted to a workbench. They can be operated manually or with the help of motorized foot pedals or electronic speed controls.
Overall, a scroll saw is a versatile and precise tool that is essential for any woodworker or craftsperson who wants to create intricate and detailed projects.
Choosing the Right Workbench
When it comes to attaching a scroll saw to a workbench, the first step is to choose the right workbench. A sturdy and stable workbench is essential to ensure accurate and precise cuts with your scroll saw. Here are a few factors to consider when selecting a workbench:

1. Size and Dimensions
Make sure the workbench you choose is large enough to accommodate your scroll saw comfortably. You’ll need enough space to maneuver the material you’re cutting and to have a clear line of sight. Measure the dimensions of your scroll saw and compare them to the size of the workbench.
2. Material
The material used to construct the workbench is an important consideration. Look for a workbench made from sturdy materials like hardwood or steel. These materials provide excellent stability and durability, ensuring that your scroll saw stays securely attached to the workbench.
3. Height
The height of the workbench is another crucial factor. You’ll want a workbench that allows you to work comfortably without straining your back or arms. Consider your own height and choose a workbench that matches your needs. Some workbenches even offer adjustable heights, allowing you to customize it to your liking.
4. Stability
A wobbly workbench can lead to inaccurate cuts and frustration. Look for a workbench with a solid and stable construction. Check if it has features like non-slip feet or a sturdy frame that will keep the workbench securely in place during use.
5. Additional Features
Consider any additional features that may enhance your workbench experience. This could include built-in storage drawers for scroll saw blades and accessories, integrated lighting for better visibility, or even a dust collection system to keep your work area clean.

By considering these factors and choosing the right workbench, you’ll be well on your way to attaching your scroll saw securely and efficiently. Remember to follow the manufacturer’s instructions for attaching the scroll saw and always prioritize safety when working with power tools.
Factors to Consider When Selecting a Workbench for Your Scroll Saw
When setting up your scroll saw, it’s important to choose the right workbench that can provide stability and support for your woodworking projects. Here are some factors to consider when selecting a workbench for your scroll saw:
1. Size and Weight
The size and weight of the workbench is an important consideration. It should be large enough to accommodate your scroll saw and provide enough space for your projects. However, if you have a limited workspace, a compact workbench that can be easily moved may be a better option.
2. Material
The material of the workbench plays a significant role in its durability. Ideally, it should be made of a sturdy material such as solid wood or metal to withstand the vibrations of the scroll saw. Avoid workbenches made from flimsy materials that may not provide the necessary stability.
3. Height and Adjustability
The height of the workbench should be comfortable for you to work on. Consider a workbench with adjustable legs or a height-adjustment feature, as this will allow you to customize the height according to your preference and ensure proper ergonomics.

4. Stability
Stability is crucial when operating a scroll saw. Look for a workbench with a solid and stable base that can absorb vibrations and prevent wobbling. A workbench with adjustable feet or leveling mechanisms can help you achieve an even surface, especially if your workshop floor is not completely flat.
5. Storage Options
Consider the storage options available on the workbench. Having built-in storage drawers or shelves can help keep your tools, blades, and accessories organized and easily accessible. This can save you time and increase efficiency during your woodworking projects.
Keep these factors in mind when selecting a workbench for your scroll saw. Investing in a quality workbench will not only enhance your woodworking experience but also ensure safety and precision in your projects.
Attaching the Scroll Saw to the Workbench
Attaching the scroll saw to the workbench is an important step to ensure stability and safety while using the tool. Here are the steps to follow:
- Start by positioning the scroll saw on the workbench in the desired location. Make sure there is enough space around the saw for comfortable operation.
- Check if the workbench has pre-drilled holes or slots specifically designed to attach a scroll saw. If it does, align the saw with these holes or slots.
- If the workbench does not have pre-drilled holes or slots, use a measuring tape to determine the appropriate location for attaching the scroll saw.
- Mark the location for the attachment points on the workbench using a pencil or marker.
- Using a drill, create the necessary holes at the marked locations. The size of the holes should be compatible with the fasteners that will be used to attach the scroll saw.
- Position the scroll saw over the drilled holes and align it with the markings on the workbench.
- Insert the appropriate fasteners, such as screws or bolts, through the holes in the scroll saw and into the holes in the workbench.
- Tighten the fasteners securely using a screwdriver or wrench. Make sure the scroll saw is firmly attached to the workbench.
- Double-check the stability of the scroll saw by gently shaking it or applying slight pressure from different angles.
- If the scroll saw feels loose or unstable, re-tighten the fasteners or consider adding additional support, such as brackets or braces, to ensure a secure attachment.
By following these steps, you can easily attach your scroll saw to the workbench, providing a solid and stable base for your woodworking projects.
Step-by-Step Guide on How to Attach a Scroll Saw to Your Workbench
Attaching a scroll saw to your workbench not only keeps it securely in place but also provides stability and precise cutting movements. Here is a step-by-step guide on how you can attach your scroll saw to your workbench:
Step 1: Gather the necessary tools and materials
Before you start, make sure you have all the tools and materials required for the installation. These typically include screws, a screwdriver or drill, a measuring tape, and a scroll saw base or mounting kit.
Step 2: Position the scroll saw on the workbench
Place the scroll saw on the desired location of your workbench. Ensure that there is enough space for the saw to operate and that it will be at a comfortable working height. Take measurements to make sure the saw is centered on the bench.

Step 3: Mark the screw hole locations
With a pencil or marker, mark the screw hole locations on the workbench. These holes will be used to secure the scroll saw base to the bench. Make sure the marks are clearly visible and evenly spaced.
Step 4: Pre-drill the screw holes
Using a drill bit slightly smaller than the diameter of the screws, pre-drill the marked screw holes on the workbench. This will help prevent the wood from splitting when the screws are inserted.
Step 5: Attach the scroll saw base to the workbench

Align the screw holes on the scroll saw base with the pre-drilled holes on the workbench. Insert the screws into the holes and tighten them using a screwdriver or drill. Ensure that the base is securely attached and doesn’t wobble or move.
Step 6: Test the stability
Once the scroll saw is attached to the workbench, give it a gentle shake or push to test its stability. If it feels loose or unstable, double-check the screws and make any necessary adjustments. It should be firmly secured to provide a stable cutting surface.
Step 7: Ensure proper alignment
Check that the scroll saw blade is aligned correctly parallel to the workbench. If needed, adjust the blade tension and position to ensure smooth and accurate cutting. Refer to the manufacturer’s instructions for more information on blade alignment.
Step 8: Secure any loose cables
If your scroll saw has any loose cables or cords, secure them to prevent tangling or accidental pulling during operation. Use cable ties or clips to keep the cables organized and out of the way.
Step 9: Test the scroll saw
Before starting any project, test the scroll saw to ensure that it is functioning properly. Check all the controls and settings, as well as the movements and vibrations of the saw. Make any necessary adjustments or repairs before beginning your work.
Following these steps will help you attach your scroll saw securely to your workbench, providing you with a stable and reliable cutting surface for all your woodworking projects.
Questions and answers
What tools do I need to attach a scroll saw to a workbench?
To attach a scroll saw to a workbench, you will need a drill, screws, a screwdriver or drill bit, and possibly a clamp. Make sure to have the appropriate tools on hand before you begin the process.
Can I attach a scroll saw to any type of workbench?
In most cases, you can attach a scroll saw to any type of workbench as long as you have the right tools and hardware. However, it is important to consider the weight and stability of the workbench before attaching the scroll saw to ensure safety and efficiency.


Harrison Clayton
Meet Harrison Clayton, a distinguished author and home remodeling enthusiast whose expertise in the realm of renovation is second to none. With a passion for transforming houses into inviting homes, Harrison's writing at https://thehuts-eastbourne.co.uk/ brings a breath of fresh inspiration to the world of home improvement. Whether you're looking to revamp a small corner of your abode or embark on a complete home transformation, Harrison's articles provide the essential expertise and creative flair to turn your visions into reality. So, dive into the captivating world of home remodeling with Harrison Clayton and unlock the full potential of your living space with every word he writes.


