How To Wet Sand With A Sander
Wet sanding is a crucial step in achieving a smooth and flawless finish on your woodworking projects. It is especially useful when working with materials like wood or plastic, as it helps to remove imperfections and creates a polished surface. One effective tool for wet sanding is a sander, which provides the power and control needed to achieve professional results.
Before you begin wet sanding with a sander, it is important to gather all the necessary materials. You will need a sander with variable speed settings, sandpaper of various grits (from coarse to fine), a bucket of water, and a sponge or cloth for dampening the sandpaper. Additionally, make sure to wear safety goggles and a dust mask to protect yourself from the debris and dust that will be generated.
To start wet sanding with a sander, begin by attaching the appropriate grit sandpaper to the sander. It is recommended to start with a lower grit (around 220) to remove any rough spots or unevenness. Dip the sandpaper into the water, making sure it is completely saturated. Next, turn on the sander and begin gently moving it across the surface of the material in smooth, even strokes. Keep the sander moving at all times to avoid creating uneven patches.
As you wet sand, periodically check the material to assess your progress. Once the surface appears smooth and the imperfections have been removed, it is time to move to a higher grit sandpaper. Repeat the process with progressively higher grits until you achieve the desired finish. Remember to always keep the sandpaper wet by dipping it in the water as needed to prevent clogging and to ensure smooth sanding.
In conclusion, wet sanding with a sander is an effective technique for achieving a smooth and flawless finish on your woodworking projects. By following the proper steps and using the right materials, you can achieve professional results. So, gather your tools, put on your safety gear, and get ready to take your woodworking skills to the next level!

Benefits of Wet Sanding
Wet sanding is a technique that is commonly used in automotive refinishing and woodworking. It involves using water as a lubricant while sanding the surface of the material. This process offers several benefits over traditional dry sanding methods.
1. Reduced Dust
One of the major advantages of wet sanding is the significant reduction in dust and debris that is generated during the sanding process. The water acts as a barrier, trapping the particles and preventing them from becoming airborne. This not only makes the working environment cleaner and healthier, but it also minimizes the risk of inhaling harmful contaminants.
2. Improved Surface Finish
Wet sanding helps achieve a smoother and more refined surface finish compared to dry sanding. The water acts as a lubricant, allowing the sandpaper to glide more smoothly across the material. This helps to prevent scratches and swirl marks, resulting in a cleaner and more professional-looking final product.
In addition, wet sanding also helps to remove any imperfections or blemishes more effectively. The water softens the material being sanded, making it easier to remove scratches, paint overspray, or other surface defects. This can result in a better overall finish, especially when working on painted surfaces or clear coats.
3. Extended Sandpaper Lifespan
Another benefit of wet sanding is that it can extend the lifespan of your sandpaper. The water acts as a cooling agent, reducing the friction and heat generated during the sanding process. This helps to prevent the sandpaper from clogging or becoming prematurely worn out. As a result, you can achieve a more consistent and efficient sanding experience, as well as save money by using your sandpaper for a longer period of time.

| Benefits of Wet Sanding |
|---|
| Reduced Dust |
| Improved Surface Finish |
| Extended Sandpaper Lifespan |
Smoother Surface
One of the main benefits of wet sanding with a sander is the ability to achieve a smoother surface. When you wet sand with a sander, the water helps to lubricate the sandpaper, reducing friction and preventing the sandpaper from clogging with particles. This allows you to remove imperfections and smooth out any rough spots on the surface more effectively.
Wet sanding with a sander is particularly useful when working with wood or automotive finishes. The water helps to soften the surface, making it easier to remove scratches, swirl marks, and other blemishes. It also helps to prevent heat buildup, which can sometimes damage the surface during dry sanding.
Step-by-step process for achieving a smoother surface:
1. Choose the appropriate grit sandpaper for the job. Start with a coarser grit for rougher surfaces and gradually move to finer grits for a smoother finish.
2. Fill a bucket or spray bottle with water. You will need to keep the surface wet as you sand.
3. Attach the sandpaper to the sander. Make sure it is securely fastened and in good condition.

4. Turn on the sander and begin moving it back and forth across the surface, applying light pressure. Keep the surface wet by periodically spraying or dipping the sandpaper in water.
5. Sand in one direction at a time, overlapping each pass slightly. This helps to ensure even sanding and prevents any visible lines or marks.
6. Check the surface regularly to assess progress. If necessary, switch to a finer grit sandpaper and continue sanding until the desired smoothness is achieved.
7. Once you have finished sanding, wipe away any excess water and let the surface dry completely before applying any finishes or coatings.
Conclusion
Wet sanding with a sander is an effective technique for achieving a smoother surface. By using water to lubricate the sandpaper and reduce friction, you can remove imperfections and smooth out rough spots more effectively. Whether you are working with wood or automotive finishes, this method can help you achieve professional-looking results.

Removes Imperfections
Wet sanding with a sander is an effective method for removing imperfections from surfaces. Whether you’re working on wood, metal, or even automotive finishes, wet sanding can help eliminate scratches, swirl marks, and other blemishes.
By using water as a lubricant, the sandpaper glides smoothly over the surface and cuts through the imperfections. The wet sanding process is especially useful for removing old paint, stains, or clear coatings, allowing you to start with a clean slate.
When using a sander for wet sanding, it’s important to choose the right type of sandpaper for the job. Coarser grits, such as 80 or 120, are suitable for removing heavy imperfections, while finer grits, like 220 or 320, are ideal for smoothing and refining the surface. Keep in mind that different materials may require different sandpaper grits, so it’s essential to select the appropriate one.
During the wet sanding process, the water helps to keep the sandpaper cool, preventing it from clogging up with debris. It also helps to reduce friction, allowing you to work more quickly and efficiently. Additionally, the water acts as a lubricant, which helps to prevent the formation of new scratches while you’re sanding.
Once you’ve completed the wet sanding process, be sure to clean the surface thoroughly to remove any residue. This will ensure a smooth, even finish when you apply a new coat of paint, stain, or clear sealer.

In conclusion, wet sanding with a sander is a valuable technique for removing imperfections from various surfaces. By using water as a lubricant and choosing the right sandpaper grits, you can achieve a flawless finish and restore the beauty of your project.
Choosing the Right Equipment
Wet sanding with a sander requires proper equipment to achieve the best results. Here are some key factors to consider when choosing the right equipment:
1. Sander Type
There are various types of sanders available in the market, including orbital sanders, random orbital sanders, and dual-action sanders. Each type has its own advantages and disadvantages, so it’s important to choose the one that suits your specific needs. For wet sanding, a random orbital sander is often the preferred choice due to its ability to provide even and controlled sanding.
2. Grit Size
The grit size of sandpaper determines how coarse or fine the sanding surface will be. Wet sanding typically requires using finer grits compared to dry sanding. An ideal starting point is to use 800-grit sandpaper and gradually move up to higher grits like 1000 or 1200 for smoother results. It’s important to consider the condition of the surface being sanded to determine the appropriate grit size.
3. Sandpaper Material
Choosing the right type of sandpaper material is crucial for wet sanding. Wet/dry sandpaper is specifically designed to withstand water, making it suitable for wet sanding applications. It’s important to use sandpaper made from high-quality materials to ensure durability and optimal performance. Silicon carbide sandpaper is often recommended for wet sanding as it provides effective cutting action when used with water.

4. Sanding Discs
When using a random orbital sander for wet sanding, it’s important to have a good supply of sanding discs. Opt for sanding discs that are specifically designed for wet sanding and can easily attach to your sander. It’s advisable to use multiple discs, especially for larger projects, to ensure uninterrupted sanding. Keep in mind that sanding discs can wear out quickly, so have extra discs on hand.
5. Safety Gear
Always prioritize safety when wet sanding with a sander. Wear a dust mask to protect yourself from fine particles and debris that may be generated during the sanding process. Additionally, wear protective eyewear to prevent any potential eye injuries. Gloves and ear protection are also recommended to minimize any discomfort or harm.
By carefully considering these factors and choosing the right equipment, you’ll be well-prepared for wet sanding with a sander and achieve excellent results.
Selecting the Appropriate Sander
When it comes to wet sanding, choosing the right sander is crucial to achieving the desired results. There are several types of sanders available on the market, each designed for specific purposes.
1. Random Orbital Sander:

The random orbital sander is a versatile tool that is commonly used for wet sanding. It features a round sanding pad that moves in an elliptical pattern, reducing the risk of leaving visible sanding marks on the surface. This type of sander is ideal for large surface areas and provides excellent control and maneuverability.
2. Palm Sander:
A palm sander, also known as a finish sander, is another option for wet sanding. It is smaller and lighter than a random orbital sander, making it easier to handle and control. This type of sander is great for fine sanding and smoothing out imperfections on smaller surfaces.
3. Detail Sander:
If you need to sand hard-to-reach areas or intricate details, a detail sander is the right choice. This compact sander features a triangular-shaped sanding pad that can easily access corners and tight spaces. It is perfect for precision work and getting into hard-to-reach areas on your project.
4. Belt Sander:
A belt sander is a powerful tool that is suitable for aggressive sanding tasks. While it may not be the best choice for wet sanding, it can be handy for initial material removal or leveling uneven surfaces. If you are planning to wet sand with a belt sander, ensure that it has a dust collection system to minimize the mess.
Before selecting a sander, take into consideration the type of surface you are working on, the size of the project, and the level of precision required. It is also important to wear appropriate personal protective equipment, such as safety goggles and a dust mask, when operating a sander.
Gathering the Necessary Supplies
Before you can start wet sanding with a sander, it’s crucial to gather all the necessary supplies. Here are the items you’ll need:
1. Wet/dry sandpaper:
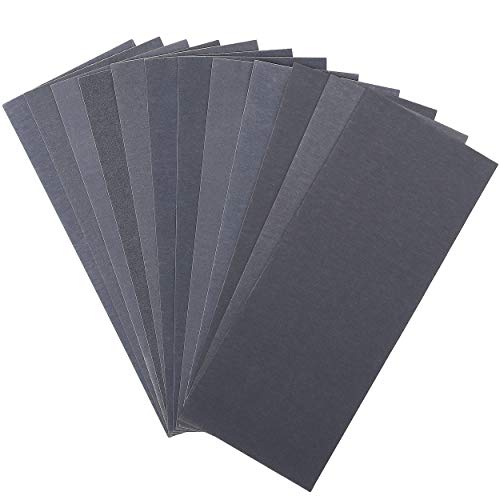
You’ll need wet/dry sandpaper with various grits, typically ranging from 400 to 2000. The higher the number, the finer the grit. It’s recommended to have multiple sheets of each grit to ensure you have enough for the entire sanding process.
2. Sander:
A random orbital sander is the best tool for wet sanding. Make sure you have a sander with variable speed settings, as it allows for better control and precision during the sanding process.
3. Water source:
You’ll need a water source to wet the sandpaper and keep it lubricated. A bucket or container filled with clean water is usually sufficient. Make sure the water is easily accessible during the sanding process.
4. Sanding block:
A sanding block is optional but can be helpful for sanding flat surfaces evenly. It provides support and helps distribute pressure evenly across the sandpaper. Make sure to choose a sanding block that is compatible with your sandpaper.
5. Safety equipment:
It’s important to prioritize safety during any sanding project. Make sure to wear safety goggles to protect your eyes from debris and a dust mask to prevent inhaling dust particles. It’s also a good idea to wear gloves to protect your hands from any potential hazards.
By gathering all the necessary supplies before you begin wet sanding with a sander, you’ll be well-prepared and able to complete the task efficiently and effectively.
Preparing the Surface
Before you begin wet sanding with a sander, it is essential to properly prepare the surface. This will ensure that the sanding process is effective and results in a smooth finish.
Here are some steps to follow when preparing the surface:
1) Clean the Surface
Start by cleaning the surface to remove any dirt, dust, or debris. You can use a damp cloth or a mild detergent solution to gently wipe away any grime. Make sure the surface is completely dry before continuing to the next step.
2) Fill in any Gaps or Imperfections
Inspect the surface for any gaps, scratches, or imperfections. Use a suitable filler or putty to fill in these areas and allow it to dry completely. Once dry, sand the filled areas with a fine-grit sandpaper to ensure they are level with the rest of the surface.
3) Protect Surrounding Areas
Before starting the wet sanding process, it is important to protect the surrounding areas to prevent any damage. This can be done by using masking tape or plastic sheets to cover adjacent surfaces, edges, or objects.
4) Select the Right Grit Sandpaper
Choose the appropriate grit sandpaper for your project. Finer grit sandpaper, such as 1000 or 1500, is ideal for removing light surface imperfections or for achieving a polished finish. If you are dealing with deeper scratches or rough surfaces, you may need to start with a coarser grit sandpaper, like 400 or 600, and gradually work your way up to the finer grits.
5) Prepare the Sander
Ensure that your sander is in good working condition and the sandpaper is securely attached. Make sure to read the manufacturer’s instructions for your specific sander model to properly set it up for wet sanding.
6) Wet the Sandpaper
Prior to sanding, wet the sandpaper thoroughly. You can either soak it in water for a few minutes or use a spray bottle to wet it evenly. This will create a slurry that helps to lubricate the surface, prevent clogging, and achieve a smoother sanding result.
By properly preparing the surface before wet sanding, you can ensure the best possible outcome for your project. Take the time to clean, repair any imperfections, protect surrounding areas, select the right sandpaper, and properly set up your sander. These steps will help you achieve a smooth and flawless finish for your surfaces.
Questions and answers
What is wet sanding and why is it important?
Wet sanding is a method of sanding surfaces using water as lubrication. It is important because it helps to achieve a smoother finish, removes imperfections, and prevents the sandpaper from clogging.
Can I use any type of sander for wet sanding?
No, not all sanders are suitable for wet sanding. You need a sander that is specifically designed for wet sanding, such as a random orbital sander with a built-in water feed system.
What grit sandpaper should I use for wet sanding?
The grit of the sandpaper you should use for wet sanding depends on the surface you are working on and the level of imperfections you need to remove. Generally, it is recommended to start with a coarser grit, such as 120 or 220, and gradually progress to finer grits, such as 400 or 600, for a smoother finish.


Harrison Clayton
Meet Harrison Clayton, a distinguished author and home remodeling enthusiast whose expertise in the realm of renovation is second to none. With a passion for transforming houses into inviting homes, Harrison's writing at https://thehuts-eastbourne.co.uk/ brings a breath of fresh inspiration to the world of home improvement. Whether you're looking to revamp a small corner of your abode or embark on a complete home transformation, Harrison's articles provide the essential expertise and creative flair to turn your visions into reality. So, dive into the captivating world of home remodeling with Harrison Clayton and unlock the full potential of your living space with every word he writes.

