How To Use Belt Sander On Floor

Belt sanders are powerful tools that can make sanding your floors a much quicker and easier process. Whether you’re refinishing an old wooden floor or removing paint and varnish from a concrete surface, a belt sander is an essential tool for achieving a smooth and polished finish. However, it’s important to use a belt sander correctly to avoid damaging your floor and to ensure the best results.
Firstly, it’s important to prepare the floor before using a belt sander. Make sure to remove any nails or staples that may be sticking out. Use a scraper or putty knife to remove any stubborn debris or adhesive. Once the floor is clean and free of obstacles, vacuum or sweep the surface to remove any remaining dirt or dust.
Before you start sanding, it’s a good idea to wear protective gear such as goggles, earplugs, and a dust mask. Belt sanders produce a lot of dust and debris, and it’s important to protect yourself from potential health hazards. Additionally, cover any nearby furniture or objects with plastic sheets to avoid damaging them.
Next, choose the right sanding belt for the job. For hardwood floors, start with a coarse grit sanding belt to remove any imperfections or old finish. Gradually work your way up to a finer grit belt for a smoother finish. If you’re working on a concrete surface, use a diamond abrasive belt for the best results. Remember to follow the manufacturer’s instructions for changing and adjusting the sanding belt.
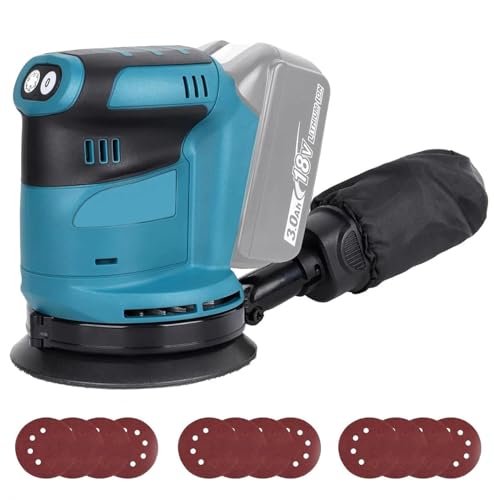
What is a Belt Sander
A belt sander is a powerful tool commonly used for sanding and smoothing surfaces. It consists of an electric motor that rotates a continuous loop of sandpaper, known as a belt, at high speeds. Belt sanders are available in various sizes and styles, with some designed for handheld use and others for stationary applications.

One of the key features of a belt sander is its ability to remove material quickly and efficiently. The fast-moving belt, combined with the weight and power of the tool, allows it to strip away layers of paint, varnish, or other finishes in a short amount of time. This makes it a popular choice for professionals and DIY enthusiasts who need to refinish or restore wooden surfaces.
In addition to sanding, belt sanders can also be used for leveling uneven surfaces, shaping and rounding edges, and even removing rust or paint from metal. The versatility of this tool makes it a valuable asset for a wide range of projects.
When using a belt sander, it’s important to wear appropriate safety gear, such as goggles and a dust mask, to protect yourself from flying debris and fine dust particles. The noise level of a belt sander can also be quite loud, so hearing protection is recommended.
Overall, a belt sander is a versatile and powerful tool that can make sanding and smoothing surfaces a breeze. With proper technique and safety precautions, it can help you achieve professional-looking results in your woodworking or home improvement projects.
Benefits of Using a Belt Sander on Floor
Using a belt sander on a floor can offer several benefits for both professional contractors and DIY enthusiasts. Here are some advantages of using a belt sander on floors:

| 1. Efficient Material Removal: | The aggressive sanding action of a belt sander allows for quick and efficient material removal. It can easily tackle tough finishes, stains, and imperfections, saving both time and effort. |
| 2. Versatility: | Belt sanders can be used on a variety of floor surfaces, including hardwood, plywood, and even concrete. They can handle both flat areas and tight corners, making them a versatile tool for floor sanding projects. |
| 3. Smooth and Even Finish: | A belt sander can help achieve a smooth and even finish on the floor surface. Its continuous sanding belt ensures consistent sanding action, resulting in a uniform appearance across the entire floor. |
| 4. Easy to Use: | Using a belt sander on a floor is relatively easy, especially with modern models that come with user-friendly features. They often have ergonomic handles and adjustable settings, allowing for comfortable and precise sanding. |
| 5. Cost-Effective: | Hiring a professional floor sander can be expensive, especially for larger projects. Using a belt sander yourself can be a cost-effective alternative, saving you money in the long run. |
| 6. Rejuvenates the Floor: | A belt sander can breathe new life into an old and worn-out floor. By removing old finishes and imperfections, it can restore the natural beauty of the wood, making the floor look fresh and rejuvenated. |
Overall, using a belt sander on a floor provides efficient material removal, versatility, a smooth finish, ease of use, cost-effectiveness, and the ability to rejuvenate the floor. It is a valuable tool for anyone looking to refinish or restore a floor.
Step-by-Step Guide
Step 1: Prepare the Floor
Before using a belt sander on your floor, make sure to clear the area of any furniture or obstacles. Sweep or vacuum the floor to remove any dirt or debris that could interfere with the sanding process.
Step 2: Choose the Right Grit
Select the appropriate grit of sandpaper for your floor. Typically, a coarser grit (around 30-40) is used for initial sanding, while a finer grit (around 80-100) is used for the final sanding.

Step 3: Put on Safety Gear
Before using the belt sander, ensure that you are wearing the necessary safety gear, including safety goggles, a dust mask, and ear protection.
Step 4: Start Sanding
Hold the belt sander firmly with both hands and turn it on. Begin sanding in a diagonal direction, moving the sander along the length of the floorboards. Avoid staying in one spot for too long to prevent uneven sanding.
Step 5: Sand the Edges

For areas that the belt sander cannot reach, such as corners and edges, use a hand sander or sandpaper to ensure consistent sanding throughout the floor.
Step 6: Change Sandpaper as Needed
As the sandpaper wears down, replace it with a fresh piece to maintain optimal sanding performance. Follow the manufacturer’s instructions for changing the sandpaper.
Step 7: Repeat the Process
Once you have sanded the entire floor with the coarse grit, repeat the process with a finer grit sandpaper to achieve a smooth and even finish.

Step 8: Clean Up
After sanding, use a vacuum or broom to remove the sanding dust from the floor.
Step 9: Apply Finish
Once the floor is clean and free of dust, you can apply the desired finish, such as varnish or oil, to protect and enhance the appearance of the floor. Follow the manufacturer’s instructions for applying the finish.
Note: It is important to follow all safety precautions and guidelines provided by the manufacturer when using a belt sander on your floor.

Preparing the Floor
Before using a belt sander on the floor, it’s important to properly prepare the surface to ensure the best results. Preparing the floor involves several steps, including cleaning, repairing any damages, and removing any existing finishes or coatings.
Cleaning the Floor
The first step in preparing the floor is to clean it thoroughly. Remove all furniture and debris from the area to be sanded. Use a broom or vacuum cleaner to remove any loose dirt or dust. For stubborn dirt or grime, use a damp mop with a mild floor cleaner to ensure a clean surface.
Repairing Damages
Inspect the floor for any damages, such as cracks, dents, or loose boards. Repair any damages before sanding to ensure a smooth and level surface. Fill in any cracks or gaps with wood filler, and secure any loose boards with screws or nails. Let the filler dry and sand it down until it’s flush with the surrounding floor.
Removing Existing Finishes or Coatings
If there are any existing finishes or coatings on the floor, they need to be removed before sanding. Use a chemical stripper or sanding machine to remove any varnish, paint, or sealants. Follow the manufacturer’s instructions for the specific product you’re using, and make sure to wear protective gear, such as gloves and goggles.
| Tools and Materials Needed: |
|---|
| – Broom or vacuum cleaner |
| – Damp mop |
| – Mild floor cleaner |
| – Wood filler |
| – Screws or nails |
| – Chemical stripper or sanding machine |
| – Protective gear (gloves, goggles) |
By properly preparing the floor, you’ll ensure a clean, level, and smooth surface for sanding with a belt sander. This will result in a professional-looking finish and extend the lifespan of your sander.

Using the Belt Sander
When it comes to refinishing your wooden floors, a belt sander can be a valuable tool. The belt sander is designed to remove old finishes, smooth out uneven surfaces, and prepare the floor for a new coat of paint or stain. However, before you start using the belt sander, it’s important to familiarize yourself with its features and proper techniques.
1. Safety Precautions
Prior to using the belt sander, make sure to wear the appropriate safety gear, such as safety goggles and ear protection. These will protect your eyes from flying debris and reduce the noise level, respectively. Additionally, ensure that the room is well-ventilated to prevent the inhalation of dust particles.
2. Preparing the Floor
Before you begin sanding, clear the room of any furniture or objects that could obstruct your movement. It’s also a good idea to inspect the floor for any nails or staples sticking out, as these could damage the sanding belt.
Next, choose the appropriate sanding belt grit for your project. Coarse grits, such as 36 or 60, are ideal for removing old finishes, while finer grits, like 80 or 100, work better for smoothing out the surface. Remember to attach the belt securely to the sander, ensuring it is centered and taut.
3. Sanding Techniques
Start the belt sander and gradually lower it onto the floor, keeping a steady grip on the handles. Move the sander in smooth, even passes along the grain of the wood, overlapping each pass by about one-third. Avoid applying excessive pressure, as this can result in uneven sanding.
When you reach the edges and corners of the room, you may need to use a smaller hand sander or sandpaper to achieve the desired finish. Take your time and be careful not to damage the surrounding walls or baseboards.
Throughout the process, periodically check the sanding belt for wear and tear. If necessary, replace it to ensure consistent sanding performance.
4. Finishing Touches
Once you have completed the sanding process, thoroughly clean the room to remove any dust and debris. Vacuum the floor and wipe it down with a damp cloth to ensure a clean surface for the next steps, such as staining or painting.
Remember, practicing proper sanding techniques with the belt sander will help you achieve the best results. Take your time, be patient, and enjoy the process of transforming your floor into a beautifully refreshed surface.
Cleaning Up
After you have finished using the belt sander on the floor, it is important to thoroughly clean up the area. This will not only help maintain the cleanliness of your workspace, but also ensure the longevity and performance of your belt sander.
1. Dust Removal
The first step in cleaning up is to remove the dust that has been generated by the sanding process. You can use a vacuum cleaner or a broom and dustpan to collect the dust. Make sure to pay attention to corners, edges, and hard-to-reach areas. If there are still visible dust particles, you can use a damp cloth or mop to wipe them away.
2. Belt Replacement
If you have been using the belt sander for an extended period of time or have completed a large project, it is a good idea to check the condition of the sanding belt. If the belt is worn out or damaged, it is important to replace it before your next use. Follow the manufacturer’s instructions on how to properly replace the belt.
3. Inspection and Maintenance
Take some time to inspect the belt sander for any signs of damage or wear. Check the power cord for any fraying or damage. Inspect the sanding pad and replace it if it is worn out. If necessary, lubricate any moving parts according to the manufacturer’s instructions. Regular maintenance will help prolong the life of your belt sander and ensure its optimal performance.
4. Storage
Properly store your belt sander in a clean and dry area when it is not in use. Ensure that the power cord is neatly wrapped and secured. If possible, use a cover or case to protect the sander from dust and moisture. Storing your belt sander properly will help prevent damage and extend its lifespan.
By following these cleaning and maintenance steps, you can ensure that your belt sander stays in good condition and continues to provide you with efficient and effective sanding results.
Tips and Tricks
When using a belt sander on a floor, there are some tips and tricks that can help you achieve the best results:
- Start with a coarse grit sandpaper to remove any existing finish or imperfections on the floor’s surface. Gradually move to finer grits for a smoother finish.
- Keep the belt sander moving at a constant pace to prevent any uneven sanding marks. Avoid leaving the sander in one spot for too long.
- Use smooth, fluid motions when operating the belt sander. Avoid applying too much pressure, as it can result in excessive wood removal.
- Always wear protective gear, such as safety goggles and a dust mask, to protect yourself from flying debris and dust particles.
- Ensure proper ventilation in the work area to prevent the accumulation of dust. Open windows and use fans or air purifiers if necessary.
- If you come across tough stains or blemishes on the floor, you can use a hand sander or sandpaper to spot-sand these areas before proceeding with the belt sander.
- Work in small sections at a time to maintain control and ensure thorough sanding. Start from one end of the room and work your way towards the exit to avoid stepping on freshly sanded areas.
- Regularly check the sandpaper on the belt sander for wear and tear. Replace it as needed to maintain optimal sanding performance.
- After sanding the floor, thoroughly clean the area to remove any dust or debris. This will ensure a clean surface when applying finishes or sealants.
- Take breaks as needed to prevent fatigue and maintain focus. Sanding a floor can be a physically demanding task, so listen to your body and pace yourself accordingly.
By following these tips and tricks, you can effectively use a belt sander on your floor and achieve professional-looking results.
Questions and answers
What is a belt sander used for?
A belt sander is a power tool that is used for smoothing and shaping wood and other materials.
Can I use a belt sander on my wooden floor?
Yes, you can use a belt sander on a wooden floor. It is an effective tool for removing old paint, finishes, and imperfections from the floor surface.
What type of sandpaper should I use with a belt sander?
The type of sandpaper to use with a belt sander depends on the task at hand. For initial sanding, coarse grit sandpaper such as 40 or 60 grit is ideal. For fine sanding and finishing, a finer grit sandpaper such as 80 or 100 grit is recommended.
What are the safety precautions to take when using a belt sander on a floor?
When using a belt sander on a floor, it is important to wear protective goggles, a dust mask, and ear protection. Make sure to remove any objects or protruding nails that may damage the sander or cause injury. Always keep the sander moving to avoid creating uneven spots on the floor.
What are some tips for using a belt sander on a floor?
Some tips for using a belt sander on a floor include starting with a coarse grit sandpaper and gradually progressing to finer grits, sanding in the direction of the wood grain, and maintaining a consistent pressure and speed while sanding. It is also important to clean the floor thoroughly before sanding to remove any debris that may scratch the surface.


Meet Harrison Clayton, a distinguished author and home remodeling enthusiast whose expertise in the realm of renovation is second to none. With a passion for transforming houses into inviting homes, Harrison's writing at https://thehuts-eastbourne.co.uk/ brings a breath of fresh inspiration to the world of home improvement. Whether you're looking to revamp a small corner of your abode or embark on a complete home transformation, Harrison's articles provide the essential expertise and creative flair to turn your visions into reality. So, dive into the captivating world of home remodeling with Harrison Clayton and unlock the full potential of your living space with every word he writes.