How To Use Makita Palm Sander

A Makita palm sander is a versatile and powerful tool that can help you achieve smooth and polished surfaces on a variety of materials, including wood, metal, and plastic. Whether you are a professional carpenter or a DIY enthusiast, learning how to use a Makita palm sander properly can greatly improve the quality of your projects.
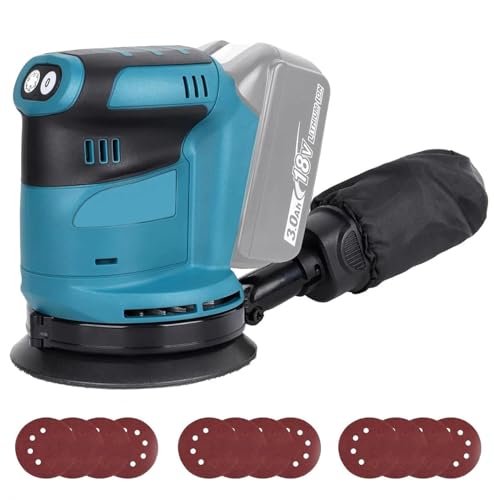
Before you start using your Makita palm sander, it is important to familiarize yourself with its features and controls. The palm sander usually has a compact design that fits comfortably in the hand, allowing for easy maneuverability and precise sanding. It is equipped with a motor that generates high-speed rotation, causing the sanding pad to move in quick circular motions.
To begin using the Makita palm sander, first, ensure that you have selected the appropriate sandpaper grit for your project. The grit determines the coarseness of the sandpaper, with lower numbers indicating rougher sandpaper and higher numbers indicating smoother sandpaper. Attach the sandpaper securely to the sanding pad of the palm sander, making sure it is centered and aligned properly.
Once the sandpaper is attached, switch on the palm sander and place it gently on the surface you want to sand. Move the sander in smooth and even strokes, applying gentle pressure. Avoid pressing too hard, as this can damage the material or create uneven sanding. Remember to keep the sander moving at all times to prevent over-sanding in one spot.
As you sand, periodically check the surface to ensure that you are achieving the desired smoothness and removing any imperfections. If necessary, you can switch to a finer grit sandpaper to achieve a finer finish. When you have completed sanding, switch off the palm sander and remove the sandpaper from the sanding pad.

Using a Makita palm sander can greatly speed up the sanding process and create professional-looking results. With practice and attention to detail, you can master the art of using a Makita palm sander and achieve smooth and flawless surfaces in your woodworking projects.
Choosing the Right Makita Palm Sander
When it comes to sanding, having the right tool can make a big difference in the quality of your work. Makita is a renowned brand that offers a variety of palm sanders to suit different needs and preferences. Here are some factors to consider when choosing the right Makita palm sander for your projects:
| Model | Grip Type | Power Source | Speed |
|---|---|---|---|
| Makita BO3710 | Pistol | Electric Corded | 11,000 OPM |
| Makita BO3711 | Pistol | Electric Corded | 11,000 OPM |
| Makita BO4556K | Palm | Electric Corded | 14,000 OPM |
| Makita BO5030K | Palm | Electric Corded | 12,000 OPM |
| Makita XOB01Z | Palm | Battery | 7,000 – 11,000 OPM |
1. Model: Makita offers various models of palm sanders, each with its own unique features and benefits. It’s important to choose a model that is suitable for the type of work you’ll be doing.
2. Grip Type: Makita palm sanders are available in both pistol grip and palm grip styles. The choice of grip type largely depends on your personal preference and comfort while using the tool.
3. Power Source: Makita palm sanders are available in electric corded and battery-powered options. Electric corded sanders provide consistent power, while battery-powered sanders offer more mobility and flexibility.

4. Speed: The speed of a palm sander is measured in orbits per minute (OPM). Higher OPMs result in faster sanding, but it’s important to choose a speed that is suitable for the material you’ll be sanding.
By considering these factors, you can choose the right Makita palm sander that will help you achieve smooth, professional-looking results in your sanding projects.
Step-by-Step Guide to Using a Makita Palm Sander
Using a Makita palm sander is a simple and effective way to achieve a smooth and polished finish on any wood surface. Whether you are a professional woodworker or a DIY enthusiast, this step-by-step guide will help you get the most out of your Makita palm sander.
| Step 1: | Preparation |
| Step 2: | Select the Right Sandpaper |
| Step 3: | Attach the Sandpaper |
| Step 4: | Turn on the Sander |
| Step 5: | Sand with Light Pressure |
| Step 6: | Move with the Grain |
| Step 7: | Regularly Inspect the Surface |
| Step 8: | Clean the Sanded Surface |
Step 1: Preparation
Before you begin sanding, ensure that the wood surface is clean and free from any dirt, debris, or previous finishes. Remove any hardware or attachments that may interfere with the sanding process.

Step 2: Select the Right Sandpaper
Choose the appropriate grit sandpaper based on the level of sanding required. Coarse grits (60-80) are suitable for heavy material removal, while finer grits (120-220) are used for finishing and smoothing.
Step 3: Attach the Sandpaper
Follow the instructions provided with your Makita palm sander to attach the sandpaper securely. Make sure the sandpaper is centered and aligned with the sander’s pad.
Step 4: Turn on the Sander

Plug in your Makita palm sander and turn it on. Familiarize yourself with the controls and ensure that you have a firm grip on the sander.
Step 5: Sand with Light Pressure
Holding the sander with both hands, apply gentle pressure to the wood surface. Let the sander’s weight do most of the work, avoiding excessive force that can cause damage or create uneven surfaces.
Step 6: Move with the Grain
Maintain a steady and fluid motion, moving the sander with the grain of the wood. This will minimize the risk of scratches and ensure an even and consistent finish.

Step 7: Regularly Inspect the Surface
Periodically stop and inspect the sanded surface to check the progress and identify any areas that may need further attention. Adjust your technique or change the sandpaper if necessary.
Step 8: Clean the Sanded Surface
Once you have achieved the desired level of smoothness, turn off the sander and clean the sanded surface. Use a brush or a damp cloth to remove any dust or particles before applying any finishes or coatings.
Following these steps will help you achieve professional-looking results with your Makita palm sander. Always prioritize safety and take breaks if needed to avoid excessive strain. Happy sanding!

Maintenance Tips for Your Makita Palm Sander
Proper maintenance of your Makita palm sander is essential to keep it running smoothly and prolong its lifespan. Here are some tips to help you maintain your palm sander:
1. Clean the sanding pad regularly: After each use, make sure to clean the sanding pad thoroughly. Use a brush or special sanding pad cleaner to remove any built-up debris. This will help prevent clogging and ensure optimal performance.
2. Check the dust bag: If your Makita palm sander is equipped with a dust bag, check it regularly and empty it when it’s full. A full dust bag can decrease the efficiency of the sander and lead to clogging. Clean the dust bag with mild soap and water if necessary.
3. Inspect the power cord: Regularly check the power cord for any signs of damage or wear. If you notice any frayed wires or exposed insulation, stop using the sander immediately and replace the power cord. Using a damaged power cord can be dangerous.
4. Lubricate moving parts: Apply a small amount of lubricant or oil to the moving parts of your palm sander periodically. This will help reduce friction and keep the sander operating smoothly. Refer to the manufacturer’s instructions for specific lubrication recommendations.

5. Store properly: When you’re done using your palm sander, store it in a clean and dry area. Keep it away from moisture, dust, and extreme temperatures. Use the provided carrying case or a protective cover to prevent damage during storage or transportation.
By following these maintenance tips, you can ensure that your Makita palm sander remains in good working condition for years to come. Regular maintenance will help you achieve optimal sanding results and avoid unnecessary repairs. Remember to always refer to the user manual for specific maintenance instructions for your model.
Questions and answers
What is the purpose of a palm sander?
A palm sander is a power tool that is used for sanding and smoothing surfaces. It is designed to be handheld and is commonly used for finishing tasks, such as sanding wood, removing rust or paint, and preparing surfaces for painting or staining.
How do you use a Makita palm sander?
Using a Makita palm sander is quite simple. First, make sure to wear appropriate safety gear, such as goggles and a dust mask. Then, plug in the sander and select the desired sandpaper grit. Hold the sander firmly with both hands, and place it flat against the surface you want to sand. Move the sander in an even and smooth motion, applying light to moderate pressure. Always sand with the grain of the wood, and avoid pressing too hard or staying in one spot for too long to prevent over-sanding. After you are done, switch off the sander and unplug it before replacing the sandpaper or storing it away.


Meet Harrison Clayton, a distinguished author and home remodeling enthusiast whose expertise in the realm of renovation is second to none. With a passion for transforming houses into inviting homes, Harrison's writing at https://thehuts-eastbourne.co.uk/ brings a breath of fresh inspiration to the world of home improvement. Whether you're looking to revamp a small corner of your abode or embark on a complete home transformation, Harrison's articles provide the essential expertise and creative flair to turn your visions into reality. So, dive into the captivating world of home remodeling with Harrison Clayton and unlock the full potential of your living space with every word he writes.