How To Sand Wood With Detaol Sander

If you are a DIY enthusiast or a professional woodworker, you know the importance of sanding wood to achieve a smooth and flawless finish. Sanding not only helps in removing imperfections and blemishes but also prepares the wood for staining or painting. While there are various types of sanders available in the market, one of the most versatile and efficient tools for sanding wood is a detail sander.
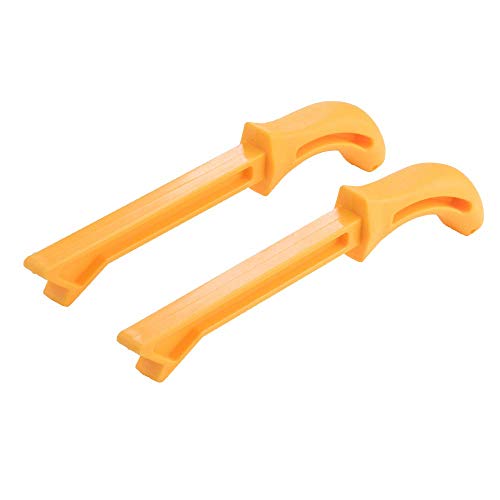
A detail sander, also known as a palm sander or a mouse sander, is a small handheld tool that is perfect for sanding in tight and intricate spaces. Its compact size and triangular sanding pad make it ideal for getting into corners and reaching difficult areas. Whether you are refinishing furniture, preparing wooden surfaces for varnishing, or smoothing rough edges, a detail sander is a must-have tool in your workshop.
Using a detail sander may seem intimidating at first, but with the right technique and a few tips, you can achieve professional-looking results. Firstly, it is important to choose the right sandpaper grit for your project. If you are removing heavy varnish or paint, start with a coarse grit (around 80-100) and gradually move to finer grits (120-180) for smoothing the surface. Remember to always sand parallel to the wood grain to avoid scratches and ensure an even finish.
In addition to choosing the right sandpaper, it is crucial to hold the detail sander properly. Grip the tool firmly with both hands, one hand on the handle and the other on the body of the sander. Apply moderate pressure and let the weight of the sander do the work. Avoid pressing too hard, as it may result in uneven sanding or damage to the wood. Move the sander in a steady and controlled motion, making sure to overlap each pass for consistent results.
Preparation for Sanding Wood
Before you start sanding wood with a detail sander, it is important to properly prepare the surface to achieve the best results. Taking the time to prepare the wood before sanding can make a significant difference in the final outcome.

Clean the Surface
The first step in preparing the wood for sanding is to thoroughly clean the surface. Remove any dust, dirt, or debris that may be present on the wood. You can use a soft brush or a vacuum cleaner to remove loose particles. For stubborn dirt or stains, you may need to use a mild soap and water solution to gently clean the surface. Remember to allow the wood to dry completely before proceeding.
Inspect for Damage
Once the surface is clean, carefully inspect the wood for any signs of damage. Look for cracks, splits, or deep gouges that may require special attention. It is important to repair any damage before sanding to ensure a smooth and even finish. You can use wood filler or epoxy resin to fill in any imperfections. Allow the filler or resin to fully dry and then sand it down to match the surrounding wood.
Remove Hardware
If your project involves sanding a piece of wood that has hardware, such as handles or knobs, it is best to remove them before sanding. This will prevent damage to the hardware and allow for better access to the entire surface of the wood. Use a screwdriver or appropriate tools to safely remove any hardware.
Tape Off Edges
Before you begin sanding, it is a good idea to tape off any edges or areas that you want to protect from accidental sanding. Masking tape or painter’s tape can be used to cover delicate surfaces, such as trim or adjacent walls, to prevent scratches or damage. Take your time to apply the tape carefully, ensuring it adheres firmly to the wood and covers the desired areas.
By following these preparation steps, you can ensure that your wood surface is clean, free from damage, and well-protected before starting the sanding process with your detail sander. Taking the extra time to prepare will result in a professional-looking finish.

Cleaning the wood surface
Before sanding the wood, it is essential to clean the surface thoroughly. This step ensures that any dirt, dust, or debris is removed, allowing for a smoother sanding process and a better finish.
Start by using a soft brush or vacuum cleaner to remove loose dirt and dust from the wood surface. Be careful not to scratch or damage the wood while doing this.
Next, dampen a clean cloth or sponge with water and a mild detergent. Gently wipe the wood surface, paying attention to any stains or sticky residues. Make sure to wring out the cloth or sponge properly to avoid excessive moisture on the wood.
If there are any stubborn stains or marks on the wood, you can use a gentle wood cleaner or a solution of vinegar and water. Apply the cleaner to a soft cloth and gently rub the affected area until the stain is removed.
After cleaning the wood surface, allow it to dry completely before proceeding with the sanding process. Any remaining moisture could affect the sanding results and compromise the quality of the finish.

Tip: If you are working with unfinished wood or wood with an existing finish, check the manufacturer’s instructions or recommendations for cleaning and sanding. Some finishes may require specific cleaning products or techniques to avoid damaging the wood.
In conclusion, cleaning the wood surface before sanding is an essential step in achieving a smooth and flawless finish. By removing dirt, dust, and stains, you can ensure optimal results and maintain the integrity of the wood.
Choosing the right type of sander
When it comes to sanding wood, having the right tools can make a significant difference in the quality of your results. There are various types of sanders available on the market, each designed for specific purposes. Here are some of the most common types:
- Detail sander: This small, handheld sander is perfect for reaching tight corners and small areas that are difficult to access. It’s great for intricate work and delicate finishing touches.
- Finishing sander: Also known as an orbital sander, this tool is ideal for final smoothing and finishing work. It uses a small, circular sanding pad that moves in random orbits to prevent swirl marks on the wood surface.
- Belt sander: This powerful, handheld sander is great for large surface areas and rough removal of material. It has a continuous sanding belt that moves rapidly, making it useful for heavy-duty sanding tasks.
- Random orbital sander: Combining the functionality of a finishing sander and a belt sander, a random orbital sander is versatile and efficient. It moves in both circular and elliptical motions, minimizing the risk of leaving swirl marks on the wood.
- Sheet sander: Also known as a palm sander, it uses sandpaper sheets attached to a rectangular pad that moves in a back-and-forth motion. It’s great for smoothing large, flat surfaces.
When choosing a sander, consider the size and complexity of your project, as well as your experience level. Some sanders may be more suitable for beginners, while others require more skill to operate effectively. It’s also important to consider the type of wood you’re working with and the finish you want to achieve.
Remember to always wear appropriate safety gear, including eye protection and a dust mask, when sanding wood. Sanding can create a lot of dust, so make sure to work in a well-ventilated area or use a dust collection system to minimize the mess.

By selecting the right type of sander for your specific needs, you can ensure that your wood sanding projects are completed with ease and produce smooth, professional results.
Using the Detail Sander
When it comes to sanding wood, a detail sander can be a handy tool to have. The detail sander is designed for those hard-to-reach areas and intricate contours that a regular sander may struggle with.
Before using the detail sander, it’s important to prepare the wood surface. Start by removing any large debris or loose paint using a brush or scraper. Then, wipe the surface clean with a damp cloth to remove any dust or dirt.
Next, plug in the detail sander and attach the appropriate sandpaper grit. The grit you choose will depend on the type of wood and the level of sanding required. Generally, a lower grit number (e.g. 80) is used for rough sanding, while a higher number (e.g. 120) is used for finer sanding.
Hold the detail sander firmly with both hands and turn it on. Begin sanding the wood by gently moving the sander in a back-and-forth or circular motion. Take care not to press too hard, as this may result in uneven sanding or damage to the wood.

Keep the sander moving at a steady pace and avoid staying in one spot for too long. This helps to prevent over-sanding and ensures a smooth finish. Remember to sand in the direction of the wood grain for the best results.
As you sand, periodically check the surface to assess your progress. If necessary, switch to a higher grit sandpaper for a finer finish. Be sure to remove any dust or debris that accumulates on the sander or the wood surface during the sanding process.
Once you are satisfied with the smoothness of the wood, turn off the sander and unplug it. Use a clean cloth or brush to remove any remaining dust from the surface. If desired, you can then apply a finish or paint to protect and enhance the appearance of the wood.
In conclusion, the detail sander is a versatile tool that can make sanding wood a breeze. With proper preparation and technique, you can achieve a smooth and professional-looking finish on even the most intricate wood surfaces.
Setting up the detail sander
Before you begin sanding wood with a detail sander, it is important to properly set up the tool. Follow these steps to ensure you are ready to sand efficiently:

- Choose the right sandpaper: Detail sanders use sandpaper sheets or pads with hook and loop fasteners for easy attachment. Select the appropriate grit for your project, considering the wood type and the level of sanding required.
- Attach the sandpaper: Remove any existing sandpaper from the sander’s base and align the new sheet with the hook and loop fasteners. Press firmly to ensure a secure attachment.
- Check the dust collection: Detail sanders often come with a built-in dust collection system or a dust bag. Make sure the dust collection port is properly connected, and the bag is empty and properly inserted.
- Prepare the work area: Clear the workspace and cover nearby objects to prevent dust and debris from spreading. Consider wearing safety goggles and a dust mask for protection.
- Plug in the sander: Locate a nearby power outlet, and plug in the detail sander. Ensure the power cord is away from the sanding area to avoid accidents.
- Test the sander: Turn on the detail sander and let it run for a few seconds. Verify that the sandpaper is properly attached and the sander is functioning smoothly.
Once the detail sander is set up, you can proceed with sanding the wood. Remember to hold the sander firmly but not too tightly, and move it in smooth, even strokes. Keep an eye on the progress and adjust the speed and pressure as needed. With proper setup and technique, a detail sander can help you achieve a smooth and even finish on your woodworking projects.
Starting the sanding process
Before you begin sanding your wood with a detail sander, it’s important to prepare the surface by removing any dirt, dust, or loose particles. Wipe down the wood with a clean cloth or use a vacuum cleaner to remove any debris.
Next, inspect the wood for any rough or uneven areas that might need extra attention. Use your fingers to feel for any imperfections and mark them with a pencil. This will help you focus your sanding efforts on those specific areas.
Choosing the right sandpaper
When it comes to sanding wood with a detail sander, selecting the correct sandpaper grit is crucial. The grit determines how rough or smooth the sanded surface will be. For initial sanding or the removal of rough surfaces, start with a lower grit sandpaper such as 80 or 120. As you progress to smoothing the surface, switch to a higher grit paper like 220 or 320.
Make sure to load the sandpaper onto the detail sander correctly. Follow the manufacturer’s instructions for your specific model. Improperly loaded sandpaper can lead to inefficient sanding and premature wear of the paper.

Techniques for sanding wood
Sanding wood is an essential step in any woodworking project to achieve a smooth and polished finish. Here are some techniques to help you get the best results:
1. Choose the right sandpaper grit
The first step in sanding wood is selecting the appropriate sandpaper grit. Coarse grits, such as 60 or 80, are ideal for removing rough imperfections or paint, while finer grits like 120 or 150 are better for smoothing the surface.
2. Prepare the wood surface
Before starting to sand, make sure the wood surface is clean and free from dust or debris. Use a tack cloth or vacuum cleaner to remove any loose particles that may affect the sanding process.
3. Start with a low speed setting
When using a detail sander, begin with a low speed setting to prevent aggressive sanding. Slowly increase the speed as needed, paying attention to the wood’s reaction and the desired result.
4. Sand in the direction of the grain
Always sand wood in the direction of the grain to achieve optimum results. Sanding against the grain may result in scratches or an uneven finish.
5. Apply even pressure
Apply even pressure on the detail sander while sanding to prevent uneven sanding or grooves in the wood. Avoid pushing too hard or using excessive force, as this may damage the surface.
6. Use light, overlapping strokes
When using a detail sander, make light, overlapping strokes to ensure consistent sanding and avoid creating visible lines or uneven areas on the wood surface.
7. Check the progress regularly
Periodically stop sanding and inspect the wood surface to check the progress. This will help you identify areas that need more sanding or areas that may require additional attention.
8. Finish with a fine grit sandpaper
After completing the initial sanding, switch to a finer grit sandpaper, such as 220 or higher, to achieve a smooth and refined finish. This final sanding will remove any remaining imperfections or sanding marks.
By following these techniques, you can effectively sand wood with a detail sander and achieve a professional-looking result that enhances the beauty of your woodworking projects.
Sanding with the grain
One important technique when sanding wood with a detail sander is to sand with the grain. Sanding with the grain means sanding in the same direction as the natural wood fibers, which helps to achieve a smoother finish and prevent any potential damage to the wood.
Why sand with the grain?
Sanding with the grain is crucial because it helps to remove any imperfections on the wood surface effectively. When you sand against the grain, you risk creating scratches and tear-out, which can ruin the appearance of your project.
By following the grain, you allow the sandpaper to work with the natural growth pattern of the wood, resulting in a more even and consistent finish. This technique also reduces the chance of splintering and ensures that the wood retains its natural texture and appearance.
How to sand with the grain?
To sand with the grain, start by identifying the direction of the wood grain. It usually runs parallel to the longer side of the wood. Once you have determined the direction, position the detail sander in alignment with the grain.
Apply gentle pressure on the sander and move it smoothly back and forth in the same direction as the wood fibers. Take care not to press too hard, as excessive pressure can cause damage or leave marks on the wood.
Always make sure to follow the contours of the wood surface and avoid sanding against the grain. If you come across any hard-to-reach corners or intricate details, consider using a smaller sanding attachment or sandpaper to ensure you can sand with the grain consistently.
Sanding with the grain may take a bit more time and effort, but the final result will be worth it. You will achieve a smoother finish and maintain the natural beauty of the wood, enhancing the overall appearance of your project.
Questions and answers
What is a detail sander?
A detail sander is a small power tool that is specifically designed for sanding small and hard-to-reach areas of wood surfaces.
How does a detail sander work?
A detail sander works by vibrating a sandpaper attachment in quick back-and-forth motions, allowing you to sand away rough patches and achieve smooth surfaces.
When should I use a detail sander?
You should use a detail sander when you need to sand intricate details, corners, edges, or other tight spots on a piece of wood.
What type of sandpaper should I use with a detail sander?
It is recommended to use fine-grit sandpaper with a detail sander, such as 120 or 220 grit, depending on the smoothness you desire for your wood surface.
What are some tips for sanding wood with a detail sander?
Some tips for sanding wood with a detail sander include starting with a light touch, moving the sander in a smooth and steady motion, and using multiple grits of sandpaper for a refined finish.

Harrison Clayton
Meet Harrison Clayton, a distinguished author and home remodeling enthusiast whose expertise in the realm of renovation is second to none. With a passion for transforming houses into inviting homes, Harrison's writing at https://thehuts-eastbourne.co.uk/ brings a breath of fresh inspiration to the world of home improvement. Whether you're looking to revamp a small corner of your abode or embark on a complete home transformation, Harrison's articles provide the essential expertise and creative flair to turn your visions into reality. So, dive into the captivating world of home remodeling with Harrison Clayton and unlock the full potential of your living space with every word he writes.

