How To Make A Disc Sander With A Drill
If you’re a woodworking enthusiast, you know how important it is to have the right tools for the job. One tool that is often needed is a disc sander. A disc sander is a powerful tool that is used for sanding and smoothing surfaces. It can be expensive to buy one, but luckily, you can make your own disc sander using a drill.
Making a disc sander with a drill is a cost-effective solution that allows you to create smooth and precise surfaces without breaking the bank. With a few simple tools and materials, you can turn your ordinary drill into a versatile and efficient disc sander.
To make a disc sander with a drill, you’ll need a few key components. First, you’ll need a disc sander attachment, which can be found at most hardware stores or online. This attachment is designed to be mounted on the front of your drill and holds the sanding disc in place. You’ll also need a drill with a speed control feature, as well as sanding discs in various grits.
Once you have all the materials, assembling your disc sander is a straightforward process. Start by attaching the disc sander attachment to the front of your drill. Make sure it is securely fastened to prevent any accidents. Then, choose the desired grit sanding disc and carefully place it onto the attachment. Make sure it is centered and tightened properly. Finally, adjust the speed of your drill to the appropriate level, and you’re ready to start sanding!
Using a disc sander with a drill allows you to have more control over your sanding process. You can easily adjust the speed and pressure to achieve the desired results. Whether you’re sanding small wooden pieces or smoothing out large surfaces, a disc sander made with a drill is a versatile and practical tool to have in your workshop. So why spend a fortune on an expensive disc sander when you can make your own with a drill?

Overview of the Disc Sander
A disc sander is a versatile power tool that is commonly used in woodworking and metalworking. It is designed to sand and shape materials by quickly rotating a sanding disc. This tool is especially useful for smoothing rough edges, removing old finishes, and creating smooth and precise surfaces.
One of the main components of a disc sander is a motor that powers the rotation of the sanding disc. The motor is typically connected to a drive belt or gear system, which provides the necessary power to spin the disc at high speeds. The disc itself is usually made of abrasive material, such as sandpaper or grinding wheels, that is capable of removing material from the workpiece.
Disc sanders come in various sizes and configurations, ranging from small handheld models to large stationary machines. Handheld disc sanders are portable and convenient for small projects or hard-to-reach areas, while stationary disc sanders offer more stability and power for larger projects.
When using a disc sander, it is important to take proper safety precautions. Always wear safety goggles or a face shield to protect your eyes from flying debris. Additionally, use a dust collection system or wear a dust mask to avoid inhaling harmful particles. It is also advisable to secure the workpiece firmly in place and avoid applying excessive pressure to prevent any accidents or damage to the disc sander.
Overall, a disc sander is an essential tool for any woodworking or metalworking enthusiast. Its ability to quickly and efficiently remove material makes it a must-have for shaping and finishing projects with precision. By following proper safety guidelines and techniques, you can maximize the effectiveness of a disc sander and achieve professional results.

Materials Needed for the Disc Sander
Before you can make a disc sander with a drill, there are a few materials you will need to gather. These materials include:
- A drill – Make sure you have a drill that is capable of handling heavy-duty tasks.
- A circular sanding disc – Look for a sanding disc that is compatible with your drill.
- Sanding paper – You will need different grits of sanding paper depending on the task at hand.
- A disc backing plate – This is used to attach the sanding disc to the drill.
- A screwdriver – You may need a screwdriver to attach the disc backing plate to the drill.
- A piece of plywood – This will serve as the base of your disc sander.
- A wooden dowel – The dowel will be used to make the sanding drum.
- Wood glue – You will need wood glue to attach the sanding drum to the dowel.
- Clamps – Clamps will help secure the sanding drum to the dowel while the glue dries.
- Screws – You will need screws to attach the base of the disc sander to your workbench or table.
Once you have gathered all of these materials, you will be ready to start building your disc sander with a drill!
List of Required Materials
To make a disc sander with a drill, you will need the following materials:
- Power Drill: A power drill that is capable of reaching high speeds is essential for this project. Make sure the drill has a chuck that can securely hold the sanding disc.
- Disc Sander Attachment: You will need a disc sander attachment specifically designed for use with a power drill. This attachment will hold the sanding disc in place and allow it to spin at high speeds.
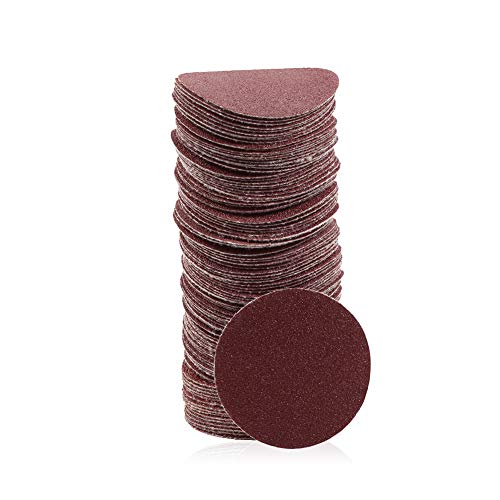
- Sanding Discs: Choose sanding discs with the appropriate grit for your project. Coarser grits, such as 80 or 120, are ideal for material removal, while finer grits, such as 220 or 320, are better suited for finishing and smoothing.
- Backing Pad: A backing pad is necessary to attach the sanding disc to the disc sander attachment. Look for a backing pad that matches the size of your sanding discs.
- Safety Goggles: Always prioritize safety when working with power tools. Wear safety goggles to protect your eyes from flying debris.
- Workbench or Table: Set up your disc sander on a stable workbench or table. Make sure the surface is sturdy and provides enough space for your materials.
- Clamps: Clamps are useful for securing your workpiece to the workbench or table. This will prevent it from moving while you sand.
- Optional Dust Collection: You may want to consider using a dust collection system to minimize the amount of airborne dust in your workspace. This can help improve visibility and reduce the risk of respiratory issues.
Step-by-Step Guide to Build a Disc Sander
Building your own disc sander can be a rewarding and cost-effective project. With just a few materials and some basic tools, you can create a functional disc sander that will serve you well in your woodworking endeavors.
Follow these step-by-step instructions to build your own disc sander:

| Step 1: | Start by gathering all the necessary materials and tools. You will need a drill, a round piece of plywood, a sanding disc, screws, a washer, a bolt, a metal plate, and adhesive. |
| Step 2: | Using the drill, make a hole in the center of the plywood. This hole should be slightly smaller than the diameter of the bolt. |
| Step 3: | Attach the sanding disc to the plywood using screws. Make sure the disc is securely fastened. |
| Step 4: | Place the metal plate on top of the sanding disc and mark its outline on the plywood. |
| Step 5: | Remove the metal plate and apply adhesive within the marked outline. |
| Step 6: | Press the metal plate firmly onto the plywood within the adhesive area. Allow the adhesive to dry according to the manufacturer’s instructions. |
| Step 7: | Attach the bolt to the drill. Insert the bolt through the hole in the plywood and secure it with a washer and nut. |
| Step 8: | Your disc sander is now ready to use! Simply turn on the drill and hold your workpiece against the sanding disc to sand it down. |
| Step 9: | Remember to wear safety goggles and gloves while operating the disc sander to protect yourself from any potential hazards. |
By following these step-by-step instructions, you can build your own disc sander and enjoy the benefits of having a versatile tool in your woodworking workshop. Happy sanding!
Step 1: Gather the Materials
To make a disc sander with a drill, you will need the following materials:
- A power drill
- A round wooden or plastic disc, preferably around 6 to 8 inches in diameter
- Sandpaper discs with different grits (coarse, medium, and fine)
- A metal washer or a nut that fits onto the drill’s chuck
- A drill bit that matches the size of the hole in the disc
- Double-sided adhesive tape or spray adhesive
- A ruler or measuring tape
Make sure you have all of these materials before starting the project. Having everything prepared in advance will make the process easier and more efficient.
Step 2: Prepare the Wooden Base
Once you have gathered all the necessary materials and tools, you can start preparing the wooden base for your disc sander. The wooden base will serve as a stable platform for the other components of the sander.
Here are the steps to prepare the wooden base:

- Measure and mark the desired size for your base on a piece of plywood. You can choose the dimensions according to your preference and the space available in your workshop.
- Using a circular saw or a jigsaw, cut the plywood along the marked lines to create the base.
- Sand the edges of the plywood base to smoothen them and remove any roughness. This will prevent any splinters and make the base safer to handle.
- Drill a hole in the center of the base that matches the size of the drill’s chuck. This hole will allow the drill to pass through and attach to the disc.
- Attach a piece of scrap wood perpendicular to the base near one of the edges. This will serve as a support for the drill and prevent it from moving during operation.
- Ensure that the scrap wood is securely attached to the base by using screws or wood glue. You can also reinforce it with additional screws if needed.
- Place the base on a flat and stable surface, ensuring that it is level and sturdy.
By completing these steps, you have successfully prepared the wooden base for your disc sander. The next step will be to attach the drill and make the necessary adjustments to create a functional disc sander.
Questions and answers
What materials do I need to make a disc sander with a drill?
To make a disc sander with a drill, you will need a drill, a plywood disc, sandpaper, adhesive, a disc sander attachment, nuts, and bolts.
Does the size of the plywood disc matter?
Yes, the size of the plywood disc matters. It should be the same size as the disc sander attachment you are using.
Is it possible to use a different type of adhesive instead of the one mentioned in the article?
Yes, it is possible to use a different type of adhesive. It is recommended to use a strong adhesive that can hold the sandpaper firmly in place.
Can I use the disc sander attachment on any type of drill?
No, not all drills are compatible with a disc sander attachment. You will need to check the specifications of your drill to see if it is compatible.


Harrison Clayton
Meet Harrison Clayton, a distinguished author and home remodeling enthusiast whose expertise in the realm of renovation is second to none. With a passion for transforming houses into inviting homes, Harrison's writing at https://thehuts-eastbourne.co.uk/ brings a breath of fresh inspiration to the world of home improvement. Whether you're looking to revamp a small corner of your abode or embark on a complete home transformation, Harrison's articles provide the essential expertise and creative flair to turn your visions into reality. So, dive into the captivating world of home remodeling with Harrison Clayton and unlock the full potential of your living space with every word he writes.

