How To Clean Belt Sander Paper
If you’ve ever used a belt sander before, you know that the sandpaper can quickly become clogged with dust and debris. This can greatly reduce the effectiveness of the tool, making it less efficient and leaving you with subpar results. However, cleaning belt sander paper is a simple process that can help extend its lifespan and keep your projects looking their best.
The first step in cleaning belt sander paper is to remove it from the sander. This can typically be done by releasing the tension on the belt and sliding it off the sander. Once the belt is removed, you can inspect it for any obvious signs of wear or damage, such as tears or fraying. If you notice any such issues, it may be time to replace the belt with a new one.
To clean the sandpaper, you’ll want to start by removing as much dust and debris as possible. One effective method is to use a stiff brush or vacuum cleaner to gently scrub or suction the surface of the paper. Be sure to remove the belt from the sander and work in a well-ventilated area to avoid inhaling any fine particles.
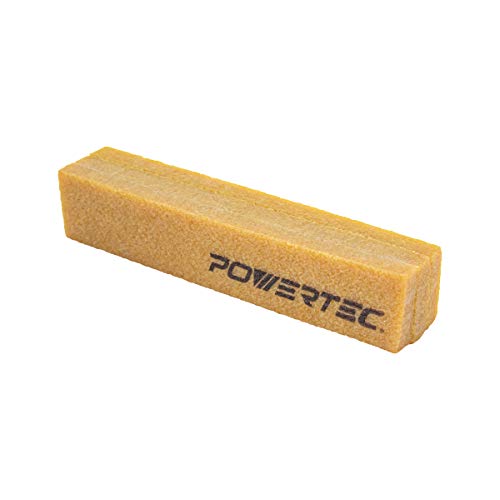
After removing the larger debris, you can further clean the belt sander paper by using a rubber cleaning stick or block. Rub the stick or block along the surface of the sandpaper, applying moderate pressure. This will help to remove any remaining dust or residue that may have become embedded in the grit. Be sure to clean the stick or block regularly to prevent it from transferring dirt back onto the sandpaper.
Once you’ve finished cleaning the sandpaper, it’s important to properly store it to prevent future contamination. Roll the belt up gently and secure it with a rubber band or clip to prevent it from unfurling. Store the belt in a clean, dry place, away from excessive heat or moisture, which can degrade the paper over time. By taking these simple steps, you can help ensure that your belt sander paper stays clean and effective for future use.

Why Clean Belt Sander Paper Matters
Keeping your belt sander paper clean is essential for maintaining its effectiveness and longevity. While it may seem like a minor detail, neglecting to clean your belt sander paper can lead to subpar sanding results and premature wear and tear.
One of the main reasons why cleaning belt sander paper matters is that debris and dust particles can quickly accumulate on the surface of the paper. As you use the sander, the sanding belt rotates and grinds away at the material you are working on. This action creates heat and friction, which causes the dust to stick to the sandpaper.
When the sandpaper becomes clogged with dust and debris, it loses its ability to remove material effectively. Instead of cutting through the material, the sander simply pushes the dust around, resulting in a less smooth and even finish. Additionally, the sandpaper can become less abrasive, making it less efficient at sanding and increasing the time it takes to complete your project.
Cleaning your belt sander paper regularly also helps to extend its lifespan. Dust and debris can be abrasive and can cause the sandpaper to wear out more quickly. By removing the accumulated dust, you can prevent premature damage to the sandpaper and ensure that it lasts longer, saving you money in the long run.
How to Clean Belt Sander Paper
Cleaning belt sander paper is a relatively simple process that can be done in a few easy steps. Start by turning off the sander and unplugging it from the power source to ensure your safety.

Next, use a soft brush or a cleaning stick specifically designed for sandpaper to gently remove the dust and debris from the surface of the sandpaper. Be careful not to apply too much pressure to avoid damaging the sandpaper.
If the sandpaper is particularly clogged, you can also try using compressed air to blow away the dust. Hold the can of compressed air a few inches away from the sandpaper and spray in short bursts to dislodge the debris.
After cleaning, inspect the sandpaper for any remaining dust or debris. If necessary, repeat the cleaning process until the surface is clean and free from any residue that could compromise the sanding performance.
By taking the time to clean your belt sander paper regularly, you can ensure that it operates at its optimal level, providing you with the best possible sanding results and extending its lifespan.
Increase Belt Sander Efficiency
Efficiency is key when using a belt sander, as it can greatly affect the quality and speed of your work. Here are some tips to help you increase the efficiency of your belt sander:

1. Choose the right grit: Using the appropriate grit for your project is crucial. If the grit is too coarse, it can take longer to achieve the desired finish. On the other hand, if the grit is too fine, it may not remove enough material. Experiment with different grits to find the one that works best for your specific needs.
2. Keep the belt clean: Clean the sanding belt regularly to prevent the buildup of dust, debris, and resin. A dirty belt can reduce the efficiency of the sander and may even cause it to overheat. Use a cleaning stick or a belt cleaner to remove any residue from the sanding belt.
3. Use proper technique: Applying too much pressure or using the wrong angle can hinder the effectiveness of the sander. Let the weight of the sander do the work and maintain a consistent, even pressure. Move the sander in a linear motion along the grain of the wood for optimal results.
4. Check the tension: Ensure that the sanding belt is properly tensioned. If it’s too loose, it may slip or not sand efficiently. If it’s too tight, it can put unnecessary strain on the sander. Follow the manufacturer’s instructions to adjust the tension correctly.
5. Replace worn-out belts: Over time, sanding belts can become worn and lose their effectiveness. Replace worn-out belts promptly to maintain the efficiency of your belt sander. Regularly inspect the condition of the sanding belt and replace it if necessary.

6. Use a dust collection system: Using a dust collection system with your belt sander can greatly improve its efficiency. It helps to remove dust and debris, keeping the sanding belt clean and preventing premature wear. A clean belt will allow the sander to work at its optimal performance level.
By following these tips, you can increase the efficiency of your belt sander and achieve better results in less time. Remember to always prioritize safety when using power tools and wear appropriate protective gear.
Prolong Belt Sander Lifespan
Keeping your belt sander in good condition is essential for getting optimal performance and prolonging its lifespan. Here are a few tips to help you make the most of your belt sander:
1. Regular Cleaning
One of the simplest yet most effective ways to extend the lifespan of your belt sander is by keeping it clean. After each use, make sure to remove dust, debris, and any other foreign particles from the sander. A buildup of dirt can cause friction and lead to premature wear and tear. Use a soft brush or compressed air to clean the sander’s exterior and the sanding belt.
2. Proper Storage
When not in use, it’s important to store your belt sander in a cool, dry place. Excessive heat and humidity can damage the sander’s components and shorten its lifespan. Store it in a protective case or cover it with a cloth or plastic bag to keep dust and moisture away. Additionally, avoid placing heavy objects on top of the sander, as this can also cause damage.

3. Check and Replace Parts
Regularly inspect your belt sander for any signs of wear and tear, such as worn sanding belts or loose screws. If you notice any issues, it’s crucial to address them promptly. Replace worn-out sanding belts or discs to ensure optimal performance. Check the tension of the sanding belt and tighten or replace it if necessary. Keeping your sander in good working condition will not only prolong its lifespan but also prevent accidents.
Remember: Always follow the manufacturer’s instructions for proper maintenance and care of your specific belt sander model. Taking these preventive measures will help keep your belt sander in good shape and ensure it lasts for years to come.
Improve Sanding Quality
To achieve the best results when using a belt sander, it’s important to focus on improving the sanding quality. By following these tips, you can ensure a smooth and professional finish:
- Use the right grit: Choose the appropriate grit size for your project. Coarser grits are ideal for removing material quickly, while finer grits are suitable for smoothing and finishing.
- Check the condition of the sandpaper: Inspect the sandpaper on your belt sander before starting. If it’s worn, torn, or clogged with dust, replace it with a new one.
- Proper alignment: Make sure the sanding belt is properly aligned on the sander. Aligning it correctly will prevent uneven wear and ensure consistent sanding.
- Apply even pressure: Apply consistent and even pressure as you move the sander across the surface to achieve an even finish. Avoid pushing too hard, as it can result in uneven sanding.
- Keep the sander moving: Avoid keeping the sander in one spot for too long, as it may cause gouges or unevenness in the material. Keep the sander moving in a steady, fluid motion.
- Remove dust: Regularly stop sanding to remove debris and dust from the surface. This will prevent it from clogging the sandpaper and affecting the sanding quality.
- Practice good technique: Take your time and practice good sanding technique. Keep the sander at a slight angle and move it in the direction of the wood grain for a smoother finish.
By following these tips, you can significantly improve the sanding quality and achieve professional results with your belt sander.
When to Clean Belt Sander Paper
The efficiency and lifespan of your belt sander paper depend on keeping it clean and free from debris. Regular cleaning not only helps maintain the sandpaper’s effectiveness but also ensures smoother and more consistent results. Here are some signs that indicate it’s time to clean your belt sander paper:

1. Clogging and Reduced Material Removal
When you notice a decrease in material removal or the belt starts to clog, it is a clear indication that the sandpaper needs cleaning. Clogging occurs when dust, wood particles, or resin build up on the sandpaper, hindering its ability to remove material effectively. Cleaning is essential to unclog the paper and restore its cutting efficiency.
2. Uneven Sanding or Surface Imperfections
If you notice uneven sanding marks or surface imperfections on your workpiece, it may be due to debris caught between the sandpaper grit. The buildup of dust or other foreign materials can cause the belt sander to skip or leave uneven marks on the surface. Cleaning the sandpaper ensures a smooth and consistent sanding action.
Cleaning belt sander paper is a straightforward process that can help prolong the life of the sandpaper and improve the overall sanding quality. It is recommended to clean the sandpaper regularly, especially when you notice the signs mentioned above. Effective cleaning techniques include using a belt cleaning stick or a cleaning block to remove debris and prolong the sandpaper’s useful life.
Regular Maintenance Schedule
Regular maintenance of your belt sander is crucial to ensure optimal performance and a longer lifespan for your sanding belts. By following a regular maintenance schedule, you can prevent buildup of dust and debris, maintain the sander’s efficiency, and reduce the risk of damage to your sanding belts.
1. Clean the dust collection bag
Start by removing the dust collection bag from your belt sander. Empty the bag and use a brush or compressed air to thoroughly clean any dust or debris that may have accumulated inside. It is important to clean the dust collection bag regularly to maintain good air circulation and prevent clogging.

2. Inspect the sanding belts
Check the condition of your sanding belts before each use. Look for any signs of wear, such as fraying edges or tears. Replace any worn-out belts to avoid potential damage to your workpiece and to ensure a smooth sanding operation.
3. Clean the sanding belts
Over time, sanding belts can become clogged with dust and resin, which can reduce their effectiveness. To clean the sanding belts, turn on the belt sander and hold a rubber cleaning stick against the moving belt. The stick will remove the built-up residue, allowing the sanding belt to perform at its best.
4. Lubricate the sander’s moving parts
Regular lubrication of the sander’s moving parts is essential to ensure smooth operation and prevent excessive wear. Apply a few drops of lubricating oil to the bearings, rollers, and other moving parts as recommended by the manufacturer. Be sure to wipe away any excess oil to prevent it from getting on your workpiece.
5. Store the sander properly
After each use, store your belt sander in a clean and dry area to protect it from dust and moisture. Use the provided storage case or cover the sander with a dust-proof cloth to keep it in good condition.
By following these regular maintenance steps, you can keep your belt sander in excellent working condition. Remember to always refer to the manufacturer’s instructions for specific maintenance guidelines and recommendations.
Signs of Dirty Belt Sander Paper
Keeping your belt sander paper clean is essential for achieving optimal performance. When your belt sander paper becomes dirty or clogged with debris, it can lead to inefficient sanding and subpar results. Here are some signs that indicate it’s time to clean or replace your belt sander paper:
1. Reduced Sanding Efficiency
If you notice that your belt sander is taking longer than usual to remove material or isn’t providing a smooth finish, it could be a sign that your sandpaper is dirty or clogged. As debris accumulates on the paper’s surface, it can reduce the effectiveness of the sanding process.
2. Uneven Sanding
Dirty belt sander paper can create inconsistent sanding results. As the debris builds up, it can cause the sander to skip or leave irregular marks on the workpiece. This can be frustrating, especially if you’re working on a project that requires a uniform and smooth surface.
When you encounter these signs, it’s important to clean or replace your belt sander paper. Cleaning can be done by using a belt cleaning stick or a crepe block to remove the debris from the paper’s surface. If cleaning doesn’t restore the functionality of the paper, it’s best to replace it with a fresh one.
Remember, keeping your belt sander paper clean is a simple but crucial step in maintaining the overall performance of your sander. Regularly inspect your paper for signs of dirt or clogging, and clean or replace as needed to ensure efficient sanding results.
Steps to Clean Belt Sander Paper
Keeping your belt sander paper clean is essential for maintaining its performance and prolonging its lifespan. Over time, sanding dust and debris can accumulate on the paper, reducing its effectiveness. Luckily, cleaning belt sander paper is a simple process that can be done in a few easy steps.
1. Disconnect and Secure the Sander
Before starting the cleaning process, ensure that the belt sander is disconnected from the power source to avoid any accidents. Secure the sander in a steady position to have better control during the cleaning process.
2. Remove the Belt
Carefully remove the sanding belt from the sander’s drum. Check for any signs of wear or damage on the belt and replace it if necessary.
3. Use Compressed Air or a Brush
With the belt removed, you can now use compressed air or a brush to clean the sanding paper. Gently blow air across the surface of the paper in a sweeping motion, or use a brush to remove the dust and debris. Be sure to remove any particles that may be lodged in the grit.
4. Clean the Drum
The drum that holds the sanding belt can also accumulate dust and debris. Use a brush or a cloth to clean the drum thoroughly. Pay close attention to the areas where the sanding belt attaches to the drum.
5. Reinstall the Belt
Once the sanding paper and drum are clean, reattach the belt to the drum. Ensure it is centered and secured properly before moving on to the next step.
6. Test the Sander
After cleaning the sanding paper and reinstalling the belt, plug in the sander and test its functionality. Run it on a scrap piece of material to check if the new belt is properly aligned and if the sander is working smoothly.
By following these steps regularly, you can keep your belt sander paper clean and maintain its optimal performance. Remember to always prioritize safety when working with power tools and disconnect them from the power source before beginning any maintenance or cleaning tasks.
Questions and answers
What is the purpose of cleaning the belt sander paper?
The purpose of cleaning the belt sander paper is to remove built-up sawdust and debris that can clog the sandpaper and reduce its effectiveness in sanding.
How often should I clean the belt sander paper?
You should clean the belt sander paper after every use or whenever you notice a decrease in its sanding performance.
What are some common methods to clean belt sander paper?
Some common methods to clean belt sander paper include using a rubber cleaning stick, using a cleaning brush, or blowing compressed air on the sandpaper.
Can I use water to clean the belt sander paper?
No, it is not recommended to use water to clean the belt sander paper as it can damage the sandpaper and the sander itself. It is best to use dry cleaning methods.
Are there any alternative methods to clean belt sander paper?
Yes, some alternative methods to clean belt sander paper include using a sanding belt cleaner or sanding belt eraser, which can effectively remove clogged particles from the sandpaper.


Meet Harrison Clayton, a distinguished author and home remodeling enthusiast whose expertise in the realm of renovation is second to none. With a passion for transforming houses into inviting homes, Harrison's writing at https://thehuts-eastbourne.co.uk/ brings a breath of fresh inspiration to the world of home improvement. Whether you're looking to revamp a small corner of your abode or embark on a complete home transformation, Harrison's articles provide the essential expertise and creative flair to turn your visions into reality. So, dive into the captivating world of home remodeling with Harrison Clayton and unlock the full potential of your living space with every word he writes.

