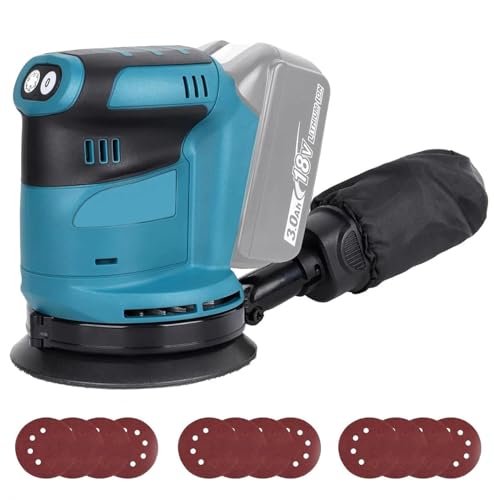
How To Clean Orbital Sander Pad

Orbital sanders are fantastic tools for smoothing and shaping wood surfaces. However, over time, the sanding pad on your orbital sander can become clogged with dust and debris, affecting its performance. To ensure the longevity and optimal functioning of your orbital sander, it’s important to regularly clean the sanding pad. In this article, we will guide you through the steps to effectively clean your orbital sander pad.
Step 1: Safety first
Before you begin the cleaning process, make sure to unplug your orbital sander from the power source. This will prevent any accidental starts or injuries during the cleaning process. Safety should always be your top priority.
Step 2: Remove the sanding pad
To clean the sanding pad properly, it is best to remove it from the orbital sander. Most orbital sanders have a hook-and-loop system that allows for easy pad removal. Simply detach the pad from the sander by pulling it away.

Step 3: Use compressed air
Once you have removed the sanding pad, use compressed air to blow off any loose dust and debris. Hold the compressed air canister at a distance to avoid damaging the pad and blow air in short bursts across the surface of the pad. This will help dislodge any stubborn particles.
Step 4: Scrub with a cleaning solution
After using compressed air, it’s time to give the sanding pad a deeper clean. Mix a mild detergent with warm water in a bucket or sink. Submerge the sanding pad in the cleaning solution and use a soft brush or sponge to scrub away any remaining dirt. Be gentle during this process to avoid damaging the pad.
Step 5: Rinse and dry

Once you have scrubbed the sanding pad thoroughly, rinse it with clean water to remove any soap residue. Then, pat it dry using a clean cloth or towel. Make sure the pad is completely dry before reattaching it to the orbital sander.
By following these simple steps, you can keep your orbital sander pad clean and in excellent condition, ensuring optimal performance for your woodworking projects.
What Is an Orbital Sander Pad
An orbital sander pad is a crucial component of an orbital sander. It is the part of the sander that comes into direct contact with the surface being worked on. The pad is responsible for evenly distributing the sanding motion and applying the necessary pressure to achieve a smooth and uniform finish.
Orbital sander pads are typically made of foam or rubber and come in different sizes and shapes to accommodate various sanding needs. They attach to the orbital sander using a hook and loop fastening system, which allows for easy and quick pad changes.
The design of the pad is critical in a successful sanding operation. It features multiple holes that serve two main purposes. Firstly, these holes facilitate the removal of dust and debris, keeping the sanding surface clean and improving the overall efficiency of the sander. Secondly, the holes allow for better airflow, reducing heat buildup and preventing the pad from getting clogged, which can negatively impact performance.

Depending on the type of surface being sanded, different grits of sandpaper can be attached to the pad. The sandpaper is secured to the pad using the same hook and loop fastening system. The combination of the pad and sandpaper allows for effective removal of paint, varnish, or other unwanted coatings from wood, metal, or other materials.
Regular cleaning and maintenance of the orbital sander pad are essential to extend its lifespan and ensure optimal performance. This involves removing any debris or residue that may have accumulated on the pad during sanding. Cleaning the pad periodically will also prevent particles from being transferred onto the surface being sanded, which can cause scratches or other damage.
| Key Points |
|---|
| – The orbital sander pad is the part of the sander that comes into direct contact with the surface being worked on. |
| – It is responsible for evenly distributing the sanding motion and applying the necessary pressure for a smooth finish. |
| – The pad is typically made of foam or rubber and is attached to the sander using a hook and loop fastening system. |
| – The design of the pad includes holes for dust removal and airflow to prevent clogging and overheating. |
| – Different grits of sandpaper can be attached to the pad, depending on the surface being sanded. |
| – Regular cleaning and maintenance of the pad are necessary to ensure optimal performance and longevity. |
Why Cleaning Is Important
Regularly cleaning your orbital sander pad is crucial for several reasons. The cleanliness of the pad directly affects the performance and efficiency of the sander, as well as the quality of the finished work.
1. Prolonging the Life of the Pad
By keeping the orbital sander pad clean, you can extend its lifespan. Dust, debris, and other particles can accumulate on the pad, causing excessive wear and tear over time. Cleaning off these particles helps reduce friction and prevents premature pad deterioration.
2. Ensuring Optimal Sanding Results
A clean orbital sander pad allows for better sanding results. Dust and debris buildup can interfere with the sanding process, leading to uneven sanding and potential damage to the workpiece. By cleaning the pad, you ensure that it maintains optimal contact with the surface, resulting in a smooth and uniform finish.
A dirty pad can also cause clogging, especially when working with fine-grit sandpaper. This can lead to reduced sandpaper efficiency and the need for frequent replacements, resulting in additional costs.
Moreover, a clean pad ensures the effective removal of dust generated during the sanding process. Dust buildup can hinder visibility and make it difficult to see the progress of your work. By keeping the pad clean, you can maintain a clear view, making it easier to achieve the desired sanding results.
In conclusion, proper cleaning of your orbital sander pad is essential for maintaining its longevity, ensuring optimal sanding results, and saving time and money in the long run. By incorporating regular cleaning into your sanding routine, you can achieve better performance and achieve professional-quality finishes.
Step-by-Step Guide to Cleaning
Cleaning your orbital sander pad regularly is important to maintain its effectiveness and prolong its lifespan. Here is a step-by-step guide to help you clean your orbital sander pad:
- Begin by unplugging your orbital sander and removing the sanding disc.
- Inspect the pad for any visible debris or buildup. Use a brush or a small vacuum to remove any loose dust or particles.
- Fill a bucket or sink with warm water and add a few drops of mild detergent.
- Submerge the orbital sander pad in the soapy water solution and let it soak for a few minutes.
- Using a soft brush or sponge, gently scrub the pad in circular motions to remove any remaining dirt or grime.
- Rinse the pad thoroughly with clean water to remove any soap residue.
- Inspect the pad again to ensure it is clean. If necessary, repeat the cleaning process.
- Once the pad is clean, pat it dry with a clean towel or allow it to air dry completely.
- Reattach the sanding disc to the orbital sander and ensure it is secure.
- Plug in the orbital sander and test it to ensure it is functioning properly.
By following these steps regularly, you can keep your orbital sander pad in optimal condition and ensure its performance is not compromised during your sanding projects.
Tips and Tricks for Effective Cleaning
Cleaning an orbital sander pad is an important task to ensure its efficiency and longevity. Here are some tips and tricks to effectively clean your sander pad:
1. Disconnect the power: Before starting the cleaning process, always make sure to disconnect the power source to avoid any accidents.
2. Remove the sanding disc: Take off the sanding disc from the pad by following the manufacturer’s instructions. This will make it easier to clean the pad properly.
3. Use compressed air: A can of compressed air can be very useful in removing any dust or debris that might be stuck in the pad. Direct the air flow towards the pad, focusing on areas with more build-up.
4. Brush off the remaining dust: Use a soft-bristle brush, like a paintbrush or toothbrush, to gently brush off any remaining dust or debris. Make sure to go over the pad thoroughly, paying attention to the edges and corners.
5. Dampen a cloth: Dampen a cloth with some mild soap and warm water. Wring out the excess moisture and gently wipe the pad surface. Avoid using excessive water, as it can damage the sander pad.
6. Use adhesive cleaner: For stubborn residue or adhesive build-up, apply a small amount of adhesive cleaner directly on the affected areas. Let it sit for a few minutes, and then use a cloth to wipe away the residue.
7. Allow the pad to dry: After cleaning, allow the pad to air dry fully before reattaching the sanding disc. This will prevent any moisture from affecting the sanding performance.
8. Inspect the pad: Thoroughly inspect the cleaned pad for any signs of wear or damage. If necessary, replace the pad to maintain optimal sanding results.
By following these tips and tricks, you can ensure that your orbital sander pad remains clean and in good condition, allowing for smooth and effective sanding operations.
Questions and answers
How often should I clean my orbital sander pad?
You should clean your orbital sander pad after every use to ensure optimal performance. Regular cleaning will help remove any debris and dust that may accumulate on the pad.
What is the best way to clean an orbital sander pad?
The best way to clean an orbital sander pad is to remove it from the sander and use a wire brush to gently scrape off any debris or residue. You can also use a soft cloth or sponge with a mild detergent and warm water to clean the pad. Make sure to completely dry the pad before reattaching it to the sander.
Why should I clean my orbital sander pad?
Cleaning your orbital sander pad is important for several reasons. Firstly, it helps maintain the performance of the sander by removing any built-up debris that may affect its efficiency. Secondly, a clean pad ensures a smooth sanding surface, allowing for more even and consistent results. Finally, regular cleaning helps extend the lifespan of the pad, reducing the need for frequent replacements.

How to breed a sugabush

Meet Harrison Clayton, a distinguished author and home remodeling enthusiast whose expertise in the realm of renovation is second to none. With a passion for transforming houses into inviting homes, Harrison's writing at https://thehuts-eastbourne.co.uk/ brings a breath of fresh inspiration to the world of home improvement. Whether you're looking to revamp a small corner of your abode or embark on a complete home transformation, Harrison's articles provide the essential expertise and creative flair to turn your visions into reality. So, dive into the captivating world of home remodeling with Harrison Clayton and unlock the full potential of your living space with every word he writes.