How To Change Sandpaper On Belt Sander Craftsman

Changing the sandpaper on a belt sander is a simple but essential process that every Craftsman should know. Whether you’re a professional woodworker or a DIY enthusiast, knowing how to properly replace the sandpaper on your belt sander can save you time and effort in your projects.
First, make sure the belt sander is unplugged before you begin. Safety should always be your top priority when working with power tools. Once the sander is unplugged, locate the tension release lever or button on the sander. This is usually located near the front or side of the sander and is used to release the tension on the sandpaper.
After releasing the tension, the old sandpaper should easily slide off the sander’s drum. Take this opportunity to inspect the drum for any dirt or debris that may have accumulated. If necessary, use a clean cloth or brush to remove any debris. Now, you’re ready to install the new sandpaper.
What is a Belt Sander Craftsman?
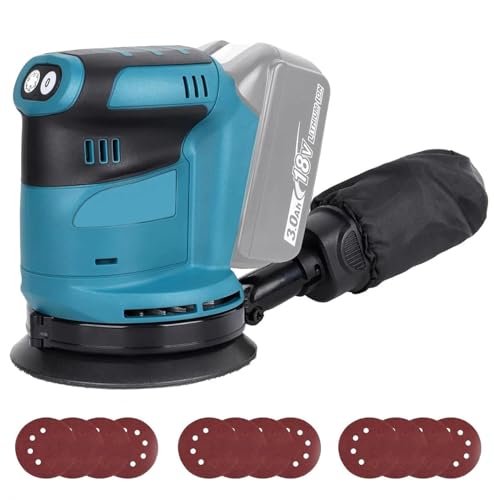
A belt sander craftsman is a type of power tool that is designed to quickly and efficiently sand large surfaces. It features a sanding belt that rotates on two cylinders, allowing for a continuous sanding motion. This type of sander is commonly used in woodworking, metalworking, and other industries that require aggressive sanding and material removal.
One of the key features of a belt sander craftsman is its ability to remove substantial amounts of material in a short period of time. The sanding belt is typically made from a durable abrasive material, such as aluminum oxide or silicon carbide, which allows for effective material removal without excessive heat buildup. This makes it ideal for tasks such as leveling or smoothing rough surfaces, removing paint or varnish, and preparing surfaces for finishing.

Key Features of Belt Sander Craftsman:
- Powerful Motor: Belt sanders craftsman are equipped with powerful motors that allow for high-speed sanding and efficient material removal.
- Adjustable Speed: Many belt sander craftsman models feature adjustable speed settings, allowing the user to customize the sanding speed based on the type of material being sanded.
- Dust Collection System: To minimize dust and debris, belt sander craftsman often have built-in dust collection systems or the ability to attach an external dust collector.
Using a belt sander craftsman requires some skill and caution, as the high-speed sanding belt can quickly remove material and cause damage if not used properly. It is recommended to wear appropriate safety gear, such as eye protection and a dust mask, and to read and follow the manufacturer’s instructions for safe operation.
Overall, a belt sander craftsman is a versatile and powerful tool that is used to quickly and efficiently sand large surfaces. Whether you are a professional woodworker or a DIY enthusiast, a belt sander craftsman can help you achieve smooth and professional-looking finishes on your projects.
Section 1: Reasons to Change Sandpaper
There are several reasons why you may need to change the sandpaper on your Craftsman belt sander. Here are some common situations that may require a sandpaper replacement:
- Worn out or damaged sandpaper: Over time, the sandpaper on your belt sander can become worn out or damaged from abrasive use. This can result in reduced sanding efficiency and uneven results. Replacing the sandpaper with a fresh sheet can help restore optimal sanding performance.
- Switching to a different grit: Depending on the project you’re working on, you may need to switch to a different grit of sandpaper. Coarser grits are typically used for heavy material removal, while finer grits are used for finer finishing work. Changing the sandpaper allows you to achieve the desired surface texture and smoothness.
- Contamination: Sometimes, sandpaper can become contaminated with debris, adhesive residue, or foreign substances like paint or varnish. This can interfere with the sanding process and result in lower quality finishes. Swapping out the sandpaper helps ensure a clean and effective sanding surface.
- Clogging: As you use the belt sander, dust and debris can accumulate on the sandpaper, leading to clogging. Clogged sandpaper loses its cutting ability and can cause overheating or burning of the material being sanded. Changing the sandpaper allows for uninterrupted sanding and prevents damage to your workpiece.
Regularly inspecting and changing your belt sander’s sandpaper will help maintain its performance and extend its lifespan. It’s essential to choose the right type and grit of sandpaper for your specific project to achieve the desired results.
Why should you change sandpaper on a Belt Sander Craftsman?
Changing the sandpaper on a Belt Sander Craftsman is crucial for maintaining optimal performance and achieving the best results in your woodworking projects. Here are a few reasons why you should regularly change the sandpaper:

- Effective sanding: Over time, sandpaper becomes worn out and loses its abrasive qualities. By changing the sandpaper, you ensure that the belt sander is equipped with a sharp and efficient abrasive surface, allowing for smoother and more effective sanding.
- Improved finishing: When the sandpaper is worn out, it can leave behind uneven marks or scratches on the surface you’re sanding. By using fresh sandpaper, you can achieve a more uniform and polished finish, enhancing the overall appearance of your workpiece.
- Prevention of overheating: As sandpaper gets clogged with dust and debris, it becomes less effective and generates more heat. This can lead to overheating of both the sandpaper and the sander’s motor, potentially causing damage. Regularly changing the sandpaper helps prevent overheating and extends the lifespan of your tool.
- Safety: Worn-out sandpaper can become dull and less stable, increasing the risk of accidents or injuries during the sanding process. By replacing the sandpaper regularly, you ensure a safer working environment and minimize the chance of slips or mishaps.
- Cost-efficiency: While it may seem counterintuitive, changing the sandpaper regularly can actually save you money in the long run. Fresh sandpaper allows for faster sanding, reducing the time you spend on each project. Additionally, damaged sandpaper can cause inconsistencies or imperfections that may require additional sanding or rework. By using quality sandpaper and changing it when necessary, you can achieve better results more efficiently and save on material costs.
By understanding the importance of changing the sandpaper on a Belt Sander Craftsman and incorporating it into your woodworking routine, you can ensure better performance, superior finishes, and a safer working environment.
Section 2: Steps to change sandpaper
Changing the sandpaper on your Craftsman belt sander is a simple process and can be done in a few easy steps. Follow the instructions below to ensure a successful replacement:
Step 1: Turn off and unplug the belt sander to ensure your safety. This will prevent any accidental contact with the sanding belt and reduce the risk of injury.
Step 2: Locate the tension release lever on the side of the sander. This lever will release the tension on the sanding belt, allowing you to remove it easily.
Step 3: Pull the tension release lever towards you to release the tension. You should feel the sanding belt loosen as the tension is released.

Step 4: Once the tension is released, carefully slide the sanding belt off the sander’s rollers. Pay attention to the direction of the arrows on the sanding belt, as you will need to install the new belt in the same direction.
Step 5: Take the new sanding belt and align the arrows on the belt with the direction of the belt sander’s rotation. Slide the new belt over the rollers, making sure it is aligned properly.
Step 6: Use the tension release lever to tighten the sanding belt. Pull the lever away from you until you feel the belt tighten. Make sure it is securely in place before proceeding.
Step 7: Plug in the belt sander and turn it on to test the new sanding belt. Check that it is running smoothly and without any issues.
Note: It is always a good idea to refer to the manufacturer’s instructions for your specific Craftsman belt sander model, as the steps may vary slightly.

Step-by-step guide on changing sandpaper on a Belt Sander Craftsman
Changing the sandpaper on a Belt Sander Craftsman is a simple process that can greatly enhance the performance and efficiency of your sander. Follow these step-by-step instructions to ensure a successful sandpaper change:
Step 1: Safety first
Before beginning any work on your Belt Sander Craftsman, it’s important to prioritize safety. Make sure the sander is unplugged and turned off before proceeding.
Step 2: Remove the old sandpaper
Locate the release lever or tension lever on the sander. This lever is typically found on the side or top of the sander. Pull or push the lever to release the tension and open the sandpaper clamps.
Once the clamps are open, carefully remove the old sandpaper from the sander. Be cautious of any remaining adhesive and ensure that all remnants of the old sandpaper are completely removed.
Step 3: Prepare the new sandpaper
Measure the length and width of your sander’s sanding belt. This will help you choose the correct size for your new sandpaper. Purchase sandpaper of the same size and grit as the old sandpaper.

Before installing the new sandpaper, check for any imperfections or tears in the belt. A damaged sandpaper belt can cause poor sanding results and potential harm to your sander.
Step 4: Install the new sandpaper
Align the new sandpaper with the sander’s rollers and place one end into the sandpaper clamps. Ensure that the sandpaper is centered and straight along the length of the sander.
Close the sandpaper clamps and engage the tension lever or release lever to secure the sandpaper in place. Test the tension of the sandpaper by gently pulling on it. The sandpaper should be taut and secure.
Step 5: Test the sander
Once the new sandpaper is installed, plug in the sander and turn it on. Run the sander for a few moments to ensure that the sandpaper is properly secured and functioning smoothly.
If there are any issues or concerns with the sandpaper installation, repeat the steps above or consult the manufacturer’s instructions for further assistance.

| Tools and materials needed: |
|---|
| – Belt Sander Craftsman |
| – Replacement sandpaper |
| – Safety goggles |
By following these easy steps, you’ll be able to change the sandpaper on your Belt Sander Craftsman quickly and effectively. With a fresh sanding belt, you’ll be ready to tackle any sanding project with confidence.
Section 3: Tips for maintaining sandpaper
Proper maintenance of sandpaper is essential to ensure optimal performance and longevity of your belt sander. Here are a few tips to help you maintain your sandpaper effectively:
1. Clean the sandpaper regularly
Over time, dust and debris can accumulate on the sandpaper, reducing its effectiveness. To remove this build-up, use a cleaning stick or a stiff brush to gently brush away the debris. This will help prevent clogging and keep the sandpaper working efficiently.
2. Use even pressure
When operating the belt sander, it’s important to apply even pressure across the entire sanding surface. Uneven pressure may cause the sandpaper to wear out unevenly or tear prematurely. Be mindful of this and ensure you are applying consistent pressure for best results.
3. Store sandpaper properly
Storing sandpaper correctly can help prevent damage and extend its lifespan. Keep your sandpaper in a dry and cool area, away from moisture, which can cause the sandpaper to deteriorate. Store the sandpaper flat or hang it to prevent any bending or warping.

By following these tips, you can maintain your sandpaper in good condition, ensuring it lasts longer and provides optimal sanding results.
Questions and answers
Why do I need to change the sandpaper on my belt sander?
Changing the sandpaper on your belt sander is necessary because over time, the sandpaper becomes worn down and less effective at sanding. By replacing the old sandpaper with a new one, you can ensure that your belt sander continues to provide optimal performance and achieve smooth and even sanding results.
How often should I change the sandpaper on my belt sander?
The frequency of changing the sandpaper on your belt sander depends on several factors, such as the type of project you’re working on and the level of wear and tear on the sandpaper. However, as a general guideline, it’s recommended to check the condition of the sandpaper after every few hours of use and replace it whenever it becomes dull or damaged.
What tools do I need to change the sandpaper on my belt sander?
To change the sandpaper on your belt sander, you will need a few basic tools, including a screwdriver or Allen wrench (depending on the type of belt sander you have) to loosen the tension on the sandpaper, a pair of pliers to remove the old sandpaper, and a new sandpaper belt that is compatible with your specific belt sander model.

How to pronounce alicia
Meet Harrison Clayton, a distinguished author and home remodeling enthusiast whose expertise in the realm of renovation is second to none. With a passion for transforming houses into inviting homes, Harrison's writing at https://thehuts-eastbourne.co.uk/ brings a breath of fresh inspiration to the world of home improvement. Whether you're looking to revamp a small corner of your abode or embark on a complete home transformation, Harrison's articles provide the essential expertise and creative flair to turn your visions into reality. So, dive into the captivating world of home remodeling with Harrison Clayton and unlock the full potential of your living space with every word he writes.