How To Change Backing Pad On Orbital Sander
If you are a woodworking enthusiast or a professional carpenter, you probably know the importance of a well-maintained orbital sander. One of the essential parts of an orbital sander is the backing pad, which allows you to attach sandpaper securely and achieve smooth finishes. However, over time, the backing pad may wear out or get damaged, and you’ll need to replace it. In this article, we will guide you through the process of changing the backing pad on your orbital sander.
Step 1: Safety First
Before you start changing the backing pad on your orbital sander, it’s crucial to ensure your safety. Make sure the sander is turned off and unplugged from the power source. Wear proper eye protection to prevent any dust or debris from getting into your eyes. Additionally, consider wearing gloves to protect your hands during the process.
Step 2: Remove the Sandpaper
Start by removing the sandpaper from the backing pad. Most orbital sanders have a hook-and-loop system that allows the sandpaper to adhere to the pad. Simply peel off the sandpaper from the pad gently. If the sandpaper is stuck, you can use a flat-head screwdriver to pry it off carefully. Dispose of the used sandpaper properly.

Step 3: Remove the Old Backing Pad
Once the sandpaper is removed, you can now remove the old backing pad. Depending on your orbital sander model, the backing pad may be attached with screws or a quick-release mechanism. If it’s attached with screws, use a suitable screwdriver to unscrew and remove them. If your orbital sander has a quick-release mechanism, follow the manufacturer’s instructions to detach the old pad.
Step 4: Attach the New Backing Pad
Now it’s time to attach the new backing pad. Ensure that the new pad is compatible with your orbital sander model. If necessary, refer to the user manual or contact the manufacturer for guidance. Align the screw holes or the quick-release mechanism with those on the sander’s body. Securely attach the pad using screws or by engaging the quick-release mechanism, according to your sander’s design.
Step 5: Test and Adjust

After attaching the new backing pad, plug in your orbital sander and turn it on. Test the sander to make sure the new pad is properly installed and functioning correctly. If you notice any issues or vibrations, double-check the attachment to ensure it’s secure. Also, inspect the pad for any visible defects or abnormalities. If everything looks good, you’re ready to attach a new sandpaper and get back to sanding!
Remember, changing the backing pad on your orbital sander is a simple process that can significantly improve your sanding results. By following these steps and ensuring proper installation, you’ll enjoy smooth and precise sanding for your woodworking projects.
Preparing the Orbital Sander for Backing Pad Replacement
Before replacing the backing pad on your orbital sander, it is important to properly prepare the tool to ensure a smooth and successful replacement process.
First, make sure the orbital sander is turned off and unplugged from any power source. This will prevent any accidental activation of the tool during the replacement procedure.
Next, remove any sandpaper or abrasive disc that may be attached to the current backing pad. This will allow you to have a clear view and access to the pad, making it easier to remove and replace.

Inspect the current backing pad for any signs of damage or wear. Look for cracks, tears, or excessive wear that could affect the performance of the sander. If you notice any issues, it is recommended to replace the backing pad to ensure optimal sanding results.
Using a screwdriver or the specific tool provided with your sander model, carefully remove the screws securing the current backing pad to the sander. Keep track of the screws and any additional parts that may be included in the backing pad assembly.
Once the screws are removed, gently lift off the old backing pad from the sander. Take this opportunity to clean any residual dust or debris from the sander’s pad holder, ensuring a clean surface for the new backing pad to adhere to.
With the old backing pad removed, it is now time to install the new pad. Align the holes on the new backing pad with the holes on the sander’s pad holder, then secure the pad in place using the screws you removed earlier. Make sure the screws are tightened securely, but be careful not to overtighten and damage the pad or the sander.
Once the new backing pad is securely attached, you can proceed to attach sandpaper or an abrasive disc onto the pad. Make sure the sandpaper is centered and aligned properly before securing it in place.

Now that the new backing pad is properly installed, you can plug in and turn on the orbital sander to test its functionality. Perform a test run on a scrap piece of material to ensure the backing pad is securely attached and functioning correctly.
By following these steps to prepare your orbital sander for backing pad replacement, you can easily and effectively replace the pad and continue using your sander for all your sanding projects.
Removing the Old Backing Pad
Before you can change the backing pad on your orbital sander, you need to remove the old one. This process requires a few simple steps:
Step 1: Unplug the Sander
Start by disconnecting the sander from the power source to ensure safety during the procedure.
Step 2: Remove the Sandpaper
Take off any sandpaper or abrasive disc that may be attached to the old backing pad. Set it aside for later use or disposal.

Step 3: Locate the Fastening System
Identify the fastening system used to secure the backing pad to the sander. It can be either a hook-and-loop system or a screw-on system.
Step 4: Hook-and-Loop System
If your orbital sander has a hook-and-loop system, simply grab the edges of the backing pad and pull firmly to detach it from the sanding plate.
Step 5: Screw-on System
If your sander has a screw-on system, you will need to use a screwdriver or wrench to remove the fasteners. Turn them counterclockwise until they are loose enough to release the old backing pad.
Step 6: Clean the Sanding Plate
After removing the old backing pad, take a moment to clean the sanding plate thoroughly. Use a brush or compressed air to remove any dust, debris, or residue that may have accumulated.
With the old backing pad removed and the sanding plate cleaned, you are now ready to install a new backing pad on your orbital sander. Please refer to the manufacturer’s instructions for the specific model you are using.

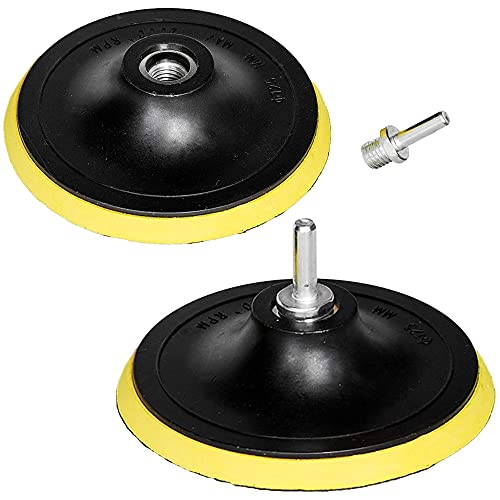
Choosing the Right Replacement Backing Pad
When it comes to changing the backing pad on your orbital sander, it’s important to choose the right replacement to ensure optimal performance. The backing pad is a crucial component of your sander, as it connects the sanding disc to the tool and helps to distribute the sanding pressure evenly.
Firstly, consider the diameter and hole pattern of the replacement backing pad. It should match the specifications of your sander. Most orbital sanders use a 5 or 6-inch diameter pad, but it’s always best to double-check the manufacturer’s recommendations. Additionally, make sure the hole pattern matches the sander’s dust collection system.
Next, think about the type of material the backing pad is made of. They are typically available in foam, rubber, or hard plastic. Foam pads provide excellent cushioning and conformability for contoured surfaces, while rubber or hard plastic pads are more durable and suitable for flat surfaces.
Consider the density of the backing pad as well. Softer pads are ideal for delicate sanding tasks, as they allow the sandpaper to conform to the surface without aggressive cutting. Harder pads, on the other hand, are better for coarse sanding and material removal.
Lastly, check for compatibility with your sanding discs. The replacement backing pad should have a hook-and-loop fastening system or a PSA (pressure-sensitive adhesive) backing, depending on the type of sanding discs you plan to use.

By choosing the right replacement backing pad, you can ensure that your orbital sander operates at its best and achieves the desired sanding results.
Installing the New Backing Pad
Once you have removed the old backing pad from your orbital sander, it’s time to install the new one. Follow these steps to ensure a proper installation:
Clean the Sander Body
Before installing the new backing pad, make sure to clean the sander body thoroughly. Use a soft cloth or brush to remove any dust or debris that might have accumulated on the surface. This will ensure a smooth and secure attachment of the new pad.
Apply Adhesive
Most backing pads come with a pre-applied adhesive, but if not, you will need to apply adhesive yourself. Make sure to use a high-quality adhesive that is suitable for the specific type of backing pad you have. Apply a thin, even layer of adhesive to the center of the sander body, where the pad will be placed.
Note: Follow the manufacturer’s instructions for the adhesive, as different types of adhesive may have different application methods and drying times.
Attach the New Backing Pad
Once the adhesive is applied, carefully align the center hole of the new backing pad with the arbor of the sander. Gently press the pad onto the sander body, making sure it is centered and properly seated. Apply light pressure and hold the pad in place for a few seconds to allow the adhesive to bond.
Tip: If necessary, use a flat object, such as a small block of wood or a flat-head screwdriver, to help seat the pad evenly.
After installing the new backing pad, it’s important to allow the adhesive to fully cure before using the sander. Consult the adhesive manufacturer’s instructions for the recommended drying time. Once the adhesive has fully cured, your orbital sander will be ready for use with the new backing pad.
Testing and Adjusting the New Backing Pad
Once you have successfully replaced the backing pad on your orbital sander, it is important to test and adjust it to ensure it is functioning properly. Follow these steps to test and adjust the new backing pad:
- Turn on the sander and let it run for a few seconds to make sure the new backing pad is securely attached and doesn’t come loose.
- Place a sanding disc onto the new backing pad and secure it in place.
- Turn on the sander again and check for any vibrations or wobbling. If you notice any, turn off the sander and readjust the sanding disc to ensure it is centered properly.
- Once the sanding disc is properly centered, turn on the sander and listen for any unusual noises. If you hear any grinding or scraping sounds, there may be an issue with the backing pad or the sanding disc. Turn off the sander and inspect both for any defects.
- With the sander still running, press the sanding disc against a test surface and check for smooth, even sanding. If you notice any uneven sanding or excessive vibration, it may indicate a problem with the new backing pad. Readjust or replace it if necessary.
- Continue testing the sander on various surfaces to ensure the new backing pad is functioning properly in different conditions.
Remember to always wear appropriate safety gear, such as safety glasses and a dust mask, when operating an orbital sander. If you encounter any issues or are unsure about the performance of the new backing pad, consult the manufacturer’s instructions or reach out to their customer support for assistance.
Questions and answers
Can you explain how to change the backing pad on an orbital sander?
Sure! To change the backing pad on an orbital sander, you first need to remove the old pad. This is usually done by using a wrench or a screwdriver to loosen the screws that hold the pad in place. Once the screws are loosened, you can simply lift off the old pad. To install the new pad, align it with the screw holes on the sander and tighten the screws securely. It’s important to make sure the pad is centered and secure before using the sander again.
What tools do I need to change the backing pad on my orbital sander?
To change the backing pad on an orbital sander, you will need a wrench or a screwdriver, depending on the type of screws used to secure the pad. If the pad is held in place by screws, a screwdriver will be sufficient. If it uses nuts or bolts, then a wrench will be required. It’s important to have the right tools for the job to ensure a smooth and hassle-free pad replacement.

Best Makita Cordless Sander

Meet Harrison Clayton, a distinguished author and home remodeling enthusiast whose expertise in the realm of renovation is second to none. With a passion for transforming houses into inviting homes, Harrison's writing at https://thehuts-eastbourne.co.uk/ brings a breath of fresh inspiration to the world of home improvement. Whether you're looking to revamp a small corner of your abode or embark on a complete home transformation, Harrison's articles provide the essential expertise and creative flair to turn your visions into reality. So, dive into the captivating world of home remodeling with Harrison Clayton and unlock the full potential of your living space with every word he writes.

