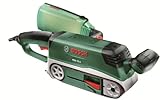
Do It Yourself Belt Sander

If you are a handyman or a DIY enthusiast, you know how important it is to have the right tools for the job. One of the most versatile and useful tools in any workshop is a belt sander. However, buying a high-quality belt sander can be quite expensive. But fear not! With a little bit of time, effort, and a few basic tools, you can build your own belt sander right at home.
Building your own belt sander not only saves you money but also allows you to customize the tool to your specific needs. Whether you are working on a small DIY project or a larger woodworking project, having a belt sander that you made yourself gives you a sense of satisfaction and pride. Plus, it’s a great way to improve your skills and expand your knowledge of woodworking.
Before you start building your belt sander, it’s important to gather all the necessary materials and tools. You will need a motor, a sanding belt, a pulley system, a base, and various other components. You can easily find these materials at your local hardware store or online. Additionally, you will need some basic tools like a drill, screwdriver, and wrench to assemble everything together.
Once you have all the materials and tools ready, you can start building your belt sander. Begin by constructing the base and attaching the motor and pulley system. Then, install the sanding belt and make sure it is properly aligned and tensioned. Finally, test the belt sander to ensure that everything is working smoothly and adjust any necessary settings.
Building your own belt sander is a rewarding project that allows you to have a versatile and effective tool without breaking the bank. So, why spend a fortune on a store-bought belt sander when you can create one yourself? Get ready to unleash your creativity and start building your very own DIY belt sander today!

How to Build Your Own Belt Sander
Building your own belt sander can be a rewarding DIY project that allows you to customize the tool to your specific needs and save money at the same time. Here are step-by-step instructions on how to build your own belt sander.
- Start by gathering the necessary materials and tools. You will need a motor, a sanding belt, roller wheels, a housing for the motor, a belt tensioning mechanism, and various hardware such as screws and bolts.
- Design a plan for your belt sander. Consider the dimensions, power requirements, and any additional features you would like to incorporate. This will help guide you through the construction process.
- Assemble the housing for the motor. This will provide a secure enclosure for the motor and protect it from dust and debris. Make sure to leave enough space for the belt tensioning mechanism and roller wheels.
- Install the motor into the housing, ensuring that it is securely fastened and aligned properly. Connect the necessary wiring according to the motor’s specifications.
- Attach the roller wheels to the housing, allowing for smooth movement of the sanding belt. Make sure they are aligned correctly and securely fastened.
- Install the belt tensioning mechanism. This will allow you to adjust the tension of the sanding belt and ensure optimal performance. Follow the manufacturer’s instructions for proper installation.
- Mount the sanding belt onto the roller wheels, making sure it is centered and aligned properly. Adjust the tension as needed using the belt tensioning mechanism.
- Safety should be a top priority when using a belt sander. Make sure to wear protective goggles and gloves, and always follow the manufacturer’s instructions for safe operation.
- Test your belt sander to ensure it is working properly before using it for any projects. Adjust the tension and alignment as needed for optimal performance.
Building your own belt sander can be a fun and rewarding project for any DIY enthusiast. With a little time and effort, you can have a customized tool that will help you tackle all your sanding needs.
Materials and Tools You Will Need
Building your own belt sander can be a rewarding project that requires a few specific materials and tools. Before you begin, make sure you have the following items:
- A sturdy workbench or table
- A 1/2 horsepower electric motor
- A metal belt sander frame or housing
- A pulley system for connecting the motor to the belt sander
- A sanding belt that fits the size of your sander
- A belt tensioning mechanism
- A power switch
- A power cord and plug
- Various screws, bolts, and nuts for assembly
- A drill and drill bits for making holes
- A screwdriver and wrench for tightening screws and bolts
- A saw for cutting the frame materials
- Safety goggles and gloves for protection
Once you have gathered all the necessary materials and tools, you will be ready to start building your DIY belt sander. It’s important to have everything prepared ahead of time to ensure a smooth and efficient construction process.
Step-by-Step Instructions on Building a Belt Sander
Building your own belt sander can be a rewarding project that allows you to customize the tool to suit your needs. With a few basic materials and some simple steps, you can create a belt sander that is both functional and cost-effective. Follow these step-by-step instructions to get started:

1. Gather the Materials
Before you begin building your belt sander, make sure you have all the necessary materials on hand. You will need:
- A motor with a pulley
- A sanding belt
- A sturdy base
- A tensioning system
- Rollers or wheels
- Bearings
- Belting or V-belt
2. Construct the Base
Start by constructing a sturdy base for your belt sander. This can be made from wood or metal, depending on your preference. Measure and cut the base to the desired size and shape, ensuring it is large enough to accommodate the motor and other components.
Drill holes or slots in the base to allow for mounting the motor, tensioning system, and rollers. Make sure everything is securely attached to the base to minimize vibrations during operation.
3. Install the Motor and Pulley
Attach the motor to the base using screws or bolts. Make sure it is positioned in a way that allows the pulley to align with the sanding belt for efficient operation. Use a pulley that is compatible with the motor and provides the desired belt speed.
4. Mount the Rollers
Install the rollers or wheels onto the base to guide and support the sanding belt. These should be positioned in a way that allows the belt to move smoothly and evenly. Use bearings to ensure the rollers rotate freely.

5. Add the Tensioning System
Include a tensioning system to keep the sanding belt tight and prevent slippage during use. This can be a spring-loaded mechanism or an adjustable arm that applies pressure to the belt. Adjust the tension to achieve the desired belt tightness.
6. Attach the Sanding Belt
Finally, attach the sanding belt to the rollers and tensioning system. Make sure the belt is straight and properly aligned with the pulley. Adjust the tension as needed to ensure the belt is tight and secure.
Once everything is in place, your DIY belt sander is ready to use. Turn on the motor and test the functionality of the sander. Make any necessary adjustments to ensure smooth operation and efficient belt sanding.
Remember to prioritize safety while using the belt sander. Wear protective eyewear and gloves, and work in a well-ventilated area. Always follow proper safety guidelines and exercise caution when operating power tools.
By following these step-by-step instructions, you can create your own belt sander and enjoy the benefits of a versatile and customizable tool for your DIY projects.
Tips for Using Your DIY Belt Sander Safely
Using a DIY belt sander can be a great way to save money and get the job done yourself. However, it’s important to prioritize safety when using any power tool. Here are some tips to help you use your belt sander safely:
1. Wear Protective Gear
Before you start using your belt sander, make sure you’re wearing eye protection, such as safety goggles or glasses. Additionally, consider wearing ear protection to protect your hearing from the noise generated by the tool. Lastly, gloves and a dust mask can also provide extra protection.
2. Familiarize Yourself with the Tool
Read the manufacturer’s instructions and familiarize yourself with the features and controls of your DIY belt sander. Understanding how the tool works will help you operate it safely and effectively.
3. Secure Your Workpiece
Make sure your workpiece is securely clamped or held in place before you start sanding. This will prevent it from moving or slipping, reducing the risk of accidents and injuries.
4. Start Slowly
When turning on your belt sander, start with a slow speed and gradually increase it as needed. This allows you to maintain better control over the tool and reduces the risk of the sander jerking or slipping out of your hands.
5. Use Proper Technique

Hold the belt sander with both hands, keeping a firm grip. Avoid putting excessive pressure on the tool, as this can decrease its effectiveness and increase the chances of accidents. Move the sander in even, steady passes along the workpiece, avoiding any sudden movements.
6. Be Mindful of the Dust
Belt sanding creates a lot of dust. To minimize the health risks associated with dust inhalation, consider using a dust collection system or working in a well-ventilated area. If using a dust collection bag, make sure it’s properly attached and emptied regularly.
7. Take Breaks
If you’re working on a large project or for an extended period, take regular breaks. Using a belt sander for long periods without breaks can lead to fatigue, which can compromise your safety and the quality of your work.

8. Keep Children and Pets Away
Always ensure that children and pets are kept well away from your work area when using a belt sander. Even when the tool is not in use, store it out of their reach to prevent accidents.
By following these safety tips, you can effectively use your DIY belt sander while reducing the risk of accidents and injuries. Always prioritize safety and take the necessary precautions when using any power tool.
Maintenance and Care for Your Homemade Belt Sander
Proper maintenance and care are essential for keeping your homemade belt sander in good working condition. Regular maintenance not only improves performance but also extends the lifespan of the machine. Here are some tips to help you maintain and care for your DIY belt sander:
Cleaning
After each use, it is important to clean your belt sander to remove any dust, debris, or residue that may have accumulated during operation. Use a clean cloth or a brush to wipe down the machine and remove any particles. Pay special attention to the sanding belt, disc, and any other moving parts.
Lubrication
Regular lubrication is vital for the smooth operation of your belt sander. Apply lubricating oil to the moving parts, such as the bearings and the motor, as per the manufacturer’s instructions. This will help reduce friction and prevent premature wear and tear.
Belt Replacement
Over time, the sanding belt on your DIY belt sander may wear out and become less effective. It is important to regularly inspect the belt for signs of wear and replace it when necessary. Follow the manufacturer’s instructions for replacing the belt to ensure proper installation.
Tension Adjustment
Check the tension of the sanding belt regularly to ensure optimal performance. The belt should be tight enough to prevent slipping but not too tight to cause excessive strain on the motor or other components. Follow the instructions provided with your belt sander on how to adjust the tension properly.
Storage
When not in use, store your homemade belt sander in a dry and secure location. This will protect the machine from dust, moisture, and other potential damage. Consider covering it with a dust cover or storing it in a dedicated toolbox to keep it in the best possible condition.
By following these maintenance and care tips, you can ensure that your DIY belt sander remains in optimal condition for years to come. Regular cleaning, lubrication, and belt replacement will keep the machine running smoothly and effectively.
Questions and answers
What materials do I need to build a DIY belt sander?
You will need a motor, a drive wheel, a sanding belt, a tensioning system, a baseplate, and some basic tools like drills and saws.
Is it difficult to build a DIY belt sander?
It can be a challenging project, especially if you have little experience with woodworking and metalworking. However, with good instructions and some patience, it is definitely doable.
What are the advantages of building a DIY belt sander?
Building your own belt sander allows you to customize it to your specific needs and preferences. It can also be a more affordable option compared to buying a pre-made belt sander.
Can I use any type of motor for my DIY belt sander?
It is recommended to use a motor with enough power and torque to handle heavy sanding tasks. A motor with at least 1 horsepower is generally preferred.
Do I need any special safety precautions when using a DIY belt sander?
Yes, it is important to wear protective goggles, gloves, and a dust mask when using a belt sander. You should also keep your fingers away from the sanding belt and avoid wearing loose clothing that could get caught in the machine.


Harrison Clayton
Meet Harrison Clayton, a distinguished author and home remodeling enthusiast whose expertise in the realm of renovation is second to none. With a passion for transforming houses into inviting homes, Harrison's writing at https://thehuts-eastbourne.co.uk/ brings a breath of fresh inspiration to the world of home improvement. Whether you're looking to revamp a small corner of your abode or embark on a complete home transformation, Harrison's articles provide the essential expertise and creative flair to turn your visions into reality. So, dive into the captivating world of home remodeling with Harrison Clayton and unlock the full potential of your living space with every word he writes.

